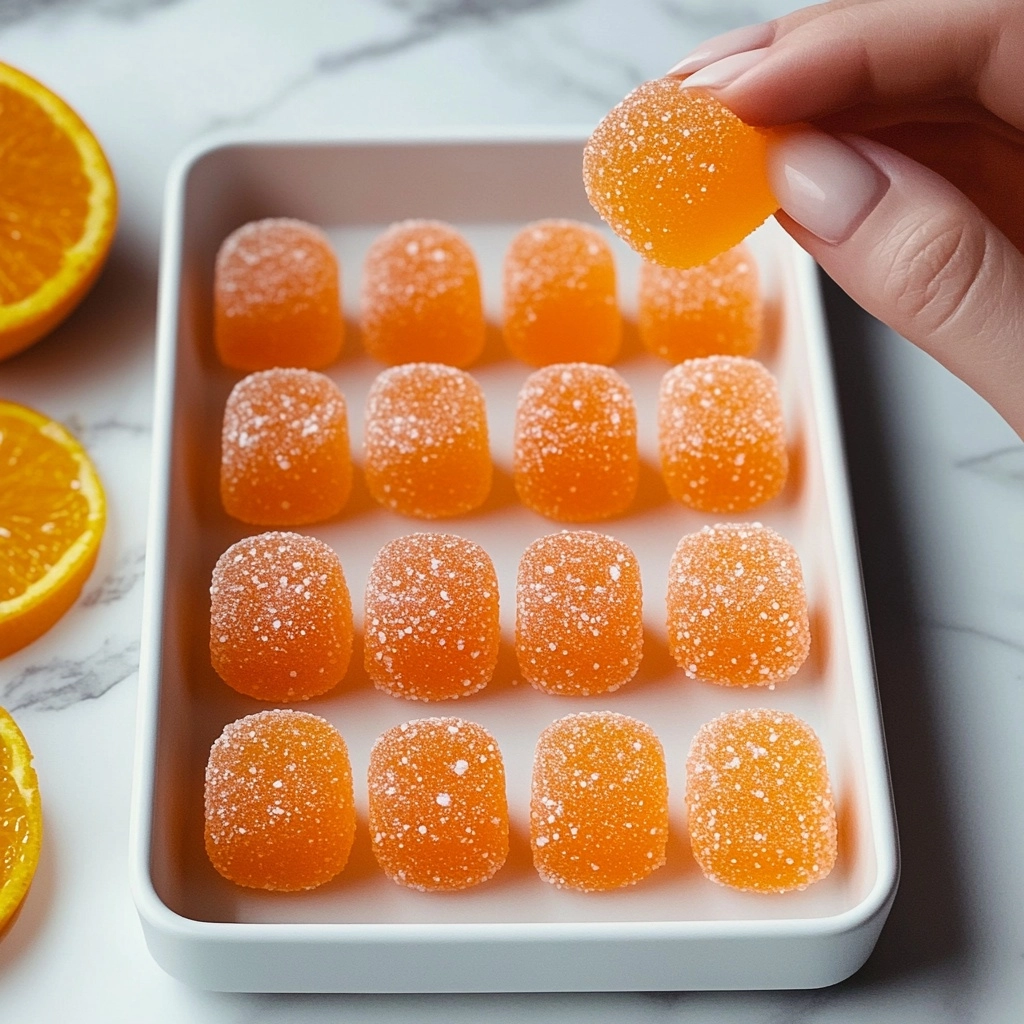
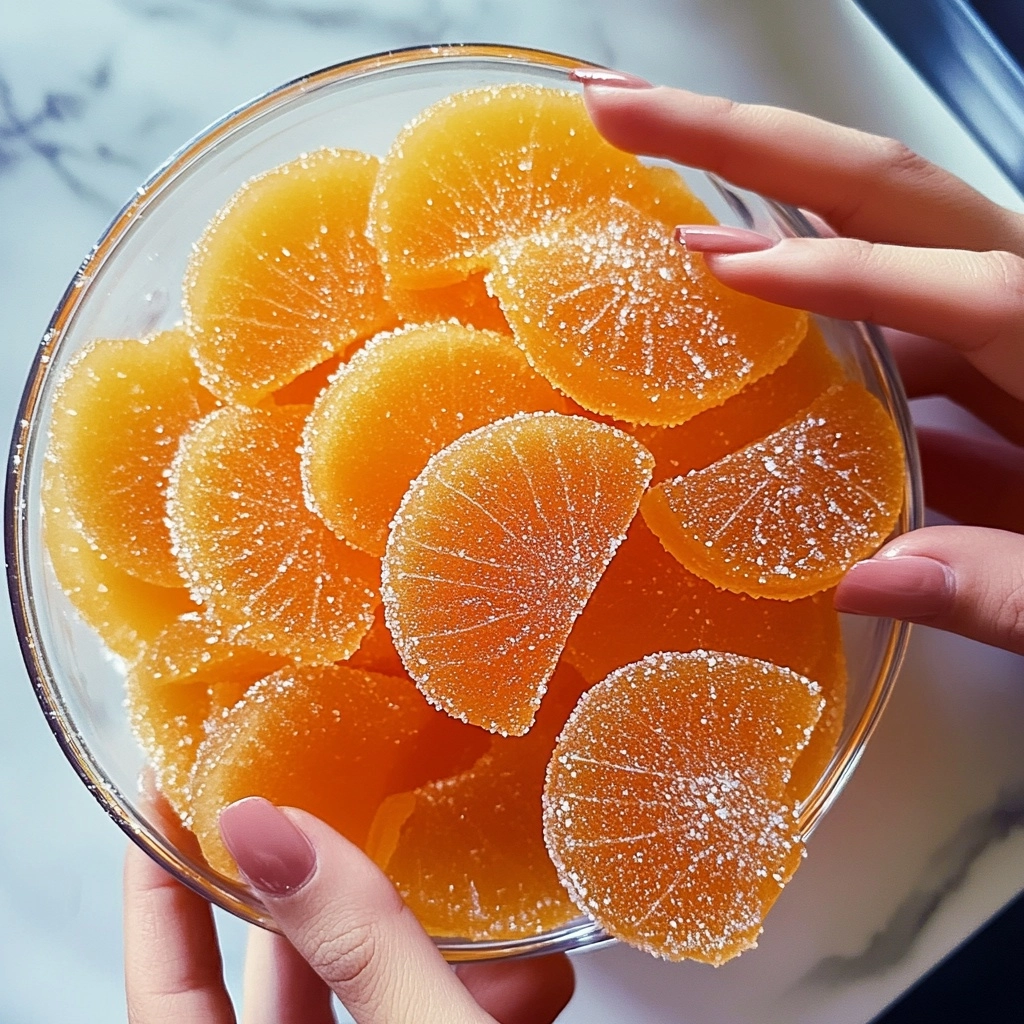
Bright, cheery, and bursting with citrusy nostalgia—Classic Homemade Orange Candy is the ultimate treat for anyone who loves the zing of fresh oranges wrapped up in a soft, chewy bite. This delightful recipe brings together juicy oranges, a hint of zest, and just the right amount of sweetness for a candy that’s both old-fashioned in spirit and undeniably satisfying.
Why You’ll Love This Recipe
- Unbeatable Freshness: Using real oranges gives every piece a bright, natural flavor you can never find in store-bought candies.
- Nostalgic Charm: This recipe brings that delightful old-fashioned candy shop vibe right into your own kitchen.
- Simple & Fun: With basic ingredients and approachable steps, it’s a joy to make solo or with kids helping out.
- Customizable Sweetness: You can easily fine-tune the flavor, tartness, and texture to suit your own perfect candy dreams!
Ingredients You’ll Need
All you need are a handful of kitchen essentials to create this Classic Homemade Orange Candy, but each one plays a crucial role—from the real citrus zing to the glossy finish and irresistible chew. Here’s why every ingredient matters!
- Fresh Oranges (juice & zest): The heart and soul! Zest infuses pure citrus aroma, while real juice gives that sweet-tart flavor you crave in every bite.
- Granulated Sugar: Adds sweetness and creates the signature candy texture—don’t skimp here.
- Corn Syrup: Prevents crystallization, lending a glossy, smooth consistency to your candies.
- Water: Helps dissolve ingredients and forms the syrup base.
- Butter: Gives the candy a touch of richness and helps with shine and texture.
- Unflavored Gelatin: Essential for that luscious, tender chew—skip it, and you’ll lose the classic candy bounce!
- Orange Extract (optional): Boosts orange flavor if you want a more intense citrus punch.
- Powdered Sugar (optional): For dusting, it keeps pieces from sticking together and adds a soft finish.
- Pinch of Salt (optional): Just a pinch elevates and balances the sweetness, making the orange pop even more.
Variations
Once you master the basics of Classic Homemade Orange Candy, it’s oh-so-easy to put your own twist on it! Feel free to swap flavors, adjust texture, or play with coatings—the sky’s the limit when you want to satisfy your sweet tooth.
- Make it Citrus Medley: Use half orange and half lemon or lime juice (plus a bit of their zest) for a lively, mixed citrus flavor.
- Dipped in Chocolate: Once set, dip your orange candy pieces in melted dark or white chocolate for a truffle-like upgrade.
- Spiced Orange: Add a hint of ground ginger or cinnamon during the syrup simmer for a warm, spicy kick.
- Vegan Option: Swap gelatin for agar-agar, adjusting quantities as needed for a plant-based version (just note the texture will be slightly different).
How to Make Classic Homemade Orange Candy
Step 1: Prep Your Oranges
Zest your fresh oranges first, capturing only the vibrant orange peel for a concentrated citrus punch. Then juice them until you have about 3/4 cup of juice—trust me, squeezing them by hand makes your kitchen smell amazing and sets the bright foundation for your Classic Homemade Orange Candy.
Step 2: Make the Orange Sugar Syrup
Combine the orange juice, water, granulated sugar, and corn syrup in a medium saucepan over medium heat. Stir gently until the sugar fully dissolves, and then bring the mixture to a gentle simmer. You’ll see everything come together into a bright, smooth syrup—the beginning of candy magic!
Step 3: Concentrate the Flavor
Let the syrup mixture simmer for about 10 minutes, stirring occasionally so nothing sticks. This step helps thicken the syrup and allows that intense orange flavor to blossom—watch the syrup transform into a slightly thicker, glossy river of sunshine.
Step 4: Bloom and Add Gelatin
In a small bowl, sprinkle the unflavored gelatin over 1/4 cup cold water. Let it bloom (soften and absorb the moisture) for about 5 minutes—this ensures your Classic Homemade Orange Candy will have that perfectly bouncy, chewy texture. Stir the bloomed gelatin into the simmering syrup until it disappears completely.
Step 5: Add the Butter and Zest
Drop in the butter and all that aromatic orange zest. Keep stirring as everything melts and melds together, cooking for another 5 minutes. This is when the candy mixture gets that rich, luscious finish and the orange scent becomes absolutely irresistible.
Step 6: Cool to Perfection
Remove the pan from the heat once your mixture is thickened to a honey-like consistency. Allow it to cool for 1–2 hours at room temperature—rushing this step will make your candies cloudy, so patience pays off!
Step 7: Pour, Set, and Chill
Pour the cooled orange mixture into a lightly greased 8×8-inch dish or spoon it into silicone candy molds for fun shapes. Let it set at room temperature for 1–2 hours, then pop the dish or molds into the fridge. Chill for 4–6 hours (overnight is even better) until perfectly firm and sliceable.
Step 8: Cut and Finish
Pop the firm candy from its mold or dish, then cut into bite-sized cubes or classic shapes. If you like, toss the pieces in powdered sugar to keep them from sticking and to add a soft, sweet finish—now your homemade candy looks (and tastes) like childhood magic!
Pro Tips for Making Classic Homemade Orange Candy
- Zest Carefully: Use only the colored part of the orange peel—avoiding the bitter white pith gives your candy the purest, brightest flavor possible.
- Test for Consistency: When the syrup is honey-thick before pouring, it ensures a perfect, chewy set (too thin, and your candy will end up soft and sticky).
- Mold with Ease: Lightly grease your pan or molds to guarantee a smooth release—no sticky surprises!
- Chill Time Counts: Letting your Classic Homemade Orange Candy set in the fridge for the full 4–6 hours gives it the perfect firm, yet tender, bite every time.
How to Serve Classic Homemade Orange Candy

Garnishes
For an extra-special presentation, dust your Classic Homemade Orange Candy with a little powdered sugar or even some edible gold dust for a touch of sparkle. A twist of fresh orange zest on top brings visual flair and a zippy citrus aroma that lingers as you nibble.
Side Dishes
These candies make an amazing ending to a light, fresh meal—think alongside a fruit platter or even next to a cup of herbal tea. For parties, pair them with a bowl of salted nuts or dried cranberries for a sweet-salty contrast that really makes the orange pop.
Creative Ways to Present
Arrange your Classic Homemade Orange Candy in little cellophane bags for adorable gifts, or set them out in mini cupcake papers for a colorful dessert platter. Shape them with silicone molds—flowers, hearts, or seasonal patterns—for a candy that doubles as edible art!
Make Ahead and Storage
Storing Leftovers
Keep any leftover Classic Homemade Orange Candy in an airtight container at cool room temperature. They’ll stay fresh and delightfully chewy for up to a week—just be sure to dust with powdered sugar to keep the pieces from sticking together.
Freezing
You can absolutely freeze these candies! Place them in a single layer on parchment paper in a sealed container. They’ll keep their flavor and texture up to 2 months—simply thaw at room temperature before serving.
Reheating
Since Classic Homemade Orange Candy is served at room temperature, you won’t need to reheat it. If the candy gets a little cold or too firm from refrigeration or freezing, just let the pieces rest on the counter for about 30 minutes before enjoying their perfect, chewy texture.
FAQs
-
Can I use bottled orange juice instead of fresh oranges?
While you can use bottled juice in a pinch, fresh oranges deliver the best flavor and aroma. Bottled juice often lacks the natural zing and vibrant citrus notes that make Classic Homemade Orange Candy extra special.
-
Why did my candy turn out sticky or too soft?
Most often, this is due to not simmering the syrup mixture long enough or pouring it before it reaches a honey-like consistency. For best results, be patient—let it thicken and always chill the candy fully before slicing.
-
Is there a gelatin substitute for vegetarians or vegans?
Yes! You can use agar-agar powder in place of gelatin, but you’ll need to experiment a bit with the amount to achieve that characteristic chewy texture. Start with a little less than the amount of gelatin and test the set as you go.
-
How do I prevent my orange candy pieces from sticking together?
Toss the finished pieces in a light coating of powdered sugar just after cutting. Store candies in single layers with parchment paper in between to keep everything neat and mess-free.
Final Thoughts
There’s something truly heartwarming about crafting Classic Homemade Orange Candy in your kitchen—the burst of citrus, the bright orange color, and the pure joy of sharing bites with people you love. I hope you give this recipe a try and let a little homemade sunshine sweeten your day!
Print
Classic Homemade Orange Candy Recipe
- Prep Time: 20 minutes
- Cook Time: 25 minutes
- Total Time: 6 hours 45 minutes
- Yield: About 36 pieces
- Category: Dessert
- Method: Stovetop, Refrigeration
- Cuisine: American
- Diet: Vegetarian
Description
Indulge in the nostalgic taste of homemade orange candy with this classic recipe. Sweet, tangy, and bursting with citrus flavor, these treats are perfect for satisfying your sweet tooth or gifting to loved ones.
Ingredients
For the Orange Candy:
- 2 large fresh oranges (zested and juiced)
- 2 cups granulated sugar
- 1/4 cup corn syrup
- 1/2 cup water
- 1 tablespoon butter
- 1 packet unflavored gelatin
- 1 teaspoon orange extract (optional)
- Powdered sugar (for dusting, optional)
- A pinch of salt (optional)
Instructions
- Prepare the Oranges: Zest the oranges and juice them. Set aside the zest and juice.
- Make the Sugar Syrup: Combine orange juice, water, sugar, and corn syrup in a saucepan. Heat and stir until sugar dissolves. Simmer the mixture.
- Simmer the Mixture: Let the syrup simmer for 10 minutes to thicken slightly.
- Prepare the Gelatin: Bloom gelatin in cold water, then add to the simmering syrup.
- Add Butter and Zest: Stir in butter and orange zest, cooking for an additional 5 minutes.
- Cool the Mixture: Remove from heat and cool for 1-2 hours.
- Pour and Set: Pour into a dish or molds, then refrigerate for 4-6 hours until firm.
- Cut and Serve: Remove from molds, cut into pieces, and dust with powdered sugar.
- Enjoy: Serve and savor your Old Fashioned Orange Candy!
Notes
- You can customize the candy by adding different extracts like lemon or vanilla.
- Store the candy in an airtight container at room temperature for up to two weeks.
Nutrition
- Serving Size: 1 piece (approx. 15g)
- Calories: 60
- Sugar: 11g
- Sodium: 10mg
- Fat: 1g
- Saturated Fat: 0.5g
- Unsaturated Fat: 0.5g
- Trans Fat: 0g
- Carbohydrates: 12g
- Fiber: 0g
- Protein: 0g
- Cholesterol: 2mg


I haven’t made these yet but I can’t wait to try them. I’m waiting till I return to Arizona where I can get fresh, luscious oranges.