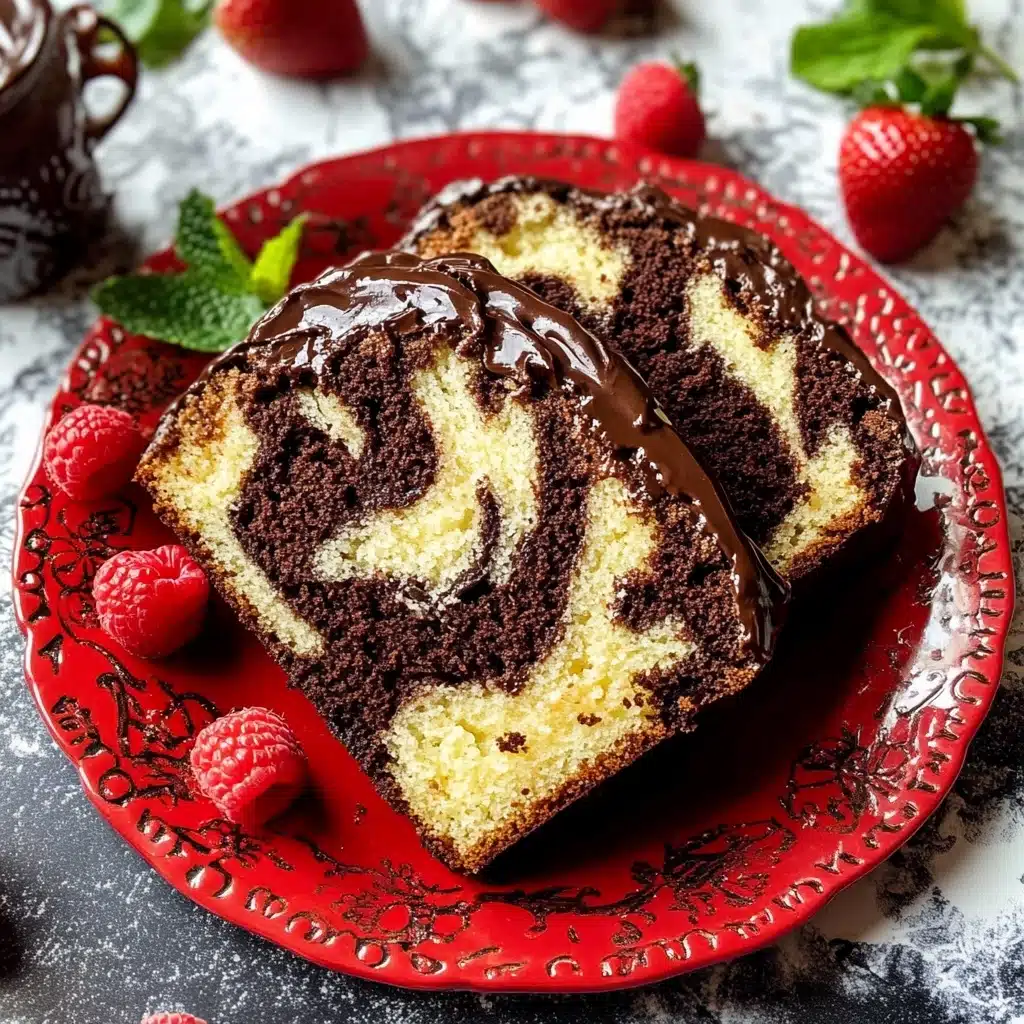
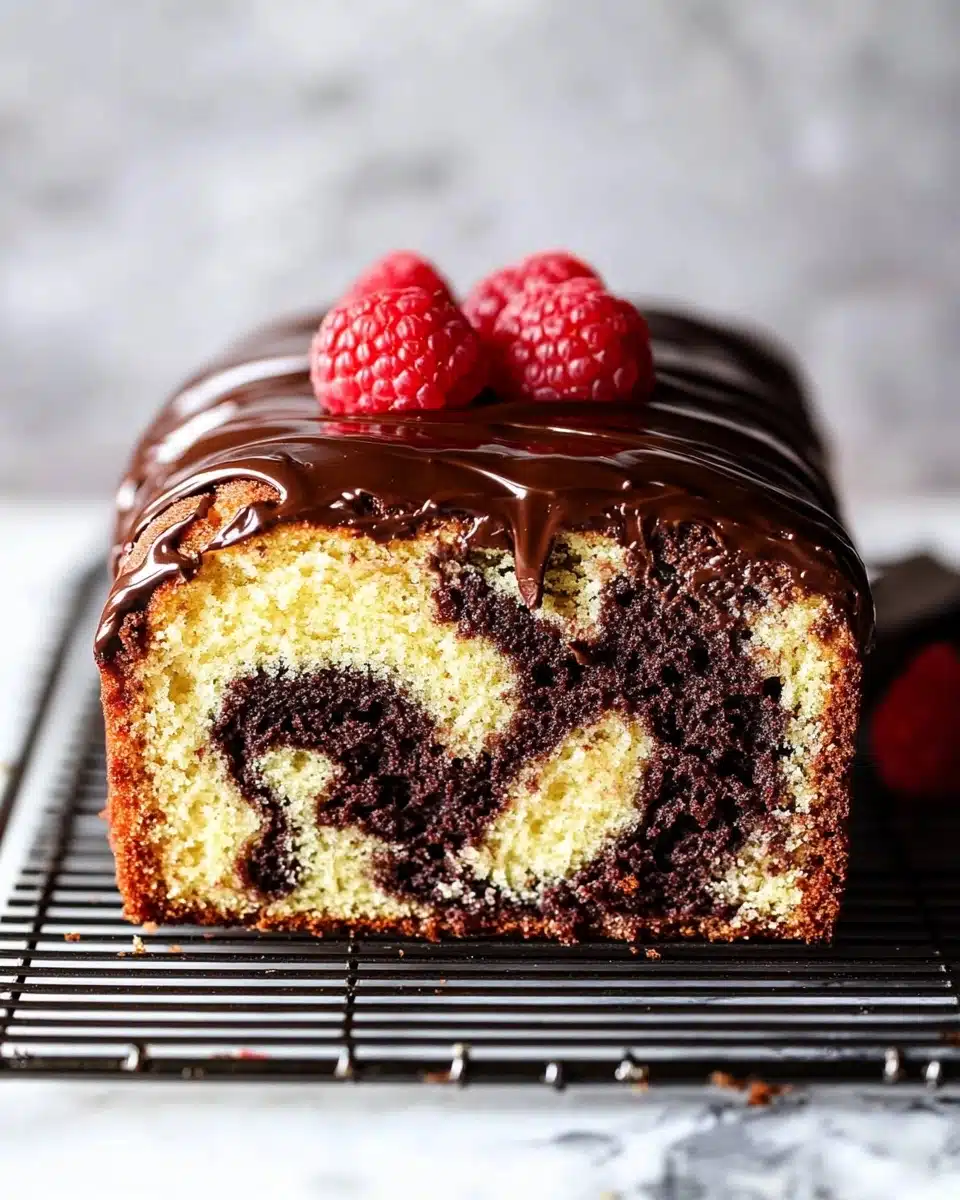
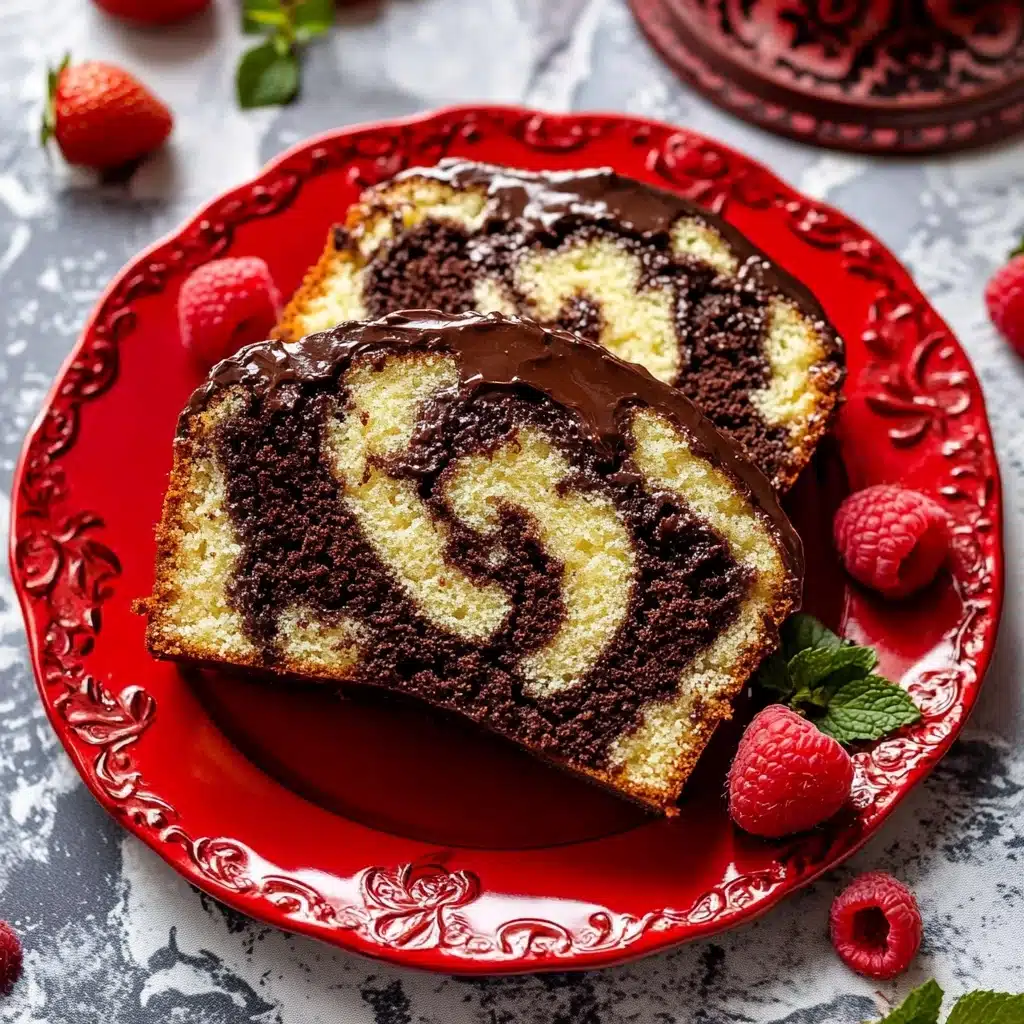
There’s something truly magical about slicing into a Marble Loaf Cake and revealing that beautiful, swirling pattern of chocolate and vanilla. It’s a cake that always delights—moist, tender, and topped with a dreamy ganache. Whether you’re baking for a cozy family gathering or just craving a nostalgic treat, this classic recipe guarantees both showstopping looks and irresistible flavor in every bite.
Why You’ll Love This Recipe
- Stunning Swirls: Every slice of this marble loaf cake is marbled with dreamy ribbons of chocolate and vanilla for bakery-style visual wow-factor.
- Incredibly Moist Crumb: Thanks to a touch of oil, sour cream, and just the right ratio of milk, each bite is tender and never dry.
- Simple Ingredients, Elegant Results: No fancy equipment or hard-to-find items—just pantry staples and a little technique make this cake totally doable for any home baker.
- Versatile for Any Occasion: Dress it up with ganache for special events or serve plain for afternoon coffee—the marble loaf cake is classy and crowd-pleasing every time.
Ingredients You’ll Need
The best part about this marble loaf cake is how it transforms simple, everyday ingredients into something extraordinary. Each item on the list contributes to that signature moist crumb, flavorful duo of batters, and the fudge-like finish on top—so don’t skip a thing if you want maximum wow!
- All-purpose flour: Provides structure for the cake, making each slice just sturdy enough to hold those chocolate and vanilla swirls.
- Baking powder: Gives lift and ensures a gentle, even crumb.
- Salt: Just a hint brings out both the vanilla and chocolate flavors.
- Unsalted butter: Adds rich, creamy flavor—always start with room-temperature butter for perfect creaming!
- Granulated sugar: Sweetens the cake and helps it stay tender.
- Vegetable oil: Keeps every bite extra moist and soft—don’t substitute with coconut oil unless absolutely necessary.
- Eggs: Bind the ingredients and add richness; room temperature eggs mix in much more evenly.
- Full-fat sour cream: Gives a luxurious texture and slight tang—plain yogurt can be used in a pinch.
- Pure vanilla extract: Don’t skimp—1 whole tablespoon makes the vanilla swirl stand out beautifully.
- Whole milk: Adds moisture; dividing it is key for the chocolate swirl texture.
- Unsweetened cocoa powder: Delivers deep chocolate flavor—Dutch-process or natural both work well here.
- Espresso powder (optional): A small amount amplifies the chocolate notes without tasting like coffee.
- Quality semi-sweet chocolate bar: For the ganache—go for the good stuff for best melt and taste.
- Heavy cream: Makes the ganache topping decadently smooth and fudgy.
Variations
One of the best things about a marble loaf cake is its versatility—you can play with flavors, fillings, and even dietary swaps. Here are some favorite twists to keep things fresh, fun, and perfectly personalized for your table.
- Citrus Swirl: Add freshly grated orange or lemon zest to the vanilla batter for a bright, zippy contrast to the chocolate.
- Nutty Delight: Fold in chopped toasted hazelnuts, pecans, or walnuts to add delightful crunch and flavor.
- Gluten-Free Marble Cake: Use a reliable cup-for-cup gluten-free flour blend in place of all-purpose flour for a treat everyone can enjoy.
- Dairy-Free: Substitute dairy-free yogurt for the sour cream and plant-based milk for whole milk, and use coconut cream in the ganache.
- Extra Chocolatey: Drop a handful of chocolate chips into the chocolate batter for little bursts of fudgy goodness throughout the loaf.
How to Make Marble Loaf Cake
Step 1: Prep the Pan and Oven
Start by preheating your oven to 350°F (177°C). Generously grease a 9×5-inch loaf pan—not just the bottom but right up the sides—to guarantee an easy release no matter how beautiful your swirls come out.
Step 2: Mix the Dry Ingredients
In a medium bowl, whisk together the flour, baking powder, and salt. This quick step evenly distributes the leavening and ensures your marble loaf cake bakes up nice and even from end to end.
Step 3: Cream the Butter and Sugar
Using a stand or hand mixer, beat the softened butter and granulated sugar together on medium-high speed until the mixture is pale and creamy—about 2 minutes. Don’t forget to scrape the bowl as needed for the silkiest base!
Step 4: Add Wet Ingredients
Add the oil and continue beating until smooth, then mix in the eggs (one at a time is easiest), followed by the sour cream and vanilla extract. Your batter will look a little lumpy and that’s totally okay—just don’t overmix.
Step 5: Combine with Milk and Dry Mix
With the mixer on low, gradually add the dry mixture to the wet, pouring in most of the milk as you go. Stop mixing as soon as everything is just combined—overmixing leads to a dense loaf. Scrape down to the bottom of the bowl to catch any sneaky flour pockets.
Step 6: Make the Chocolate Batter
Transfer a little less than half the batter into a separate bowl. Stir in the extra milk, cocoa powder, and (if you like) espresso powder. This gives you a lusciously smooth, deeply chocolatey swirl that stands out against the vanilla.
Step 7: Layer and Swirl
Spoon a thin layer of vanilla batter into your pan first. Then alternate dollops of vanilla and chocolate batters, layering until all the batter is used. Use a knife to gently zig-zag horizontally and vertically—this is what creates the classic marble loaf cake look!
Step 8: Bake and Cool
Bake for 65-75 minutes. Every oven is a little different, so start checking at 55 minutes. If the top browns too quickly, tent loosely with foil. The cake sinks just a bit as it cools, which is perfectly normal.
Step 9: Make the Ganache Topping
As the cake cools, combine the chopped chocolate and cream in a heat-safe bowl. Melt gently over simmering water, stirring until glossy and smooth, then let cool to thicken slightly. Spread or drizzle over the cake and let it set to a dreamy, fudge-like finish.
Pro Tips for Making Marble Loaf Cake
- Swirl Like a Pro: Use a butter knife and make gentle, rounded zig-zags; sharp motions can muddy the batters rather than beautifully marbling them.
- Check for Doneness: Insert a toothpick in the center after 65 minutes and check for moist crumbs (not wet batter); keep a close eye to avoid overbaking!
- Room Temperature is Key: Ensure all dairy and eggs are at room temperature for a silky, lump-free batter and perfectly even bake.
- Ganache Perfected: Let the ganache cool 20-30 minutes before spreading so it thickens to that glossy, fudge-like finish instead of sliding right off.
How to Serve Marble Loaf Cake

Garnishes
Marble loaf cake is a looker all on its own, but for that extra-special finishing touch, try a dusting of powdered sugar, a scattering of chocolate shavings, or a handful of toasted nuts on top of the ganache. A few fresh berries scattered around the platter look gorgeous and add a refreshing bite.
Side Dishes
This cake pairs perfectly with a cup of bold coffee, a frothy latte, or spicy chai. For a luxurious touch, serve with a dollop of whipped cream or a scoop of vanilla or coffee ice cream—simple sides that let the chocolate and vanilla flavors shine.
Creative Ways to Present
For a party-worthy spread, slice your marble loaf cake and fan the pieces on a cake stand, alternating chocolate and vanilla-forward sides for contrast. Wrap individual slices in parchment for a lunchbox surprise, or turn leftover slices into out-of-this-world French toast the next morning.
Make Ahead and Storage
Storing Leftovers
Store your cooled marble loaf cake (with or without ganache) tightly covered at room temperature for up to 3 days. For longer storage, pop it in the refrigerator—it stays fresh and moist for up to a week, though it’s best served at room temperature for maximum tenderness.
Freezing
Marble loaf cake freezes beautifully! Once cooled, wrap whole or sliced cake tightly in plastic wrap, then foil, and freeze for up to 3 months. Thaw overnight in the fridge, then bring to room temperature before serving for best flavor and texture.
Reheating
If you’d like your cake slightly warm (and who doesn’t love gooey, soft ganache?), microwave individual slices in 10-second bursts until just warmed through. Be careful not to overheat, especially with ganache on top.
FAQs
-
Can I make marble loaf cake without the ganache topping?
Absolutely! This cake is delicious even without the ganache—it’s moist, flavorful, and perfect for a simple snack or breakfast treat. The ganache just adds extra decadence if you’re in the mood for it.
-
What’s the best way to achieve a perfect swirl in a marble loaf cake?
The trick is to layer your vanilla and chocolate batters in alternating spoonfuls, then gently swirl with a knife just enough to create ribbons—think slow, rounded motions to avoid over-mixing and muddying the colors.
-
Can I use a different size pan if I don’t have a 9×5-inch loaf pan?
You can use an 8×4-inch loaf pan for a slightly taller cake—just keep an eye on the baking time (it may bake a bit longer). Muffin tins also work for mini marble loaf cakes; start checking after 20–22 minutes.
-
Is there a strong coffee taste if I use espresso powder?
No, espresso powder only deepens the chocolate flavor—it won’t make the cake taste like coffee. If you prefer, skip it, but it’s a small step that really elevates the chocolate swirl!
Final Thoughts
If you’re looking for a classic, crowd-pleasing bake that’s as much fun to make as it is to eat, this marble loaf cake is it. Go ahead and swirl, bake, slice, and savor—it’s a treat that brings together the best of both worlds and is sure to leave everyone asking for seconds. Happy baking!
Print
Marble Loaf Cake Recipe
- Prep Time: 25 minutes
- Cook Time: 65 minutes
- Total Time: 4 hours
- Yield: 8-10 servings
- Category: Dessert
- Method: Baking
- Cuisine: American
- Diet: Vegetarian
Description
Delicious and visually stunning, this Marble Loaf Cake is a perfect blend of vanilla and chocolate flavors swirled together. Topped with a rich ganache, this moist and tender cake is a delightful treat for any occasion.
Ingredients
Dry Ingredients:
- 2 cups (255g) all-purpose flour (spooned & leveled)
- 1 and 1/2 teaspoons baking powder
- 1/4 teaspoon salt
Wet Ingredients:
- 1/2 cup (8 Tbsp; 113g) unsalted butter, softened to room temperature
- 1 cup (200g) granulated sugar
- 1/3 cup (80ml) vegetable oil
- 2 large eggs, at room temperature
- 1/4 cup (60g) full-fat sour cream, at room temperature
- 1 Tablespoon pure vanilla extract
- 2/3 cup + 2 tablespoons (190ml) whole milk, divided and at room temperature
- 3 Tablespoons (16g) unsweetened natural or dutch-process cocoa powder
- optional but recommended: 1/2 teaspoon espresso powder
Instructions
- Preheat the oven: Preheat the oven to 350°F (177°C) and grease a 9×5-inch loaf pan.
- Make the cake batter: Whisk dry ingredients. Beat butter and sugar, add oil, eggs, sour cream, and vanilla. Mix in dry ingredients and milk. Divide batter and mix cocoa powder and espresso powder into a portion.
- Layer and swirl the batters: Alternate spoonfuls of vanilla and chocolate batter in the loaf pan. Swirl with a knife.
- Bake: Bake for 65-75 minutes until a toothpick comes out clean.
- Cool and make ganache: Cool cake, then make ganache by melting chocolate and cream. Spread on the cake.
- Serve: Allow topping to set before slicing and serving.
Notes
- Freezing Instructions: Cake freezes well for up to 3 months.
- Special Tools: 9×5-inch Loaf Pan, Whisk, Electric Mixer, Cooling Rack.
- Oil: Use vegetable oil for best results.
- Whole Milk & Sour Cream: Whole milk is recommended, and sour cream can be replaced with low-fat plain yogurt.
- Room Temperature Ingredients: Ensure all refrigerated ingredients are at room temperature.
- Espresso Powder: Deepens chocolate flavor, use instant coffee as a substitute.
- Ganache Topping: Adjust cream amount based on chocolate type.
Nutrition
- Serving Size: 1 slice (assuming 10 slices)
- Calories: Approximately 350 per slice
- Sugar: Approximately 20g per slice
- Sodium: Approximately 200mg per slice
- Fat: Approximately 18g per slice
- Saturated Fat: Approximately 8g per slice
- Unsaturated Fat: Approximately 10g per slice
- Trans Fat: 0g
- Carbohydrates: Approximately 40g per slice
- Fiber: Approximately 2g per slice
- Protein: Approximately 5g per slice
- Cholesterol: Approximately 60mg per slice


Your email address will not be published. Required fields are marked *