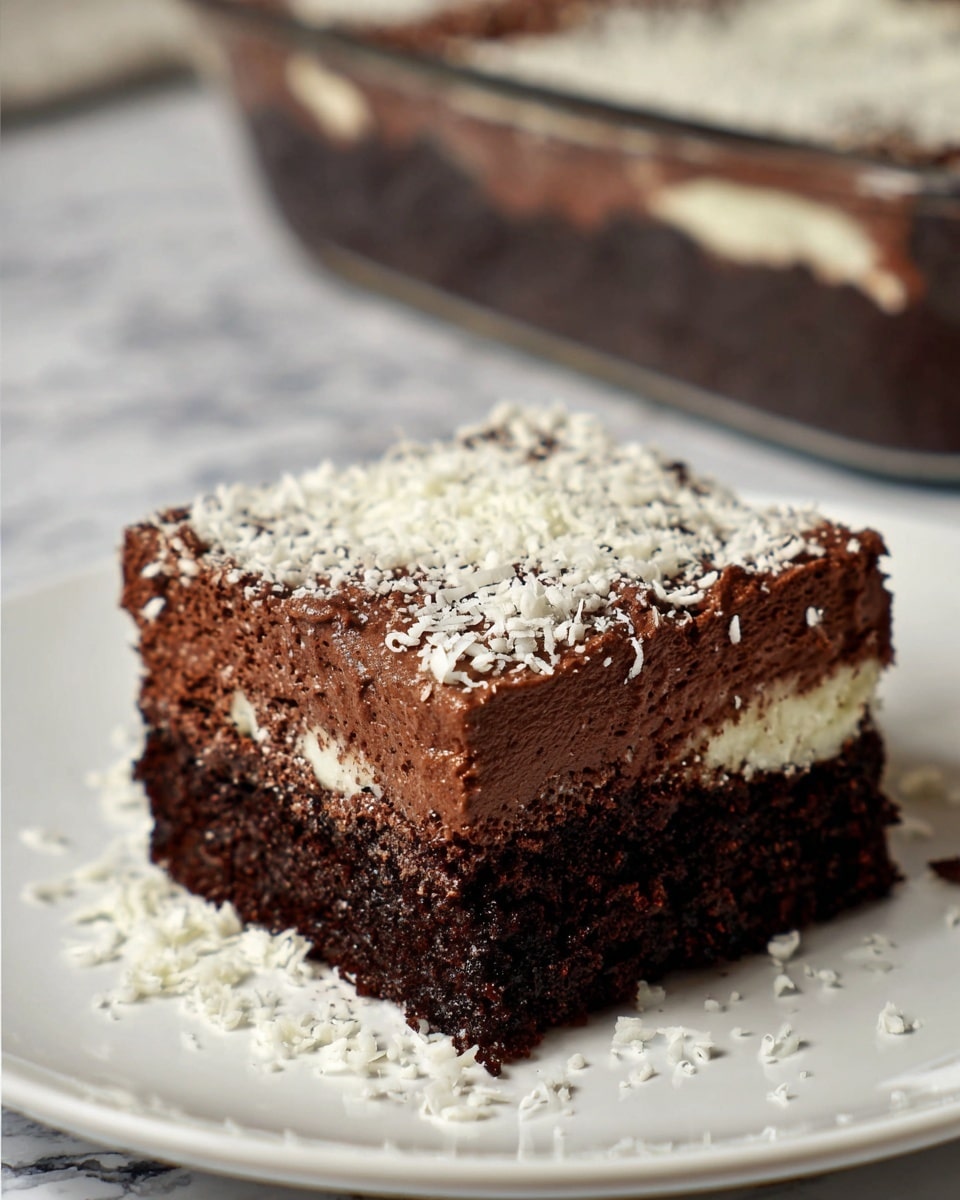
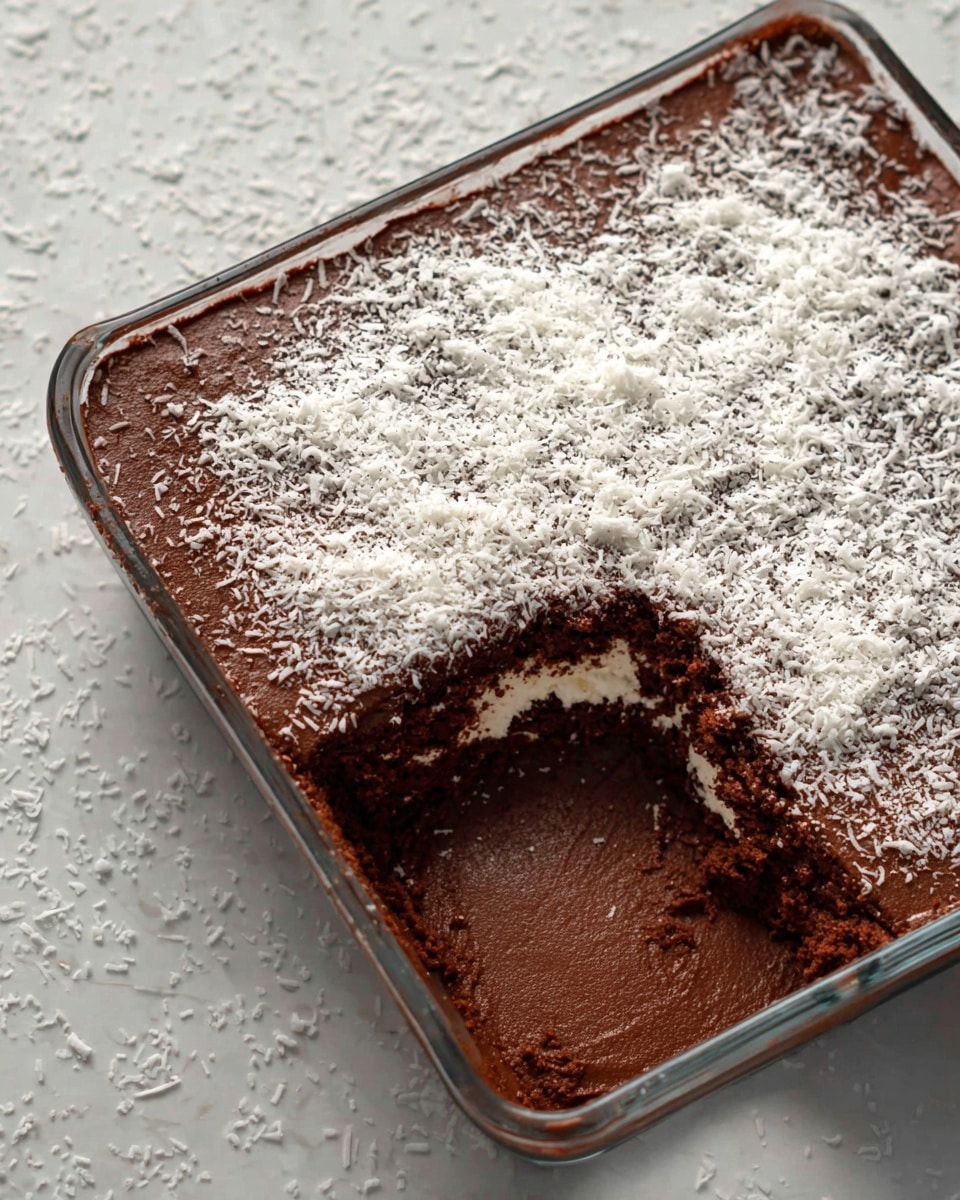
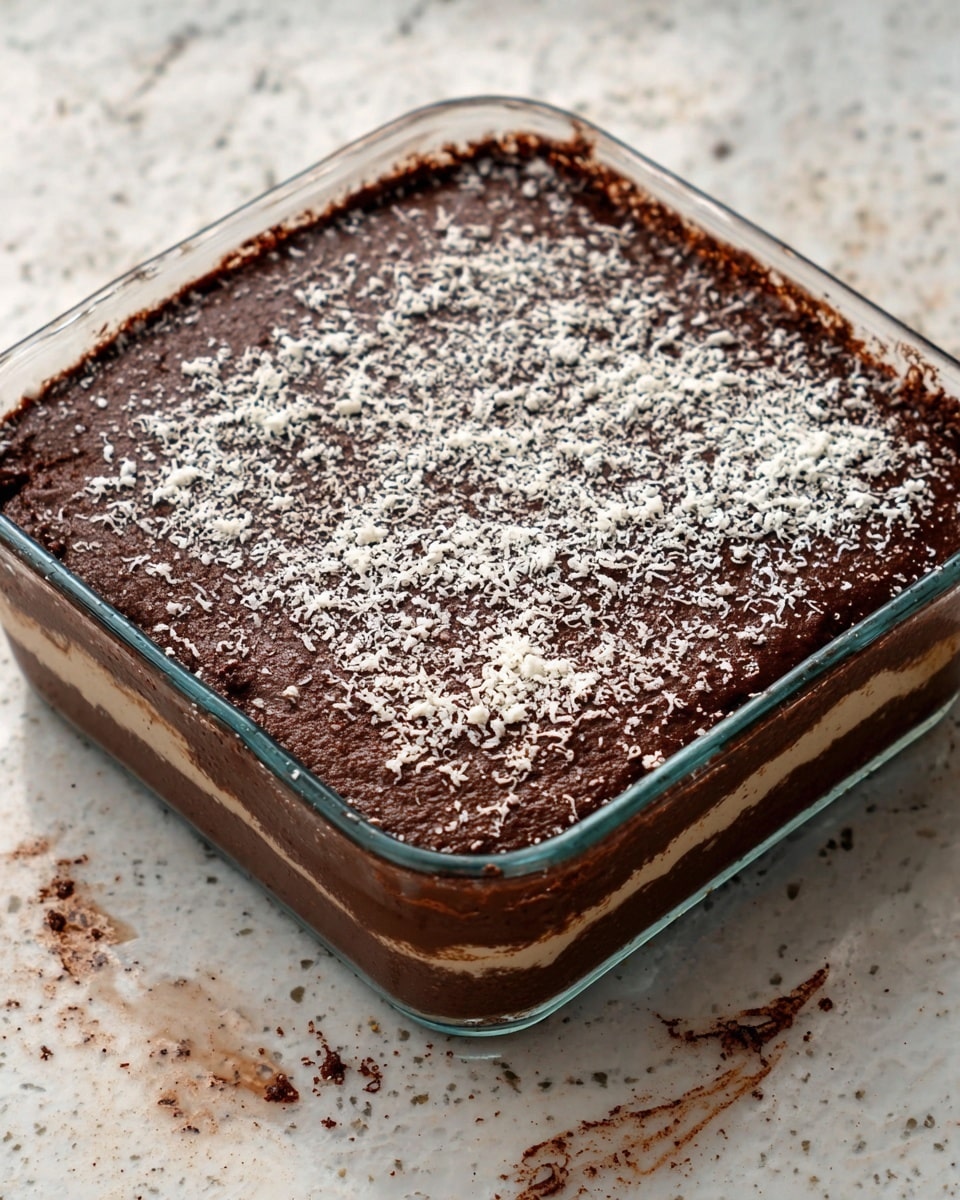
If you’re a chocolate lover like me, you’re going to fall head over heels for this Dark Chocolate Mousse Brownies Recipe. It’s that perfect dessert that marries the rich, fudgy texture of brownies with the light, creamy indulgence of dark chocolate mousse on top. The first time I tried this, I was honestly surprised how the silky mousse added such an elegant twist to a classic treat.
Whether you’re serving it for a special dinner or just want a show-stopping dessert for your family, this recipe delivers every time. Plus, it’s easier than it looks! I love that you don’t have to fuss with complicated techniques—just straightforward steps that make a deep chocolate flavorshine through beautifully.
Why You’ll Love This Recipe
- Decadent and Light: Combines brownie richness with airy chocolate mousse for a balanced dessert.
- Simple Ingredients: Uses easy-to-find staples and a box mix option to keep prep stress-free.
- Great for Entertaining: Looks fancy but is easy to scale for parties or family gatherings.
- Flexible Prep: Use homemade or store-bought brownies, so you can customize it your way.
Ingredients You’ll Need
The star ingredients in this Dark Chocolate Mousse Brownies Recipe work together to create layers of flavor and texture. The quality of the chocolate and cream really makes a difference, so choose ones you enjoy eating on their own!
- Chocolate Brownie Mix: A convenient shortcut; you can also bake your own brownies if you prefer homemade.
- Dark Chocolate: Aim for good-quality dark chocolate with at least 60-70% cocoa for that deep, intense flavor.
- Heavy Whipping Cream: It whips beautifully to give the mousse its fluffy texture, but make sure it’s cold for best results.
- Unflavored Gelatin: Helps stabilize the mousse so it sets nicely on top of the brownies without being runny.
- Water: Used to bloom the gelatin before dissolving it—don’t skip this step for a perfect mousse.
Variations
I love how adaptable the Dark Chocolate Mousse Brownies Recipe is. Once you master the base, you can easily tweak it to fit dietary needs or just mix things up for a special occasion.
- Gluten-Free Version: I swapped regular brownies for gluten-free brownies once, and everyone still raved about the dessert.
- Nutty Twist: Adding chopped toasted hazelnuts or walnuts on top creates a lovely crunch contrast.
- Berry Layer: Mixing in fresh raspberries between the brownie and mousse layers adds a bright, tart surprise.
- White Chocolate Mousse: For a different flavor, I sometimes make the mousse layer with white chocolate instead of dark—equally delicious!
How to Make Dark Chocolate Mousse Brownies Recipe
Step 1: Bake the Brownies
Start by preparing your box brownie mix according to the package instructions or use your favorite homemade brownie recipe. I find that letting the brownies cool fully before adding the mousse is key—it prevents the mousse from melting or becoming too soft. While they bake and cool, you’ve got plenty of time to prep the luscious mousse topping.
Step 2: Create the Dark Chocolate Mousse
Chop your dark chocolate into small pieces and place it in a heatproof bowl. In a small dish, sprinkle the unflavored gelatin over cold water to let it bloom—that’s when it softens and dissolves easily later. Meanwhile, warm ½ cup of the heavy cream on the stove until it just starts boiling. Pour this hot cream over the chopped chocolate, stirring gently until the chocolate melts into a silky, shiny mixture.
Next, warm the gelatin mixture over low heat until it’s fully dissolved—this step took me a couple of tries to get right. Add the gelatin into the melted chocolate and mix well to combine perfectly. Then whip the remaining 1 cup of heavy cream to soft peaks—watch for that perfect fluffy texture; it makes all the difference.
Step 3: Fold Whipped Cream Into Chocolate
First, fold about half the whipped cream into the chocolate mixture gently—don’t overmix, or you’ll lose the airy texture. Then fold in the remaining whipped cream with the same gentle motion. This keeps the mousse light yet stable. Spread the mousse evenly over the cooled brownie base and pop it in the fridge to chill for at least 1-2 hours so it sets properly.
When I first made this, I grated a bit of white chocolate on top for a touch of elegance and scoops of contrasting color—it’s completely optional but a nice finishing touch that always gets compliments!
Pro Tips for Making Dark Chocolate Mousse Brownies Recipe
- Use Quality Chocolate: I once used lower-quality chocolate, and the flavor didn’t pop as much—invest in good dark chocolate for best results.
- Whip Cream Just Right: Watching for soft peaks means your mousse will be fluffy without collapsing.
- Don’t Rush the Chill Time: Patience pays off—chill the mousse long enough to fully set for the perfect texture.
- Bloom Gelatin Properly: Skip this step, and your mousse might not hold together as nicely—take those few extra minutes.
How to Serve Dark Chocolate Mousse Brownies Recipe

Garnishes
I usually keep garnishes simple: a sprinkle of grated white or dark chocolate adds a lovely finish and a little extra style. Fresh berries like raspberries or strawberries also pair wonderfully, providing a bright, tart contrast to the rich chocolate. If you’re feeling fancy, a few mint leaves or a light dusting of powdered sugar can elevate the presentation effortlessly.
Side Dishes
This dessert shines on its own, but if you want a side, I love serving it with a scoop of vanilla bean ice cream or a dollop of freshly whipped cream. A hot espresso or rich coffee really complements all that chocolaty goodness, too—perfect for after-dinner indulgence.
Creative Ways to Present
For small gatherings, I’ve served this mousse brownie layered in individual glasses — it looks gorgeous and makes it easy to portion. You can also cut them into elegant squares and arrange on a platter with decorative garnishes. For holiday parties, adding edible gold flakes or a dusting of cocoa powder in a festive stencil makes a striking impression.
Make Ahead and Storage
Storing Leftovers
I store leftover Dark Chocolate Mousse Brownies in an airtight container in the fridge—keeping them chilled is important to maintain the mousse texture. They last up to 3 days, and I love grabbing one as a quick treat. Just make sure to handle gently so the mousse topping stays intact.
Freezing
I’ve frozen this dessert before, wrapping it tightly in plastic wrap and foil to avoid freezer burn. When you’re ready to enjoy, let it thaw overnight in the fridge. Be aware the mousse might lose a bit of its lightness, but the flavor stays rich and satisfying.
Reheating
This dessert is best served chilled, so I don’t recommend reheating. If you want the brownie a little warmer, gently warm individual slices before adding a fresh mousse topping or whipped cream for maximum enjoyment.
FAQs
-
Can I make the mousse layer without gelatin?
You can skip gelatin, but the mousse won’t set as firmly and might be softer or less stable on the brownies. If you want a firmer texture that holds up well when sliced, gelatin is your best bet, especially if you’re serving it chilled for several hours.
-
Can I use milk chocolate instead of dark chocolate?
Yes, though dark chocolate gives a rich, slightly bitter note that balances the sweetness of the brownies and cream. Milk chocolate will make the mousse sweeter and less intense, which works if that’s your preference.
-
How do I know when the whipped cream is whipped enough?
Look for soft peaks that hold shape but still have a gentle curve on the tip when you lift your whisk. Overwhipping can cause it to turn grainy or start turning into butter, so it’s better to stop just as the peaks form.
-
Can I make this recipe ahead of time for a party?
Absolutely! This is great to prepare a day in advance. Just make sure to chill it well so the mousse sets, then garnish right before serving for the freshest look.
Final Thoughts
I absolutely love how this Dark Chocolate Mousse Brownies Recipe turns out every single time—rich, indulgent, yet surprisingly light with the mousse topping. It’s become my go-to for impressing guests without spending hours in the kitchen, and my family goes crazy for it at every gathering. I highly recommend giving this one a try; once you see how easy it is to pull off, it just might become your favorite chocolate dessert to make, too!
Print
Dark Chocolate Mousse Brownies Recipe
- Prep Time: 10 minutes
- Cook Time: 35 minutes
- Total Time: 2 hours 45 minutes
- Yield: 9 servings
- Category: Dessert
- Method: Baking
- Cuisine: American
Description
This decadent Dark Chocolate Mousse Brownies recipe combines rich, fudgy brownies with a smooth, silky dark chocolate mousse topping. The contrast of textures and intense chocolate flavor make it an irresistible dessert perfect for chocolate lovers and special occasions.
Ingredients
Brownie Base
- 1 box chocolate brownie mix plus ingredients needed on box (or homemade brownie batter equivalent)
Mousse Layer
- 10 oz dark chocolate, chopped
- 1 ½ cups heavy whipping cream, divided
- 1 teaspoon unflavored gelatin
- 2 tablespoons water
Instructions
- Prepare Brownies: Follow the directions on the brownie mix box or your homemade brownie recipe to prepare the batter. Bake as directed, then allow the brownies to cool completely before adding the mousse topping.
- Soften Gelatin: In a small dish, combine the unflavored gelatin with 2 tablespoons of water and let it soften, then gently heat the mixture over low heat until the gelatin dissolves completely.
- Melt Chocolate: Place chopped dark chocolate in a medium bowl. Heat ½ cup of the heavy whipping cream over medium heat until it reaches a boil, then pour it over the chocolate. Stir gently until the chocolate is fully melted and smooth.
- Incorporate Gelatin: Add the dissolved gelatin mixture to the melted chocolate and stir well to combine evenly.
- Whip Cream: Whip the remaining 1 cup of heavy whipping cream until soft peaks form.
- Combine Mousse: Fold half of the whipped cream into the chocolate mixture gently to lighten it, then fold in the remaining whipped cream carefully until the mixture is smooth and evenly combined.
- Assemble: Spread the mousse evenly over the completely cooled brownie base.
- Chill: Refrigerate for at least 1 to 2 hours to let the mousse set properly.
- Serve: Optionally, grate white chocolate over the mousse for decoration before serving. Slice and enjoy your rich dark chocolate mousse brownies!
Notes
- Ensure brownies are fully cooled before spreading mousse to prevent melting.
- Use high-quality dark chocolate for the best flavor.
- The gelatin ensures the mousse sets firmly; do not skip or substitute.
- White chocolate garnish is optional but adds a nice visual contrast and sweetness.
- Store leftovers covered in the refrigerator for up to 3 days.
Nutrition
- Serving Size: 1 brownie (approx. 1/9th of recipe)
- Calories: 350
- Sugar: 28g
- Sodium: 150mg
- Fat: 22g
- Saturated Fat: 13g
- Unsaturated Fat: 7g
- Trans Fat: 0g
- Carbohydrates: 35g
- Fiber: 3g
- Protein: 5g
- Cholesterol: 70mg


Your email address will not be published. Required fields are marked *