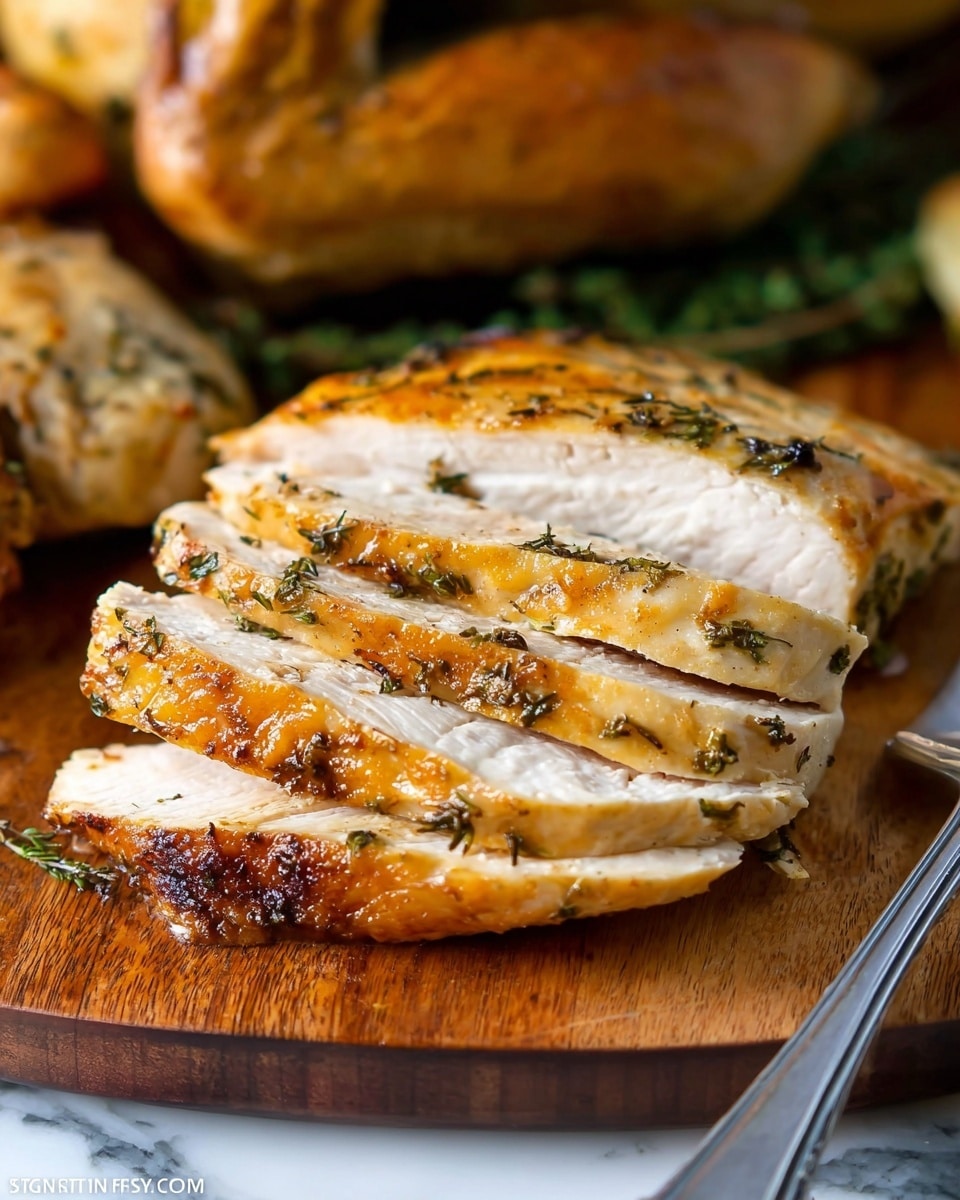
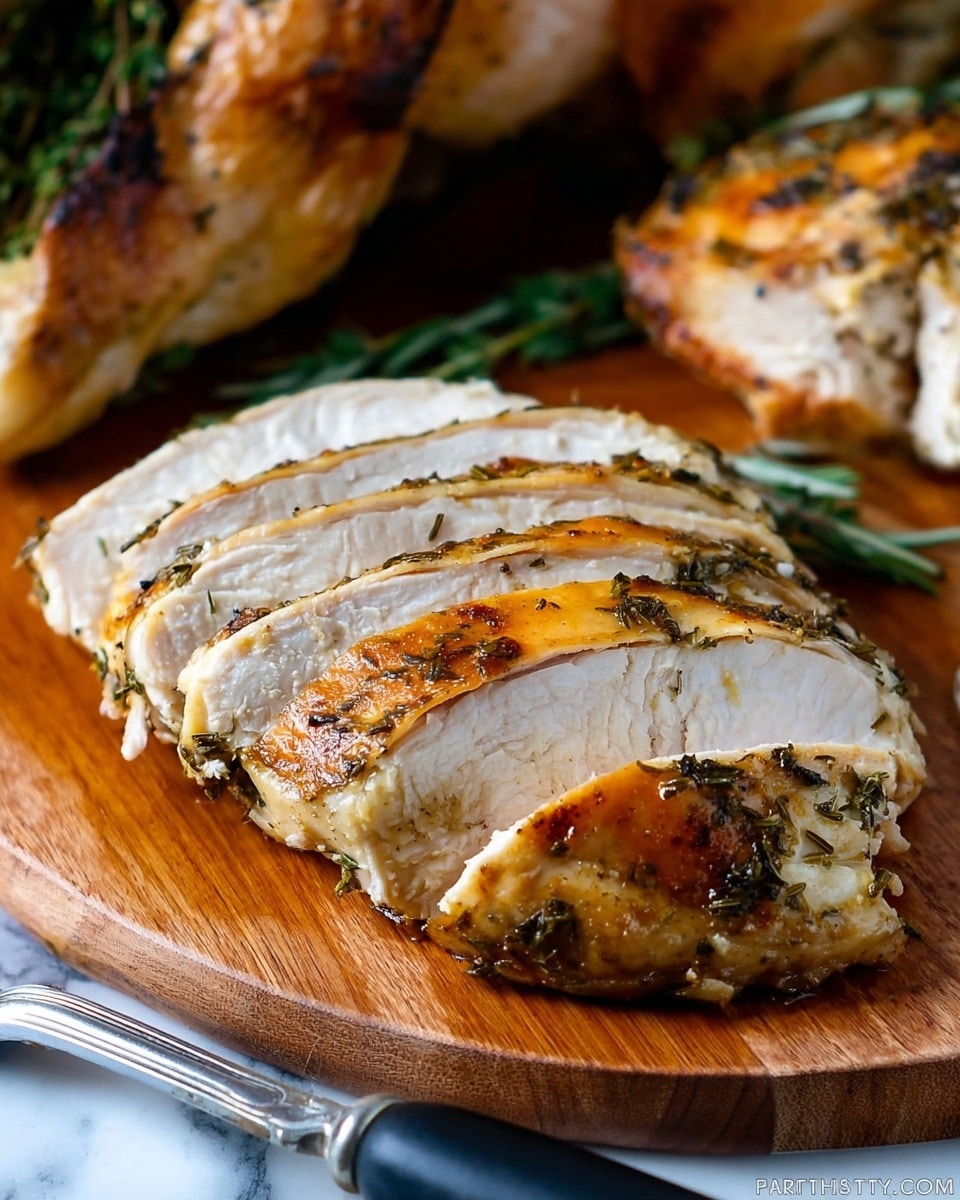
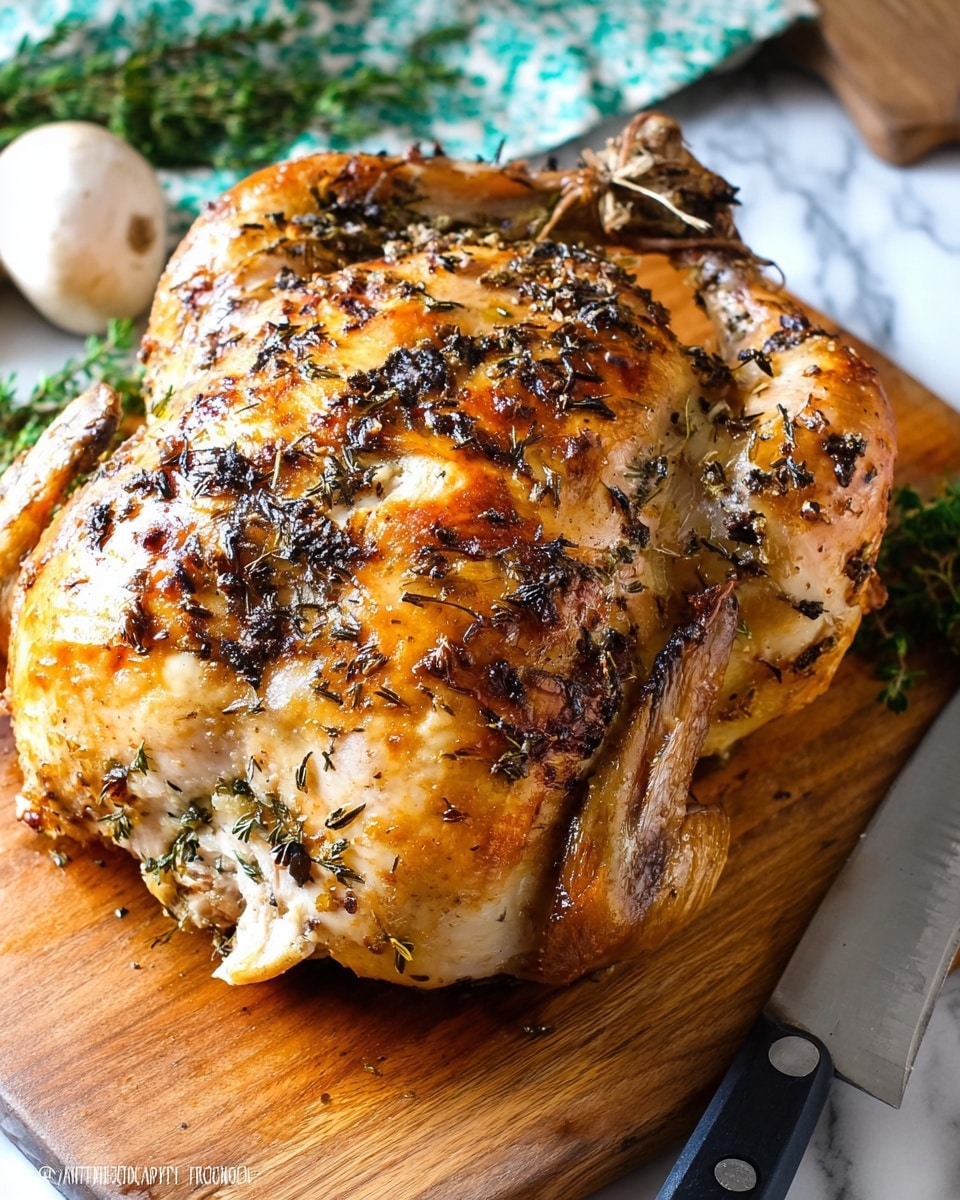
If you’re searching for that seriously juicy, aromatic, and beautifully golden roast chicken, then you’re in the right place. This Perfect Herb Roasted Chicken Recipe is my go-to when I want something that feels special but isn’t complicated. I’ve made this countless times—and honestly, every time it comes out spot-on. The herbs, butter, and just the right roasting technique come together to make the crispiest skin and the most tender, flavorful meat you’ll ever taste. Stick with me here—I’ll share all my insider tips so you’ll nail this recipe the very first time you try it.
Why You’ll Love This Recipe
- Incredibly Juicy Meat: The butter-herb mix under the skin keeps every bite tender and packed with flavor.
- Beautifully Crispy Skin: Roasting at 375°F and adding water partway creates that perfect golden crunch.
- Easy to Prep: Few ingredients, simple steps, but the results are anything but basic.
- Perfect for Any Occasion: Whether it’s a weeknight dinner or a holiday centerpiece, this recipe shines.
Ingredients You’ll Need
The mix of fresh herbs, butter, and aromatics work so well in this Perfect Herb Roasted Chicken Recipe—each ingredient plays a big part in building flavor. Don’t skip on fresh herbs if you can help it, and if you’re out of something, I have substitutions and tips below.
- Roasting chicken: I recommend a whole chicken around 9 pounds for even roasting; too small and it might dry out too quickly.
- Unsalted butter: Softened to room temperature so it’s easy to mix with herbs and to gently spread under the skin.
- Fresh herbs: Rosemary, sage, thyme, and parsley make the classic poultry blend; fresh gives much deeper flavor than dried.
- Kosher salt: Essential for seasoning and helping to crisp the skin.
- Freshly ground black pepper: Adds that perfect subtle heat and seasoning balance.
- Garlic: Minced finely so it disperses evenly without overpowering.
- Onion, carrots, celery: These veggies form a flavorful bed that also adds moisture and subtle sweetness to the roast.
- Lemon rind: Adds bright citrus notes that cut through the richness—don’t skip this! Just peel the outer rind, avoiding the bitter pith.
- Water: Used mid-roast to keep the pan from burning and to help maintain moist heat.
Variations
I love how versatile this Perfect Herb Roasted Chicken Recipe is—you can easily swap herbs or boost flavors based on what you have and what mood you’re in. Customizing it is part of the fun, and you’ll discover your own favorite twists pretty quickly.
- Herb swaps: When I’m out of sage, I sometimes use oregano or marjoram—works surprisingly well and keeps that earthy, fresh vibe.
- Garlic butter variations: Adding a little lemon zest into the butter mixture can brighten up the flavor even more, especially in warmer months.
- Spicy kick: Toss in some red pepper flakes or smoked paprika to the herb butter if you like a mild heat.
- Other veggies: Try baby potatoes or parsnips with the carrots and celery for a heartier veggie bed that cooks alongside the chicken.
How to Make Perfect Herb Roasted Chicken Recipe
Step 1: Prep Your Chicken for Maximum Flavor
First things first—remove the giblets from the cavity. I usually save these for gravy or toss them if I don’t have plans. Rinse the bird under cold water and pat it completely dry with paper towels; this dryness is key for crispy skin. Wet chicken skin steams and won’t crisp up right, so give it a good thorough pat.
Step 2: Make Your Herb Butter Mixture
Mix the softened butter with your finely chopped fresh herbs, salt, pepper, and garlic. I love using a fork or small whisk here to really break up the herbs and evenly distribute everything. This herb butter is the game-changer for juicy, flavorful meat—not just a topping but a marinade under the skin.
Step 3: Arrange the Vegetables and Chicken
Place the majority of your sliced onion, carrots, and celery on the bottom of the roasting pan, then put a rack on top. This setup keeps the chicken elevated, preventing sogginess, while the veggies roast and flavor pan drippings. Reserve a few veggies and herb sprigs for the chicken cavity to infuse from the inside out.
Step 4: Stuff the Cavity and Add Lemon Rinds
Fill the chicken cavity with a few of the reserved vegetables, fresh herb sprigs, and lemon rind pieces—just enough to add amazing flavor but not so full the chicken struggles to cook evenly inside. Tuck wing tips under the bird to avoid burning, too—that’s a neat trick I learned from a chef friend!
Step 5: Spread Herb Butter Under and Over the Skin
This part can be a little tricky, but here’s the secret: gently loosen the skin from the meat starting with your fingers for ease, then use an upside-down large spoon to reach tricky spots like the back. Carefully avoid tearing the skin. Spoon half your herb butter under the skin, spreading it evenly with your fingers and the spoon. Finish by spreading the remaining butter all over the skin’s surface for that golden crust.
Step 6: Tie Legs and Insert Thermometer
Use kitchen twine to tightly tie the legs together—it helps the chicken cook evenly and look beautiful. Then insert a probe thermometer into the thickest part of the thigh without touching bone (which gives a false reading). Set the alarm to 160°F—you’ll remove the bird once it hits this temp because it’ll continue cooking while resting.
Step 7: Roast and Add Water Midway
Roast the chicken uncovered at 375°F for 45 minutes. The skin starts to develop a crispy, golden layer during this time. Then add 2 cups of water to the roasting pan (not at the start to keep skin crisp). This water keeps the bottom veggies moist and prevents burning. Keep adding a cup or so if the water evaporates before the chicken’s done. Total roasting time is about two hours, but watch the thermometer!
Step 8: Rest Your Bird
Once the probe hits 160°F, remove the chicken from the oven but leave the thermometer in. Loosely tent with foil and let it rest for 20 minutes. I know it’s tempting to dive right in—trust me, I’m guilty too—but resting is what lets the juices redistribute and the temperature rise to that perfect 165°F USDA recommended mark.
Pro Tips for Making Perfect Herb Roasted Chicken Recipe
- Pat the Chicken Very Dry: Moisture on the skin can stop crisping, so don’t skimp on paper towel drying.
- Don’t Overstuff the Cavity: Too many veggies inside slow cooking and cause uneven doneness—just a few aromatics is best.
- Add Water after 45 Minutes: This clever step prevents the pan from burning while keeping the chicken moist without sacrificing crispy skin.
- Use a Probe Thermometer: It’s the most reliable way to avoid over or undercooking and ensures juicy meat every time.
How to Serve Perfect Herb Roasted Chicken Recipe

Garnishes
I love to finish the roast with a few fresh herb sprigs like rosemary or thyme on the platter for that homemade, earthy look—and sometimes serve wedges of lemon on the side for anyone wanting a zesty fresh squeeze. A little sprinkle of flaky sea salt right after carving also amps up the flavor.
Side Dishes
Since the chicken is so flavorful, I keep sides simple: roasted garlic mashed potatoes, green beans tossed in butter, or a crisp arugula salad with lemon vinaigrette. The pan-roasted veggies from underneath are delicious, too, so don’t hesitate to spoon those onto your plate.
Creative Ways to Present
For special occasions, I sometimes carve the chicken at the table right onto a rustic wooden board surrounded by colorful roasted veggies and fresh herbs. Adding some edible flowers or microgreens gives it a gorgeous, restaurant-quality touch. Friends always ask for the recipe after seeing that!
Make Ahead and Storage
Storing Leftovers
I usually carve any leftover chicken and store it in an airtight container in the fridge. It keeps beautifully for 3 to 4 days. Keeping the skin on the pieces helps retain moisture, and I always store some of the pan juices in a separate container to drizzle when reheating.
Freezing
This recipe freezes well, too! Portion out the carved chicken and some pan drippings in freezer-safe bags or containers. When I’ve done this, I freeze for up to 3 months and still get great flavor and tenderness after thawing.
Reheating
To reheat, I usually cover the chicken loosely with foil and warm it in a 325°F oven for about 15-20 minutes, adding a splash of the pan juices to keep it moist. Microwave works in a pinch but can dry out the meat faster, so oven reheating is my preferred method for best results.
FAQs
-
Can I use dried herbs instead of fresh in the Perfect Herb Roasted Chicken Recipe?
Yes, you can substitute dried herbs, but reduce the amount to about one-third since dried herbs are more concentrated. The flavor won’t be as vibrant as fresh, but it will still be delicious. If possible, use fresh for the best results.
-
How do I know when the chicken is fully cooked?
The best way is to use a probe thermometer and cook until the internal temperature reaches 160°F, then let it rest until it rises above 165°F. This ensures the chicken is safe to eat and perfectly juicy. Avoid cutting it open to check, as that releases the tasty juices.
-
Can I cook this chicken at a higher temperature to reduce cooking time?
Cooking at higher heat can risk burning the skin or drying out the meat before it’s cooked through. The 375°F temperature strikes a great balance—crispy skin and juicy meat with gentle roasting. If you’re short on time, spatchcocking the chicken might help speed things up.
-
What do I do with the pan juices left after roasting?
The pan juices are packed with flavor! You can use them to make a quick gravy by thickening with a bit of flour or cornstarch and adding extra seasoning, or simply drizzle some over your carved chicken and veggies for extra richness.
Final Thoughts
This Perfect Herb Roasted Chicken Recipe is one of those dishes I always come back to when I want comfort food that feels like a labor of love but without the fuss. I love sinking my teeth into the crispy skin, knowing how the fresh herbs and butter gave the meat so much goodness inside. If you try this recipe, I’m confident it’ll become one of your favorites, too—like that reliable friend in your recipe box that never lets you down. Grab your roasting pan, toss on some herbs, and enjoy every unforgettable bite.
Print
Perfect Herb Roasted Chicken Recipe
- Prep Time: 30 minutes
- Cook Time: 2 hours
- Total Time: 2 hours 30 minutes
- Yield: 6 servings
- Category: Dinner
- Method: Baking
- Cuisine: American
Description
This Perfect Herb Roasted Chicken recipe offers a succulent and flavorful way to enjoy a classic roasted chicken. Infused with a fragrant blend of fresh herbs and garlic, the chicken is buttered and roasted to crispy, golden perfection. Vegetables and lemon rind add depth to the flavor, while careful roasting ensures juicy, tender meat. Ideal for a comforting family dinner or special occasion, this dish promises a deliciously simple approach to gourmet home cooking.
Ingredients
Chicken
- 1 large roasting chicken (approximately 9 pounds)
Herb Butter Mixture
- 1 stick (1/2 cup) unsalted butter, softened to room temperature
- 1/4 cup finely chopped fresh herbs (rosemary, sage, thyme, parsley or poultry blend)
- 1 teaspoon kosher salt
- 1 teaspoon freshly ground black pepper
- 1 tablespoon garlic, finely minced
Vegetables and Aromatics
- 1/2 of a large onion, cut into quarter-inch vertical slices
- 2 medium carrots, peeled and sliced
- 2 celery stalks, sliced (include celery leaves)
- Rind of one lemon (outer rind peeled with a peeler)
- Additional sprigs of fresh herbs for chicken cavity
- Water as needed for roasting pan
Instructions
- Prepare the Chicken: Remove giblets from the chicken cavity, rinse the chicken with cold running water, and pat completely dry with paper towels.
- Make Herb Butter: In a medium bowl, combine the softened butter with chopped fresh herbs, kosher salt, freshly ground black pepper, and minced garlic, mixing thoroughly.
- Preheat Oven: Preheat your oven to 375 degrees Fahrenheit.
- Prepare Roasting Pan: Place most of the sliced vegetables in the bottom of a roasting pan, then position a flat rack over the vegetables. Reserve a few vegetables for the chicken cavity.
- Stuff Cavity: Place a few reserved vegetables, fresh herb sprigs, and lemon rind pieces into the chicken cavity—just enough to enhance flavor without overfilling, which could prevent proper cooking.
- Position Chicken: Set the chicken onto the rack. Arrange remaining lemon rinds around the outside of the chicken. Tuck the wing tips under the chicken for even roasting.
- Loosen Skin: Gently separate the skin from the meat using your fingers and an upside-down long spoon, taking care to keep the skin intact, especially around the back, thighs, and legs.
- Apply Herb Butter: Spoon half of the herb butter mixture under the loosened skin, spreading it evenly. Then, spread the remaining butter mixture over the top of the chicken skin.
- Tie Legs: Use kitchen twine to tightly tie the ends of both legs together to ensure even cooking.
- Insert Thermometer: Insert a probe thermometer into the thickest part of the chicken and set the alarm to 160 degrees Fahrenheit.
- Initial Roasting: Roast the chicken uncovered for 45 minutes to allow the skin to crisp.
- Add Water: Add 2 cups of water to the pan under the chicken. This moisture prevents burning and keeps the chicken juicy.
- Continue Roasting: Roast for approximately 1 hour and 15 minutes more (total cooking time ~2 hours). Add water in 1-cup increments if it evaporates, and tent with foil if the skin browns too quickly before reaching 160 degrees.
- Rest Chicken: When the thermometer reads 160 degrees F, remove the chicken from the oven, leave the probe in, tent loosely with foil, and let it rest for 20 minutes. The internal temperature will rise to above 165 degrees, ensuring safe doneness.
- Carve and Serve: Remove the probe and foil, carve the chicken, and serve warm.
Notes
- Ensure the chicken is patted completely dry to achieve crispy skin.
- Do not overfill the cavity to allow even cooking inside the bird.
- Tying the legs helps maintain shape and ensures even cooking.
- Resting the chicken after roasting allows juices to redistribute for moist meat.
- Use a probe thermometer to monitor internal temperature accurately.
Nutrition
- Serving Size: 1 serving (approx. 6 oz cooked chicken with skin and vegetables)
- Calories: 550 kcal
- Sugar: 3 g
- Sodium: 450 mg
- Fat: 35 g
- Saturated Fat: 15 g
- Unsaturated Fat: 18 g
- Trans Fat: 0.2 g
- Carbohydrates: 7 g
- Fiber: 2 g
- Protein: 45 g
- Cholesterol: 140 mg


Your email address will not be published. Required fields are marked *