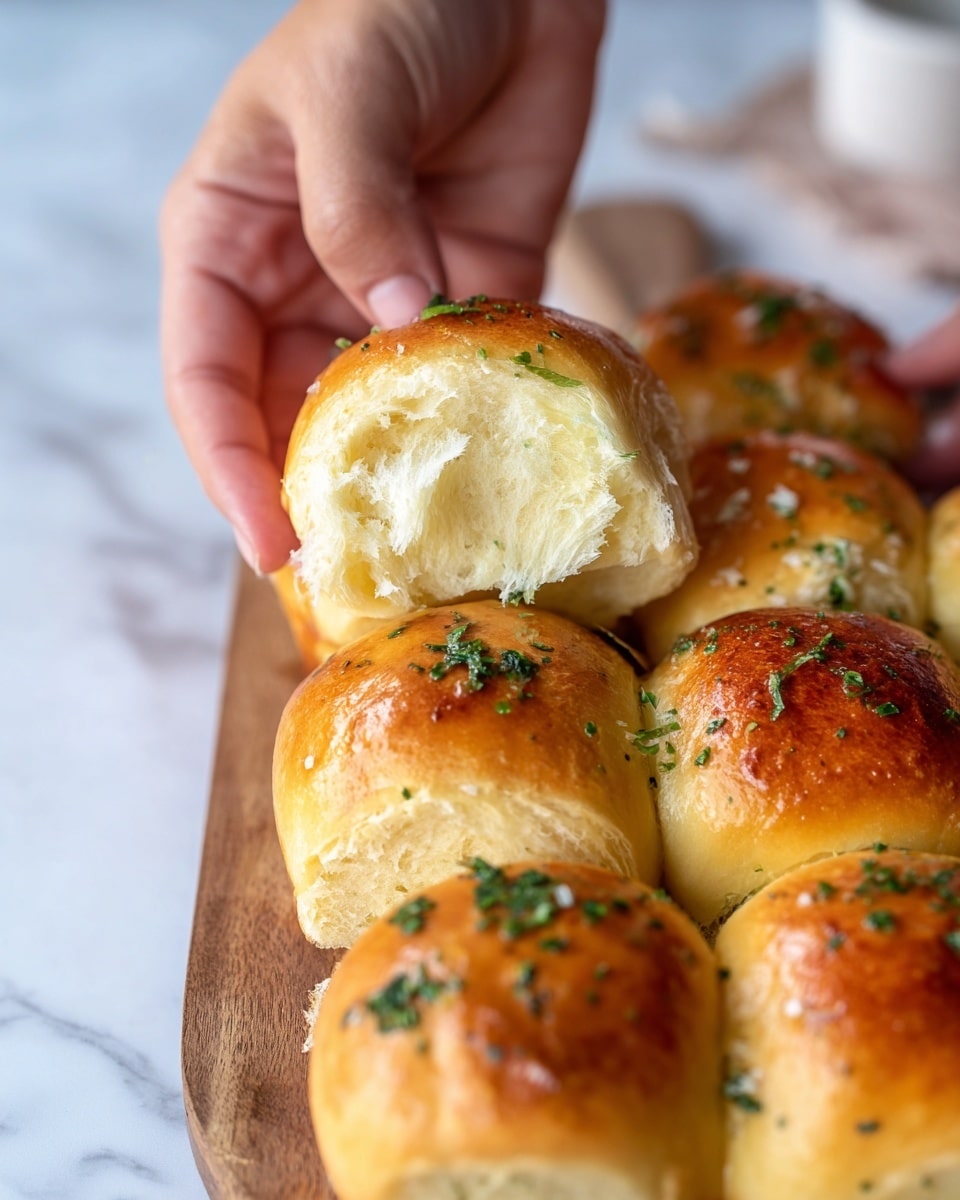
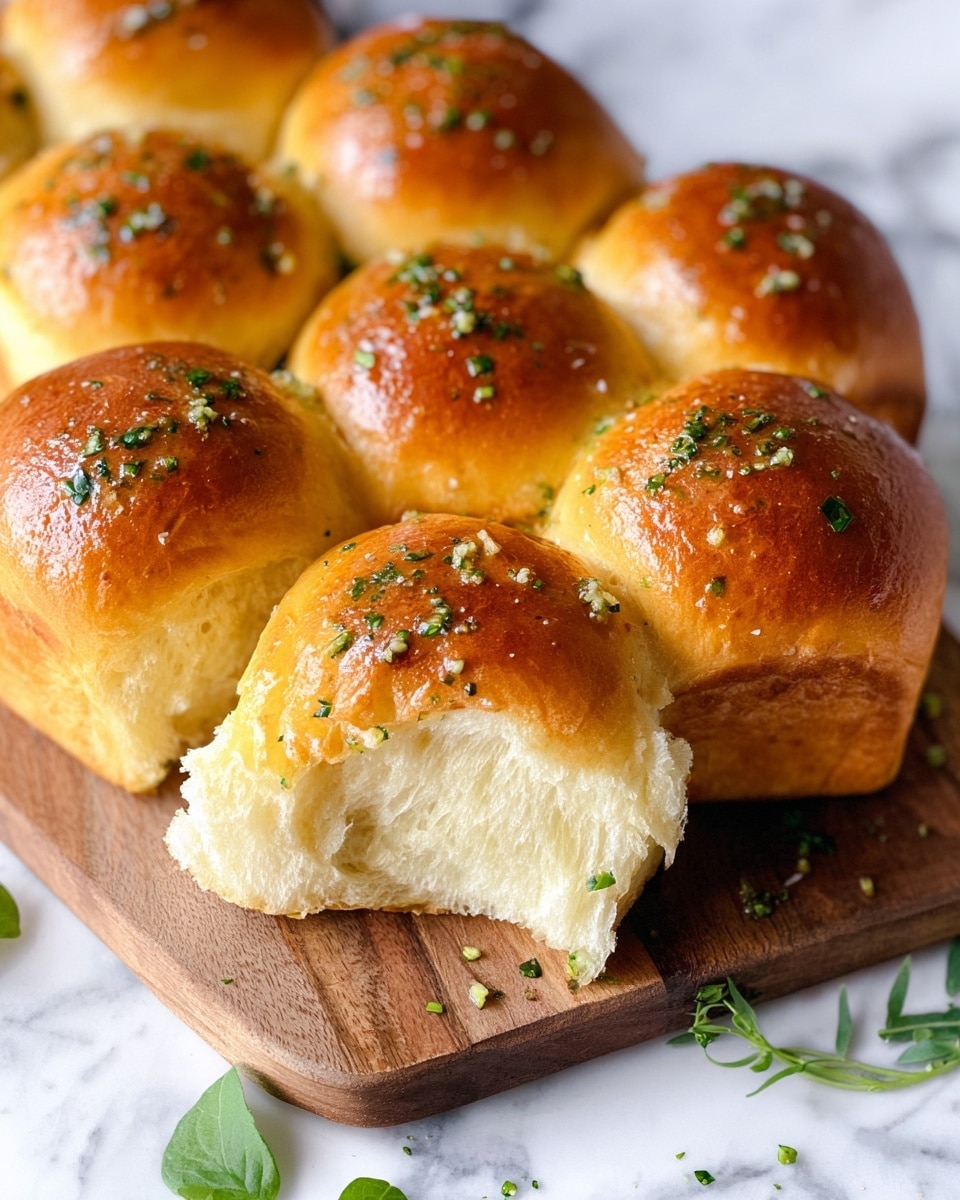
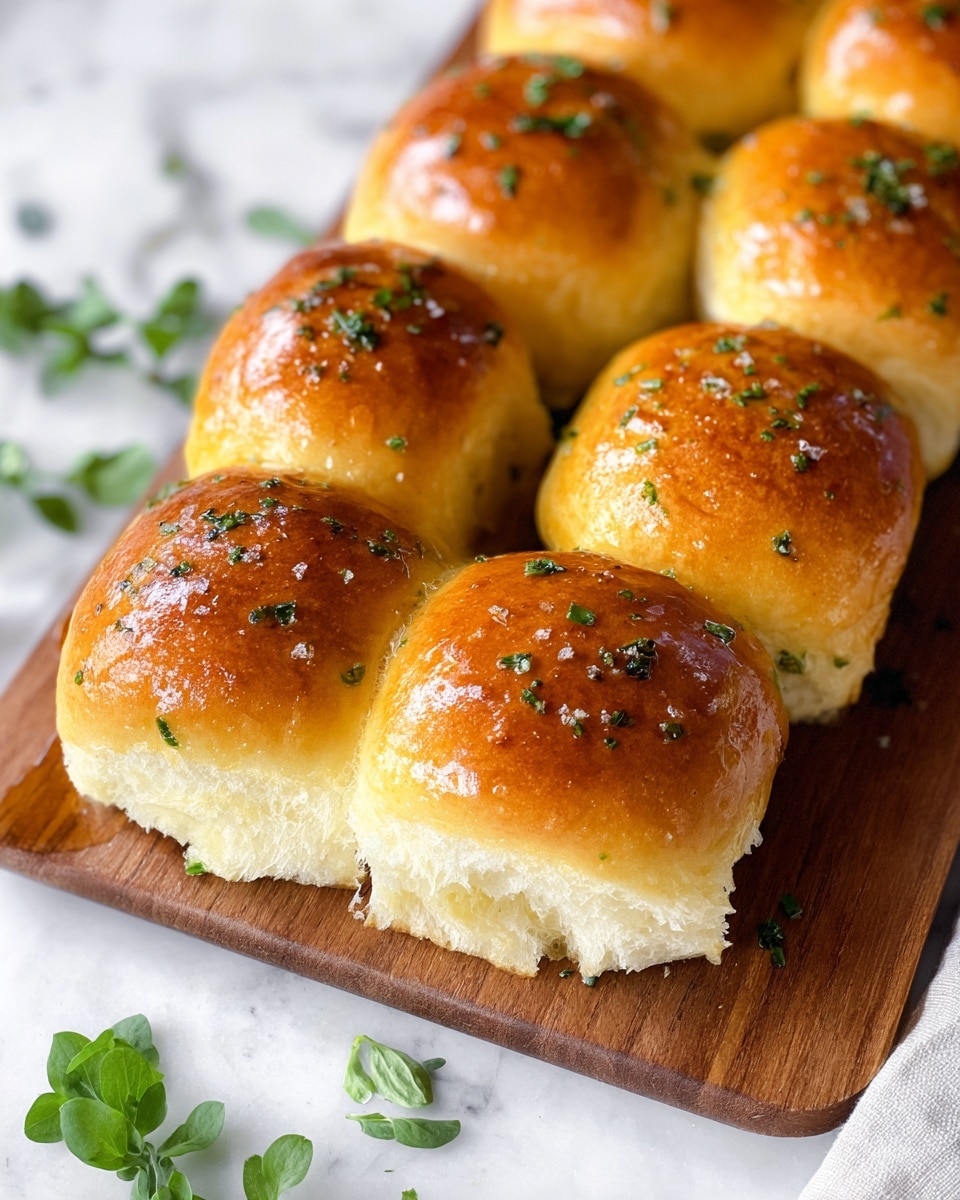
If you’ve been craving soft, fluffy dinner rolls that pack a punch of flavor, you absolutely need to try this Easy Garlic Butter Dinner Rolls Recipe. I promise you, these rolls come out golden, buttery, and irresistibly garlicky—perfect for any meal or even just a cozy snack. Stick with me here, because I’m sharing all my tips and tricks so you can nail this at home, even if you’ve never made rolls from scratch before. Trust me, once you try these, your family and friends will be asking for seconds (and thirds) every time!
Why You’ll Love This Recipe
- Super Soft Texture: The dough comes out perfectly light and fluffy thanks to simple, classic ingredients and proper kneading.
- Rich Garlic Butter Flavor: The garlic butter glaze adds a punch of savory goodness that makes these rolls irresistible fresh from the oven.
- Beginner Friendly: Even if you’re new to baking bread, the step-by-step instructions and tips will guide you through making these like a pro.
- Great for Any Occasion: Whether it’s a family dinner, holiday feast, or casual gathering, these rolls always impress.
Ingredients You’ll Need
Every ingredient in this Easy Garlic Butter Dinner Rolls Recipe plays a key role in crafting tender, flavorful rolls. I always recommend using fresh yeast and warm milk for a perfect rise, and real butter for that rich, melt-in-your-mouth taste.
- Whole milk: Warm milk activates the yeast and tenderizes the dough, making it soft and rich.
- Active dry yeast or instant yeast: This is the magic behind your rolls’ rise—make sure it’s fresh and not expired.
- Sugar: Feeds the yeast and adds just a touch of sweetness to balance the savory flavors.
- All-purpose flour: Forms the structure of your rolls, so choose a good quality brand for best results.
- Egg: Adds richness and helps bind the dough together for a perfect crumb.
- Salt: Enhances all the flavors without overpowering.
- Unsalted butter (softened): Gives tenderness and flavor; don’t skip softening it ahead of time.
- Egg yolk and milk (for egg wash): This gives your rolls that irresistible golden, glossy finish.
- Salted butter (for garlic butter): For that luscious topping that melts into every bite.
- Garlic cloves: Freshly chopped garlic makes all the difference—skip the powder for this one.
- Fresh parsley: Adds color, freshness, and a hint of herbal brightness to cut through the richness.
Variations
I love experimenting with this Easy Garlic Butter Dinner Rolls Recipe to match the mood or occasion. Whether you’re making these for a holiday dinner or a quick weeknight meal, adding your personal twist makes it all the more special.
- Cheesy Twist: Adding shredded cheddar or parmesan right into the dough or as a topping before baking adds a melty, savory surprise my family adores.
- Herb Infusion: Mix fresh rosemary or thyme into the garlic butter for a fragrant kick that pairs beautifully with roasted meats.
- Spicy Kick: A pinch of red pepper flakes in the butter gives these rolls an exciting edge—I’m hooked on this variation for game day snacks.
- Gluten-Free Version: Though a bit trickier, swapping in a good gluten-free flour blend and slightly adjusting the liquid can yield tasty results.
How to Make Easy Garlic Butter Dinner Rolls Recipe
Step 1: Activate the Yeast & Combine Ingredients
Start by warming your milk to about 110°F—it should feel warm but not hot to the touch, like a cozy bath. Stir in the yeast until it dissolves and bubbles a bit, signaling it’s ready to work its magic. Next, add your sugar, flour, egg, salt, and softened butter directly into the same bowl. You’ll find the dough looks shaggy at this point—that’s totally normal and exactly what you want before kneading.
Step 2: Knead Until Perfectly Smooth and Elastic
Turn the dough onto a clean surface and knead using a push-pull motion with your palms for about 15 minutes. It’s sticky at first, which threw me off the first time I made these—I wanted to add more flour! Resist that urge. With patience, the dough becomes smooth and stretchy. You’ll know you’re done kneading when it passes the “windowpane test”—stretch a piece gently between your fingers until it’s thin and translucent without tearing. This texture tells you the gluten is well-developed, which means soft, fluffy rolls.
Step 3: First Rise in a Warm, Humid Spot
Place your dough into a lightly oiled bowl and cover it with cling wrap. I usually pop mine into a warm spot in the kitchen—like the top of the fridge or inside the oven with just the light on—to create a cozy environment. After about 90 minutes, the dough should at least double in size (sometimes mine rises faster depending on the day). This rise is what makes your rolls light and airy.
Step 4: Shape and Second Rise
Punch down the dough gently (I like to imagine releasing all the built-up air bubbles) and turn it out onto a clean surface. Divide it into 12 equal pieces and shape each into a tight, smooth ball—this is my favorite part because you get to feel the dough’s transformation. I hold one palm flat and use the other to twist and tuck the dough underneath, making sure there are no wrinkles. Arrange your rolls on a parchment-lined 9×13” pan, leaving some space so they can puff up nicely. Then brush generously with egg wash and let them rise again for 30-45 minutes until puffy.
Step 5: Bake and Brush with Garlic Butter
Preheat your oven to 350°F about 20 minutes before baking. Just before sliding the rolls in, brush them with another coat of egg wash for that beautiful golden crust. Bake for 20-22 minutes or until the tops are golden and glossy. While the rolls bake, melt butter in a small saucepan, sauté the garlic just until fragrant (about 1-2 minutes), then stir in the fresh parsley. The moment you pull your warm rolls from the oven, brush them with this garlicky butter and watch everyone swoon.
Pro Tips for Making Easy Garlic Butter Dinner Rolls Recipe
- Don’t Rush the Kneading: The more patient you are kneading, the better the gluten develops, resulting in those soft, airy rolls I love.
- Use Warm (Not Hot) Milk: Too hot and you risk killing the yeast; too cool and it won’t activate properly. Aim for just warm enough to be comfy on your wrist.
- Shape Rolls Tightly: Tucking the dough under when rolling helps create smooth, wrinkle-free rolls that bake evenly and look gorgeous.
- Avoid Adding Extra Flour: Sticky dough is okay here; extra flour leads to dense rolls. Stick with kneading to tame stickiness.
How to Serve Easy Garlic Butter Dinner Rolls Recipe

Garnishes
I like to sprinkle freshly chopped parsley or a light dusting of parmesan right after brushing the garlic butter—adds a beautiful pop of color and flavor. Sometimes a few flaky sea salt crystals on top bring these rolls to the next level of savory perfection.
Side Dishes
These rolls pair beautifully with hearty soups like tomato basil, classic chicken noodle, or even alongside a big salad and roasted chicken. I’ve also served them with pasta dinners and creamy casseroles—and honestly, they soak up gravy and sauces like champs.
Creative Ways to Present
For special occasions, I love arranging the rolls in a wreath shape on a platter, brushing the garlic butter over the whole wreath just before serving. It’s festive, extra inviting, and perfect for sharing. Another fun idea: bake the rolls in individual ramekins or muffin tins for a cute, pull-apart presentation.
Make Ahead and Storage
Storing Leftovers
I usually store leftover rolls in an airtight container or resealable plastic bag at room temperature—they stay soft and tasty for about 2 days. To keep them fresh longer, I add a small slice of bread inside the container to maintain humidity and prevent drying out.
Freezing
These rolls freeze beautifully—just let them cool completely, then wrap individually in plastic wrap and place in a freezer bag. When you want them, thaw at room temperature or overnight in the fridge. I’ve found freezing actually helps if you want to prep ahead for a big meal.
Reheating
To reheat, I wrap the rolls in foil and warm them in a 350°F oven for about 10 minutes. Then, I brush a little extra garlic butter on top to freshen up the flavor and restore that melt-in-your-mouth texture. Microwave can work in a pinch, but it tends to dry them out.
FAQs
-
Can I use instant yeast instead of active dry yeast in this recipe?
Absolutely! Instant yeast can be added directly to the dry ingredients without proofing in warm milk first. It often speeds up the rising time slightly, so keep an eye on your dough. Just reduce the warm milk amount a bit to account for this difference, and you’ll get the same wonderful results.
-
What temperature should the milk be for activating the yeast?
The ideal temperature is about 110°F (43°C)—warm but not hot. A good test is to feel with your wrist; it should be comfortably warm like a bath, not scalding. Too hot can kill the yeast, while too cold won’t activate it properly.
-
How do I know when the dough is ready after kneading?
Perform the windowpane test by stretching a small piece of dough gently between your fingers. If it stretches thin enough to see light through without tearing, your gluten is well-developed, and you’re good to go. The dough should also feel smooth and elastic, not sticky or lumpy.
-
Can I make these rolls ahead of time?
Yes! You can shape the rolls, place them on the baking sheet, cover, and refrigerate overnight for a slow second rise. Just bring them back to room temperature before baking, and adjust your baking time slightly if needed. This makes morning prep much easier.
-
What if I don’t have fresh garlic for the butter?
Fresh garlic really shines here, but if you’re in a pinch, a good quality garlic powder can work. Use about 1/2 teaspoon, sauté it gently in butter to release its aroma. It won’t be exactly the same but still tasty!
Final Thoughts
This Easy Garlic Butter Dinner Rolls Recipe holds a special place in my kitchen because it captures everything I want from homemade bread—comfort, flavor, and a little bit of magic with every bite. I hope you take the leap to make them yourself; the process is as rewarding as the delicious results, and you’ll impress anyone lucky enough to share them with you. Happy baking, friend!
Print
Easy Garlic Butter Dinner Rolls Recipe
- Prep Time: 30 minutes
- Cook Time: 22 minutes
- Total Time: 3 hours 45 minutes
- Yield: 12 dinner rolls
- Category: Bread
- Method: Baking
- Cuisine: American
Description
These Easy Garlic Butter Dinner Rolls are soft, fluffy, and filled with rich garlic butter flavor. Perfect for any meal, these homemade rolls feature a tender crumb from an enriched yeast dough and a shiny golden crust brushed with egg wash. Serve them warm, slathered with aromatic garlic butter and fresh parsley for an irresistible side.
Ingredients
Dinner Rolls
- 1 cup whole milk (240g), warm (around 110°F)
- 3 teaspoons active dry yeast or instant yeast
- 1/3 cup sugar (70g)
- 3 3/4 cups all purpose flour (490g)
- 1 large egg
- 1.5 teaspoons salt
- 6 tablespoons unsalted butter, softened at room temperature (85g)
Egg Wash
- 1 egg yolk
- 1 tablespoon milk
Garlic Butter
- 1/4 cup salted butter (57g)
- 2-3 garlic cloves, finely chopped
- 1-2 tablespoons freshly chopped parsley
Instructions
- Activate Yeast: In a large bowl, stir together the warm milk with the yeast until dissolved and slightly foamy.
- Combine Ingredients: Add sugar, flour, egg, salt, and softened unsalted butter to the yeast mixture. Stir together until a shaggy dough forms.
- Knead Dough: Turn the dough onto a clean surface and knead for 15 minutes using a push-pull motion with your palms. The dough will be sticky initially but will become smooth and elastic. Perform the window-pane test to check readiness.
- First Rise: Transfer dough to a large bowl lightly sprayed with oil. Cover with cling wrap and place in a warm, humid spot for about 90 minutes, or until doubled in size.
- Shape Rolls: Punch down the risen dough and turn onto a clean surface. Divide it into 12 equal pieces and roll each into a tight, smooth ball, ensuring no wrinkles or cracks.
- Prepare Baking Pan: Line a 9×13-inch baking sheet with parchment paper and place the rolls spaced evenly apart.
- Apply Egg Wash: Mix egg yolk and 1 tablespoon milk in a small bowl. Use a pastry brush to generously coat the rolls with the egg wash.
- Second Rise: Let the rolls rise again in a warm spot for 30-45 minutes until puffy.
- Preheat Oven: About 20 minutes before baking, preheat the oven to 350°F (conventional).
- Final Egg Wash: Brush the rolls with another generous layer of egg wash just before baking.
- Bake: Bake the rolls for 20-22 minutes until they develop a shiny, golden-brown crust.
- Make Garlic Butter: While the rolls bake, melt salted butter in a saucepan over medium heat. Add finely chopped garlic and sauté 1-2 minutes until fragrant. Remove from heat and stir in freshly chopped parsley.
- Brush Rolls: Once rolls are hot out of the oven, generously brush them with the prepared garlic butter.
- Serve: Serve the garlic butter dinner rolls warm and enjoy!
Notes
- For best results, maintain the milk temperature around 110°F to activate yeast properly.
- Kneading time is important to develop gluten for soft, fluffy rolls; avoid adding extra flour even if dough is sticky.
- The window-pane test ensures dough elasticity and readiness for rising.
- Use parchment paper for easy cleanup and to prevent sticking.
- Double egg wash application helps achieve a shiny, golden crust.
- Garlic butter should be brushed on while rolls are hot to maximize flavor absorption.
- You can substitute parsley with other fresh herbs like chives or thyme for variation.
Nutrition
- Serving Size: 1 roll (approx. 65g)
- Calories: 180
- Sugar: 4g
- Sodium: 170mg
- Fat: 7g
- Saturated Fat: 4.5g
- Unsaturated Fat: 2g
- Trans Fat: 0g
- Carbohydrates: 26g
- Fiber: 1g
- Protein: 4g
- Cholesterol: 45mg


Your email address will not be published. Required fields are marked *