
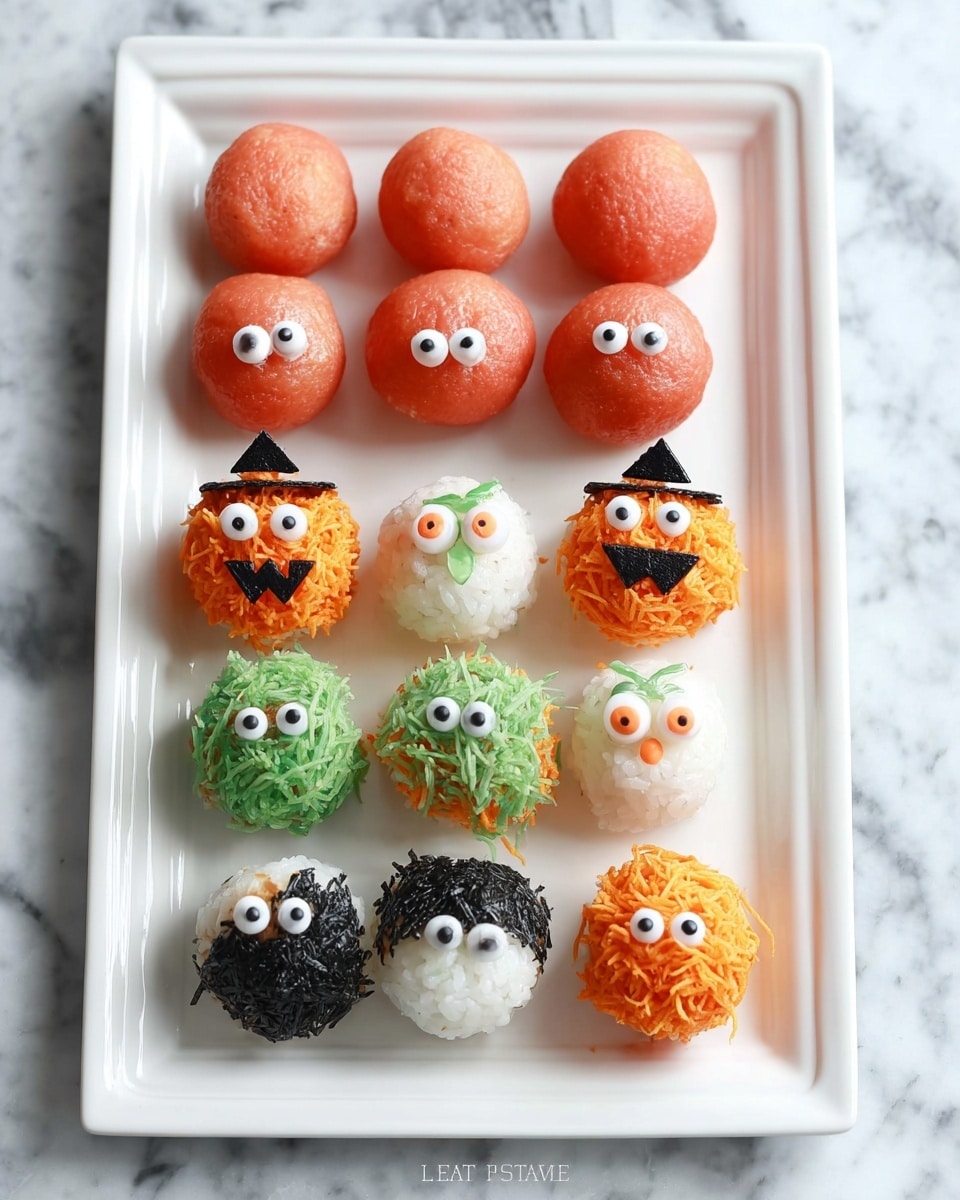
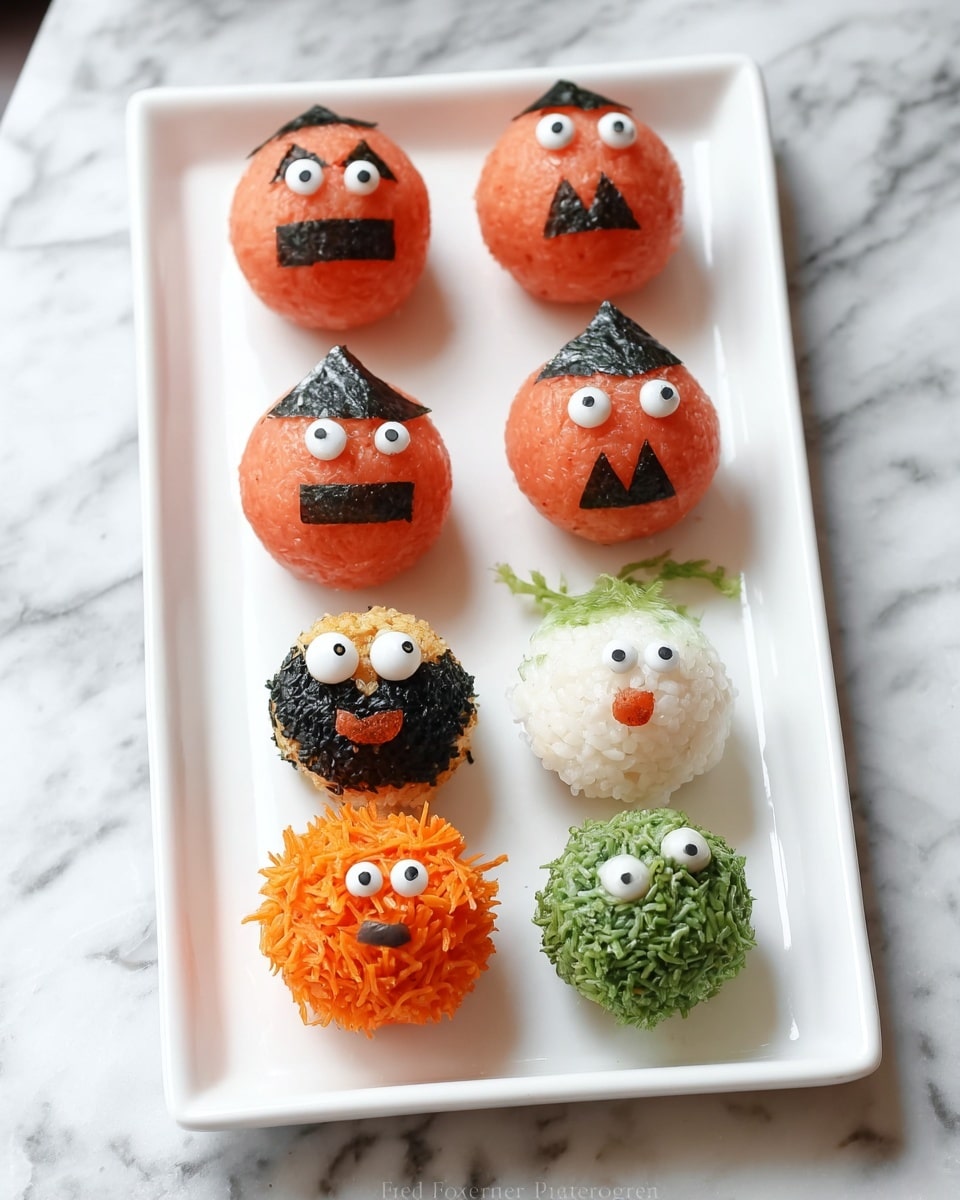
If you’re looking to bring some spooky, fun vibes to your next party, I have a treat for you. This Halloween Sushi Balls Recipe is one of my favorite festive snacks to make — it’s both visually striking and surprisingly easy! Trust me, once you try this, you’ll be hooked on these cute little sushi balls that look perfect for a Halloween spread. Plus, they’re a great way to impress your friends without spending all day in the kitchen.
Why You’ll Love This Recipe
- Festive and Fun: These sushi balls bring a spooky charm to your table that kids and adults adore alike.
- Simple to Make: The steps are straightforward—perfect even if sushi feels intimidating to you.
- Versatile Toppings: You get to customize with veggies, seafood, and fun “monster” decorations.
- Perfect Party Food: Bite-sized and mess-free, these sushi balls are a hit at any gathering.

Ingredients You’ll Need
The ingredients here come together beautifully to create sushi balls that are tender, flavorful, and fun to decorate. The balance between the tangy sushi rice and fresh, crisp toppings makes all the difference. When shopping, look for good quality sushi rice and fresh veggies – it really makes the final result shine.
- Short-grain white rice (sushi rice): This is key for that perfect sticky texture that holds the balls together.
- Rice or apple cider vinegar: To season the rice with that classic sushi tang.
- Sugar and salt: Balance flavors beautifully in the vinegar seasoning.
- Roasted sesame seeds (optional): Add a lovely crunch and nutty flavor, plus a touch of visual interest.
- Smoked salmon, avocado, pickled daikon or radish: These make great bases and add color and texture variety.
- Roasted nori seaweed: Great for wrapping or cutting into fun shapes.
- Shredded carrot, kale, cucumber, imitation crab meat: Perfect for lively, “monster” toppings to make your sushi balls stand out.
- Roasted black sesame seeds: Use these for garnish and to create spooky eyes or other decorations.
Variations
I like to switch things up depending on the mood and who I’m serving these to. This Halloween Sushi Balls Recipe is so flexible that you can get really creative with your bases and toppings—and it’s always a crowd-pleaser regardless.
- Vegetarian version: I swap out smoked salmon for extra avocado and colorful veggies like thinly sliced bell peppers or purple cabbage, which add that spooky pop of color.
- Spicy kick: When I want a little heat, I mix some sriracha mayo right into the rice or drizzle it on top – it adds flavors that guests rave about.
- Kid-friendly: My niece loves when I form little sushi balls wrapped with seaweed crinkles and topped with tiny cucumber smiles – perfect for little hands!
- Gluten-free option: Just be sure your soy sauce is gluten-free, and you’re set.
How to Make Halloween Sushi Balls Recipe
Step 1: Make the Perfect Sushi Rice
Start by washing your sushi rice thoroughly—this is a step you don’t want to skip because it removes excess starch and prevents mushiness. I usually rinse my rice about 3-4 times until the water runs clear. After that, cook the rice using either a rice cooker or stovetop method. If using the stove, make sure to cover and simmer on low heat so the rice cooks evenly without burning.
While the rice is still warm, gently fold in your vinegar, sugar, and salt mixture. The trick is to fluff it with a fork or rice paddle without smashing the grains. I love to sprinkle in roasted sesame seeds here for that extra toasty crunch. Cover it and let it cool until just warm or slightly above room temp before shaping—it makes the rice easier to handle.
Step 2: Form Your Sushi Balls with a Tasty Base
Place a thin slice of smoked salmon, avocado, or your chosen base ingredient on a piece of plastic wrap. Then scoop a small amount of sushi rice and set it on top. Using the plastic wrap, gently gather and twist it around the rice to mold it into a neat ball. This method helps keep your hands clean and shapes the balls evenly. I’ve found about 1½-inch diameter balls are perfect for bite-sized fun finger food.
Step 3: Decorate Your Halloween Sushi Balls
Time to get creative! On a small plate, place shredded veggies like carrots, kale, or cucumber, or use roasted black sesame seeds for detail. Roll the sushi balls gently in these toppings and press lightly to adhere. This is where your “monster” sushi come to life—imagine using thin nori pieces or edible eyes to create spooky faces. It’s really fun and the perfect way to get kids involved in the kitchen!
Serve them alongside soy sauce, wasabi paste, and pickled ginger to complete the experience. My family goes crazy for the vibrant colors and playful shapes every single Halloween.
Pro Tips for Making Halloween Sushi Balls Recipe
- Rice Rinse Ritual: Don’t rush rinsing your sushi rice; it’s the secret to that perfect texture and non-sticky result every time.
- Plastic Wrap Magic: Using plastic wrap to form balls keeps your hands mess-free and helps you get uniform shapes easily.
- Cool But Not Cold: Let your rice cool to just above room temperature before shaping to avoid it getting mushy or sticking too much.
- Eye Placement: Use tiny nori cutouts or black sesame seeds for eyes — placing them carefully before serving keeps your monsters looking fresh.
How to Serve Halloween Sushi Balls Recipe
Garnishes
I usually add a few creative garnishes to amp up the spooky vibe—thin nori strips form “mouths” or “webs,” and little carrot sticks can turn into devilish horns. Roasted black sesame seeds sprinkled on top make awesome “eyes” or freckles, giving those sushi balls that monster personality I absolutely adore.
Side Dishes
To complement the sushi balls, I love serving edamame pods sprinkled with sea salt, a simple miso soup, or a crisp Asian slaw with sesame dressing. These sides keep the meal light and refreshing, perfect for Halloween parties where finger-food is king.
Creative Ways to Present
Once, I arranged these sushi balls on a black serving tray with tiny vampire and ghost figurines peppered around for a real Halloween vibe. Another fun way is to serve sushi balls stacked in a bamboo steamer basket lined with dark green leaves to mimic a haunted forest floor—trust me, guests loved the surprise and whimsy of it! Presentation definitely adds that extra “wow” factor.
Make Ahead and Storage
Storing Leftovers
If you happen to have leftovers (which rarely happens in my house!), store your sushi balls in an airtight container in the fridge. Cover them with a damp paper towel to keep the rice from drying out. I recommend eating them within 24 hours for the best texture and flavor.
Freezing
Personally, I don’t freeze sushi balls because the rice texture changes too much and can become hard or dry. Fresh is always best with sushi rice, but if you’re in a pinch, you can freeze the cooked rice (without seasoning) and prepare the balls fresh when you’re ready.
Reheating
If you have cold leftover sushi balls, I like to bring them to room temperature before serving—take them out of the fridge about 30 minutes ahead. Avoid microwaving as it changes the texture and can make the rice mushy. Instead, rely on letting them sit gently to regain their softness.
FAQs
-
Can I use brown rice for the Halloween Sushi Balls Recipe?
You can, but traditional sushi uses short-grain white rice because it’s sticky and holds shape well. Brown rice has a different texture and is less sticky, so your sushi balls might not hold together as nicely. If you want a healthier option, try a short-grain brown rice variant and expect a different bite.
-
How do I make the “eyeball” decorations for the sushi balls?
I usually use small circles of nori seaweed for the black part of the eye, then add a tiny dab of cream cheese or mayo for the white highlight. You can also use black sesame seeds as simple pupils. Placing these carefully right before serving keeps them fresh and fun looking.
-
What’s the best way to prevent sushi rice from sticking to my hands?
Keep a small bowl of water nearby and wet your hands lightly before handling the rice. This stops the rice from sticking to your fingers and makes shaping much easier. Alternatively, using plastic wrap to form the balls is a game-changer for mess-free assembly.
-
Can I prepare the sushi rice ahead of time for this recipe?
Yes! You can prepare the sushi rice a few hours ahead. Just make sure to cover it with a damp cloth or paper towel to keep it moist and store it at room temperature or in the fridge. Let it come to slightly above room temperature before forming your sushi balls for best handling.
Final Thoughts
I absolutely love how this Halloween Sushi Balls Recipe manages to be both playful and elegant at the same time. It’s a recipe that invites creativity, and watching everyone’s faces light up when they see these sushi balls shaped like little monsters is priceless. Whether it’s for a party or just a fun evening snack, I really recommend giving this a try—you’ll not only impress your guests but have a blast making it. No fancy sushi skills needed, just some imagination and a little love!
Print
Halloween Sushi Balls Recipe
- Prep Time: 30 mins
- Cook Time: 30 mins
- Total Time: 1 hour
- Yield: About 20 sushi balls (1½-inch each)
- Category: Appetizer
- Method: Stovetop
- Cuisine: Japanese
- Diet: Halal
Description
Halloween Sushi Balls are a fun and festive twist on traditional sushi, perfect for spooky celebrations. These bite-sized sushi balls feature a seasoned sushi rice base, topped with colorful vegetables or imitation crab, and decorated with edible eyeballs for a monster-like appearance. Easy to make and customizable, they are great for parties or themed gatherings.
Ingredients
Sushi Rice
- 2 cups short-grain white rice (“sushi rice”)
- 2 tablespoons rice or apple cider vinegar
- 1 tablespoon sugar
- ½ teaspoon salt
- 1 – 2 tablespoons roasted sesame seeds (optional)
Base
- Thinly sliced smoked salmon, avocado, Japanese pickled daikon, or radish
- Roasted nori seaweed, cut into rounds if desired
Topping
- Shredded carrot, kale, cucumber, or imitation crab meat
- Roasted black sesame seeds
- Edible eyeballs (for decoration)
Instructions
- Prepare the vinegar mixture: In a small bowl, dissolve the sugar and salt in the rice or apple cider vinegar. Set this mixture aside to be added to the rice later.
- Wash the rice: Rinse the short-grain rice under cold water, swirling and draining repeatedly until the water runs clear to remove excess starch. Drain completely.
- Cook the rice: If using a rice cooker, combine the rice with 2 cups of water and cook according to the rice cooker’s instructions. For stovetop cooking, place the rice and 2½ cups of water into a pot, bring to a boil over medium-high heat uncovered, then stir. Cover and reduce to low heat to simmer for about 15 minutes until the water is absorbed.
- Let the rice rest: Remove from heat and let the rice sit covered for 5 minutes to steam and finish cooking.
- Season the rice: Transfer the hot rice into a bowl. While gently fluffing with a fork, sprinkle in the vinegar mixture evenly without mashing the rice. Cover the bowl with a paper towel and allow the rice to cool to just above room temperature.
- Optional add sesame: If desired, mix in roasted sesame seeds for added flavor and texture once the rice has cooled slightly.
- Form the sushi balls base: Place a thin slice of smoked salmon, avocado, pickled daikon, or radish on a piece of plastic wrap. Add a scoop of the sushi rice on top of the base ingredient.
- Mold the sushi balls: Gather the plastic wrap around the rice and twist to form a tight ball shape, gently compacting the rice without crushing it. Repeat to make about 20 sushi balls (approximately 1½-inch each).
- Add toppings: Place shredded vegetables or roasted black sesame seeds in a shallow bowl or plate. Roll or gently press each sushi ball onto the toppings so they stick, creating monster-like textures.
- Decorate: Affix edible eyeballs to the sushi balls to enhance the spooky monster appearance.
- Serve: Present the sushi balls with soy sauce, wasabi paste, and gari (pickled ginger) on the side for dipping and added flavor.
Notes
- Use short-grain white rice labeled as sushi rice for the best texture.
- Plastic wrap helps in shaping sushi balls easily and keeps them intact.
- Customize toppings and bases based on dietary preferences or available ingredients.
- Edible eyes can be found at specialty baking or party stores.
- Serve sushi balls shortly after preparing for best freshness and appearance.
- Leftover sushi rice can be refrigerated and used for other sushi dishes within a day.
Nutrition
- Serving Size: 1 sushi ball
- Calories: 45
- Sugar: 1.0 g
- Sodium: 120 mg
- Fat: 1.5 g
- Saturated Fat: 0.3 g
- Unsaturated Fat: 1.0 g
- Trans Fat: 0 g
- Carbohydrates: 7 g
- Fiber: 0.5 g
- Protein: 1.5 g
- Cholesterol: 5 mg

Your email address will not be published. Required fields are marked *