
If you’re looking for a Halloween treat that’s downright irresistible and surprisingly easy, let me introduce you to my Mummy Cake Balls Recipe. These little bites of cake covered in spooky mummy wrappings are the perfect mix of cute and delicious, and trust me, your family and friends will go absolutely crazy over them. Whether you’re hosting a party or just want a festive snack, this recipe will quickly become your go-to for fun and flavor.
Why You’ll Love This Recipe
- Effortless Halloween Fun: No tricky decorating skills needed to create adorable mummy-themed treats.
- A Perfect Combination: Moist cake mixed with smooth cream cheese and coated in sweet vanilla almond bark – balance at its best!
- Great for Parties or Snacks: Bite-sized and mess-free, these cake balls are perfect for sharing or sneaking a few yourself.
- Customizable Creativity: You can easily switch up flavors or colors for different occasions beyond Halloween.

Ingredients You’ll Need
One of the reasons I adore this Mummy Cake Balls Recipe is how straightforward the ingredients are – nothing fancy, but they come together for maximum flavor and texture. Grab quality ingredients and you’re halfway there!
- White cake mix: I recommend using a boxed mix here – it makes things quick and easy without sacrificing great flavor.
- Cream cheese: Softened to room temperature for smooth mixing; it adds rich creaminess and holds the cake balls together.
- Vanilla almond bark: This candy coating melts perfectly for dipping and sets to a shiny, smooth finish.
- Candy eyes: The cutest touch that brings your mummy cake balls to life – get them in the baking aisle or online.
Variations
I love how this recipe is flexible, and honestly, it’s more fun when you make it your own. Whether you’re into tweaking flavors or need to accommodate a sweet tooth or two, here are some ways I like to mix it up.
- Chocolate Lover’s Twist: Swap the vanilla almond bark for white chocolate or dark chocolate coating. I’ve done this for birthday parties, and the kids went nuts over the rich flavor.
- Spooky Gummies: Instead of candy eyes, try mini gummy worms peeking out for a different creepy vibe – perfect for teen gatherings.
- Diet-Friendly Option: Use a sugar-free cake mix and light cream cheese to reduce sugar without losing that creamy, dreamy texture.
- Seasonal Flare: Add a splash of pumpkin spice to the cake mix before baking. It’s subtle, but you’ll notice that cozy fall feeling in every bite.
How to Make Mummy Cake Balls Recipe
Step 1: Bake and Cool the Cake
Start by baking your white cake mix according to the box directions. This is the base of your mummy cake balls, so make sure to cool the cake completely before moving on – warm cake will make mixing tricky. When I first tried this, I learned the hard way that if the cake is even a bit warm, the cream cheese melts and turns the mixture too sticky.
Step 2: Crumble and Mix with Cream Cheese
Once cooled, crumble the cake into a large bowl. I find using my hands works best to break it up evenly. Then add your softened cream cheese. Using a hand mixer or stand mixer on low, blend until fully combined into a dough-like consistency. This mixture should hold together easily but not be too wet.
Step 3: Shape and Chill the Cake Balls
Roll the mixture into 2-tablespoon sized balls – I use a cookie scoop to keep them even. Place them on a parchment-lined baking sheet. Pop them in the freezer for 30 minutes; this isn’t absolutely necessary but it makes dipping much easier and keeps your hands cleaner.
Step 4: Dip and Decorate Your Mummies
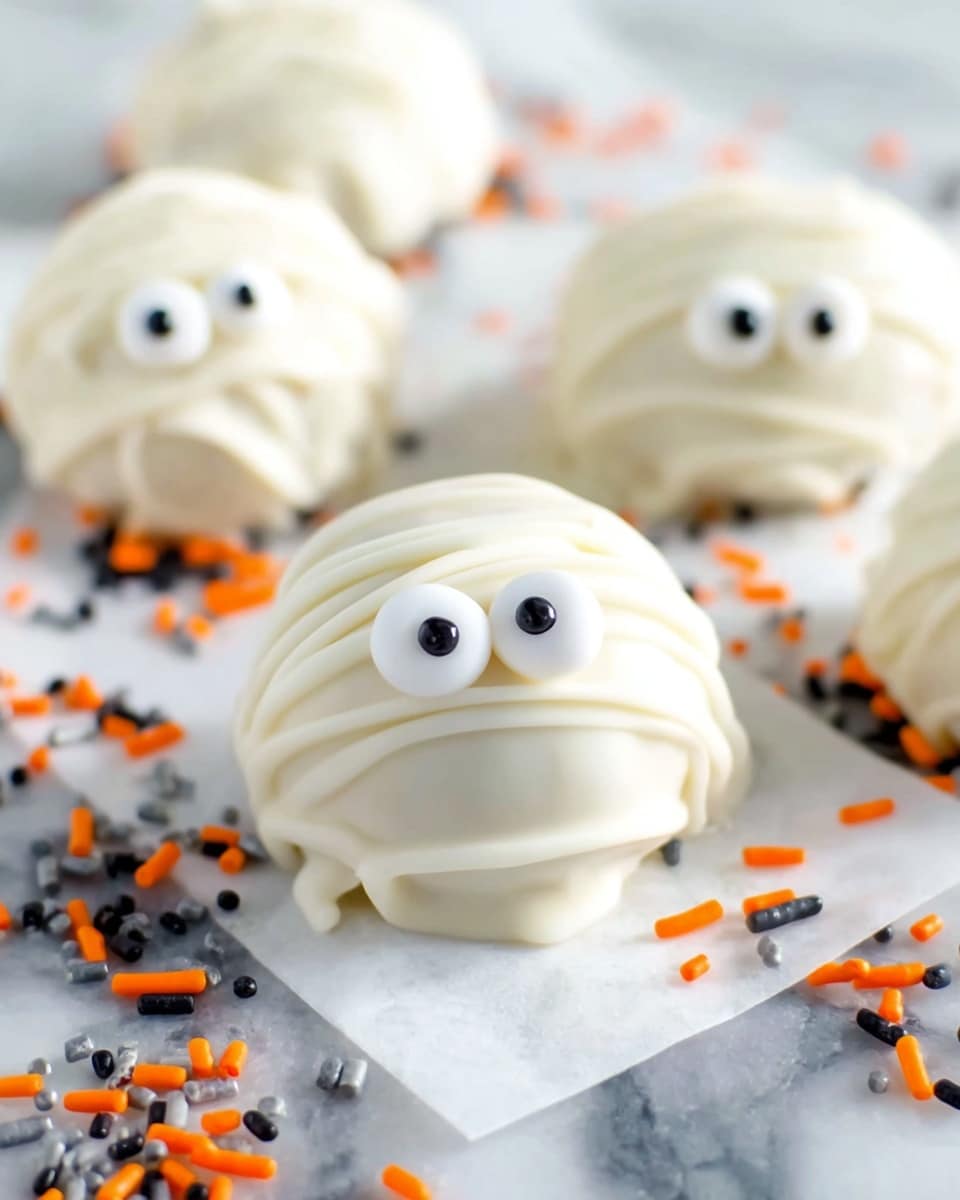
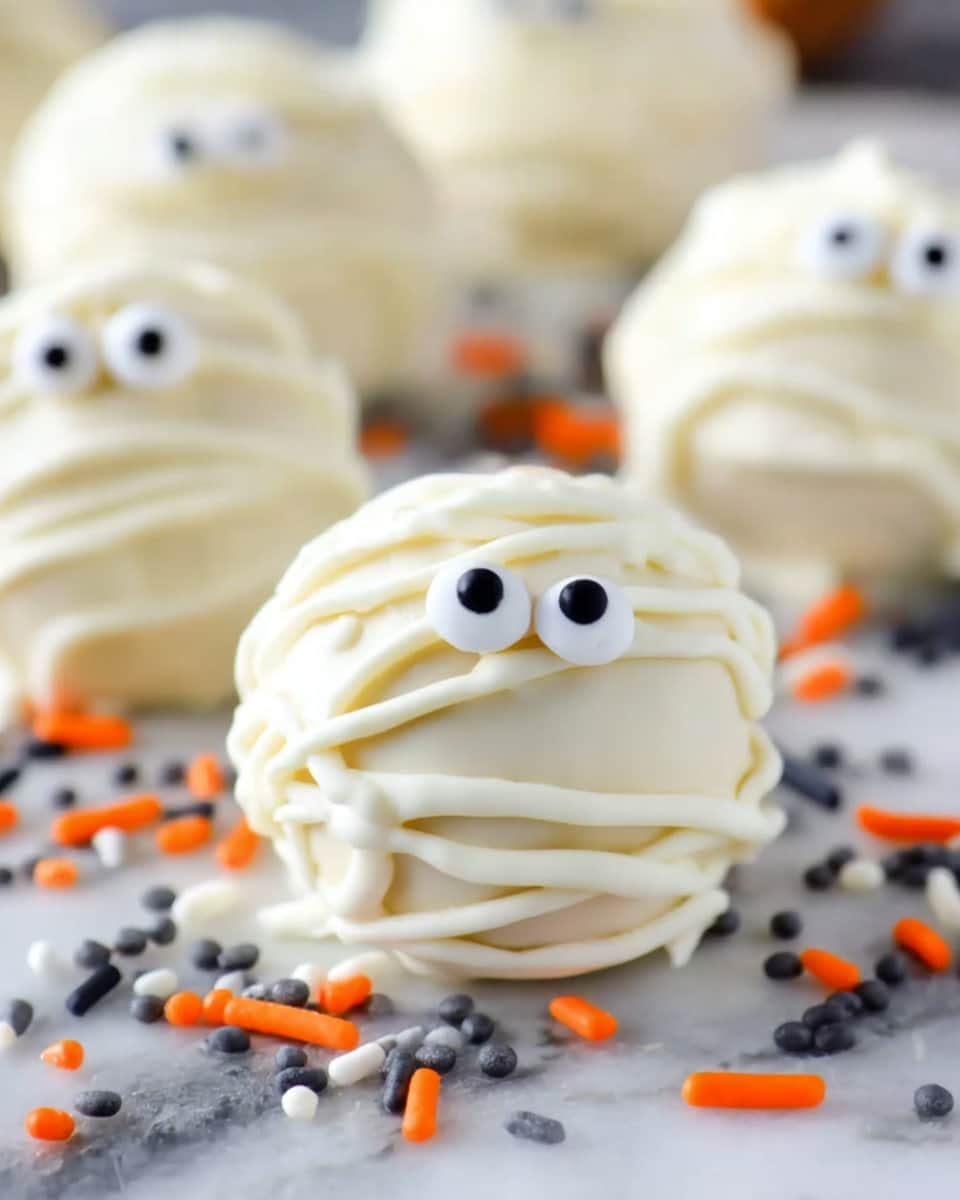
While the cake balls chill, melt your vanilla almond bark according to the package instructions. Use a fork or dipping tool to coat each ball in the melted candy. Then, quickly press two candy eyes into the coating before it hardens. Let the coating set, then drizzle more melted almond bark over the top to create edgy mummy bandages. It’s that easy to make these look super cute and spooky.
Pro Tips for Making Mummy Cake Balls Recipe
- Use Room Temperature Cream Cheese: It blends so much smoother with the cake, preventing lumps and dry crumbs.
- Freezing First is a Game-Changer: I discovered this trick after a messy first attempt – it helps the coating go on cleanly and sets faster.
- Work Quickly When Adding Eyes: Candy eyes stick best before the coating firms up, so have them ready before dipping.
- Avoid Over-Mixing: Mix just until combined to keep the perfect texture without turning the batter gummy.
How to Serve Mummy Cake Balls Recipe
Garnishes
I usually keep things simple here by adding just the candy eyes and that classic drizzle of white almond bark to look like mummy wrappings. But for parties, I’ve sprinkled a bit of edible glitter or black sugar crystals for a spooky shimmer that kids absolutely adore.
Side Dishes
Since these cake balls are sweet and rich, I like serving them alongside simple fruits like fresh apple slices or a tangy cranberry sauce to balance the flavors. A cup of hot apple cider or spiced tea also pairs beautifully if you’re serving this as a cozy treat.
Creative Ways to Present
For Halloween gatherings, I’ve placed my mummy cake balls on a platter lined with black lace doilies or in mini cupcake liners themed with spooky prints. Sometimes, I stick a festive toothpick in each for easy serving or arrange them in a pyramid to create a fun mummy “tower” centerpiece. It’s such a crowd-pleaser!
Make Ahead and Storage
Storing Leftovers
Once your mummy cake balls are set, store them in an airtight container in the refrigerator. They’ll keep nicely for about 4-5 days, which is perfect for nibbling through the week. I typically line them in a single layer with parchment paper between layers to avoid sticking.
Freezing
If you want to prepare in advance, these are freezer-friendly! Arrange them on a tray to freeze solid first, then transfer to a freezer-safe bag or container. They’ll keep well for up to 3 months without losing their charm. When I’ve made extras for parties, freezing was a lifesaver.
Reheating
Since they’re best served cold or at room temperature, I don’t recommend reheating cake balls. Instead, thaw them overnight in the fridge and let them sit out for 15-20 minutes before enjoying. This way, they maintain their creamy texture and that perfect coating snap.
FAQs
-
Can I use a different cake flavor for the Mummy Cake Balls Recipe?
Absolutely! While I use white cake for a classic look, you can swap in chocolate, red velvet, or even pumpkin spice cake to suit your taste or theme. Just remember to adjust your coating color and decorations to match the flavor and vibe.
-
What if I can’t find candy eyes?
No worries! You can easily make eyes using small dots of melted chocolate or icing piped onto the cake balls after the coating sets. Alternatively, mini chocolate chips or black sprinkles work well in a pinch.
-
Is it necessary to freeze the cake balls before dipping?
It’s not must-do, but I highly recommend it. Freezing firms up the cake balls, making them easier to dip and helping the coating set nicely without melting your hands – plus less mess!
-
Can I make these dairy-free or vegan?
Definitely possible! Use a dairy-free cake mix, vegan cream cheese alternatives, and dairy-free candy coating. It might take a bit of trial to find blends you love, but the Mummy Cake Balls Recipe is pretty forgiving once you get the texture right.
Final Thoughts
I absolutely love how this Mummy Cake Balls Recipe turns out every single time—it’s become my secret weapon for easy, festive gatherings. The balance of moist cake and creamy filling wrapped in sweet candy makes everyone smile, and the fun mummy design adds that perfect touch of whimsy. Honestly, if you’re after a crowd-pleaser that’ll have everyone asking for the recipe, you can’t go wrong with these. Give them a try—you’re going to love showing off your crafty side without the fuss!
Print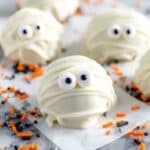
Mummy Cake Balls Recipe
- Prep Time: 30 minutes
- Cook Time: 36 minutes
- Total Time: 1 hour 6 minutes
- Yield: 36 cake balls
- Category: Dessert
- Method: Baking
- Cuisine: American
Description
Delightfully spooky and sweet, these Mummy Cake Balls are a fun and easy treat perfect for Halloween or any festive occasion. Made from moist white cake mixed with cream cheese, then dipped in vanilla almond bark and decorated with candy eyes and drizzle to resemble cute mummies, these bite-sized desserts are sure to impress both kids and adults alike.
Ingredients
Cake Mixture
- 1 white cake mix, prepared according to box directions and cooled
- 8 ounces cream cheese, softened to room temperature
Coating and Decoration
- 16 ounces vanilla almond bark (candy coating)
- Candy eyes, for decorating
Instructions
- Bake the Cake: Prepare the white cake mix according to the package directions, bake as instructed, and allow the cake to cool completely.
- Mix with Cream Cheese: Crumble the cooled cake into a large bowl and combine with the softened cream cheese using an electric mixer until fully blended into a uniform mixture.
- Form Cake Balls: Roll the cake mixture into approximately 2 tablespoon-sized balls, shaping them evenly for uniform size.
- Freeze the Balls: Place the cake balls on a parchment-lined baking sheet and freeze for 30 minutes. This step helps firm them up, making them easier to dip in the coating.
- Melt the Almond Bark: Melt the vanilla almond bark according to the package instructions until smooth and ready for dipping.
- Dip and Decorate: Dip each chilled cake ball into the melted almond bark, then immediately press two candy eyes onto each to create the mummy look.
- Drizzle Coating: Allow the initial coating to harden slightly, then drizzle additional melted almond bark over each ball to mimic mummy bandages.
- Serve: Let the coating harden completely before serving these adorable mummy cake balls at your next party or festive gathering.
Notes
- Freezing the cake balls before dipping helps prevent them from falling apart and makes dipping cleaner and easier.
- You can substitute the white cake mix with any cake flavor you prefer for a different taste.
- If you want to make the drizzled lines very fine, use a piping bag or a plastic bag with a small hole cut in the corner to drizzle the almond bark.
- Store cake balls in an airtight container in the refrigerator to keep them fresh for up to 4 days.
Nutrition
- Serving Size: 1 cake ball
- Calories: 120
- Sugar: 10g
- Sodium: 105mg
- Fat: 6g
- Saturated Fat: 3.5g
- Unsaturated Fat: 2g
- Trans Fat: 0g
- Carbohydrates: 15g
- Fiber: 0.3g
- Protein: 1.5g
- Cholesterol: 20mg

Your email address will not be published. Required fields are marked *