
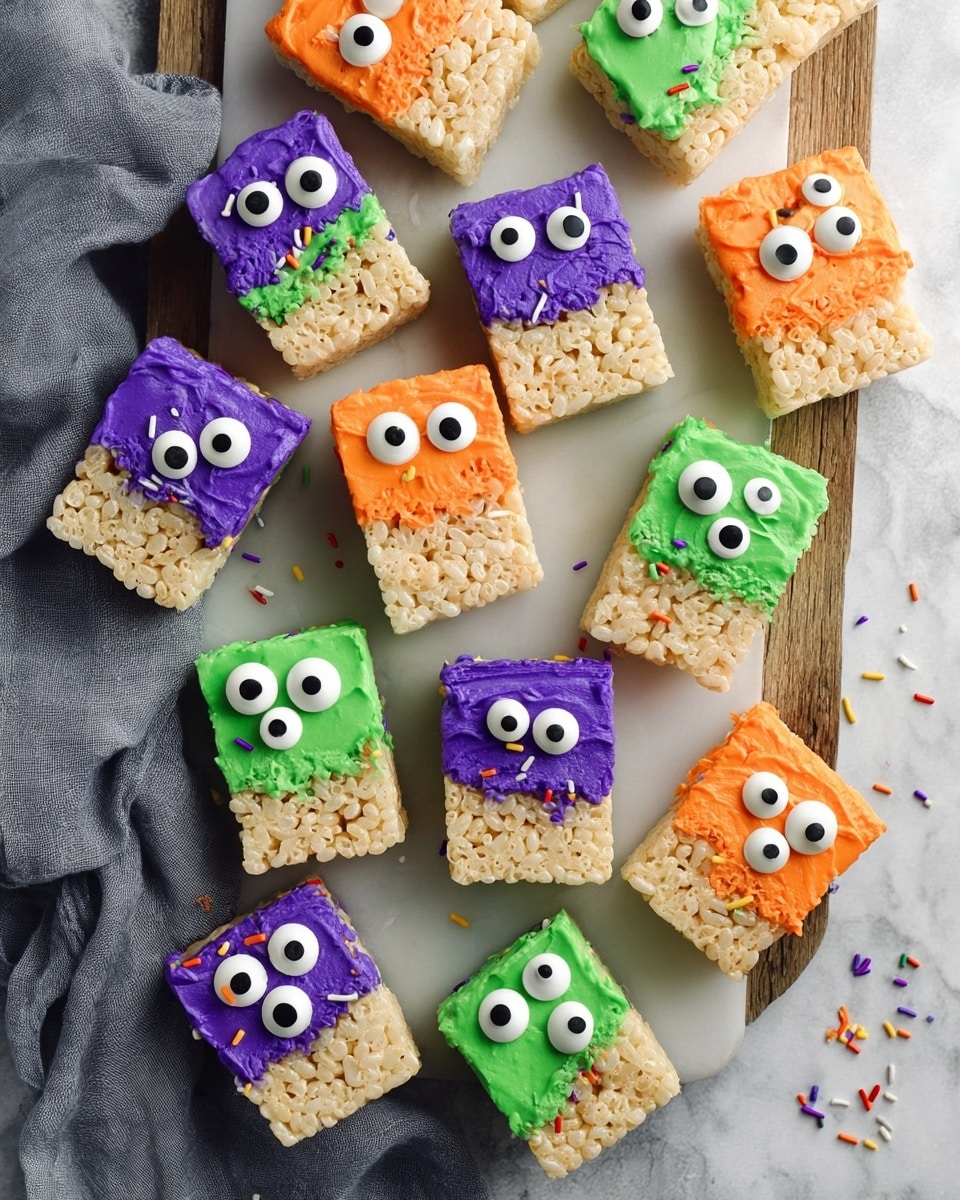
If you’re looking for a fun, crowd-pleasing dessert that’s as adorable as it is tasty, you’re going to absolutely love my Easy Rice Krispie Monster Treats Recipe. These playful little monsters are perfect for parties, lunchbox surprises, or anytime you want a sweet treat with a bit of whimsy. When I first tried making these, I was amazed at how simple it was to transform the classic Rice Krispie treat into something so fun and colorful. Stick with me—I’ll walk you through every step to help you create these cute critters that your family (and maybe you!) will go crazy for.
Why You’ll Love This Recipe
- Super Simple Ingredients: You can whip this up with pantry staples and a few fun extras for decoration.
- Fun for All Ages: Kids love helping decorate, and grown-ups enjoy the nostalgia.
- Customizable Looks: With candy eyes and sprinkles, each monster turns out uniquely adorable.
- Perfect Party Treat: These treats are a guaranteed hit at birthdays, Halloween, or anytime you want to impress without stress.

Ingredients You’ll Need
The magic of this Easy Rice Krispie Monster Treats Recipe is in how these simple ingredients come together to form that classic chewy texture you love—plus some colorful fun to bring them to life. Using mini marshmallows gives a smoother melt, and I recommend trying Wilton candy melts for the best coating consistency.
- Unsalted butter: Use real butter for that rich, creamy base—it melts beautifully and keeps the marshmallows from sticking.
- Mini marshmallows: They melt faster and evenly, making the mixture nice and smooth.
- Crispy rice cereal: Classic Rice Krispies or similar crunchy cereal will give you that perfect crispy chew.
- Candy melts: Colored candy melts make decorating easy and give your monsters vibrant colors. Wilton brand is my go-to.
- Candy eyes (assorted sizes): These little eyes are the secret to bringing your monsters to life—grab assorted sizes for quirky character.
- Sprinkles: Use fun-shaped or colorful sprinkles for “hair” that sticks while the candy is still warm.
Variations
I love that this Easy Rice Krispie Monster Treats Recipe is totally flexible—you can easily customize colors and decorations to fit the occasion or your mood. Here are some ideas I’ve tried or want to try next time.
- Halloween Edition: I once swapped in orange and black candy melts with spooky sprinkles—instant festive monsters!
- Peanut Butter Twist: Stir in a few tablespoons of peanut butter to the melted butter and marshmallows for a richer, nutty flavor that kids adore.
- Fruit Loop Monsters: Try mixing in Froot Loops or another fruity cereal for a colorful crunch swap—just as fun but with a fruity pop!
- Dairy-Free Version: Use dairy-free butter and marshmallows to make this allergy-friendly while keeping the yummy monster look.
How to Make Easy Rice Krispie Monster Treats Recipe
Step 1: Melt Butter and Marshmallows to Gooey Perfection
Start by melting the unsalted butter over medium-low heat in a large pot. I like taking it slow here—it keeps the butter from browning and lets the marshmallows melt gently for that silky texture. Toss in the mini marshmallows and stir constantly until everything is smooth and glossy. One trick I learned: remove the pot from heat right before it’s fully melted and keep stirring; residual warmth finishes the job without burning.
Step 2: Stir in the Crispy Rice Cereal
Once your marshmallow mixture is beautifully smooth, add the crispy rice cereal. I spray my rubber spatula lightly with cooking spray—that way, the sticky mix doesn’t glue to my tools. Gently fold the cereal in until every crunchy bit is coated and the mixture feels evenly combined. Don’t overmix, or the cereal can break down.
Step 3: Press the Mixture into the Pan and Cool
Line a 9″x9″ pan with parchment paper—this step is a game-changer when it comes to easy removal later. Press your mixture evenly into the pan using clean hands or the back of a buttered spatula. I find pressing it down firmly but not too tight keeps the treats chewy yet nicely shaped. Pop it in the fridge or on the counter to cool for about 40 minutes so it firms up just right before cutting.
Step 4: Cut Into Rectangles and Prepare Your Monster Coating
After cooling, lift the whole slab out by the parchment paper and cut it into evenly sized rectangles—about 12 pieces works great. Meanwhile, melt your candy melts following the package instructions. Using a microwave in short bursts and stirring often helps you avoid lumps and burning. Choose colors that make your monsters pop!
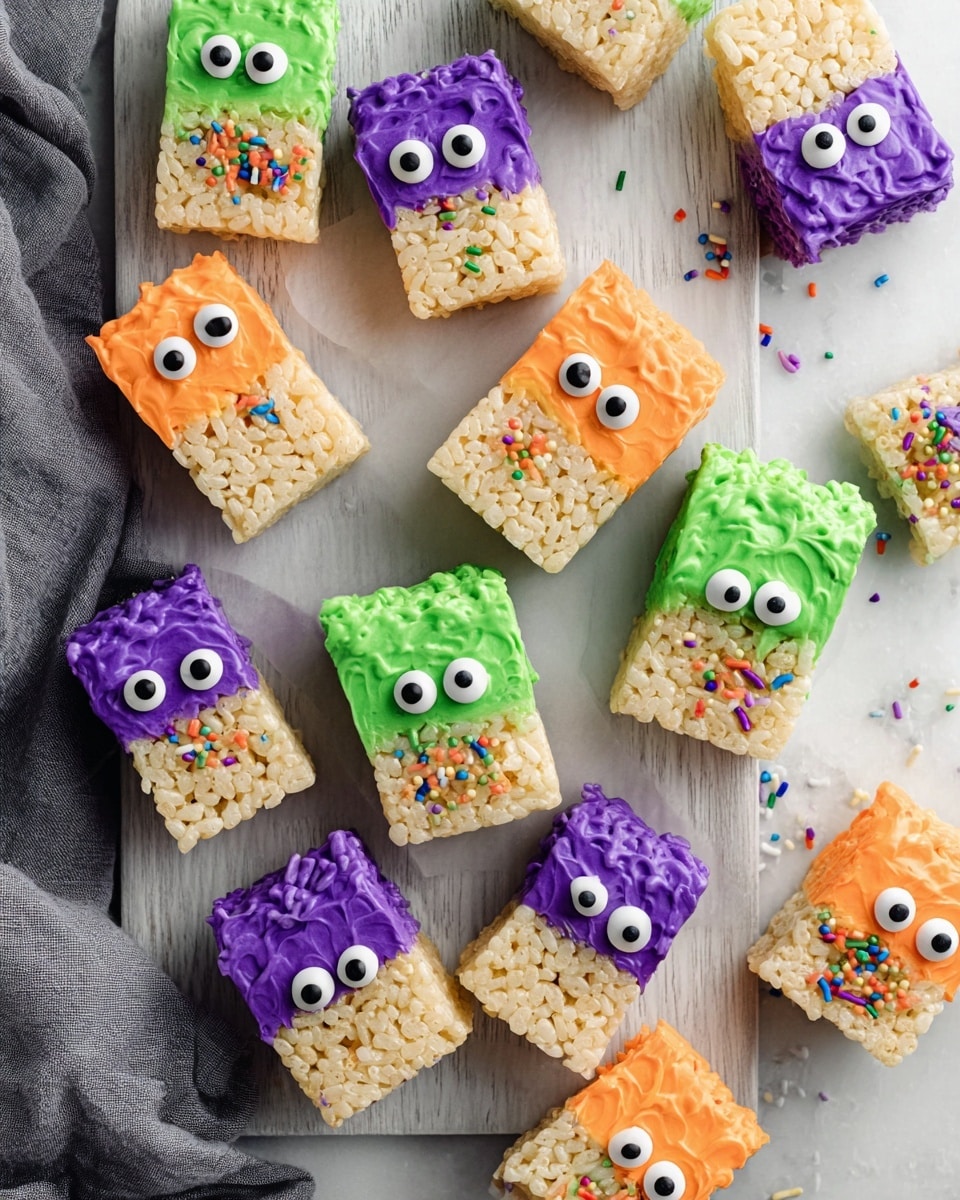
Step 5: Dip, Decorate, and Set Your Monsters
Dip each Rice Krispie treat halfway into the melted candy. I use a butter knife to spread the candy melt evenly—it’s the little details that make them look polished. Set the dipped treats on parchment paper, then while the coating is still warm, press candy eyes into place and sprinkle on the “hair.” This step is so fun—you can get creative and make each monster uniquely goofy or spooky! Let them set for about 45 minutes until solid before serving.
Pro Tips for Making Easy Rice Krispie Monster Treats Recipe
- Low and Slow Melting: I always melt butter and marshmallows over medium-low heat to keep the texture silky and avoid burning.
- Spray Your Tools: Coating your spatula and knife with cooking spray prevents sticky messes and makes spreading candy melts easier.
- Parchment Paper is Your Best Friend: It creates an easy release for your treats and keeps your workspace clean.
- Work Quickly on Decoration: Candy melts harden fast, so be ready to add eyes and sprinkles immediately for best adhesion.
How to Serve Easy Rice Krispie Monster Treats Recipe
Garnishes
I like to keep garnishes fun and simple—extra candy eyes of various sizes, colorful sprinkles, and sometimes little edible glitter stars for a magical shine. The kids love choosing how to “style” their monster’s hair, so I keep a bowl of sprinkles nearby at serving time for last-minute fluff ups!
Side Dishes
These treats are sweet enough to shine on their own, but I sometimes serve them alongside a tall glass of cold milk or a fruity punch at parties. They also pair well with light fruit slices like apple or pear to balance out the sweetness.
Creative Ways to Present
For Halloween, I’ve laid these monster treats on black or purple doilies with little “warning” signs, and on birthdays, I arrange them in fun shapes like smiley faces or monster clusters on serving trays. I even wrapped a few individually in cellophane tied with colorful ribbons to bring as gifts—everyone was so impressed!
Make Ahead and Storage
Storing Leftovers
Store leftover Monster Treats in an airtight container at room temperature—no fridge needed—to keep that perfect chewy texture. I recommend layering parchment or wax paper between them to prevent sticking. They usually stay fresh and delicious for up to 3 days.
Freezing
If you want to freeze these, wrap each treat individually in plastic wrap and place them in a freezer-safe bag. When I do this, I find they keep great for up to a month. Just thaw them at room temp before decorating, or if already decorated, thaw gently in the fridge to avoid sweating.
Reheating
Reheating isn’t really necessary since these treats are best served at room temperature. However, if you want to freshen them up, a few seconds in the microwave (about 5-7 seconds) can soften the edges nicely, but don’t overheat or you’ll melt the candy coating.
FAQs
-
Can I use regular marshmallows instead of mini marshmallows?
Yes, you can absolutely use regular marshmallows! They may take a little longer to melt and might result in a slightly less smooth texture, but your treats will still be delicious. Just be patient and stir gently to help them melt evenly.
-
What if I don’t have candy melts? Can I use chocolate chips?
You can substitute chocolate chips, but keep in mind they have different melting properties and may seize or be less glossy. Adding a small amount of vegetable oil or shortening when melting chocolate chips helps the consistency, but candy melts are best for smooth, colorful coatings and easy decorating.
-
How do I prevent the candy coating from cracking?
Be sure to dip the treats gently and let them cool and set at room temperature—not in the fridge—to avoid sudden temperature changes that cause cracking. Also, avoid over-thick coatings by spreading the candy melt evenly and thinly with a butter knife.
-
Can I make these gluten-free?
Yes! Just use a gluten-free crispy rice cereal brand (many are available nowadays) and ensure any sprinkles or candy decorations are certified gluten-free. The rest of the ingredients are naturally gluten-free.
Final Thoughts
This Easy Rice Krispie Monster Treats Recipe has become a favorite in my kitchen because it’s quick, playful, and so versatile. I love watching my kids’ faces light up as they pick out eyes and sprinkles to make silly monsters—those moments make the extra effort totally worth it. Plus, the nostalgia of Rice Krispie treats paired with the fun decorating makes this recipe a winner for all ages. Next time you want to impress with little stress, give this one a try—you’ll be thankful for how easy and delightful it turns out!
Print
Easy Rice Krispie Monster Treats Recipe
- Prep Time: 10 minutes
- Cook Time: 10 minutes
- Total Time: 60 minutes
- Yield: 12 rice krispie treats
- Category: Dessert
- Method: Stovetop
- Cuisine: American
Description
These Easy Rice Krispie Monster Treats are a fun and creative twist on the classic rice krispie treat. Perfect for parties or a playful snack, these treats are coated with colorful candy melts and decorated with candy eyes and sprinkles to resemble quirky little monsters. The recipe combines a simple stovetop method to make the rice krispie base and a no-bake candy coating step for decorating.
Ingredients
For Making Rice Krispie Treats:
- 3 tablespoons unsalted butter
- 10 ounces mini marshmallows
- 5 cups crispy rice cereal
For Making Monsters:
- 2 cups candy melts (colored candy wafers)
- Candy eyes (assorted sizes)
- 3 tablespoons sprinkles
Instructions
- Make the Rice Krispie Treat Base: In a large pot over medium-low heat, melt the butter gently. Once melted, add the mini marshmallows and stir continuously until completely smooth and melted. Remove the pot from the heat to avoid burning the marshmallow mixture.
- Add Cereal and Combine: Immediately add the crispy rice cereal to the melted marshmallow mixture. Using a rubber spatula coated lightly with cooking spray, fold and stir the cereal into the marshmallow until fully combined and evenly coated.
- Press Mixture into Pan: Transfer the sticky mixture into a 9″ x 9″ pan lined with parchment paper. Press it down evenly and firmly to create a uniform layer. Allow it to cool and set for 40 minutes at room temperature.
- Cut into Rectangles: Once the rice krispie base has set, carefully cut it into evenly sized rectangles to prepare for decorating.
- Melt Candy Coating: Following the package instructions, melt the 2 cups of candy melts (colored candy wafers) until smooth and ready for dipping.
- Dip and Decorate: Dip each Krispie treat halfway into the melted candy coating. Use a butter knife to smooth and spread the coating evenly, covering all desired surfaces to create the monster look. Place the coated treats on parchment paper.
- Add Monster Features: While the candy coating is still warm and soft, gently press candy eyes onto each treat to form monster faces. Sprinkle 3 tablespoons of sprinkles to resemble hair or other monster details.
- Set and Serve: Allow the coated treats to set fully at room temperature for about 45 minutes before serving to ensure the coating hardens properly.
Notes
- We recommend using Wilton colored candy melts for the best coating and vibrant colors.
- Coating the spatula in cooking spray helps prevent sticking when mixing the cereal and marshmallow.
- Make sure to wait until the rice krispie mixture has fully cooled before cutting for clean edges.
- Use parchment paper to line the pan and to set the dipped treats for easy removal and cleanup.
Nutrition
- Serving Size: 1 treat
- Calories: 180
- Sugar: 15g
- Sodium: 75mg
- Fat: 6g
- Saturated Fat: 4g
- Unsaturated Fat: 2g
- Trans Fat: 0g
- Carbohydrates: 29g
- Fiber: 0.5g
- Protein: 1g
- Cholesterol: 15mg

Your email address will not be published. Required fields are marked *