
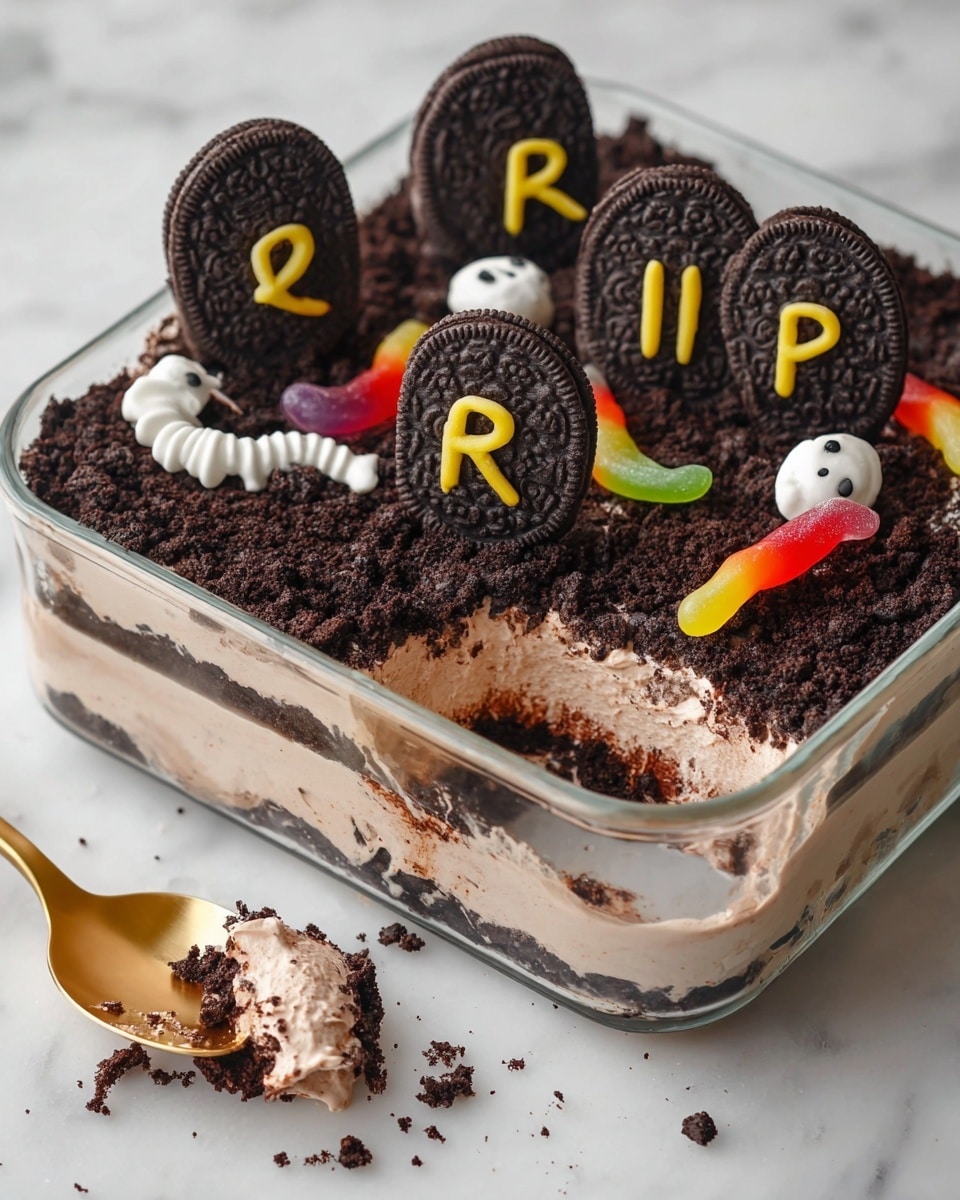
If you’re looking for a fun, spooky dessert that’s as delicious as it is festive, you’re in for a treat with this Halloween Graveyard Dirt Cake Recipe. I absolutely love how easy this comes together and the way it captures that creepy graveyard vibe with crushed Oreos and gummy worms—it’s always a party favorite at my house! This recipe is perfect for Halloween celebrations, but honestly, it’s delicious anytime you need a playful, chocolatey dessert. Stick around because I’m sharing all my best tips to help you nail this fun and fudgy cake.
Why You’ll Love This Recipe
- Simple Ingredients: You probably already have everything in your pantry—Oreos, cream cheese, pudding mix, and cream.
- No-Bake Ease: No oven needed, which means it’s a breeze to throw together any time.
- Fun and Festive: Ready to decorate and impress guests with gummy worms, “RIP” tombstones, and more Halloween flair.
- Crowd-Pleaser: Every time I bring this out, my family and friends ask for seconds—it’s that irresistible!

Ingredients You’ll Need
The magic of this Halloween Graveyard Dirt Cake Recipe comes from a balance of crunchy Oreos, smooth cream cheese, and fluffy pudding. I love using full-fat cream cheese for that luxurious texture, and the chocolate pudding adds extra richness that pulls the whole thing together. Here’s a little about what goes into it:
- Oreos: I use classic Oreos for the perfect cookie “dirt” texture, but feel free to try chocolate or other flavored ones for a twist.
- Unsalted Butter: Melts into the crushed Oreos to help form the dirt base and layer – make sure it’s just melted, not hot!
- Chocolate Instant Pudding Mix: Provides that creamy, chocolatey layer, but brands vary—Angel Delight or Jell-O work well with adjustments.
- Milk: Whole or semi-skimmed milk helps the instant pudding set with the perfect consistency.
- Cream Cheese: Full-fat is best for richness and smoothness here—don’t skimp on this!
- Powdered Icing Sugar: Sweetens the cream cheese mixture without any graininess.
- Heavy Cream: Whipped to stiff peaks for that light, fluffy texture in the filling.
- Optional Decorations: Extra Oreos for tombstones, white chocolate for “RIP” writing, gummy worms, and Halloween candies add the spooky fun factor.
Variations
This Halloween Graveyard Dirt Cake Recipe is super adaptable, and I love trying out different flavors or decorations depending on the occasion. Don’t be afraid to make it your own!
- Flavor Swaps: I’ve made this with vanilla or butterscotch instant pudding for a fun twist when I want to mix up the chocolate-heavy vibe.
- Dietary Tweaks: Using dairy-free cream cheese and milk alternatives works surprisingly well if you want a vegan or lactose-free option.
- Extra Crunch: Sprinkle crushed nuts or pretzels in the layers for added texture, especially if you love mixing sweet and salty.
- Creative Decorations: Instead of gummy worms, try candy skeleton bones, edible spiders, or festive sprinkles for a different spooky scene.
How to Make Halloween Graveyard Dirt Cake Recipe
Step 1: Crush Your Oreos and Prepare the Base
First things first: get those Oreos crushed fine! I love using a food processor because it gives that perfect dirt-like consistency, but if you don’t have one, put the cookies in a sturdy plastic bag and crush them with a rolling pin. Just make sure to save about ½ cup (75g) of the crumbs to sprinkle on top later—that crunchy finish is everything. Once crushed, melt your butter until just soft (30 seconds in the microwave usually does the trick) and mix it right into your Oreo crumbs. Then press half of this mixture firmly into the bottom of your serving dish to create a solid “graveyard floor.” Pop it in the fridge to chill while you work on the creamy layers.
Step 2: Make the Chocolate Pudding Layer
In a separate bowl, whisk together your instant pudding mix and milk until smooth—this typically takes just a couple of minutes. Refrigerate this mixture while you prepare the next component. A quick tip: some pudding packs are stronger than others, so start with the amount in the recipe and adjust slightly if you want a thicker or thinner pudding layer.
Step 3: Whip Up the Cream Cheese Mixture
This is where the silky texture comes from. Using a mixer, beat together your cream cheese and powdered icing sugar until it’s totally smooth and creamy—no lumps allowed! In a separate bowl, whip your heavy cream until stiff peaks form, then fold this gently into the cream cheese mixture. Finally, fold in the chilled pudding mixture for a luscious, fluffy filling that tastes like chocolate clouds.
Step 4: Layer Everything Together
Pour half of the cream mix over your Oreo base, spreading it evenly but gently so you don’t disturb that firm cookie layer. Next, sprinkle on the other half of your Oreo crumble mixture and smooth out the remaining cream mixture on top. This creates those distinct layers like you’re building a spooky secret underground—the best part is knowing there’s dirt (aka Oreo crumbs) hiding in there. Now cover and chill it for at least 3 hours or overnight if you can. It’s worth the wait!
Step 5: Decorate Your Graveyard
Once your dirt cake is set, it’s time to get creative. Sprinkle the reserved Oreo crumbs over the top to look like fresh dirt. For some playful gravestones, cut some Oreos on the sides to stand upright, then melt white chocolate in short bursts in the microwave and pipe “RIP” on them using a small piping bag or a plastic bag with the tip cut off. Let these set, then press them gently into the cake. Add gummy worms squiggling out of the dirt, and scatter any Halloween candies you love. My family goes crazy for the gummy worms poking out—it always gets a few laughs!
Pro Tips for Making Halloween Graveyard Dirt Cake Recipe
- Perfect Oreo Crushing: I always crush the Oreos just right—not too powdery and not chunked—to get that authentic dirt look and satisfyingly crunchy bite.
- Use Cold Ingredients: Make sure your cream cheese and heavy cream are well-chilled for easier whipping and a fluffier texture in the filling.
- Don’t Overmix: When folding the whipped cream into the cream cheese and pudding, be gentle to keep it airy and light instead of dense.
- Add Crumbs Last: To keep your top layer crunchy and fresh, only sprinkle the reserved Oreo crumbs right before serving.
How to Serve Halloween Graveyard Dirt Cake Recipe
Garnishes
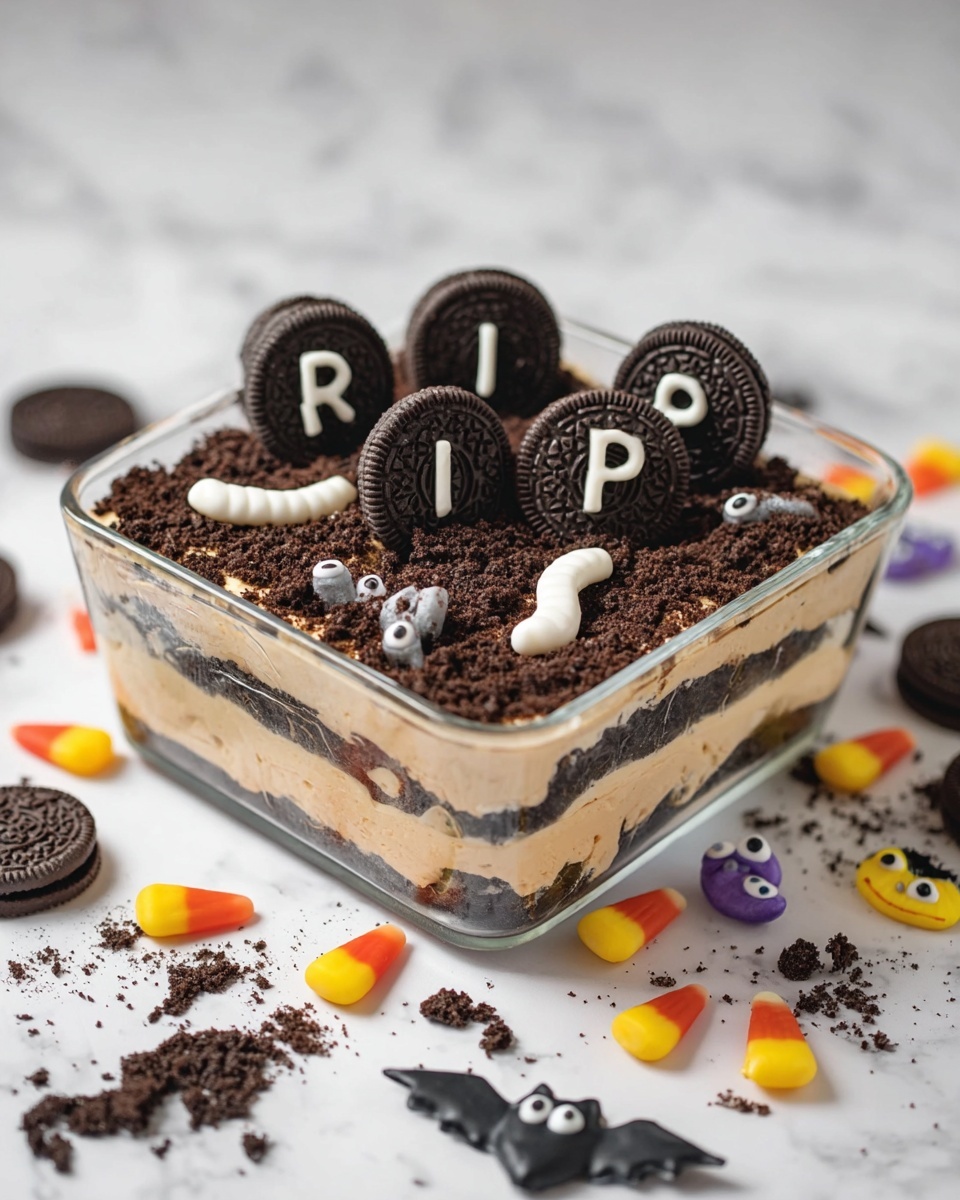
I love garnishing with the classic gummy worms—they curl up perfectly and bring the graveyard to life. The white chocolate “RIP” tombstones are a must for me since they add that iconic spooky vibe. I also like adding candy eyeballs or tiny pumpkin-shaped candies, just for a pop of Halloween fun and color. Trust me, these little extras make your dirt cake look like it just came from a haunted cemetery!
Side Dishes
This cake is a rich dessert, so I like pairing it with lighter, refreshing sides during parties. Think crisp apple slices or a bright citrus fruit salad—to balance the creamy sweetness. For drinks, a warm cup of spiced cider or a simple black iced tea complements the chocolate nicely without overpowering it.
Creative Ways to Present
If you’re hosting a Halloween bash, try serving the dirt cake in mini clear cups or mason jars for individual “graveyard” desserts. Add small plastic skeletons or plastic spiders on top for extra creepiness. Another fun idea: build the cake in a large rectangular glass dish and use candy bones and cookie “rocks” to create an elaborate spooky scene. It’s a guaranteed conversation starter!
Make Ahead and Storage
Storing Leftovers
Cover your Halloween Graveyard Dirt Cake tightly with plastic wrap or an airtight lid and store it in the refrigerator for up to 4 days. I’ve found it actually tastes better after a day because the flavors really meld together, but the Oreo crumbs on top stay crunchiest if you add them right before serving.
Freezing
I’ve successfully frozen my dirt cake a couple of times when I wanted to prep early. Just skip the decorations, cover it well with cling film, and freeze for up to 3 months. When you’re ready to serve, defrost overnight in the fridge, then add your crumb topping and decorations fresh. The texture stays surprisingly good!
Reheating
This dessert is best served cold, so I don’t recommend reheating it. Instead, just let frozen leftovers thaw gradually in the fridge. If the top isn’t as crunchy as you like, sprinkle on some fresh crushed Oreos right before serving to revive the texture.
FAQs
-
Can I make Halloween Graveyard Dirt Cake Recipe ahead of time?
Absolutely! In fact, this recipe actually benefits from chilling overnight, which lets the flavors meld beautifully. Just keep it covered and add the final crumb topping and decorations right before serving to keep everything looking fresh and crunchy.
-
What kind of pudding mix should I use?
I recommend a chocolate instant pudding mix like Angel Delight or Jell-O. Keep in mind that different brands have varying strengths—if your pudding pack is more concentrated, use only half the amount called for in the recipe to avoid the filling becoming too stiff.
-
Can I substitute the Oreos for another cookie?
Definitely! While Oreos give the classic dirt look and taste, using chocolate wafers, graham crackers with cocoa, or even chocolate digestive biscuits can work well too. Just try to keep them crushed finely for the best “dirt” effect.
-
How do I make the “RIP” tombstones if I don’t have a piping bag?
No piping bag? No problem! Just melt white chocolate, spoon it into a small plastic freezer bag, and cut a tiny hole in one corner. It acts just like a piping bag and lets you write your spooky messages perfectly.
-
Is this Halloween Graveyard Dirt Cake Recipe kid-friendly?
Oh yes! Kids love the gummy worms and the look of the graveyard, and the sweet creamy layers make it a huge hit with little ones. Just keep an eye on any Halloween candies if there are allergies to consider.
Final Thoughts
This Halloween Graveyard Dirt Cake Recipe is one of those treats that brings people together with its fun presentation and irresistible chocolatey layers. I love how easy it is to make, how adaptable it is to your own style, and how much joy it brings at Halloween parties—or any time you want to conjure a bit of spooky dessert magic. Give it a try and watch your family and friends’ faces light up with delight. Trust me, it’s a dessert you’ll want to make again and again!
Print
Halloween Graveyard Dirt Cake Recipe
- Prep Time: 30 minutes
- Cook Time: 0 minutes
- Total Time: 3 hours 30 minutes
- Yield: 8 servings
- Category: Dessert
- Method: No-Cook
- Cuisine: American
- Diet: Vegetarian
Description
This Halloween Graveyard Dirt Cake is a fun and festive dessert perfect for spooky celebrations. Layers of crushed Oreos mixed with buttery crumbs and a creamy chocolate pudding and cream cheese filling create a rich, luscious treat. The top is topped with crushed Oreos, homemade white chocolate tombstones, gummy worms, and Halloween candy for a creepy, edible graveyard effect that is sure to delight both kids and adults.
Ingredients
Dirt Cake
- 310 g Oreos (2 packets)
- 50 g unsalted butter
- 1 packet (approx. 60 g / 2 oz) chocolate instant pudding mix (e.g. Angel Delight or ½ packet Jell-O)
- 275 ml milk (whole or semi-skimmed)
- 250 g full fat cream cheese
- 70 g powdered icing sugar
- 125 ml heavy cream (double or whipping cream)
Optional Decorations
- ½ packet Oreos (approx. 6+ cookies for tombstones)
- 35 g white chocolate (for writing/drawing)
- Gummy worms
- Halloween candy (candy eyes, bones, pumpkins, etc.)
Instructions
- Prepare Oreo Crumbs: Crush the Oreos to fine crumbs using a food processor, then set aside ½ cup (75 g) of the crumbs for later and pour the remaining crumbs into a medium mixing bowl.
- Melt Butter and Combine: Melt butter in a heatproof bowl in the microwave for 30 seconds. Stir melted butter into the crushed Oreo crumbs in the bowl until fully combined.
- Press Base Layer: Press half of this Oreo-butter mixture evenly into the base of your glass dish to form the first layer. Refrigerate this layer while leaving the other half of the Oreo mixture at room temperature for later layering.
- Prepare Pudding Mixture: In a medium bowl, stir together milk and the chocolate instant pudding mix until smooth. Refrigerate to set.
- Mix Cream Cheese and Sugar: In a large mixing bowl using a stand or hand mixer, beat the full-fat cream cheese and powdered icing sugar until fully combined and smooth.
- Whip Cream: In a separate bowl, whip the heavy cream with a mixer until stiff peaks form for a light and airy texture.
- Combine Cream Mixtures: Gently fold the whipped cream into the cream cheese mixture until combined, then carefully stir in the chilled instant pudding until smooth and uniform.
- Assemble Layers: Pour half of the creamy pudding mixture over the Oreo base layer in the dish, smoothing gently. Layer the remaining Oreo-butter mixture evenly on top of the cream layer.
- Top With Remaining Cream: Smooth the remaining pudding cream mixture over the middle Oreo layer to create the top creamy layer of the cake.
- Refrigerate and Set: Refrigerate the assembled dirt cake for at least 3 hours or preferably overnight to allow it to firm up properly.
- Decorate the Graveyard: For tombstones, cut two sides off of 6 or so Oreos. Melt white chocolate in the microwave in 20-second intervals, then transfer to a piping bag with a small tip. Write “RIP” on the Oreo tombstones and let set for 5 minutes before inserting them into the cake.
- Add Final Decorations: Optionally, draw small bones on greaseproof paper with melted white chocolate and let set before placing on the cake. Decorate with gummy worms and other Halloween candies as desired.
- Serve and Enjoy: Sprinkle the reserved crushed Oreos on top just before serving for added crunch and texture.
Notes
- Storage: Keep the Halloween dirt cake covered in the fridge for up to 4 days.
- Freezing: Undecorated dirt cake can be frozen in a freezer-safe covered dish for up to 3 months. Defrost thoroughly before enjoying.
- For a crunchier Oreo top layer, add the crushed Oreos and decorations only after the cake has fully set, right before serving.
- Instant pudding mix packets vary by brand; Angel Delight is about 56 g per packet, while others like Jell-O may be double this amount. Adjust the quantity accordingly.
- If you do not have a piping bag, use a plastic freezer bag with a tiny corner cut off to pipe melted white chocolate for writing.
- If you lack a food processor, crush Oreos by placing them in a sturdy plastic bag and pressing with a rolling pin.
- Try experimenting with different instant pudding flavors, Oreo varieties, and Halloween candies to customize this spooky dessert.
Nutrition
- Serving Size: 1 slice (1/8 of cake)
- Calories: 420
- Sugar: 35 g
- Sodium: 210 mg
- Fat: 25 g
- Saturated Fat: 15 g
- Unsaturated Fat: 8 g
- Trans Fat: 0.3 g
- Carbohydrates: 45 g
- Fiber: 2 g
- Protein: 5 g
- Cholesterol: 70 mg

Your email address will not be published. Required fields are marked *