
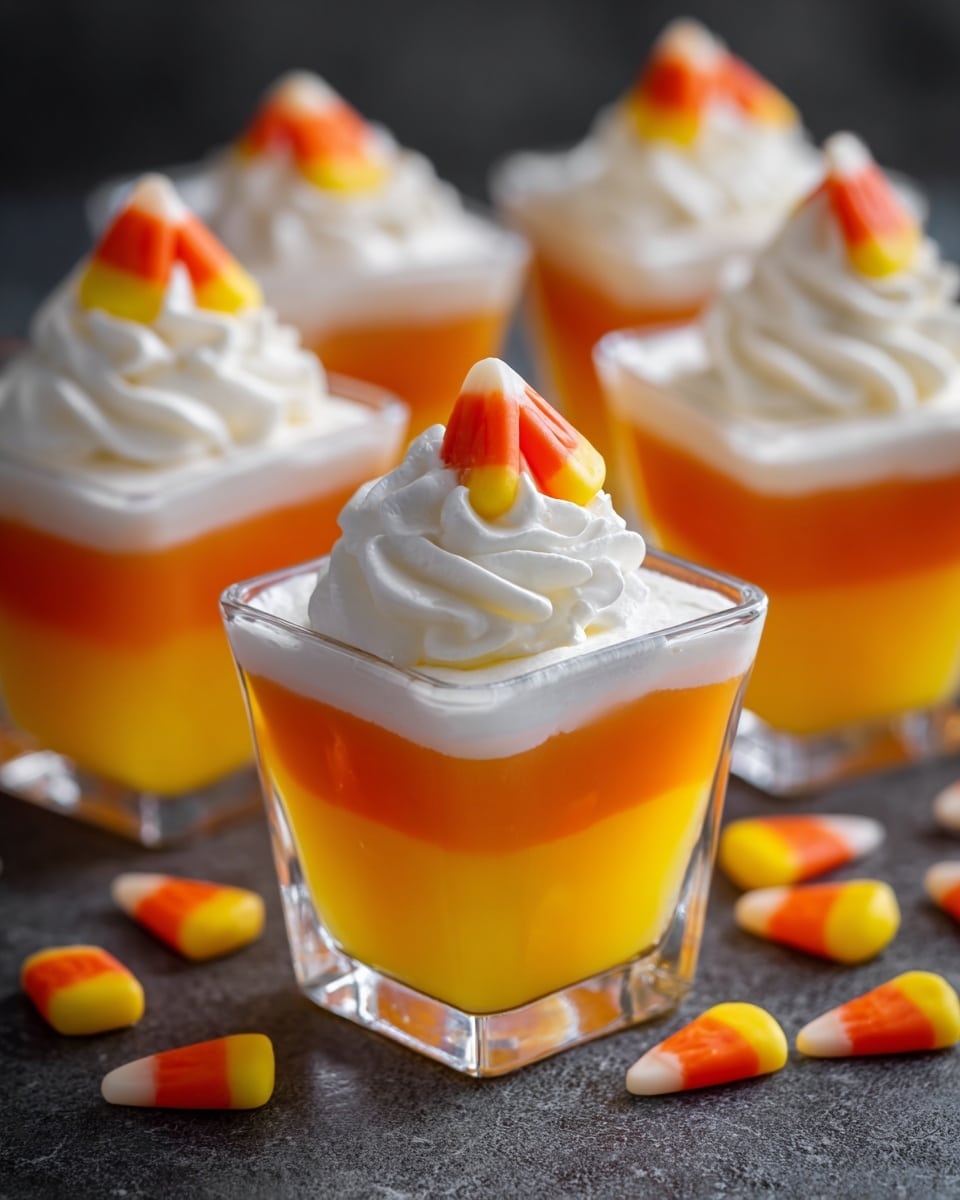
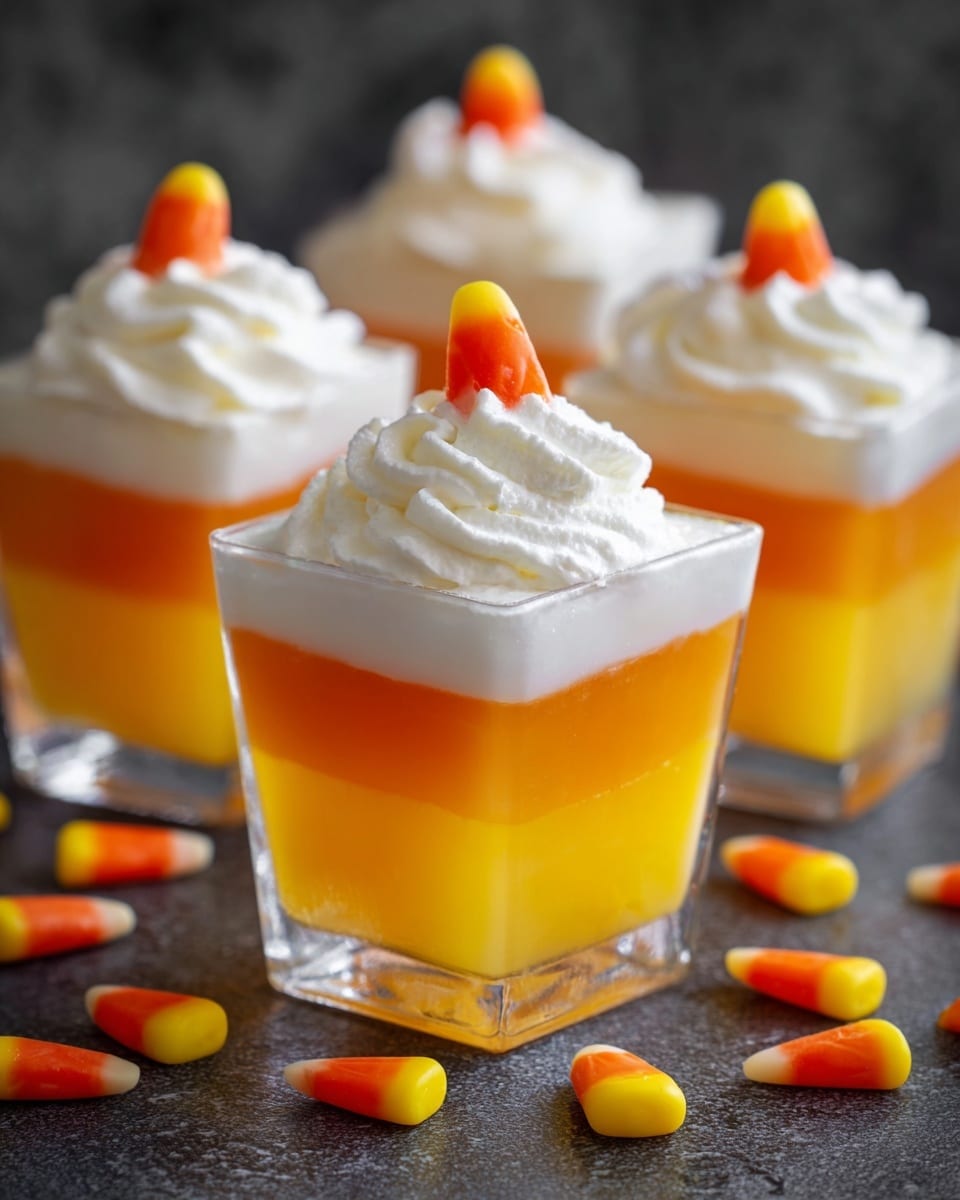
If you’re looking for a fun and festive treat that’s as colorful as it is delicious, you’ve got to try this Candy Corn Jello Cups Recipe. I absolutely love how this dessert layers those bright autumn colors and the creamy sweet layer in the middle—it’s such a showstopper for Halloween parties or any fall gathering. Plus, it comes together faster than you’d think, and your family and friends will be begging for seconds!
Why You’ll Love This Recipe
- Festive and Fun: The layered colors perfectly mimic candy corn, making it an eye-catching seasonal dessert.
- Creamy & Fruity Combo: You get that refreshing jello texture with a smooth sweetened milk layer that’s just dreamy.
- Kid-Friendly & Easy: Even if you’re not a pro in the kitchen, you’ll find this recipe straightforward and forgiving.
- Make-Ahead Friendly: Prep these cups ahead of time to wow guests without last-minute stress.

Ingredients You’ll Need
Every ingredient in this Candy Corn Jello Cups Recipe plays a role in creating that perfect balance of flavors and textures. You’ll want to look for quality gelatin and sweetened condensed milk because they have a big impact on the creamy layer’s consistency and taste.
- Yellow Jello: This represents the bright yellow candy corn section; use a lemon or pineapple flavor for authenticity.
- Orange Jello: Pick an orange, mango, or similar flavor to mimic the orange candy corn color.
- Sweetened Condensed Milk: This adds the creamy, rich middle layer essential to the candy corn effect.
- Knox Unflavored Gelatin: It stabilizes the condensed milk mixture so it sets nicely without being runny.
- Candy Corn: Optional, but a cute and tasty garnish that reinforces the theme.
- Cool Whip or Whipped Cream: For that fluffy topping that adds sweetness and visual appeal.
Variations
I love mixing things up a bit with this Candy Corn Jello Cups Recipe depending on what I have on hand or who I’m serving. Feel free to personalize it — that’s half the fun of making it your own!
- Flavor Swaps: I once swapped out the yellow jello for pineapple and added a splash of coconut milk in the creamy layer for a tropical twist my family went nuts over.
- Diet-Friendly Version: Try sugar-free jello and a lightened condensed milk alternative to make this a bit healthier without losing the magic.
- Mini Dessert Cups: Using smaller cups is a crowd-pleaser for parties — everyone loves bite-sized treats!
How to Make Candy Corn Jello Cups Recipe
Step 1: Create the Yellow Jello Layer
Start by mixing 2 cups of boiling water with the yellow jello, stirring until it’s completely dissolved. This is key because any undissolved powder can create graininess or lumps you don’t want. Then, add 1½ cups of cold water (this is slightly different than the usual box instructions—I discovered this helps with the setting texture). Pour this mixture into your cups, but only fill about one-third full. Pop them into the fridge for roughly 2 hours or until completely set. Pro tip: I like to place all the cups on a baking sheet so I can easily slide them in and out of the fridge at once.
Step 2: Prepare the Orange Jello Layer
While the yellow jello chills, prepare the orange layer by repeating the same process: dissolve 2 cups boiling water with the orange jello powder, stir, then add 1½ cups cold water. Let it cool down to room temperature before moving forward. This step is important because pouring hot jello over the yellow layer might melt it and ruin your neat stripes.
Step 3: Layer the Orange Jello
Once your yellow layer has set firmly and your orange mixture is cool, gently pour the orange jello over the yellow layer until your cups are about two-thirds full. Return the cups to the refrigerator and chill for at least an hour. I’ve noticed that because the yellow jello was refrigerated hot and the orange jello is room temperature, this step doesn’t require as much time.
Step 4: Prepare the Creamy Middle Layer
Next, mix the sweetened condensed milk with 1 cup of boiling water; set this aside for now. In a separate small bowl, combine one envelope of Knox unflavored gelatin with ½ cup cold water and let it soak for 3 minutes. Then, add ½ cup boiling water to dissolve the gelatin completely. Finally, stir that into the condensed milk mixture. Allow this entire mixture to cool to room temperature before pouring it on top of the orange layer—this prevents the jelly layers from melting or blending together.
Step 5: Pour the Creamy Layer and Chill
Gently pour the cooled creamy mixture over the orange jello layer. I like to pour it slowly and sometimes I use the back of a spoon to diffuse the flow, protecting those perfectly set layers beneath. Chill the cups in the refrigerator for 1 to 2 hours until everything is firm and beautifully set.
Step 6: Garnish and Enjoy
When you’re ready to serve, top each cup with a dollop of Cool Whip or whipped cream using a piping bag for that professional look. Sprinkle a few candy corns on top if you’re feeling festive. I always find this last touch makes the presentation pop and kids especially go wild for it!
Pro Tips for Making Candy Corn Jello Cups Recipe
- Cooling the Layers: Always let the jello cool to room temperature before layering to prevent melting the previous layer.
- Use a Baking Sheet: Transport your cups on a baking tray for less spills when moving in and out of the fridge.
- Slow Pour Technique: Pour each layer gently over a spoon to avoid mixing the colors.
- Gelatin Dissolving: Make sure your unflavored gelatin is fully dissolved to avoid lumps in the creamy layer.
How to Serve Candy Corn Jello Cups Recipe
Garnishes
I usually stick with the classics: a swirl of Cool Whip or homemade whipped cream and a handful of candy corn on top. It’s simple but instantly makes these jello cups feel special—and those candy corns add a satisfying crunch alongside the softness of the jello.
Side Dishes
These vibrant jello cups pair great with hearty fall dishes like chili or slow-cooked pulled pork sandwiches because they offer a sweet, refreshing contrast. I’ve also served them alongside pumpkin muffins or spiced cookies for a festive dessert spread.
Creative Ways to Present
For Halloween parties, I’ve tried serving the Candy Corn Jello Cups Recipe in clear mini mason jars with ribbon tied around the lid—super cute! You could also layer the jello in a large glass trifle bowl for a stunning centerpiece that guests can scoop out. Using fun Halloween-themed cups or spoons adds that extra festive flair too.
Make Ahead and Storage
Storing Leftovers
I keep any leftover Candy Corn Jello Cups Recipe refrigerated in an airtight container or simply covered tightly with plastic wrap. They stay fresh and tasty for about 3 to 4 days. The flavors meld even more overnight, making them even better the next day!
Freezing
Freezing jello isn’t something I usually recommend because it can change the texture, making it grainy or watery when thawed. I tried it once and the creamy layer separated a bit, so I stick with fresh or refrigerated next-day servings instead.
Reheating
This dessert is best served chilled, so reheating isn’t necessary or advised. If you prefer a softer consistency, just let the cups sit out at room temperature for 15 minutes before serving—they soften just enough without losing their form.
FAQs
-
Can I use different jello flavors for the Candy Corn Jello Cups Recipe?
Absolutely! While traditional lemon and orange flavors match candy corn colors best, you can experiment with other flavors. Just keep in mind that changing flavors may slightly change the overall taste, but it will still be delicious.
-
How long does it take for the layers to set properly?
Each layer takes about 1 to 2 hours to fully set, but I recommend chilling each layer at least 2 hours for the yellow jello and making sure the orange and creamy layers are completely cool before adding. Patience here really pays off to keep your layers neat and defined.
-
Can I make these jello cups ahead of time?
Yes! One of the best things about this Candy Corn Jello Cups Recipe is that you can prepare them a day or two in advance. Just keep them covered and refrigerated until ready to serve.
-
What if I don’t have Knox gelatin?
If you don’t have Knox unflavored gelatin, you can usually substitute with any unflavored gelatin powder, but make sure to follow the package instructions closely for dissolving amounts. Avoid flavored gelatin as it will change the texture and taste.
Final Thoughts
I’ve made this Candy Corn Jello Cups Recipe every Halloween season for years, and honestly, it never gets old. It’s one of those recipes that feels nostalgic but still fresh and fun. Whether you’re prepping for a party or just want a colorful dessert to brighten up your day, these jello cups are an absolute winner. I hope you enjoy making and sharing them as much as my family and I do—go ahead and dive in, you’re going to love it!
Print
Candy Corn Jello Cups Recipe
- Prep Time: 10 minutes
- Cook Time: 0 minutes
- Total Time: 5 hours 10 minutes
- Yield: 8 servings
- Category: Dessert
- Method: No-Cook
- Cuisine: American
- Diet: Vegetarian
Description
Candy Corn Jello Cups are a festive and colorful layered dessert perfect for Halloween or any celebration. This recipe combines bright yellow and orange gelatin layers with a creamy white sweetened condensed milk layer, topped with whipped cream and candy corn for a fun, vibrant treat.
Ingredients
Yellow Jello Layer
- 1 6-ounce package yellow jello (or two 3-ounce boxes)
- 2 cups boiling water
- 1½ cups cold water
Orange Jello Layer
- 1 6-ounce package orange jello (or two 3-ounce boxes)
- 2 cups boiling water
- 1½ cups cold water
White Layer
- 1 14-ounce can sweetened condensed milk
- 1 cup boiling water (for mixing with sweetened condensed milk)
- 1 envelope Knox unflavored gelatin
- ½ cup cold water (for gelatin)
- ½ cup boiling water (to dissolve gelatin)
Garnish (optional)
- Candy Corns
- Cool Whip or whipped cream
Instructions
- Prepare Yellow Jello Layer: In a bowl, dissolve the yellow jello in 2 cups of boiling water, stirring until fully dissolved. Add 1½ cups cold water to the mixture and stir well. Pour the yellow jello into dessert cups, filling each about one-third full. Place the cups on a baking sheet and refrigerate for about 2 hours until firm.
- Prepare Orange Jello Layer: While the yellow layer chills, dissolve the orange jello in 2 cups boiling water. Stir until completely dissolved, then add 1½ cups cold water and stir again. Allow the orange jello to cool to room temperature on the counter.
- Add Orange Layer to Cups: Once the yellow layer is set and the orange jello has cooled, gently pour the orange jello over the yellow layer in each cup until they are about two-thirds full. Return the cups to the refrigerator and chill for about 1 hour or until firm.
- Prepare White Layer: In a bowl, combine the sweetened condensed milk with 1 cup boiling water and set aside. In a separate small bowl, sprinkle the Knox unflavored gelatin over ½ cup cold water and let it soak for 3 minutes. Then add ½ cup boiling water to dissolve the gelatin, stirring until smooth. Add this gelatin mixture to the milk mixture and stir well. Allow this white layer mixture to cool to room temperature.
- Add White Layer to Cups: After the orange layer is set and the white mixture is cooled, gently pour the white layer on top of the orange layer. Return the cups to the refrigerator for an additional 1 to 2 hours until fully chilled and firm.
- Garnish and Serve: When ready to serve, decorate the top of each jello cup with Cool Whip or whipped cream using a piping bag and tip. Optionally, garnish with candy corns for a festive look.
Notes
- The recipe can be easily halved for a smaller batch by using 3-ounce jello boxes, half a can of sweetened condensed milk, half an envelope of unflavored gelatin, and halving all water measurements.
- Placing all dessert cups on a baking sheet makes transferring in and out of the refrigerator easier and prevents spills.
- Allow the orange jello to cool to room temperature before pouring over the yellow layer to avoid mixing or melting layers.
- Chilling times may vary depending on refrigerator settings; ensure each layer is fully set before adding the next.
Nutrition
- Serving Size: 1 cup serving
- Calories: 180
- Sugar: 31g
- Sodium: 80mg
- Fat: 2g
- Saturated Fat: 1.5g
- Unsaturated Fat: 0.5g
- Trans Fat: 0g
- Carbohydrates: 38g
- Fiber: 0g
- Protein: 2g
- Cholesterol: 5mg

Your email address will not be published. Required fields are marked *