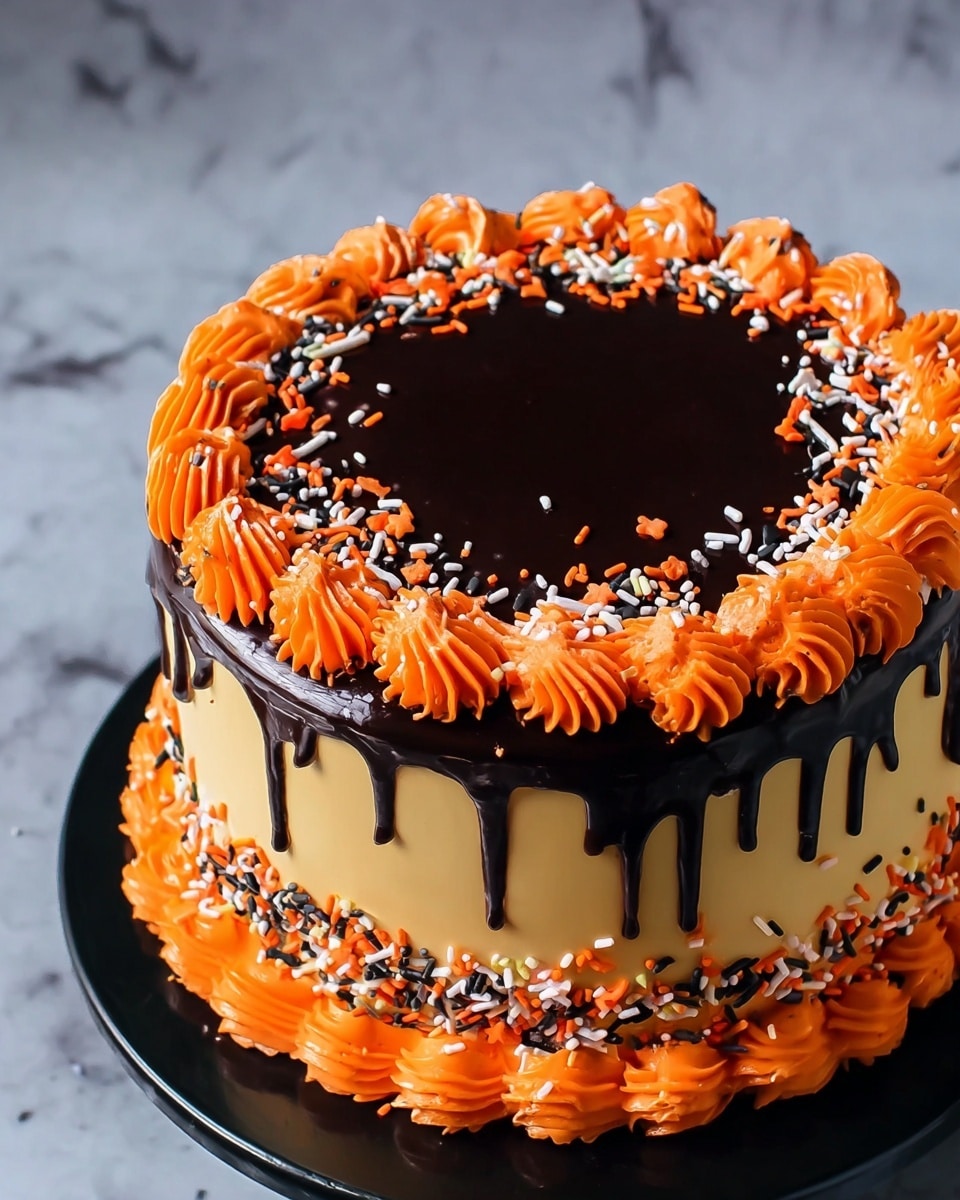
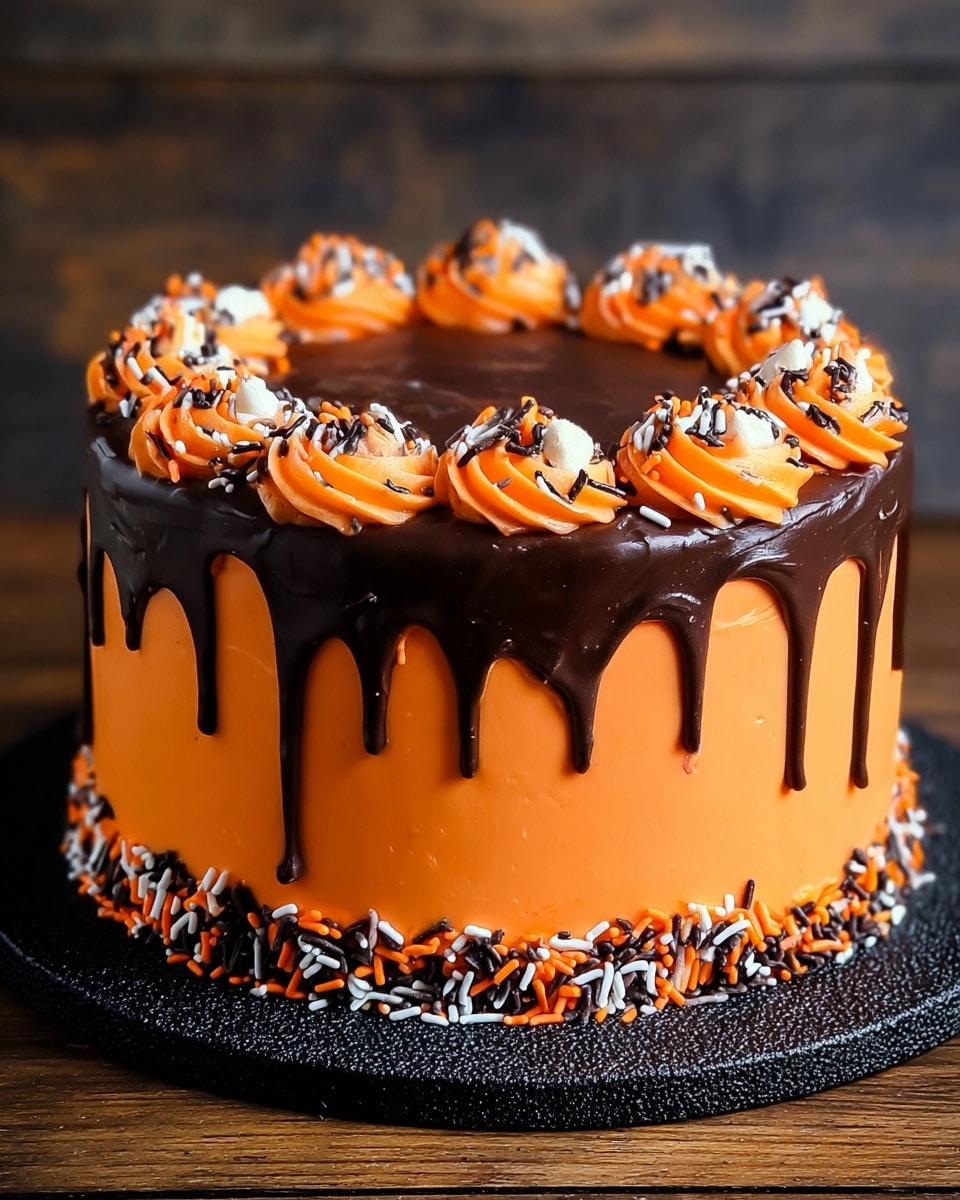
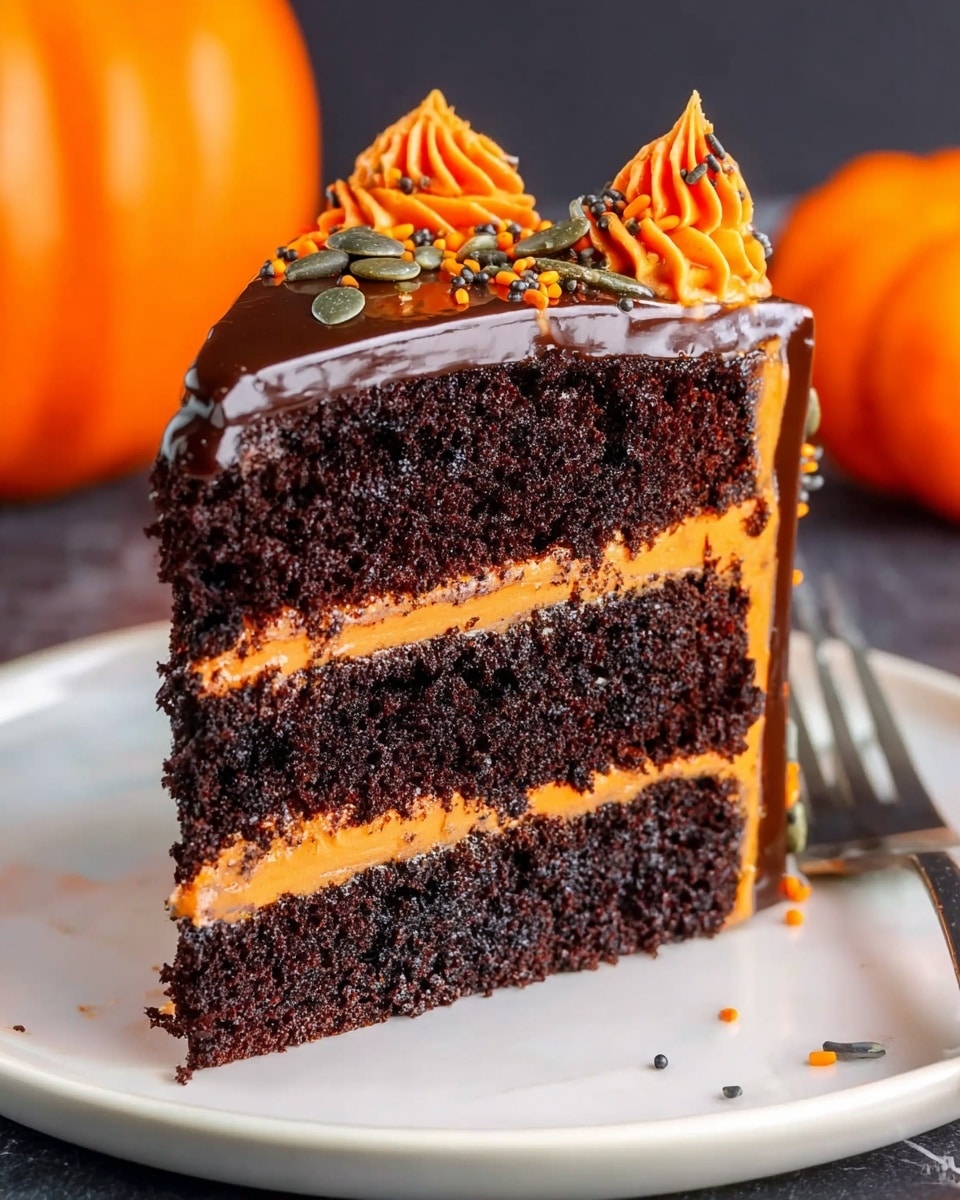
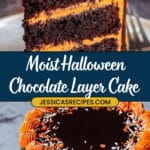
If you’re on the hunt for a show-stopping dessert this spooky season, I can’t recommend this Halloween Layer Cake Recipe enough. It’s rich, deeply chocolaty, and perfectly moist, layered with a dreamy orange-tinted white chocolate buttercream that will absolutely wow your guests. Plus, the dark chocolate glaze and festive sprinkles tie everything together in a way that’s just irresistible. Trust me, once you try this cake, you’ll want to make it your new Halloween tradition.
Why You’ll Love This Recipe
- Mood-Boosting Flavor: The blend of coffee and cocoa gives it a rich depth that wakes up your taste buds without being bitter.
- Frosting with a Twist: A white chocolate buttercream dyed with vibrant orange gel food coloring adds festive fun and a silky texture.
- Moist Layers Every Time: Buttermilk and coffee keep the cake incredibly tender – no one will guess how moist these layers are!
- Festive Presentation: The final glaze and sprinkle mix make it perfect for Halloween parties or family get-togethers.
Ingredients You’ll Need
Every ingredient here is chosen to build layers of flavor and texture that complement one another. When shopping, I like to pick the best quality cocoa and chocolate chips—trust me, it makes a difference.
- All-purpose flour: Provides structure for the cake layers; make sure to spoon and level for accuracy.
- Sugar: Sweetens and tenderizes; go with granulated white sugar.
- Unsweetened cocoa powder: Use a good-quality Dutch-processed cocoa for richness.
- Baking soda and baking powder: The right amount keeps the cake light and fluffy.
- Salt: Enhances all the flavors.
- Large eggs: Room temperature eggs help the batter emulsify better.
- Buttermilk: Adds moisture and a subtle tang for depth.
- Strongly brewed coffee: Amplifies chocolate flavor without tasting like coffee.
- Vegetable oil: Keeps the cake tender and moist.
- Vanilla extract: Rounds out the flavor beautifully.
- Egg whites for buttercream: Separate carefully for best results.
- Sugar for buttercream: Creates the perfect meringue base.
- Unsalted butter: Use soft but cool butter for smooth frosting.
- White chocolate: Melted and folded into buttercream for extra decadence.
- Orange, red, yellow gel food coloring: To get that perfect Halloween orange buttercream.
- Heavy cream and bittersweet chocolate chips: For a luscious glossy glaze.
- Haunted House Sprinkle Mix: Adds festive texture and fun visual appeal on top.
Variations
One thing I love is how adaptable this Halloween Layer Cake Recipe is. Whether you want to dial up the spooky factor or make it a bit friendlier for picky eaters, there’s room to personalize.
- Vegan version: I once swapped out eggs for a flaxseed mix and used a dairy-free butter in the frosting – still delicious, though the buttercream texture was a bit different.
- Spice it up: Adding a pinch of cinnamon or pumpkin pie spice to the batter can give it an extra fall vibe my family goes crazy for.
- Color frenzy: Use green gel food coloring in the buttercream for a Frankenstein-themed layer cake that’s just as fun.
- Nutty twist: Adding finely chopped toasted pecans between layers adds delightful crunch if you’re feeding texture lovers.
How to Make Halloween Layer Cake Recipe
Step 1: Mix Your Dry Ingredients
Start by whisking together the all-purpose flour, sugar, unsweetened cocoa powder, baking soda, baking powder, and salt in a large bowl. Getting the dry ingredients well combined upfront helps your cake bake evenly without surprises.
Step 2: Combine Wet Ingredients and Coffee
In a separate bowl, whisk the eggs, buttermilk, strong brewed coffee (warm but not hot), vegetable oil, and vanilla extract until smooth. The coffee boosts the chocolate flavor beautifully – I discovered this trick early on and haven’t looked back.
Step 3: Blend Wet Into Dry
Slowly pour the wet ingredients into the dry mixture and gently fold until just combined. Don’t overmix here—stop when you have a smooth batter; it’ll help keep your cake layers light and tender.
Step 4: Bake the Layers
Divide the batter evenly into three greased and floured 9-inch cake pans. Bake at 350°F (175°C) for about 30-35 minutes or until a toothpick inserted in the center comes out mostly clean. Let the layers cool in the pans for 15 minutes before turning out onto wire racks. Cooling fully is key to avoid the frosting melting.
Step 5: Make the Buttercream
The buttercream takes a bit of patience but is so worth it. Start by whisking the egg whites and sugar over a double boiler until hot and the sugar dissolves. Then, whip it into a glossy meringue. Gradually add your softened butter, one tablespoon at a time, beating well after each addition. You’ll get a smooth, fluffy frosting. Fold in melted white chocolate, then tint with the orange, red, and yellow gel food colorings until you get that perfect Halloween orange. This color mix is a fun trick I experimented with until it felt just right.
Step 6: Assemble the Cake
Place one cake layer on your serving plate, spread a generous amount of buttercream, then repeat with the remaining layers. Frost the outside smoothly, then chill the cake briefly to let the buttercream set before glazing.
Step 7: Prepare the Glaze & Decorate
Heat heavy cream just to a simmer and pour over bittersweet chocolate chips. Stir until smooth and let cool slightly, then drizzle over the cake. The glaze adds a glossy dark contrast that instantly ups the wow factor. Finally, sprinkle with your Haunted House Sprinkle Mix – those spooky shapes are the icing on the cake, literally!
Pro Tips for Making Halloween Layer Cake Recipe
- Temperature Matters: Make sure all your ingredients, especially eggs and butter, are at the right temperature to achieve the best texture.
- Don’t Overbake: Watch your cakes carefully near the end of baking; pulling them out just as a toothpick comes out mostly clean keeps them moist.
- Gel Food Coloring Over Liquid: I prefer gel for vibrant color without changing frosting consistency – way easier to control!
- Chill Before Glazing: Setting the frosted cake in the fridge first prevents the glaze from running too much.
How to Serve Halloween Layer Cake Recipe
Garnishes
I love topping this cake off with the Haunted House Sprinkle Mix because it’s festive and kids adore it. For a grown-up twist, you can add a sprinkle of edible gold dust or chopped toasted pecans around the edges—both look stunning and add a bit of crunch.
Side Dishes
Pair your Halloween Layer Cake with a simple dollop of lightly sweetened whipped cream or a scoop of vanilla bean ice cream to balance the chocolate richness. For drinks, spiced apple cider or a cinnamon-infused coffee are my go-to combos with this cake.
Creative Ways to Present
One year, I turned this cake into a “haunted graveyard” by adding cookie tombstones and spooky spider web piping in black gel on top. It’s a fun way to get creative and delight kids and adults alike at a Halloween party. Another time, I served mini slices on individual plates with edible candy eyes for a playful effect.
Make Ahead and Storage
Storing Leftovers
I usually keep leftover cake covered tightly in the fridge for up to 3 days. The buttercream frostings hold up really well chilled, and the cake stays moist. Just bring slices to room temperature before serving so the flavors come through beautifully.
Freezing
This cake freezes wonderfully! I recommend freezing unfrosted cake layers wrapped tightly in plastic wrap and then foil—up to 2 months. When you’re ready, thaw overnight in the fridge before frosting. Alternatively, freeze fully assembled and frosted, sliced into portions, wrapped individually for a quick treat anytime.
Reheating
Since it’s a cake, you don’t really need to reheat – I prefer it at room temp. But if you want a slight warmth, pop a slice in the microwave for just 10-15 seconds. It softens the buttercream slightly and makes the chocolate flavors more pronounced.
FAQs
-
Can I make this Halloween Layer Cake Recipe nut-free?
Absolutely! This recipe is naturally nut-free, but if you’re adding any garnishes or sprinkles, double-check labels to ensure they’re safe for those with allergies.
-
What if I don’t have buttermilk on hand?
No worries! You can make a buttermilk substitute by adding 1 1/2 tablespoons of lemon juice or white vinegar to 1 1/2 cups of milk and letting it sit for 5-10 minutes before using.
-
Can I use regular food coloring instead of gel?
You can, but gel food coloring is best because it doesn’t thin the frosting. Regular liquid colors can make your buttercream runnier and more difficult to spread evenly.
-
How do I prevent my layers from sticking to the pans?
Grease the pans well with butter or non-stick spray and dust with flour or cocoa powder. Let the pans come to room temperature before buttering for better sticking prevention. Also, avoid overbaking to make removal easier.
-
What’s the secret to the bright orange buttercream color?
I mix orange, red, and yellow gel food colorings to get a rich and vibrant hue—adjusting the drops until it’s just the right festive shade.
Final Thoughts
I absolutely love how this Halloween Layer Cake Recipe turns out every single time—it’s become my favorite way to impress family and friends during fall celebrations. From the first moist bite to the festive glaze and sprinkles, it has everything you want in a holiday dessert. Plus, making it feels like a fun little kitchen adventure, which is what I believe good cooking should be all about. I can’t wait for you to try it and put your own spin on it—promise your Halloween gathering will be unforgettable!
Print
Halloween Layer Cake Recipe
- Prep Time: 30 minutes
- Cook Time: 35 minutes
- Total Time: 2 hours 5 minutes
- Yield: 12 servings
- Category: Dessert
- Method: Baking
- Cuisine: American
Description
This Halloween Layer Cake is a decadent and festive dessert perfect for spooky celebrations. Featuring rich chocolate layers infused with coffee and buttermilk for moistness, it is topped with a vibrant, colorful white chocolate buttercream in shades of orange and yellow to capture the Halloween spirit. A luscious bittersweet chocolate glaze adds depth, and the cake is finished with a playful sprinkle mix to create an eye-catching haunted house theme.
Ingredients
For the cake
- 3 cups (12.75 oz) all-purpose flour
- 3 cups (21 oz) sugar
- 1 1/2 cups (4.5 oz) unsweetened cocoa powder
- 1 tbsp baking soda
- 1 1/2 tsp baking powder
- 1 1/2 tsp salt
- 4 large eggs
- 1 1/2 cups buttermilk
- 1 1/2 cups strongly brewed coffee
- 1/2 cup vegetable oil
- 2 tsp vanilla extract
For the buttercream
- 9 large egg whites, at room temperature
- 2 cups (14 oz) sugar
- 1 lb unsalted butter, soft but still cool
- 1 tbsp vanilla extract
- 1/4 tsp salt
- 8 oz white chocolate, melted
- 20 drops orange gel food coloring
- 5 drops red gel food coloring
- 5 drops yellow gel food coloring
For the glaze
- 1 cup heavy cream
- 7 oz bittersweet chocolate chips
Additional
- Sweets and Treats Haunted House Sprinkle Mix
Instructions
- Prepare the cake batter: Preheat your oven to 350°F (175°C). In a large bowl, sift together the all-purpose flour, sugar, unsweetened cocoa powder, baking soda, baking powder, and salt to ensure even mixing. In a separate medium bowl, whisk the eggs, buttermilk, coffee, vegetable oil, and vanilla extract until fully combined. Gradually blend the wet ingredients into the dry ingredients, stirring gently until the batter is smooth and uniform.
- Bake the cake layers: Divide the batter evenly among three greased and floured 9-inch round cake pans. Smooth the tops with a spatula for even baking. Bake in the preheated oven for approximately 30-35 minutes, or until a toothpick inserted into the center comes out clean. Remove from the oven and allow the cakes to cool in the pans for 10 minutes before transferring to wire racks to cool completely.
- Make the white chocolate buttercream: Using a double boiler or microwave, gently melt the white chocolate until smooth and set aside to cool slightly. In a heatproof bowl, combine the egg whites and sugar. Place over a simmering water bath and whisk continuously until the sugar dissolves completely and the mixture is warm to the touch (about 160°F/71°C) to create an Italian meringue. Transfer to a stand mixer and whip on high speed until stiff, glossy peaks form and the meringue has cooled to room temperature. Gradually add the softened butter in small pieces while mixing, ensuring each piece is fully incorporated before adding the next. Mix in the vanilla extract, salt, and the melted white chocolate until smooth.
- Color the buttercream: Divide the buttercream evenly into three bowls. Add 20 drops of orange gel food coloring to the first bowl and mix thoroughly for bright orange. To the second bowl, add 5 drops of red and 5 drops of yellow gel food coloring to create a warm yellow-orange hue. Leave the third bowl of buttercream white. Adjust colors as needed for vibrancy.
- Assemble and frost the cake: Place the first cake layer on a serving plate or cake stand. Spread a thick, even layer of orange buttercream on top. Add the second cake layer, then cover with the yellow-orange buttercream. Add the final cake layer and frost the entire outside with the white buttercream, smoothing the surface with a spatula or bench scraper for a clean finish.
- Prepare the chocolate glaze: In a small saucepan, heat the heavy cream until it just begins to simmer. Remove from heat and pour over the bittersweet chocolate chips in a bowl. Let sit for 2-3 minutes, then stir gently until the chocolate is fully melted and the glaze is smooth and glossy.
- Glaze and decorate the cake: Pour or drizzle the chocolate glaze over the top of the frosted cake, allowing some to drip down the sides for a dramatic effect. Immediately decorate with the Sweets and Treats Haunted House Sprinkle Mix to add festive textures and colors. Allow decorations and glaze to set for about 30 minutes before serving.
Notes
- Ensure the egg whites for the buttercream are at room temperature for better volume and stability.
- If you do not have strongly brewed coffee, use espresso or very strong instant coffee for the best chocolate flavor enhancement.
- The cake layers can be baked a day in advance and wrapped tightly in plastic wrap to maintain moisture.
- For a non-alcoholic version, omit any flavorings like extracts that contain alcohol or replace with alternatives.
- Allow the cake to come to room temperature before slicing to prevent the buttercream from cracking.
Nutrition
- Serving Size: 1 slice (approx. 1/12 of cake)
- Calories: 520 kcal
- Sugar: 50 g
- Sodium: 290 mg
- Fat: 28 g
- Saturated Fat: 16 g
- Unsaturated Fat: 10 g
- Trans Fat: 0.3 g
- Carbohydrates: 65 g
- Fiber: 4 g
- Protein: 6 g
- Cholesterol: 110 mg

djya8u