
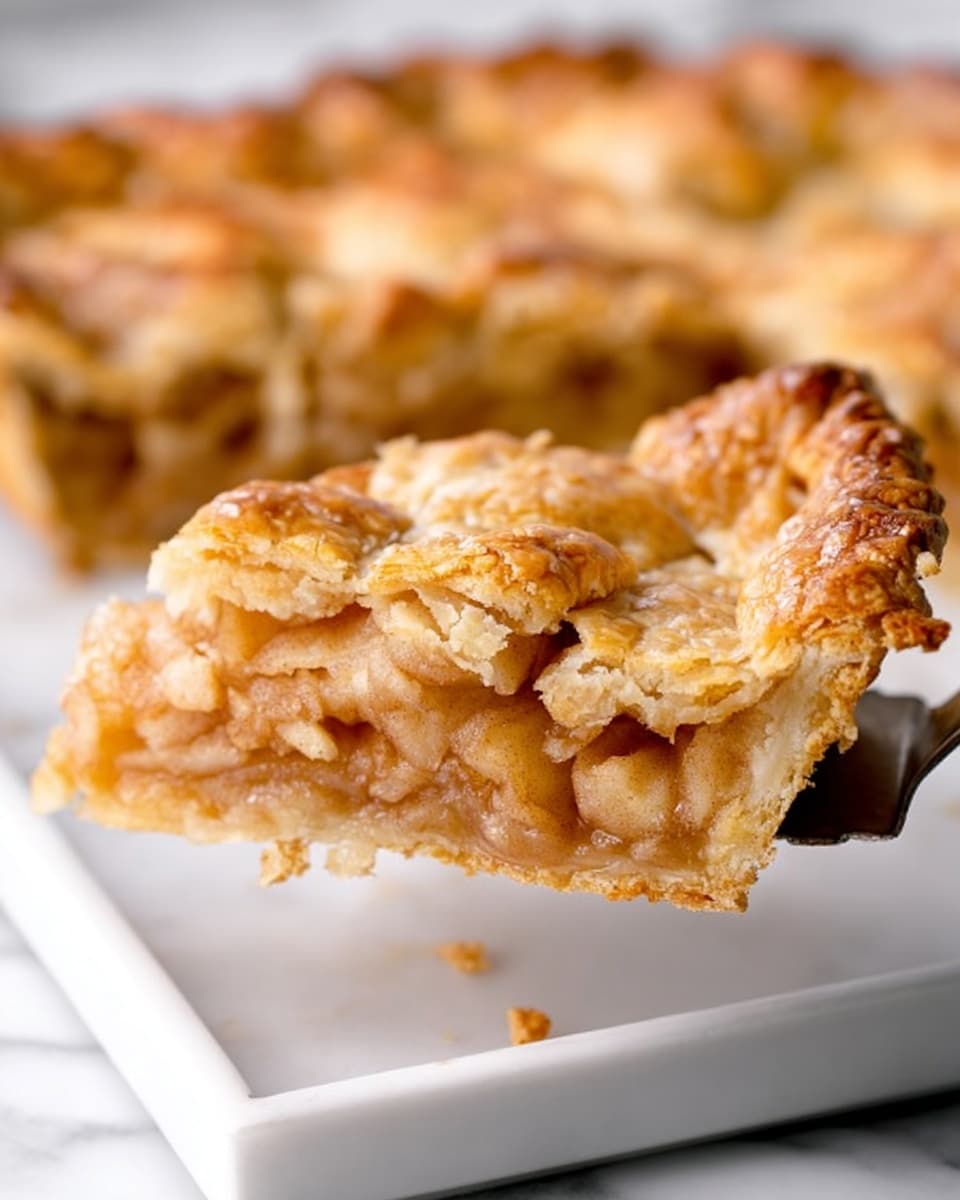
If you’ve been searching for a dessert that’s not only comforting but also crowd-pleasing, I promise you’ll want to try this Apple Slab Pie Recipe. It’s that perfect blend of buttery, flaky crust loaded with juicy, spiced apples – and the best part is you get a giant slab to share (or not, I won’t judge). Whether you’re hosting a casual get-together or just craving a big slice, this recipe will become your go-to.
Why You’ll Love This Recipe
- Big Batch, Big Flavor: This slab pie feeds a crowd without losing any of that homemade charm.
- Buttery, Flaky Crust: The crust recipe is foolproof and turns out crisp and tender every time.
- Perfectly Spiced Filling: The blend of cinnamon, nutmeg, and allspice complements the apples just right.
- Make Ahead Friendly: With tips on prepping in advance, this pie fits perfectly into your busy schedule.

Ingredients You’ll Need
I love that this Apple Slab Pie Recipe sticks to simple, classic ingredients you can find easily. The key is picking the right apples and keeping that butter super cold for the crust.
- All-purpose flour: A staple for pie crust, gives just the right texture.
- Sugar: Adds a touch of sweetness to the crust and filling; adjust to taste for your apples.
- Salt: Enhances all the flavors, especially in the crust.
- Unsalted butter: Keep it cold for that flaky, melt-in-your-mouth crust.
- Cold water: Just enough to bring the dough together without making it tough.
- Apples: Choose a mix like Granny Smith and Honeycrisp for a balance of tartness and sweetness.
- Lemon juice: Keeps the apples from browning and adds a subtle brightness.
- Cornstarch: For thickening the juicy apple filling so it isn’t runny.
- Ground cinnamon, nutmeg, allspice: Classic warming spices that make that filling sing.
- Heavy cream or egg wash: For a golden, shiny crust finish.
Variations
One of the things I love most about this Apple Slab Pie Recipe is how flexible it is. If you’re feeling adventurous or have specific preferences, make it your own!
- Using Different Apples: I once swapped in Fuji apples for extra sweetness, and my family went crazy for the subtle floral notes.
- Adding Nuts: Toasted walnuts or pecans sprinkled over the filling before adding the top crust give a delightful crunch and extra depth.
- Diet-friendly tweaks: You can easily swap sugar for maple syrup or honey, and try a gluten-free flour blend for the crust.
- Seasonal spice variations: In fall, I love to add a pinch of clove or cardamom to the spice mix for something a little different.
How to Make Apple Slab Pie Recipe
Step 1: Crafting the Perfect Crust
Start by measuring your flour, sugar, and salt into a large bowl. Toss in the cold, cubed butter and, using your fingers or a pastry blender, gently mash everything until the butter pieces are just bigger than peas – this is what creates those flaky layers. Next, stir in cold water gradually, just enough so the dough clings together but stays soft. I like to divide the dough into two rectangles, chilling them for a couple of hours – that rest time is key to preventing shrinkage when baked. Trust me, I used to rush it, and the difference is night and day!
Step 2: Preparing Your Spiced Apple Filling
While your dough chills, peel, core, and chop your apples into chunky half-inch pieces – I always toss them with a squeeze of lemon juice right away to keep them bright. Mix the sugar, cornstarch, cinnamon, nutmeg, allspice, and a pinch of salt in a separate bowl, then coat the apples thoroughly. The cornstarch is my secret to a filling that’s juicy without being soupy. I’ve learned that mixing the sugar and spices separately before tossing helps distribute the flavors evenly.
Step 3: Assembling the Pie
Preheat your oven to 375°F. Roll out the larger dough piece into a generous rectangle that fits your pan, then carefully transfer it to the pan, gently pressing it into the edges without stretching. Pop it back in the fridge or freezer to stay nice and cold. Roll out the second piece for the top crust while the bottom chills. Pour your luscious apple filling into the pan—don’t be shy, it looks like a lot but it’ll cook down. Lay the top crust over the apples, trim edges so there’s about a ¾-inch overhang, then pinch them tightly to seal. Brush the top with cream or egg wash and slice 1-inch vents across the surface to let steam escape during baking.
Step 4: Baking and Cooling
Pop your slab pie into the oven (place the pan on a larger sheet to catch any drips). Bake for 40 to 45 minutes until the crust is golden and the filling bubbles up through the vents. Now, here’s a trick I learned the hard way: resist the temptation to dig in immediately! Let it cool completely—at least 45 minutes on a rack—to let the filling set, or you’ll end up with a drippy, messy slice. I know, smelling that warm apple goodness from the kitchen is torture, but it’s worth it!
Pro Tips for Making Apple Slab Pie Recipe
- Keep Butter Ice Cold: The cold butter makes all the difference for flaky crust, so chill your cubes until the last minute.
- Don’t Overwork the Dough: Handle the dough gently to avoid toughness – I learned this the hard way during my first few pies.
- Use a Large Baking Sheet Underneath: Apple filling can bubble over, and a larger sheet catches spills and keeps your oven clean.
- Patience is Key: Let the pie cool completely to ensure the filling sets perfectly — no one wants a runny slice.
How to Serve Apple Slab Pie Recipe
Garnishes
I love topping my thick slice of apple slab pie with a scoop of vanilla ice cream to balance the warm spices and buttery crust. A dollop of whipped cream or a drizzle of caramel sauce also elevates the dessert into something special, especially when serving guests.
Side Dishes
For casual dinners, I pair the pie with a pot of hot coffee or spiced apple cider. During holiday feasts, something simple like sharp cheddar cheese on the side serves as a surprising but delicious companion to the sweet pie.
Creative Ways to Present
For special occasions, I’ve presented this slab pie on a rustic wooden board, cutting it into cute bite-size squares for easy sharing. Ribbon-wrapped slices in parchment paper make adorable edible favors, perfect for potlucks or holiday parties.
Make Ahead and Storage
Storing Leftovers
I usually cover the apple slab pie loosely with foil and keep it at room temperature if I plan to eat it within a day. If the kitchen’s warm, the garage or a cool spot works too. This keeps the crust crispy but prevents the filling from drying out.
Freezing
Freezing this pie after baking works surprisingly well. I slice it, wrap individual pieces tightly in plastic wrap and foil, then freeze for up to 3 months. When you’re ready, thaw in the fridge overnight and reheat in the oven to revive that fresh-baked crust.
Reheating
To reheat leftover slices, I preheat the oven to 300°F and warm the pie for about 15-20 minutes. Avoid the microwave if you want to keep the crust crisp. For a finishing touch, I sometimes pop it under the broiler for a minute or two—just watch it so it doesn’t burn.
FAQs
-
Can I use any type of apple for this Apple Slab Pie Recipe?
You can use a variety of apples, but a mix of tart (like Granny Smith) and sweet (like Honeycrisp or Fuji) works best. It balances flavor and texture so the filling isn’t too sweet or mushy.
-
How do I prevent the crust edges from burning?
If your crust edges brown too quickly, cover them loosely with foil halfway through baking. This will shield them while allowing the rest of the pie to cook thoroughly.
-
Can I make the pie ahead of time?
Absolutely! You can assemble the whole pie a day ahead and keep it refrigerated until baking. Or bake it fully, then cover and store at room temp or in a cool place for serving later.
-
Why should I let the Apple Slab Pie cool before serving?
Cooling lets the filling thicken up and prevents a messy, runny slice. It’s hard to wait, especially with the smell in the kitchen, but your taste buds will thank you.
Final Thoughts
I absolutely love how this Apple Slab Pie Recipe turned out the first time I tried it — big enough to feed a crowd, bursting with warm apple spice, and with a crust so buttery it practically melts in your mouth. Whenever I make it, friends and family inevitably ask for seconds (and sometimes thirds). Give it a shot, follow these tips, and I bet you’ll find it quickly becomes one of your favorite desserts too — it’s just that good.
Print
Apple Slab Pie Recipe
- Prep Time: 45 minutes
- Cook Time: 45 minutes
- Total Time: 4 hours 15 minutes
- Yield: Approximately 12-16 servings
- Category: Dessert
- Method: Baking
- Cuisine: American
Description
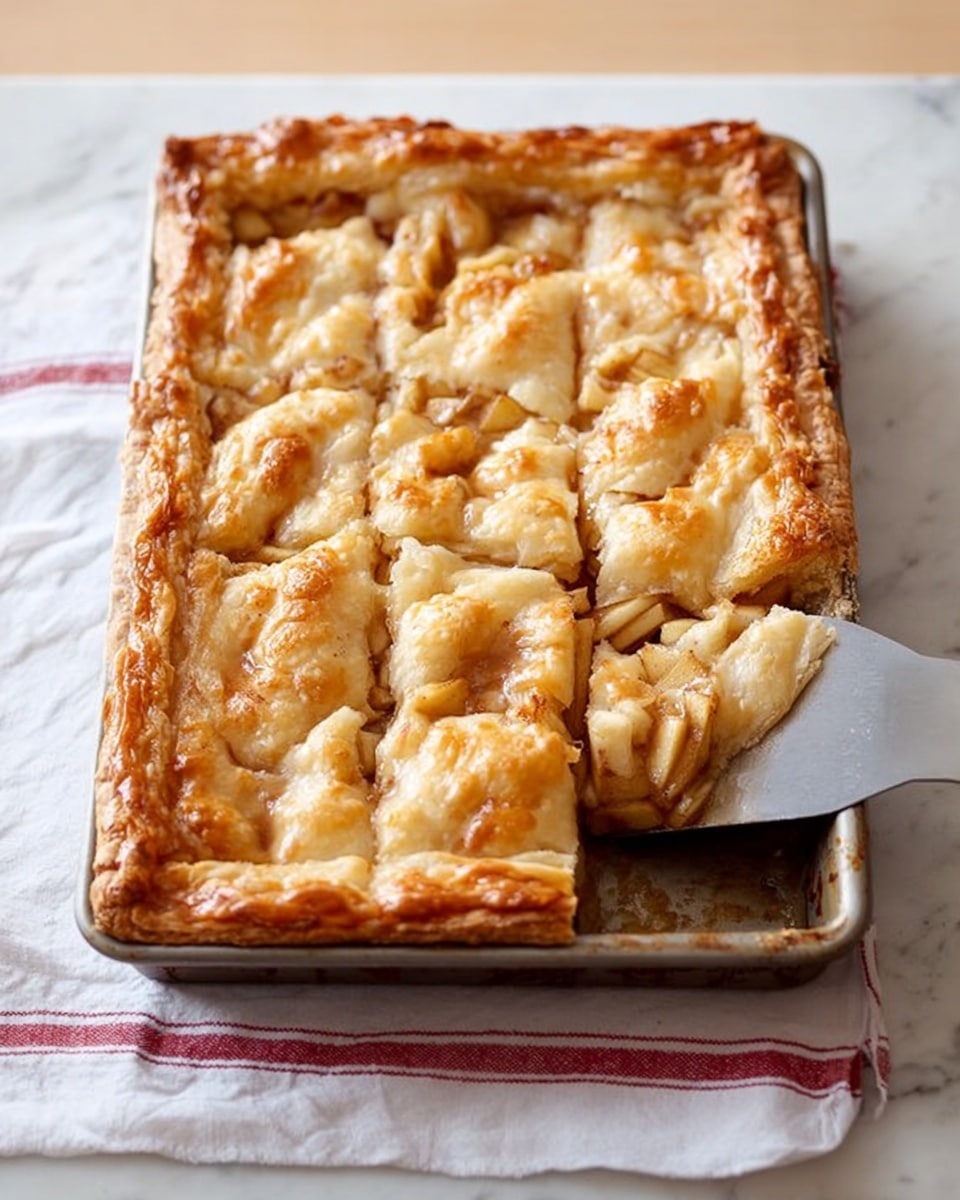
A classic Apple Slab Pie featuring a buttery, flaky crust and a spiced apple filling, baked to golden perfection in a large rectangular pan. This dessert is perfect for gatherings, offering a generous serving size and a comforting balance of sweet and warm spices.
Ingredients
For the crust:
- 3 ¾ cups (470 grams) all-purpose flour
- 1 ½ tbsp sugar
- 1 ½ tsp table salt
- 3 sticks (12 oz or 340 grams) unsalted butter, cubed and kept very cold
- ¾ cup very cold water
For the apple filling:
- 3 ½ to 4 pounds apples, peeled, cored and chopped into approximately ½-inch chunks (about 10 cups)
- Squeeze of lemon juice
- ⅔ to ¾ cup sugar (depending on sweetness preference and apple variety)
- 3 tbsp cornstarch
- 1 rounded tsp ground cinnamon
- ¼ tsp ground nutmeg
- ¼ tsp ground allspice
- ⅛ tsp table salt
To finish:
- 2 tbsp heavy cream or 1 egg beaten with 1 tbsp water
Instructions
- Make the crust: In a large bowl, combine the flour, sugar, and salt. Add the cold butter cubes and coat them with the flour mixture. Using your fingers, two knives, or a pastry blender, mash the butter into pea-sized pieces. Gradually stir in ½ cup cold water with a spatula until absorbed, adding up to ¼ cup more water one tablespoon at a time as needed until the dough begins to come together into a soft ball. Divide into two pieces, shape into rectangular slabs about 1-inch thick, wrap in plastic, and chill for at least 2 hours.
- Prepare the filling: In a very large bowl, toss the apple chunks with lemon juice. In a medium bowl, mix the sugar, cornstarch, cinnamon, nutmeg, allspice, and salt. Sprinkle this mixture over the apples and toss thoroughly to coat evenly. Set aside.
- Preheat and prepare pan: Preheat oven to 375°F (190°C). Line a 10×15×1-inch baking sheet or similar-sized jelly roll pan with parchment paper. If your pan is smaller, some dough may remain.
- Roll out bottom crust: On a floured surface, roll out the larger piece of chilled dough into an 18×13-inch rectangle. Transfer to the lined pan, draping edges over sides, and gently press dough into corners. Chill in fridge or freezer while preparing top crust.
- Roll out top crust: Roll the smaller dough piece into a 16×11-inch rectangle.
- Assemble the pie: Remove the pan from the fridge/freezer and pour the apple filling into the bottom crust. Drape the top crust over the apples and trim edges so both crusts overhang about ¾ inch. Seal edges tightly with fingers.
- Prepare for baking: Brush the top crust with heavy cream or egg wash. Using a sharp knife, cut multiple 1-inch slits in the top crust to allow steam to escape.
- Bake: Place the pan on a larger baking sheet to catch any spills and bake the pie for 40-45 minutes until the crust is golden brown and the filling bubbles through the slits.
- Cool and serve: Cool the pie on a wire rack for at least 45 minutes before slicing and serving to allow the filling to set properly, preventing a soggy mess.
Notes
- Allow the pie to cool nearly completely before serving to avoid a sloppy filling.
- This pie is best eaten the day it is baked but can be made fully one day ahead and reheated at 300°F for about 20 minutes. Broil briefly to crisp the top if desired.
- You can also assemble the pie up to one day in advance and refrigerate it before baking.
Nutrition
- Serving Size: 1 slice (1/12th of pie)
- Calories: 380
- Sugar: 25g
- Sodium: 220mg
- Fat: 22g
- Saturated Fat: 13g
- Unsaturated Fat: 8g
- Trans Fat: 0.5g
- Carbohydrates: 45g
- Fiber: 4g
- Protein: 3g
- Cholesterol: 45mg

Your email address will not be published. Required fields are marked *