

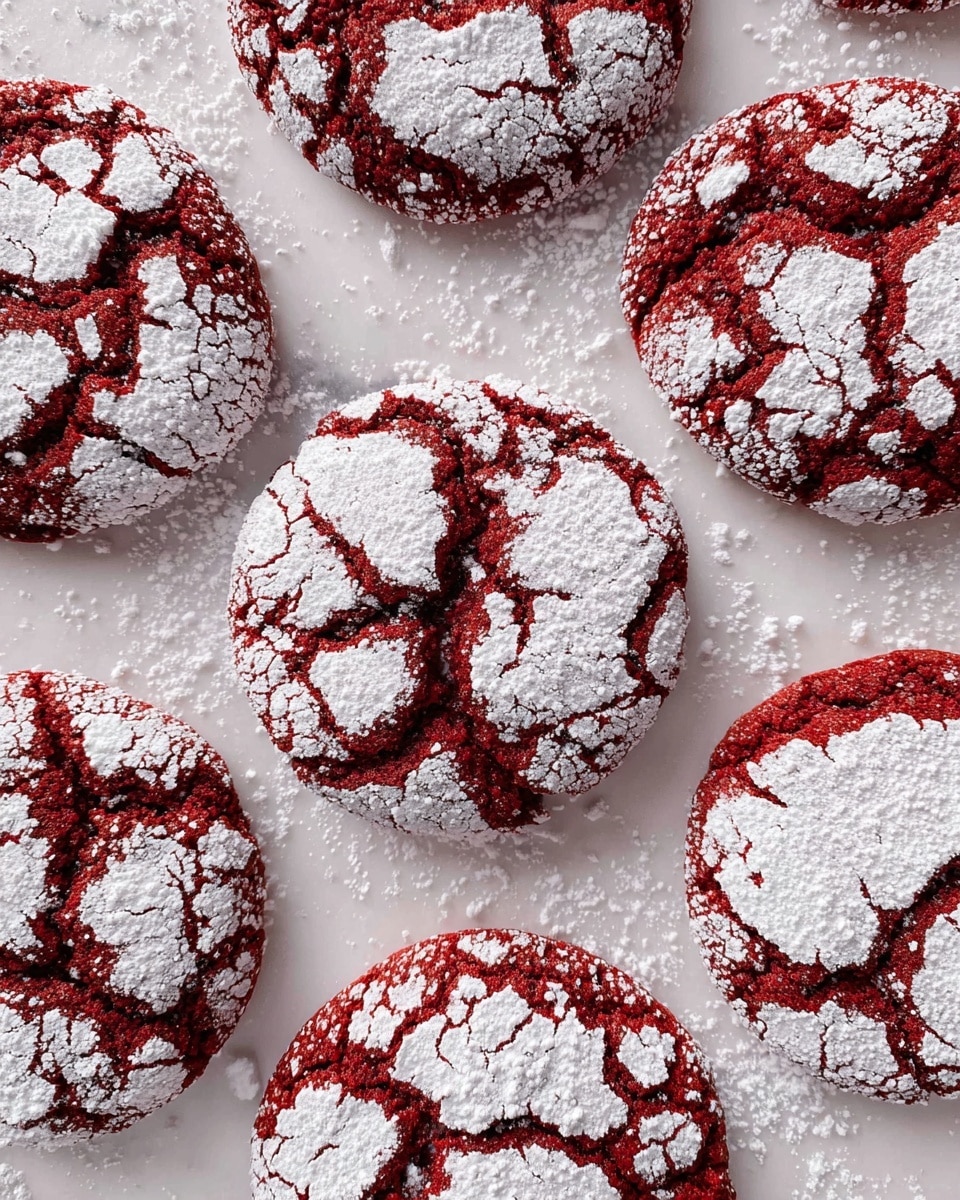
If you’re craving something that hits both the cookie and cheesecake buttons all at once, you’re in for a treat with this Cheesecake-Stuffed Red Velvet Cookies Recipe. I absolutely love how these cookies come out – they’re rich, soft, and the surprise cheesecake center is just divine. When I first made these, I was amazed at how the creamy filling contrasts with the cocoa-spiced dough. Stick around and I’ll walk you through everything you need to know to make these show-stoppers yourself!
Why You’ll Love This Recipe
- Decadent Flavor Fusion: Combines classic red velvet with rich cheesecake for a dessert that’s both familiar and exciting.
- Soft & Chewy Texture: The cookie edges hold firm while the centers stay tender, making every bite heavenly.
- Fun to Make and Impress: Perfect for sharing at parties or special occasions, these cookies are guaranteed to wow your friends and family.
- Versatile and Adaptable: You can tweak the filling or adjust sweetness easily to suit your taste or dietary needs.

Ingredients You’ll Need
The magic of these Cheesecake-Stuffed Red Velvet Cookies happens because of a balance between just the right cream cheese filling and the cocoa-laced red velvet dough. I like to use full-fat cream cheese for that smooth, rich texture, and baking powder combined with baking soda gives the cookies a perfect rise and soft crumb.
- Full-fat cream cheese: For the creamiest, richest cheesecake filling. Make sure it’s softened to avoid lumps.
- Granulated sugar: Used in both the filling and cookie dough to balance sweetness and tenderness.
- Sour cream: Adds tang and extra moisture to the cheesecake center.
- Vanilla extract: Enhances the depth of flavor in both filling and dough.
- All-purpose flour: The sturdy base for the cookie dough.
- Unsweetened cocoa powder: Brings that classic red velvet hint of chocolate without bitterness.
- Baking powder & baking soda: Leavening agents that help the cookies to rise just right.
- Salt: A pinch to balance all the sweetness and boost overall flavor.
- Butter (melted): Adds richness and moisture to the cookie dough.
- Low fat buttermilk: Keeps the dough tender and adds acidity; I sometimes use milk plus lemon juice if I don’t have buttermilk on hand.
- Red food coloring (optional): This is what gives the cookies their signature vibrant red hue — but it’s not mandatory for taste!
- Eggs: Help bind everything together and add moisture.
- Powdered sugar: For coating the cookies and preventing the dough from sticking while shaping.
Variations
I love making this Cheesecake-Stuffed Red Velvet Cookies Recipe my own by mixing things up every time I bake it. It’s a perfect base for personalization — so you’ll find that small tweaks can make it feel special for different occasions or preferences.
- Swap the Cheesecake Filling: Sometimes I add a touch of lemon zest or a little cinnamon to the filling for a fresh twist — it brightens the richness beautifully.
- Make It Vegan: Use vegan cream cheese and dairy-free butter substitutes, plus a flax egg in place of eggs, and you’ll still end up with tasty cookies.
- Use Different Colors: If red velvet isn’t your thing, try swapping the red food coloring for purple or green for a holiday vibe without losing the chocolate essence.
- Mix-ins: For an extra surprise, fold in chopped nuts, mini chocolate chips, or even white chocolate chunks to the dough before baking.
How to Make Cheesecake-Stuffed Red Velvet Cookies Recipe
Step 1: Whip Up the Creamy Cheesecake Filling
First things first, line a baking sheet with parchment paper — this is where your cheesecake dollops will chill. Using a mixer (either hand or stand), beat together softened cream cheese, granulated sugar, sour cream, and vanilla until mixture is perfectly smooth and creamy, about 1 minute. The smoother, the better! Then, spoon out tablespoon-sized scoops onto your parchment-lined tray. Freeze these scoops for at least 2 hours until solid. This freezing step is key; it keeps the filling intact when baking the cookies—trust me, it makes all the difference!
Step 2: Prepare the Rich Red Velvet Dough
While the filling chills, whisk together your dry ingredients: sift the flour, cocoa powder, baking powder, salt, and baking soda into a large bowl. In a separate bowl, beat the sugar, melted butter, buttermilk, red food coloring (if you’re using it), vanilla, and eggs until smooth and well mixed. Then fold the dry ingredients into the wet until just combined — don’t overmix, or your cookies could get tough. Cover the dough with plastic wrap and pop it in the fridge for about half an hour. The slight chill makes it more manageable and helps it hold its shape better when forming cookies.
Step 3: Stuff, Shape, and Coat Your Cookies
Preheat your oven to 350°F and line two baking sheets with parchment paper. Pour some powdered sugar into a shallow bowl, and keep extra powdered sugar nearby for your hands — this little trick keeps the sticky dough from getting all over you and makes shaping a breeze. Take about a generous tablespoon of cookie dough and flatten it into a circle. Place a frozen cheesecake dollop in the middle and cover it with another flattened tablespoon of dough. Then, using your powdered sugar-coated hands, carefully wrap dough around the cheesecake center and roll into a ball. Don’t rush this part — take your time so the filling stays sealed inside. Roll each ball in powdered sugar, then place on your baking sheets about two inches apart; this spacing prevents the cookies from crowding each other as they spread.
Step 4: Bake to Perfection and Cool
Bake the cookies for 10 to 15 minutes, rotating the baking sheets halfway through so they bake evenly. Look for edges that are set but centers that still look soft—that’s your cue that they’re perfectly done. Let them cool on the baking sheets for about 10 minutes before transferring to a wire rack. Cooling is crucial here because the cheesecake filling remains soft but firm as the cookies cool down, giving you that wonderful melty surprise when you bite in.
Pro Tips for Making Cheesecake-Stuffed Red Velvet Cookies Recipe
- Freeze Your Filling Thoroughly: I learned that partially frozen cheesecake scoops won’t hold up inside the dough, so make sure they’re rock solid before stuffing.
- Keep Hands Powdered: Coating your hands in powdered sugar stops the dough from sticking and gives the cookies that classic cracked look.
- Don’t Overmix the Dough: Overworking can make the cookies tough; gently fold the dry ingredients just until combined.
- Watch Baking Time Closely: Every oven is different, so start checking at 10 minutes—cookies are best when edges are set but centers are soft.
How to Serve Cheesecake-Stuffed Red Velvet Cookies Recipe
Garnishes
For serving, I actually keep it simple — a light dusting of powdered sugar on top is lovely and looks classic. If it’s a special occasion, a drizzle of white chocolate or a sprinkle of edible glitter can add a festive touch. Fresh raspberries on the side I find pair wonderfully, their tartness cuts through the richness.
Side Dishes
These cookies shine as a stand-alone treat but also go great alongside a cup of strong coffee, a dollop of whipped cream, or even a scoop of vanilla ice cream for extra indulgence. Sometimes, I pair them with a small fresh fruit salad for balance.
Creative Ways to Present
When I’ve brought these to holiday gatherings, I love lining them up on a decorative platter with a red velvet cake slice or mini cupcakes of a complementary flavor. Wrapping them individually in cellophane with a ribbon makes an adorable homemade gift, especially if you tuck in a little note about the cheesecake surprise inside!
Make Ahead and Storage
Storing Leftovers
I store any leftover cookies in an airtight container in the fridge because of the cheesecake filling. I’ve found they stay fresh and chewy for up to 4 days this way — just make sure the container is well sealed so the cookies don’t dry out.
Freezing
Freezing is a great option if you want to prep ahead. I wrap individual baked cookies tightly in plastic wrap, then place them all in a freezer-safe bag or container. They freeze beautifully for up to 3 months. When you’re ready, thaw overnight in the fridge to avoid melting the cheesecake filling too quickly.
Reheating
To warm leftover cookies, I pop them in a preheated 300°F oven for about 5 minutes. This gently revives the soft texture without drying them out. Avoid microwaving, as it can make the filling runny and the cookie edges chewy.
FAQs
-
Can I make the cheesecake filling ahead of time?
Absolutely! It’s even recommended that you freeze the filling dollops at least 2 hours before assembling the cookies. If you’re prepping days in advance, you can make the filling and freeze it well-wrapped; just keep it frozen until the baking day to maintain the shape and prevent leaking.
-
Do I have to use red food coloring?
Not at all! The red coloring is mainly for the signature look of red velvet; the flavor profile comes from the cocoa powder and vanilla. If you prefer to skip food coloring, your cookies will simply have a chocolate-y hue but still taste delicious.
-
Can I make these cookies gluten-free?
You can substitute all-purpose flour with a gluten-free blend that’s designed for baking. Just be sure your blend contains xanthan gum or a similar binder to keep the dough from crumbling. Texture might be a little different, but still tasty!
-
What if the cheesecake filling leaks out during baking?
This usually happens if the filling isn’t frozen enough or if the dough isn’t sealed tightly around it. Make sure your filling dollops are solidly frozen and take your time wrapping the dough around the filling. Using powdered sugar on your hands helps create a better seal without sticking.
Final Thoughts
This Cheesecake-Stuffed Red Velvet Cookies Recipe quickly became one of my favorite baking projects because it feels a little bit fancy but is surprisingly easy to pull off at home. I love sharing them with friends because their reactions are priceless—they never expect that creamy surprise inside! If you give this recipe a try, don’t rush through the freezing step, and treat yourself to that first warm bite fresh from the oven. You’re going to love it as much as I do.
Print
Cheesecake-Stuffed Red Velvet Cookies Recipe
- Prep Time: 30 minutes
- Cook Time: 12 minutes
- Total Time: 2 hours 12 minutes
- Yield: 12 cookies
- Category: Dessert
- Method: Baking
- Cuisine: American
Description
These Cheesecake-Stuffed Red Velvet Cookies combine the rich, creamy texture of cheesecake with the classic moist and slightly chocolatey flavor of red velvet cookies. Perfectly soft and fudgy with a delightful surprise filling, these cookies are ideal for special occasions or an indulgent treat.
Ingredients
Cheesecake Filling
- 8 ounces full-fat cream cheese, softened
- ⅓ cup granulated sugar
- 2 tablespoons sour cream
- 1 teaspoon vanilla extract
Cookies
- 1 ⅔ cups all-purpose flour
- ¼ cup unsweetened cocoa powder
- 1 teaspoon baking powder
- ½ teaspoon salt
- ¼ teaspoon baking soda
- 1 ¼ cups granulated sugar
- ¼ cup butter, melted
- 1 tablespoon low fat buttermilk
- 1 teaspoon red food coloring (optional)
- 1 teaspoon vanilla extract
- 2 large eggs
- ½ cup powdered sugar plus more for coating hands
Instructions
- Make the cheesecake filling: Line a baking sheet with parchment paper. Using a hand or stand mixer fitted with a paddle attachment, beat together cream cheese, granulated sugar, sour cream, and vanilla extract until the mixture is creamy and smooth, about 1 minute. Spoon the filling into 12 dollops (about 1 tablespoon each) onto the lined baking sheet and freeze for 2 hours or until solid.
- Prepare the cookie dough: In a large bowl, sift or whisk together all-purpose flour, cocoa powder, baking powder, salt, and baking soda. In a separate large bowl, whisk granulated sugar, melted butter, buttermilk, red food coloring if using, vanilla extract, and eggs until smooth. Fold the dry ingredients into the wet ingredients using a spatula until just combined. Cover and refrigerate the dough for 30 minutes to firm up slightly.
- Preheat oven and prepare for baking: Heat the oven to 350°F (175°C). Line two baking sheets with parchment paper. Place powdered sugar in a shallow bowl and keep extra powdered sugar nearby to coat your hands while shaping.
- Assemble the cookies: Using powdered sugar-covered hands, scoop a generous tablespoon of cookie dough and flatten it into a circle. Place one frozen cream cheese dollop in the center, then top with another generous tablespoon of dough. Enclose the dough around the filling, shaping it into a ball. Roll the ball in powdered sugar and place it on the prepared baking sheet. Repeat for remaining dough and filling, spacing cookies at least 2 inches apart.
- Bake the cookies: Bake for 10 to 15 minutes, or until the cookies have spread slightly and the edges are set. Rotate the baking sheets halfway through baking for even cooking.
- Cool the cookies: Let the cookies cool on the baking sheets for 10 minutes before transferring them to a wire rack to cool completely.
- Storage: Store fully cooled cookies in an airtight container in the refrigerator for up to 4 days.
Notes
- Adapted from The Food Network.
- If you don’t want to buy buttermilk, you can make a substitute by adding a small squeeze of lemon juice or a splash of white vinegar to milk and let it sit for 5-10 minutes to curdle.
- Red food coloring is optional but gives the cookies their signature red velvet color.
Nutrition
- Serving Size: 1 cookie
- Calories: 220 kcal
- Sugar: 18 g
- Sodium: 120 mg
- Fat: 11 g
- Saturated Fat: 6 g
- Unsaturated Fat: 4 g
- Trans Fat: 0.3 g
- Carbohydrates: 26 g
- Fiber: 1 g
- Protein: 3 g
- Cholesterol: 40 mg

Your email address will not be published. Required fields are marked *