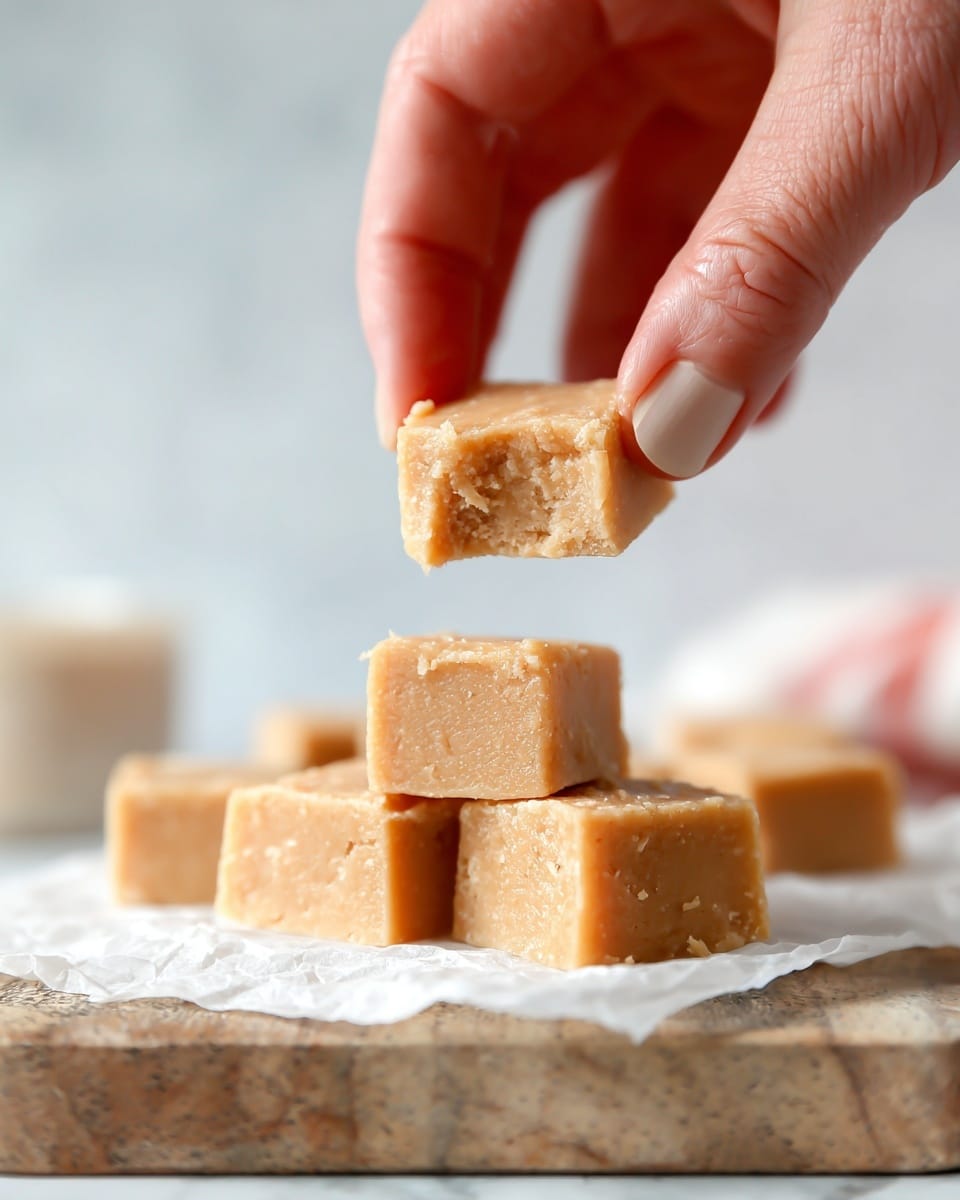
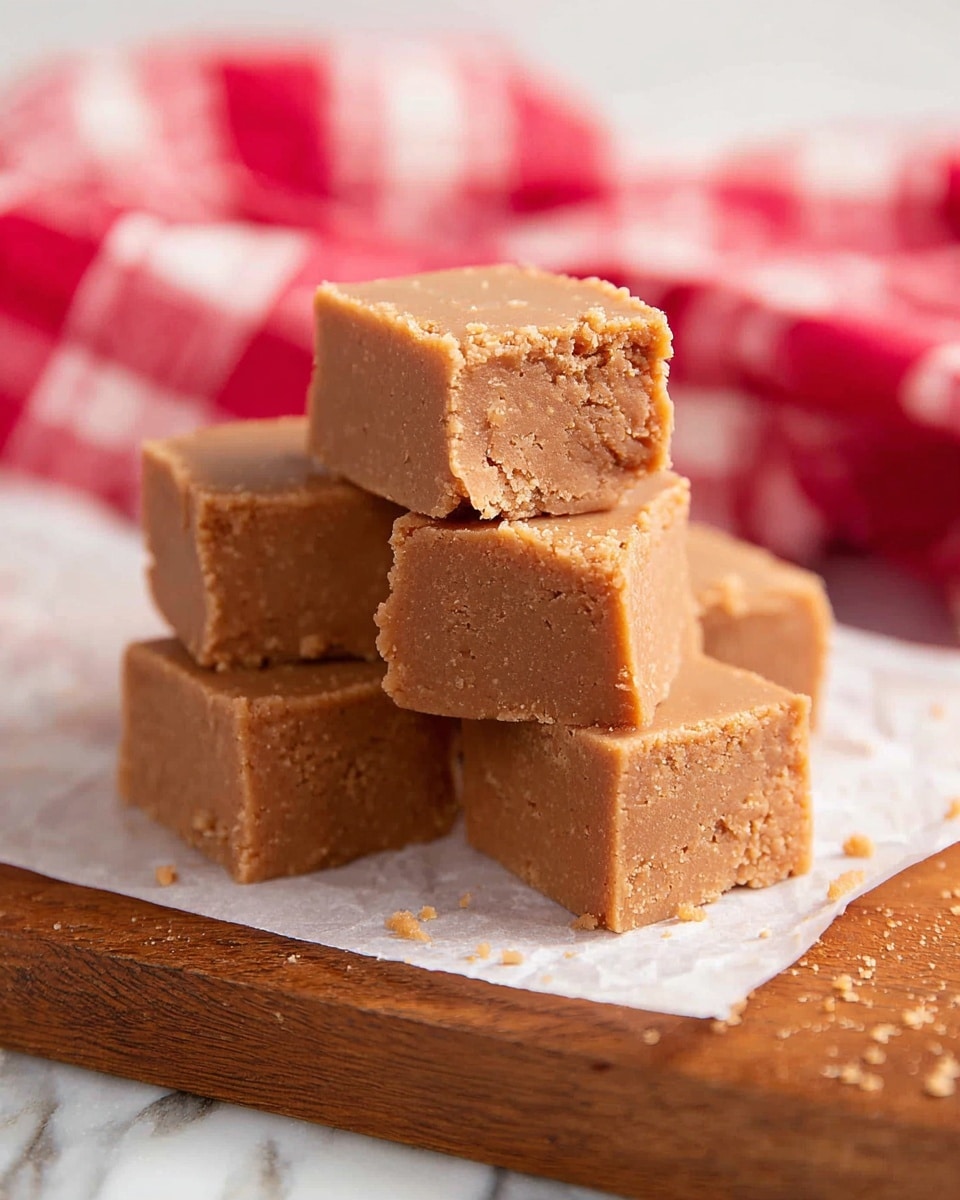
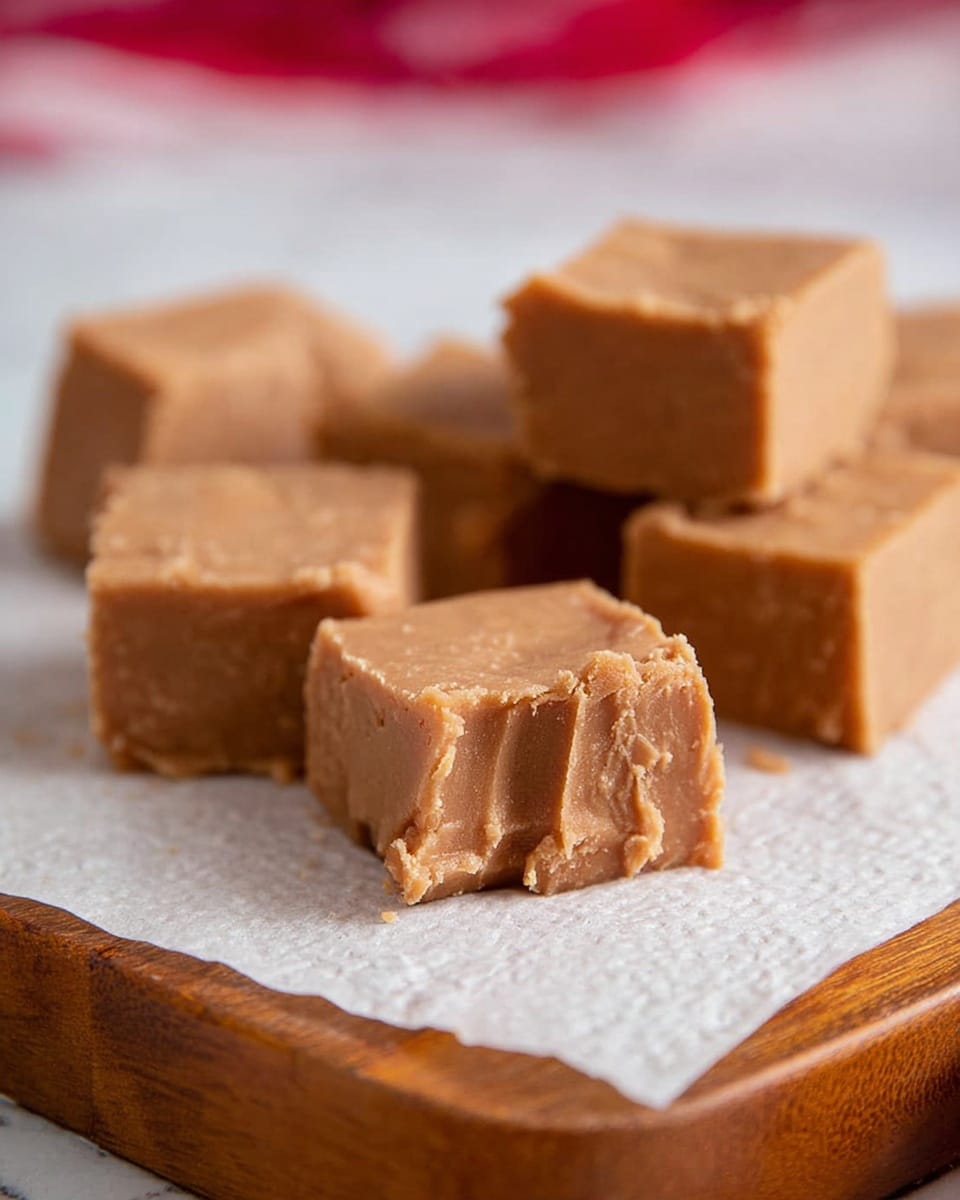
If you’re craving a truly nostalgic treat that melts perfectly in your mouth, you’re in the right place. This Old Fashioned Stovetop Fudge Recipe is exactly what you need—rich, creamy, and made right on your stovetop without any fancy equipment. I absolutely love how simple it is and how that classic, buttery chocolate flavor comes through every time. Trust me, once you try it, you’ll wonder why it took so long to make fudge from scratch at home!
Why You’ll Love This Recipe
- Classic, Timeless Flavor: This recipe tastes just like the fudge my grandma used to make—smooth, buttery, and perfectly chocolatey.
- Easy Stovetop Method: No candy molds or fancy tools needed; just your trusty saucepan and a candy thermometer.
- Perfect Texture Every Time: Cooking to soft-ball stage and beating it properly guarantees that creamy, melt-in-your-mouth fudge you want.
- Quick and Fun to Make: From start to finish, you’ll be enjoying homemade fudge in about 40 minutes—perfect for last-minute gifts or treats.
Ingredients You’ll Need
Each ingredient here plays an important role in that classic fudge flavor and texture. You’ll notice this recipe keeps things simple but effective—I recommend looking for quality cocoa powder because it really amps up the chocolate taste.
- Granulated sugar: The foundation of your fudge’s sweetness and structure, so make sure it’s fresh for best results.
- Cocoa powder: Use a good-quality unsweetened cocoa like Hershey’s for rich chocolate flavor.
- Salt: Just a pinch to balance sweetness and deepen the chocolate notes.
- Half and half: Provides the creamy base, making the fudge luscious and tender.
- Corn syrup: Helps prevent graininess and keeps the fudge smooth and shiny.
- Butter: Adds richness and smooth texture—unsalted is preferred to control salt levels.
- Vanilla extract: Enhances the chocolate flavor with its warm, aromatic touch.
Variations
I love tweaking the Old Fashioned Stovetop Fudge Recipe sometimes, especially when I want to surprise my family or adjust for different occasions. Feel free to get creative—you’ll find that small changes can make a big impact!
- Nutty Twist: I often fold in toasted pecans or walnuts right before pouring the fudge into the pan—my family absolutely goes crazy for the extra crunch.
- Mint Chocolate: Add a teaspoon of peppermint extract instead of vanilla for a fresh holiday flair; it gives the fudge a delightful, cool bite.
- Salted Caramel Fudge: Drizzle caramel sauce and sprinkle flaky sea salt on top before it sets for a sweet-salty surprise.
- Dairy-Free Version: Swap half and half with full-fat coconut milk and butter with coconut oil; though the result tastes a little different, it still satisfies your fudge craving.
How to Make Old Fashioned Stovetop Fudge Recipe
Step 1: Combine and Heat Your Ingredients
Start by mixing the sugar, cocoa powder, half and half, salt, and corn syrup in a 2-quart saucepan. Give it a good whisk until everything is smooth—this helps avoid lumps later. Set your burner to medium-low heat and slowly bring the mixture to a gentle boil. Stir occasionally to keep it from sticking, but be careful not to heat too fast or scorch the bottom.
Step 2: Cook to Soft-Ball Stage (240°F)
This is the critical step in the Old Fashioned Stovetop Fudge Recipe. Let your candy thermometer do the work—watch the mixture carefully and cook it without stirring once it’s boiling, until it hits 240°F. This “soft-ball” temperature ensures your fudge will set with that creamy, soft texture. If you don’t have a thermometer, you can test by dropping a bit of the mixture into cold water; it should form a soft, pliable ball.
Step 3: Add Butter and Vanilla, Then Cool
Remove the pan from heat immediately and place the butter and vanilla extract on top of the hot fudge mixture without stirring. Let it rest for about 20 minutes until the side of the pan feels warm but not hot. This cooling stage is essential—it allows the sugars to crystallize just right, setting the stage for the perfect fudge texture.
Step 4: Beat Until Thick and Glossy
Now comes the fun part! Beat the fudge mixture using a hand mixer on medium to low speed. You’ll want to continue for about 1 to 3 minutes until the fudge loses its shine and becomes thickened. I discovered this step makes such a difference—it transforms the fudge from syrupy to just the right spreadable consistency.
Step 5: Pour, Spread and Set
Quickly pour the fudge into a buttered plate or dish, smoothing it out with a spatula as needed. This step has to be fast because your fudge will start to set almost immediately. Let it cool on the counter for about 20 minutes before cutting into one-inch squares. By the way, I like to butter my spatula too—it helps the fudge spread smoothly without sticking.
Pro Tips for Making Old Fashioned Stovetop Fudge Recipe
- Use a Candy Thermometer: This ensures you hit the perfect soft-ball stage for ideal fudge texture every time — I’ve found guessing just doesn’t work well.
- Don’t Skip the Cooling Step: Letting the mixture cool before beating avoids gritty fudge and helps achieve that creamy finish.
- Beat Just Right: Overbeating can make fudge dry, while underbeating keeps it too soft. Watch for that glossy, thick stage!
- Butter Your Equipment: Butter the pan and spatula before pouring and spreading fudge to stop it from sticking and to help with easy cutting later.
How to Serve Old Fashioned Stovetop Fudge Recipe

Garnishes
I’m a simple gal when it comes to garnishing fudge—I usually keep it classic with a light sprinkle of flaky sea salt on top just before it sets. It adds a subtle crunch and elevates the chocolate flavor in a way you might not expect. Sometimes, I toss a handful of chopped toasted nuts over the fudge for both texture and that cozy, nutty aroma.
Side Dishes
Fudge is pretty decadent on its own, but I’ve enjoyed serving it alongside a hot cup of coffee or a creamy latte for a cozy afternoon treat. It’s also a fun little dessert paired with fresh berries or a scoop of vanilla ice cream to balance the richness perfectly.
Creative Ways to Present
For holiday seasons or gift-giving, I like to cut the fudge into bite-sized squares and wrap each piece in colorful wax paper tied with twine—it looks so charming and homemade. Sometimes, I layer fudge with crushed peppermint or swirl in bits of chopped candy canes for that festive look and extra crunch.
Make Ahead and Storage
Storing Leftovers
I store leftover fudge in an airtight container at room temperature or in the fridge if it’s warm in your kitchen. It stays fresh for about 1 to 2 weeks, but honestly, it rarely lasts that long around here. Make sure to separate layers with wax paper to keep squares from sticking together.
Freezing
Freezing fudge is totally doable! I wrap pieces individually in plastic wrap and place them in a sealed freezer bag. When you’re ready to enjoy, just thaw at room temperature for about 30 minutes. The texture stays delightful, almost like fresh-made.
Reheating
Since fudge is best enjoyed as-is, I don’t usually reheat it. But if it gets a little too firm from the fridge, just let it sit at room temp for 15 minutes before serving—it softens beautifully without losing that creamy feel.
FAQs
-
Can I use a microwave instead of stovetop for this fudge?
While microwaving fudge is possible, I find the stovetop method gives you much better control over temperature, which is crucial for the texture of this Old Fashioned Stovetop Fudge Recipe. The gentle heating on the stovetop makes for a perfectly smooth and creamy outcome every time.
-
Why is my fudge grainy?
Grainy fudge usually means the sugar crystallized too early. This can happen if you stirred the mixture after it started boiling, or didn’t let it cool enough before beating. Following the cooking to 240°F and cooling steps carefully helps prevent that gritty texture.
-
Do I have to use corn syrup?
Corn syrup helps keep the fudge smooth and prevents crystallization. You can experiment with alternatives like honey or maple syrup, but results might vary. I recommend sticking to corn syrup for the most reliable classic texture in this Old Fashioned Stovetop Fudge Recipe.
-
How do I know when to stop beating the fudge?
Stop beating when your fudge starts to lose its glossy shine and thickens noticeably. It will look creamy and less liquid. Overbeating can dry it out, so watch carefully, and you’ll get perfect consistency every time!
Final Thoughts
This Old Fashioned Stovetop Fudge Recipe holds a special place in my heart—it’s comforting, nostalgic, and surprisingly easy to master. Whether you’re treating yourself or sharing with friends and family, the joy of making fudge from scratch can’t be beat. So grab your saucepan, your candy thermometer, and get ready to create a sweet memory. You’re going to love the way it turns out, I promise!
Print
Old Fashioned Stovetop Fudge Recipe
- Prep Time: 5 minutes
- Cook Time: 7 minutes
- Total Time: 42 minutes
- Yield: 16 servings (1-inch squares)
- Category: Dessert
- Method: Stovetop
- Cuisine: American
Description
This Old Fashioned Stovetop Fudge recipe offers a rich, creamy, and classic chocolate treat made from simple ingredients. Cooked on the stovetop to the perfect soft-ball stage and beaten to a velvety finish, this fudge sets beautifully without the need for complicated tools or baking, creating an indulgent sweet perfect for sharing or gifting.
Ingredients
Fudge Ingredients
- 2 cups granulated sugar
- ¼ cup cocoa powder (Hershey’s recommended)
- ½ teaspoon salt
- ⅔ cup half and half
- 1 tablespoon corn syrup
- 3 tablespoons butter
- 2 teaspoons vanilla extract
Instructions
- Prepare the fudge base: In a 2-quart saucepan, combine granulated sugar, cocoa powder, half and half, salt, and corn syrup. Whisk the ingredients together until smooth and well mixed. Place the pan over medium-low heat and bring the mixture to a gentle boil, stirring occasionally to prevent burning.
- Heat to 240°F: Allow the mixture to cook without stirring until it reaches 240°F, which is the soft-ball stage on a candy thermometer. This temperature ensures the fudge will have the correct setting texture. Once reached, immediately remove the pan from heat to prevent overcooking.
- Add butter and vanilla, then cool: Place the butter and vanilla extract on top of the hot fudge mixture, but do not stir. Let the mixture cool undisturbed for about 20 minutes or until the side of the pan feels warm but not hot to the touch. This resting period helps the fudge to set properly.
- Beat until thickened: Using a hand mixer on medium to low speed, beat the fudge mixture for 1 to 3 minutes. Continue until the mixture begins to thicken and lose its glossy shine, indicating it is ready for pouring.
- Pour and set: Quickly pour or scoop the fudge into a buttered plate or dish. Use a spatula to spread it evenly as needed. Work quickly, as the fudge will start to set once cooled. Allow the fudge to cool for about 20 minutes before cutting into one-inch squares for serving.
Notes
- Use a reliable candy thermometer to accurately monitor the soft-ball stage at 240°F.
- Do not stir the mixture while it is heating to avoid grainy fudge.
- Beating the fudge at the correct time is critical to achieve the perfect creamy texture.
- Butter the dish well to prevent fudge from sticking when setting.
- Store leftovers in an airtight container at room temperature for up to one week.
Nutrition
- Serving Size: 1 piece (approx. 30g)
- Calories: 150 kcal
- Sugar: 25 g
- Sodium: 45 mg
- Fat: 6 g
- Saturated Fat: 3.5 g
- Unsaturated Fat: 2 g
- Trans Fat: 0 g
- Carbohydrates: 27 g
- Fiber: 1 g
- Protein: 1 g
- Cholesterol: 15 mg


