

If you’ve ever wanted to make your own delicious, vibrant treats from scratch, this Homemade Hard Candy Recipe is where you want to start. I absolutely love how this recipe turns out every single time — glossy, perfectly crisp, and bursting with whatever flavor you choose. Plus, making hard candy at home is such a fun experience (and makes your kitchen smell amazing!). Trust me, once you try this, you’ll be hooked.
Why You’ll Love This Recipe
- Simple Ingredients: You only need a handful of pantry staples that come together beautifully.
- Customizable Flavors & Colors: Play with oil flavorings and food colorings to make candies uniquely yours.
- Fun & Rewarding Process: Watching the sugar melt and harden is oddly satisfying and makes a great little kitchen project.
- Great for Gifts & Parties: Homemade hard candy always impresses friends and family, making it perfect for special occasions.

Ingredients You’ll Need
All the ingredients here are ones I always keep stocked because they’re so helpful for candy-making (and other sweet treats). They mix perfectly, with the corn syrup keeping the sugar smooth and preventing crystallization. Let’s go through each one!
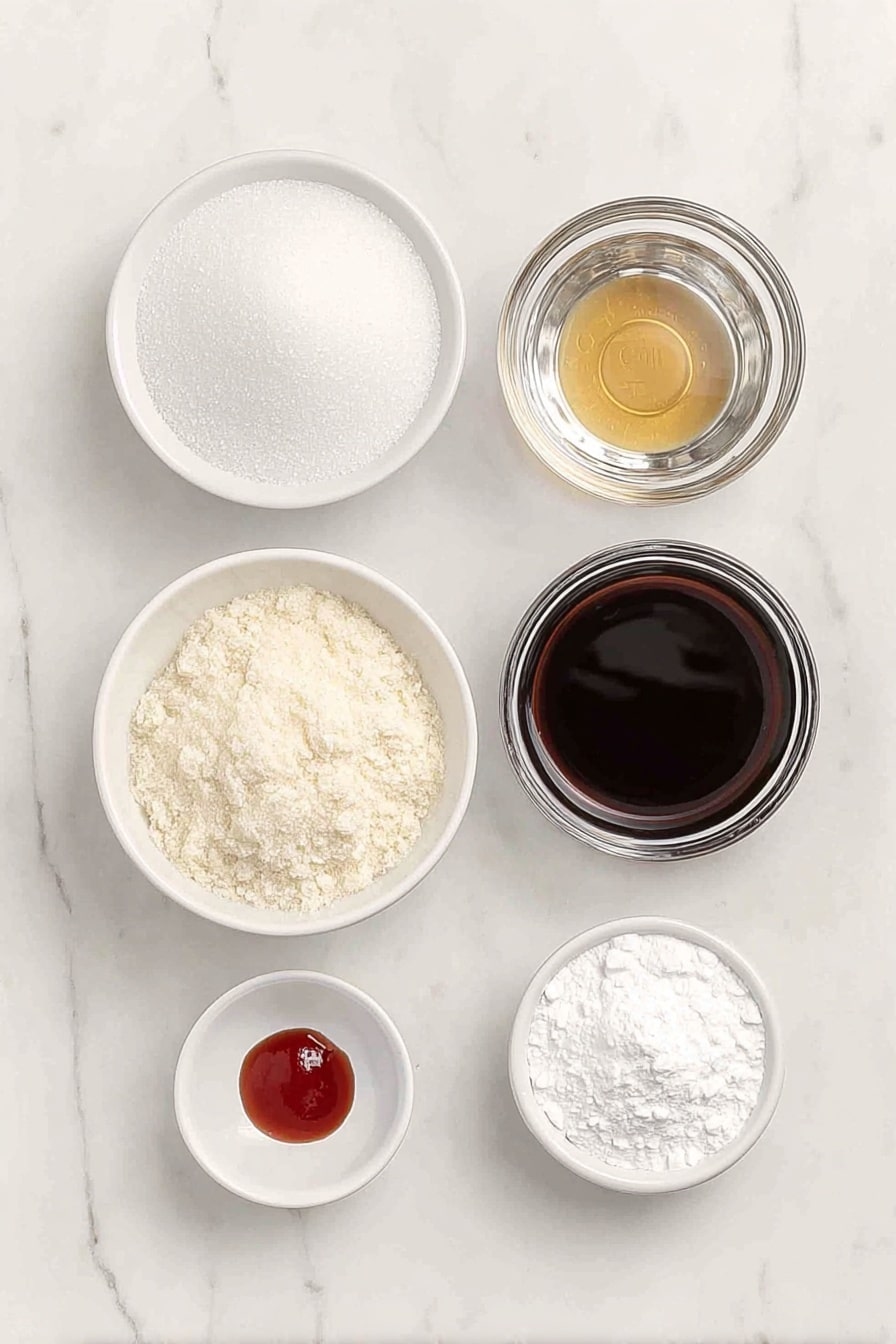
- Granulated white sugar: This is your base, so make sure it’s pure and dry for the best texture.
- Light corn syrup (Karo syrup): Corn syrup stops the sugar from crystallizing and gives your candy that smooth, brilliant finish.
- Water: It dissolves the sugar as it boils, helping you reach that perfect hard crack stage.
- Oil flavoring: I recommend oils over extracts because they pack more punch; just remember, a little goes a long way.
- Food coloring: Choose vibrant colors to make your candies pop—7-10 drops per batch usually works well.
- Powdered sugar (for dusting): This keeps your candy pieces from sticking together once they’re broken up.
Variations
I love to experiment with flavors and colors, and I find that mixing up the oils and food coloring really lets you make this recipe your own. Don’t be shy to try seasonal flavors or even swirl two colors together for a marbled effect.
- Strawberry Oil + Red Food Coloring: This combo is a classic that my family absolutely goes crazy for during summer picnics.
- Lemon Oil + Yellow Food Coloring: I enjoy this zesty option on hot days—it feels so refreshing.
- Orange Oil + Orange Food Coloring: Perfect for Halloween or fall-themed parties; it creates that warm, cozy vibe.
- Spearmint or Wintergreen Oil + Green Food Coloring: My go-to for holiday candies—kids and adults both love the minty freshness.
- Use Candy Molds or Make Lollipops: You can pour the hot candy into molds or sucker sticks for a completely different presentation.
How to Make Homemade Hard Candy Recipe
Step 1: Prep Your Workspace
Line cookie sheets with silicone liners, parchment paper, or aluminum foil, then sprinkle powdered sugar on top to prevent sticking. I find silicone mats especially convenient since they’re reusable and really make clean-up a breeze.
Step 2: Dissolve the Sugar
Combine the granulated sugar, light corn syrup, and water in a medium saucepan. Stir over medium heat until the sugar has completely dissolved. This usually takes a few minutes, and you want to avoid any sugar graininess to get a perfectly smooth candy.
Step 3: Boil to Hard Crack Stage
Attach a candy thermometer to your pan, making sure it doesn’t touch the bottom. Let the mixture cook without stirring until it hits 295°F – this is the “hard crack” sugar stage when your candy will become crisp and brittle. It usually takes 35-45 minutes, so patience is key here.
Step 4: Add Flavor & Color
Remove the pan from the heat. Carefully stir in your oil flavoring and food coloring. I learned the hard way not to lean over the pot here—the steam can be intense! Adding oil flavoring at this moment infuses your candy with that beautiful punch of flavor.
Step 5: Pour & Cool
Pour the hot mixture onto your prepared cookie sheet and let it cool completely. It takes about 30 minutes to harden fully, so this is a great time to clean up your tools and prepare for the fun part.
Step 6: Break & Dust
Once cool, lay parchment or wax paper over the candy and gently tap with a hammer or meat tenderizer to break into bite-sized pieces. Lastly, toss the candy in powdered sugar to keep the pieces from sticking together. And voilà—you’ve got your own homemade hard candy!
Pro Tips for Making Homemade Hard Candy Recipe
- Use a Candy Thermometer: It’s the only way to guarantee you hit exactly 295°F for that perfect hard crack texture.
- Be Patient, Don’t Stir After Boiling: Stirring after the sugar boils can cause crystals to form—trust me, it ruined a batch for me once!
- Handle Flavor Oils with Care: They’re powerful; start with less and add more if needed. And watch out for the steam when adding to hot sugar.
- Break Candy Gently: Use light taps at first to avoid turning your candy into dust, then gradually increase force to get perfect chunks.
How to Serve Homemade Hard Candy Recipe

Garnishes
Personally, I like to dust the candy generously with powdered sugar, not just for practicality but because it adds a lovely snowy look that’s especially cute for gifting. Sometimes, I’ll sprinkle crushed candy canes on green or red-flavored batches around the holidays—it adds a festive crunch and flavor boost.
Side Dishes
While hard candy shines as a sweet on its own, I also love pairing it with a cozy cup of hot tea or coffee. It’s a little sweet finish after a savory meal. Plus, if you’re serving it at parties, little bowls of nuts or dried fruit complement the candy’s flavor beautifully.
Creative Ways to Present
For holidays or birthdays, I’ve wrapped small bags of broken candy pieces in clear cellophane tied with festive ribbon. Using candy molds, you can make custom shapes for guests, which always feels extra special. Another fun idea I tried was layering different colored hard candies in a jar for a colorful countertop display that everyone wanted to dig into!
Make Ahead and Storage
Storing Leftovers
I store leftover hard candy in an airtight container at room temperature, dusted lightly with powdered sugar to keep pieces from sticking. I’ve found that keeping them dry is key because humidity can make the candy sticky or soft over time.
Freezing
I’ve experimented with freezing hard candy, but honestly, it’s usually unnecessary since it keeps so well at room temp. If you do freeze it, make sure to seal it tightly; otherwise, condensation can soften the candy when thawed.
Reheating
If your candy gets a bit sticky or soft, you can warm it very gently in a low oven just for a few minutes, then let it cool again. That said, reheating is rarely needed if you store it properly to begin with!
FAQs
-
Can I use extracts instead of oil flavoring in this homemade hard candy recipe?
Yes, you can substitute extracts for oil flavorings, but keep in mind extracts are much milder. You’ll need to use about three times the amount of extract to get a comparable flavor strength. Also, oils blend better into hot sugar without affecting texture.
-
What does cooking the candy to 295°F mean?
Cooking sugar syrup to 295°F brings it to the ‘hard crack’ stage. This means when cooled, the candy will be brittle and snap easily, exactly how hard candies should be. Using a candy thermometer is essential to get this precise temperature.
-
Can I use molds or make lollipops with this recipe?
Definitely! You can pour the hot candy mixture into silicone candy molds or onto sucker sticks to create customized lollipops. Just be sure to work quickly as the sugar hardens fast when pouring.
-
Why does my homemade hard candy turn cloudy sometimes?
Cloudiness usually happens if sugar crystals form during cooking or if the candy isn’t cooled properly. To avoid this, avoid stirring once boiling starts, make sure ingredients are fully dissolved, and cool the candy on a flat, clean surface.
Final Thoughts
This Homemade Hard Candy Recipe holds a special place in my kitchen repertoire because it’s simple yet so rewarding. The combination of making something from scratch, customizing flavors, and the satisfying crunch of the final product always makes me smile. You’ll enjoy this too—it’s fun, nostalgic, and a perfect sweet treat to share with those you love. Give it a try and let me know what flavors you come up with!
Print
Homemade Hard Candy Recipe
- Prep Time: 10 minutes
- Cook Time: 45 minutes
- Total Time: 1 hour 15 minutes
- Yield: Approximately 20 servings
- Category: Candy
- Method: Stovetop
- Cuisine: American
Description
This recipe guides you through making classic homemade hard candy using simple ingredients like sugar, corn syrup, and water, enhanced with flavorful oils and vibrant food coloring. Perfect for candy lovers wanting a nostalgic, colorful treat, it involves heating the mixture to the hard crack stage, cooling, and breaking into bite-sized pieces.
Ingredients
Primary Ingredients
- 3 ¾ cups granulated white sugar
- 1 ⅓ cups light corn syrup (Karo syrup)
- 1 cup water
Flavoring & Finishing
- 1 teaspoon oil flavoring (varies by choice)
- 7-10 drops food coloring (adjust as needed for desired color)
- Powdered sugar for dusting
Instructions
- Prepare the Baking Surface: Line cookie sheets, preferably those with a lip, using silicone liners, parchment paper, or aluminum foil. Lightly sprinkle with powdered sugar and set aside to prevent sticking.
- Dissolve Sugar Mixture: In a saucepan, combine granulated sugar, light corn syrup, and water. Stir continuously over medium heat until the sugar is fully dissolved, creating a clear syrup.
- Cook to Hard Crack Stage: Attach a candy thermometer about an inch from the bottom of the pan. Continue cooking without stirring until the temperature reaches 295°F (hard crack stage), which typically takes 35-45 minutes.
- Add Flavor and Color: Remove the pan from heat and quickly stir in the oil flavoring and food coloring, adjusting drops to achieve the desired shade. Be cautious of the strong steam during this step.
- Pour and Cool: Immediately pour the hot syrup onto the prepared cookie sheets. Allow the candy to cool completely, approximately 30 minutes, until it hardens thoroughly.
- Break Into Pieces: Once cooled, cover the candy with parchment or wax paper and gently break it into pieces using a hammer, meat tenderizer, or mallet.
- Coat and Store: Toss the candy pieces with powdered sugar to prevent sticking. Repeat this process for each flavor or color variant you desire.
Notes
- One batch fills one cookie sheet and can be broken into any size pieces.
- Oil flavorings are more potent than extracts; use cautiously.
- When adding oils, avoid leaning over the pot as the steam can be very strong.
- Optional to use candy molds or lollipop sticks with this recipe.
- You can use up to 1 teaspoon of oil flavor per batch depending on flavor strength; extracts require about 1 tablespoon as they are milder.
- Flavor combinations include: Strawberry oil with red food coloring, Lemon oil with yellow coloring, Orange oil with orange coloring, and Spearmint or Wintergreen oil with green coloring.
Nutrition
- Serving Size: 1 piece (approx. 10g)
- Calories: 45
- Sugar: 11g
- Sodium: 0mg
- Fat: 0g
- Saturated Fat: 0g
- Unsaturated Fat: 0g
- Trans Fat: 0g
- Carbohydrates: 12g
- Fiber: 0g
- Protein: 0g
- Cholesterol: 0mg

Your email address will not be published. Required fields are marked *