
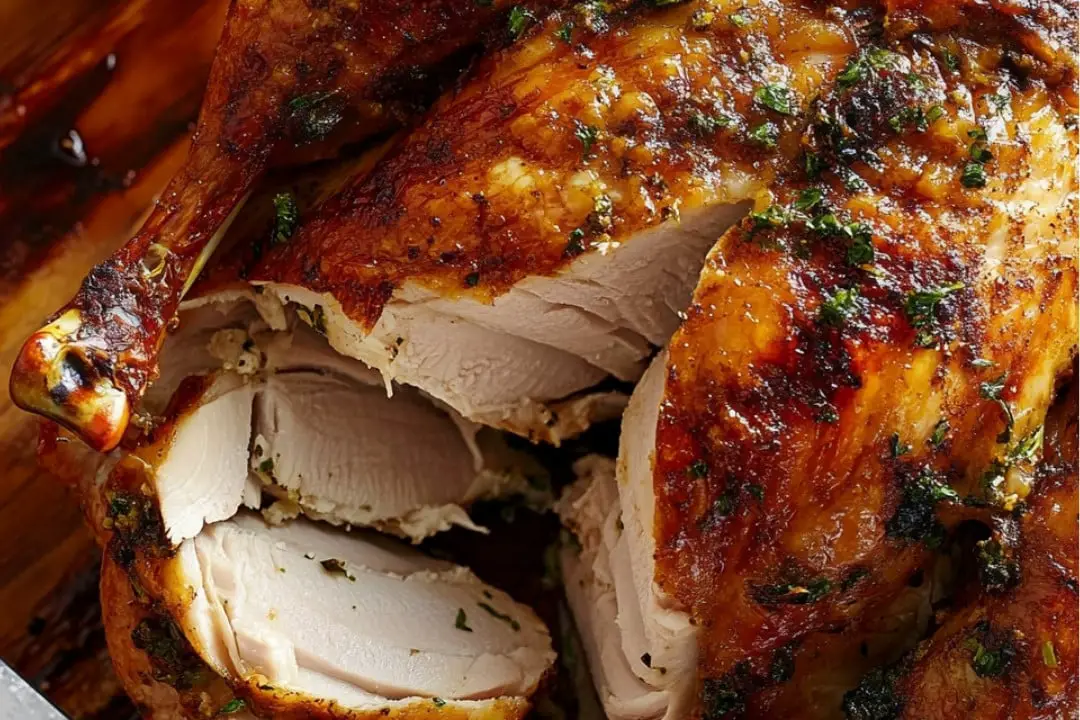
This incredible Air Fryer Whole Chicken delivers the perfect combination of juicy meat and crispy skin without heating up your entire kitchen. The herb-infused garlic butter tucked under the skin ensures maximum flavor in every bite, while the air fryer works its magic to create that coveted golden-brown exterior. Ready in just over an hour with minimal hands-on time, this recipe transforms a humble chicken into a show-stopping meal that’s perfect for busy weeknights or casual entertaining.
Why You’ll Love This Recipe
- Incredibly Juicy Interior: The garlic herb butter melts slowly under the skin, basting the meat from within as it cooks, resulting in the juiciest chicken you’ve ever tasted.
- Perfectly Crispy Skin: The air fryer circulates hot air around the entire chicken, creating a beautifully golden, crispy skin that’s impossible to achieve in a regular oven.
- Weeknight Friendly: While a traditional roast chicken can take hours, this method cuts the cooking time significantly without sacrificing flavor or texture.
- No Special Skills Required: If you can mix butter with herbs and operate an air fryer, you can make this impressive dish that looks and tastes like it came from a professional kitchen.
Ingredients You’ll Need
- Whole Chicken: The star of the show! Look for a chicken around 4 pounds to ensure it fits in your air fryer basket. Always go for the highest quality you can afford – the better the chicken, the better the final dish.
- Unsalted Butter: Forms the base of our flavor-packed compound butter. Using unsalted allows you to control the salt content in the final dish.
- Garlic: Infuses the butter with aromatic flavor that permeates the meat during cooking. Fresh is absolutely essential here!
- Fresh Herbs: Parsley and dill add brightness and depth. Feel free to experiment with different herb combinations based on what you have on hand.
- Olive Oil: Helps the skin crisp up beautifully and gives the seasonings something to adhere to.
- Paprika: Adds a gorgeous color and subtle smoky flavor to the skin.
- Salt and Pepper: The most essential seasonings that enhance all the other flavors in the dish.
Variations
Flavor Profiles
- Lemon Herb: Add lemon zest to the butter mixture and place lemon quarters in the cavity for a bright, citrusy version.
- Southwestern: Swap the herb mixture for a blend of chili powder, cumin, and oregano for a Mexican-inspired twist.
- Mediterranean: Use rosemary, oregano, and thyme with a splash of lemon juice for a Greek-inspired chicken.

Ingredient Swaps
- No Fresh Herbs? Use dried herbs at a ratio of 1 teaspoon dried for each tablespoon of fresh.
- Butter Alternatives: Dairy-free butter works well for those with lactose issues.
- Spice Adjustments: Add cayenne pepper or red pepper flakes for heat lovers.
How to Make Air Fryer Whole Chicken
Step 1: Prepare the Chicken
Thoroughly pat the chicken dry with paper towels. This crucial step ensures crispy skin, as moisture is the enemy of crispiness. Take your time here – a dry chicken makes all the difference.
Step 2: Make the Garlic Butter
In a small bowl, mash the softened butter with a fork until smooth. Add the crushed garlic, fresh parsley, dill, and sea salt. Mash again until all ingredients are well incorporated into a fragrant compound butter.
Step 3: Season the Chicken
Carefully run your fingers between the skin and meat of the chicken, creating pockets over the breast and legs without tearing the skin. Slide dollops of the garlic butter into these pockets, then gently press the skin to distribute the butter evenly underneath. Don’t forget to place some butter inside the cavity as well.
Step 4: Apply the External Seasonings
Drizzle olive oil over the entire chicken and use a brush to ensure even coverage. Sprinkle sea salt, paprika, and black pepper over both sides of the chicken, creating a flavorful crust.
Step 5: First Air Frying Session
Place the chicken breast-side down in your air fryer basket. Cook at 350°F (176°C) for 30 minutes, allowing the dark meat to get a head start on cooking.
Step 6: Flip and Finish Cooking
Carefully flip the chicken to breast-side up and tie the legs together if desired for a more traditional presentation. Continue air frying for another 25-35 minutes until a thermometer inserted into the thickest part of the breast reads 160°F (71°C).
Step 7: Rest Before Carving
Remove the chicken from the air fryer and let it rest for 10-15 minutes. This critical step allows the juices to redistribute throughout the meat, ensuring moistness in every bite.
Pro Tips for Making the Recipe
- Bring to Room Temperature: Let your chicken sit out for 30 minutes before cooking for more even cooking results.
- Invest in a Probe Thermometer: Temperature is everything with chicken – too low is unsafe, too high means dry meat. A good probe thermometer takes the guesswork out.
- Space Matters: Make sure your chicken isn’t crowded in the air fryer basket. Proper air circulation is key to even cooking and crispy skin.
- Check Your Manual: Air fryer models vary, so consult your specific model’s manual for any adjustments to temperature or timing.
- Season Under the Skin: Placing seasonings directly under the skin ensures flavor penetrates the meat, not just the exterior.
How to Serve
Perfect Pairings
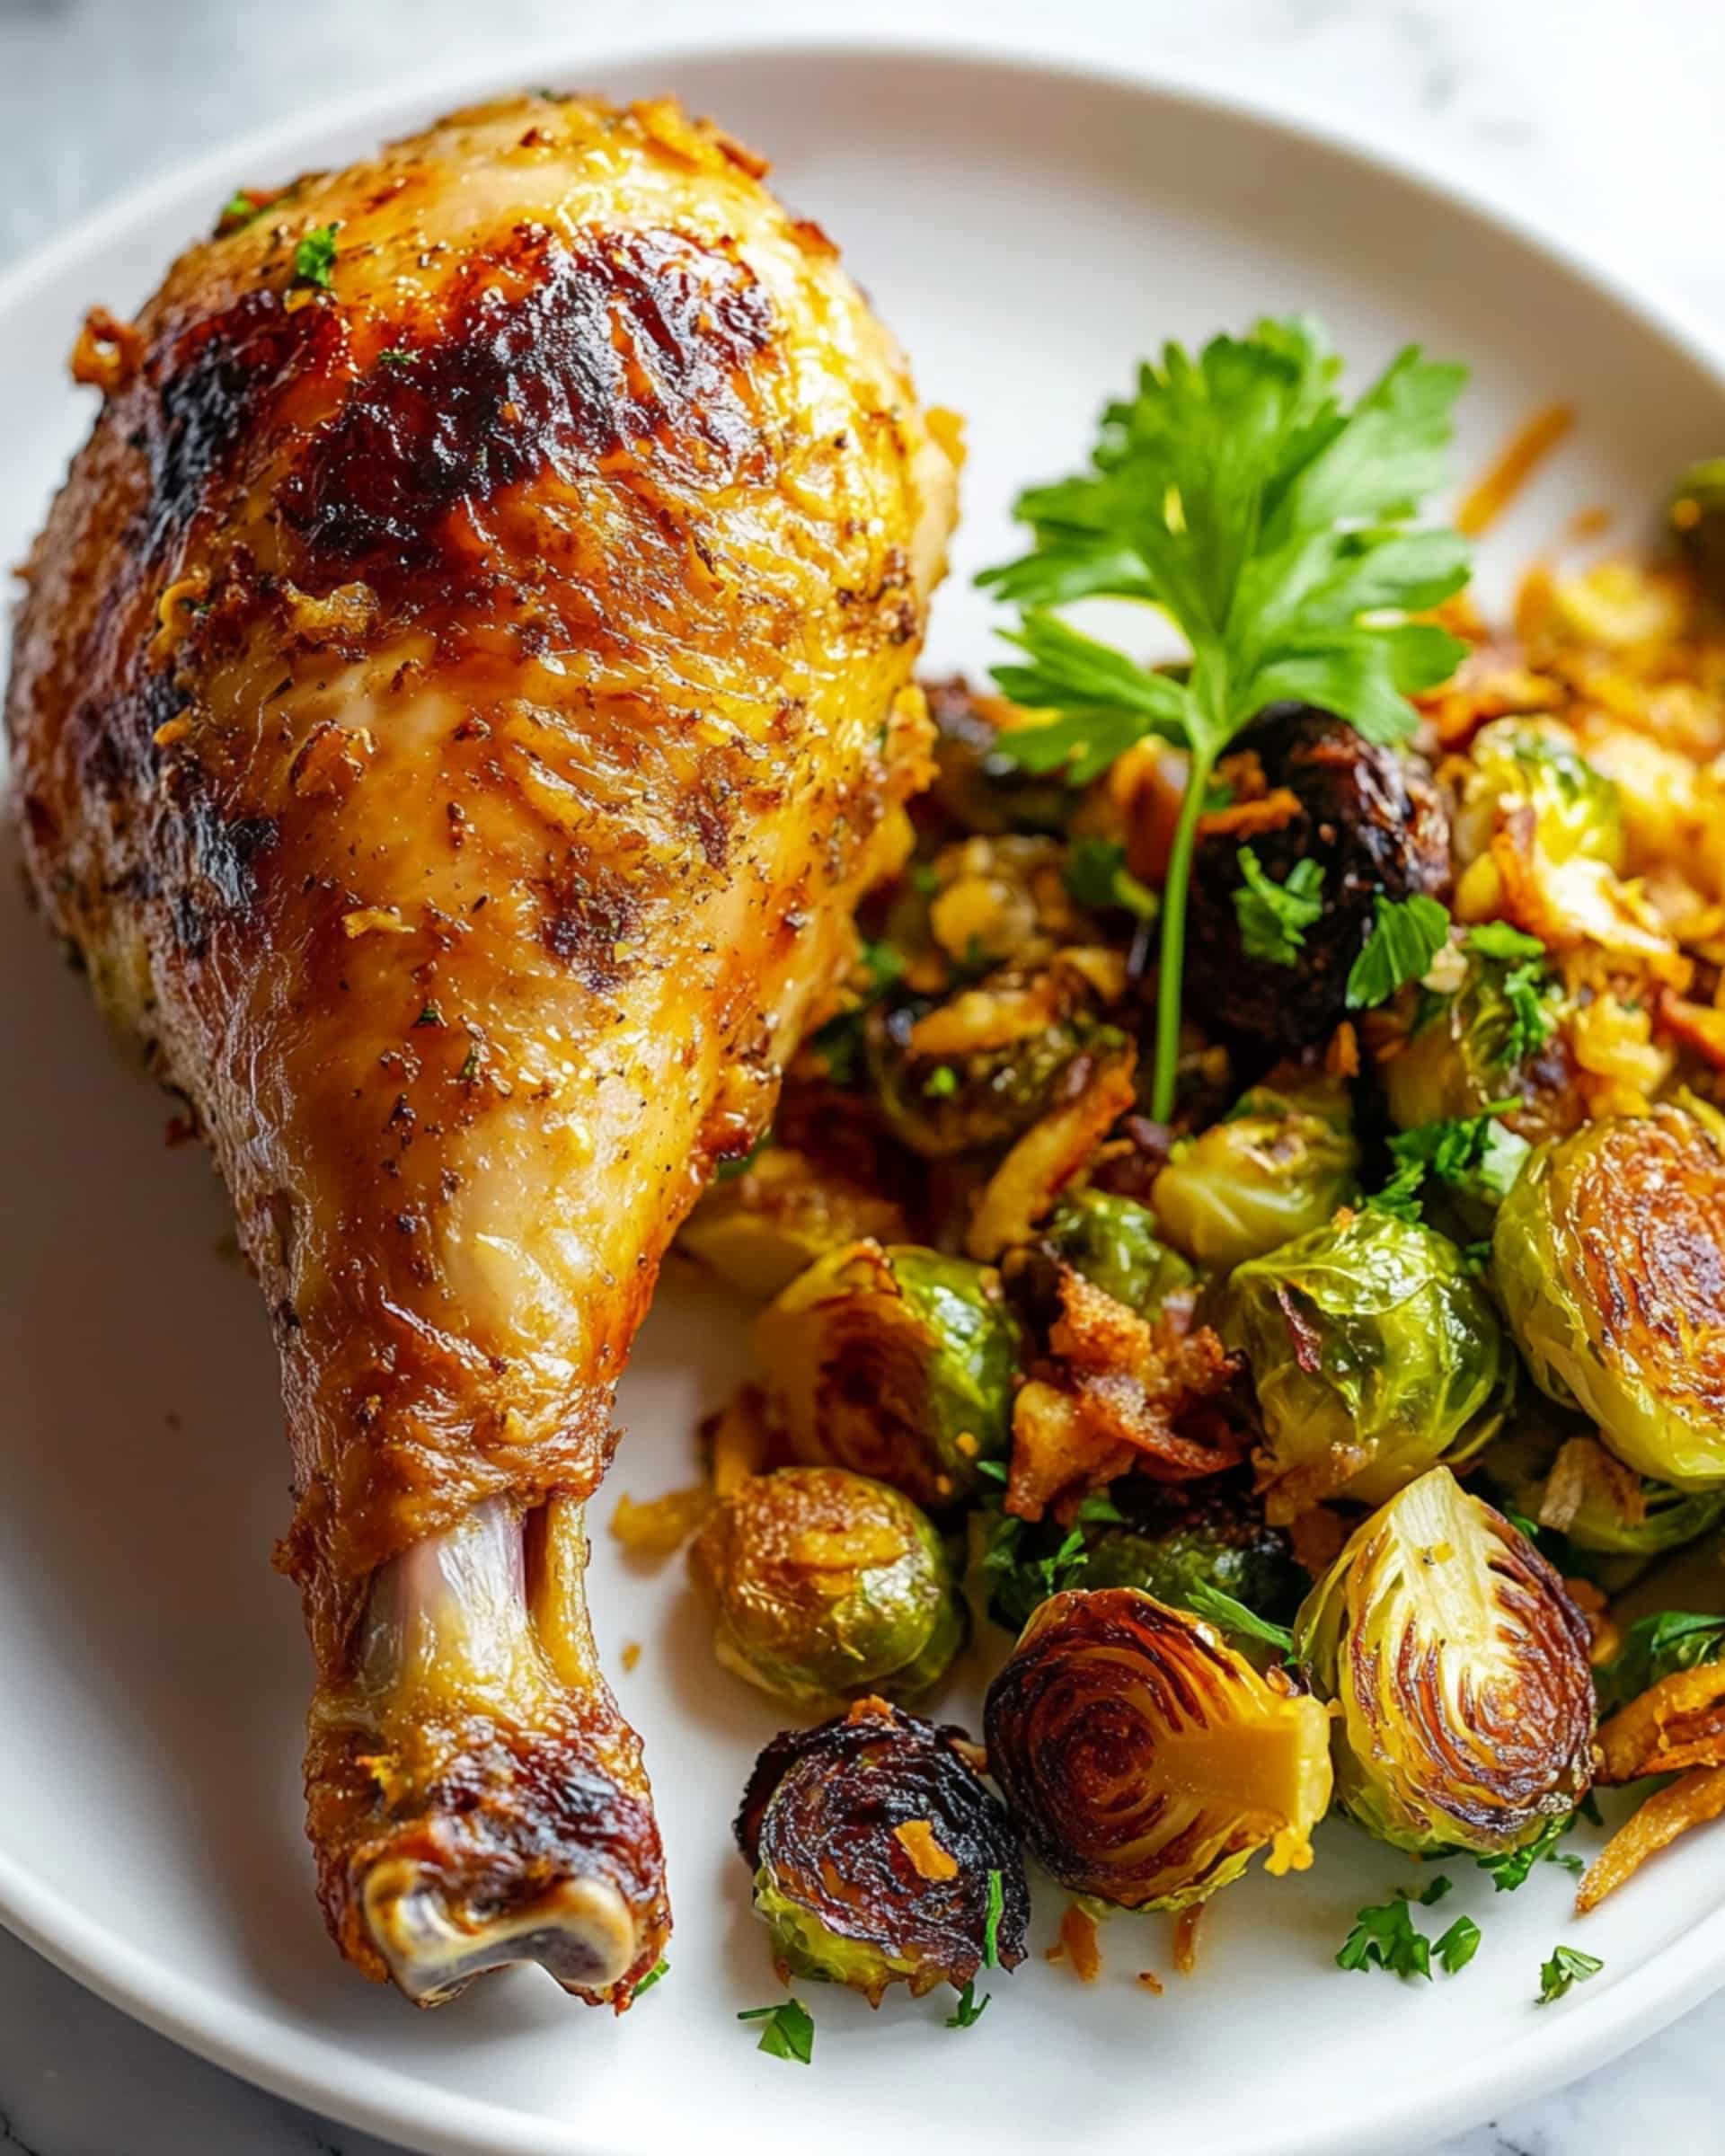
Serve this succulent chicken with simple sides that complement without competing. Roasted potatoes, a crisp green salad, or steamed vegetables make ideal companions.
Sauce Suggestions
While this chicken is flavorful enough to stand alone, a simple pan sauce made from the drippings collected at the bottom of the air fryer can elevate it further. Mix with a splash of white wine and simmer briefly.
Presentation
For a restaurant-worthy presentation, place the whole chicken on a platter surrounded by fresh herbs and lemon wedges before carving at the table.
Make Ahead and Storage
Storing Leftovers
Store carved leftover chicken in an airtight container in the refrigerator for up to 3 days. The flavor actually improves overnight as the herbs and garlic continue to infuse the meat.
Freezing
Freeze leftover chicken in portioned containers for up to 3 months. For best results, freeze with some of the juices to maintain moisture when reheating.
Reheating
For crispy skin, reheat chicken pieces in the air fryer at 350°F for 3-5 minutes. For a quicker option, microwave at 70% power with a damp paper towel over the chicken to maintain moisture.
FAQs
Can I use a larger chicken for this recipe?
If your chicken is larger than 4 pounds, you’ll need to adjust the cooking time accordingly. Add approximately 7-8 minutes of cooking time per additional pound. Also, ensure your air fryer can accommodate the larger size – the chicken shouldn’t touch the heating element or be squeezed into the basket.
Why isn’t my chicken skin getting crispy?
Two main culprits prevent crispy skin: moisture and temperature. Make sure to thoroughly pat the chicken dry before seasoning, and don’t overcrowd your air fryer basket. If your chicken is too close to the top of the fryer, try removing the rack to lower it away from the heating element.
Can I prepare the garlic herb butter in advance?
Absolutely! The compound butter can be made up to 3 days ahead and stored in the refrigerator. Just bring it to room temperature before using so it’s soft enough to spread under the chicken skin. You can even freeze extra portions of the butter for future use.
Is it safe to cook a whole chicken in an air fryer?
Yes, it’s completely safe as long as you ensure the chicken reaches the proper internal temperature of 165°F (74°C). Always use a reliable meat thermometer to check the temperature at the thickest part of the breast and the innermost part of the thigh.
Final Thoughts
This Air Fryer Whole Chicken recipe transforms an everyday protein into a memorable meal with minimal effort. The combination of crispy, seasoned skin and juicy, herb-infused meat delivers restaurant-quality results right in your kitchen. Whether you’re cooking for a weeknight family dinner or weekend gathering, this versatile recipe is sure to become a regular in your meal rotation. Give it a try – your taste buds (and your schedule) will thank you!
Print
Air Fryer Whole Chicken Recipe
- Prep Time: 10 minutes
- Cook Time: 1 hour
- Total Time: 1 hour 10 minutes
- Yield: 4 servings
- Category: Main-course
- Method: Air Frying
- Diet: Gluten Free
Description
A simple and delicious air fryer recipe for whole chicken, seasoned with herbs and garlic butter to achieve a juicy, flavorful dish with crispy skin.
Ingredients
Chicken:
-
- 4 lb Whole chicken
Garlic butter:
-
- 6 tbsp Unsalted Butter (softened)
- 3 cloves Garlic (crushed)
- 1 tbsp Fresh parsley
- 1 tbsp Fresh dill
- 1/4 tsp Sea salt
Seasoning:
- 2 tbsp Olive oil
- 1/2 tsp Sea salt
- 1 tsp Paprika
- 1/2 tsp Black pepper
Instructions
- Pat the chicken dry: Use paper towels to thoroughly pat the chicken dry to prepare it for seasoning.
- Prepare garlic butter: In a small bowl, mash the softened butter with a fork. Add crushed garlic, parsley, dill, and sea salt, and mash again until well combined. Set the butter mixture aside.
- Add garlic butter under the skin: Gently run your hands under the chicken skin on the breast and legs to separate it from the meat underneath. Place dollops of the prepared garlic butter under the skin, spreading it evenly by pressing over the skin. Spread a small amount of butter inside the cavity of the chicken as well.
- Season the chicken: Drizzle olive oil over the skin of the chicken on both sides. Use a brush if needed to evenly coat. Sprinkle with sea salt, paprika, and black pepper, ensuring both sides are well seasoned.
- Cook breast side down: Place the chicken breast side down in the air fryer basket. Cook for 30 minutes at 350°F (176°C).
- Flip and finish cooking: Flip the chicken over for even cooking and optionally tie the legs together. Air fry for an additional 25-35 minutes, or until a thermometer inserted into the thickest part of the breast reads 160°F (71°C). Note that the temperature will rise about 5°F while resting.
- Rest and carve: Remove the chicken from the air fryer and let it rest for 10-15 minutes to retain juices before carving and serving.
Notes
- If desired, tie the chicken legs for a neater presentation.
- Use a probe thermometer to measure the internal temperature for perfectly cooked chicken.
- Letting the chicken rest before carving helps retain juiciness.
Nutrition
- Serving Size: 1 serving

Your email address will not be published. Required fields are marked *