
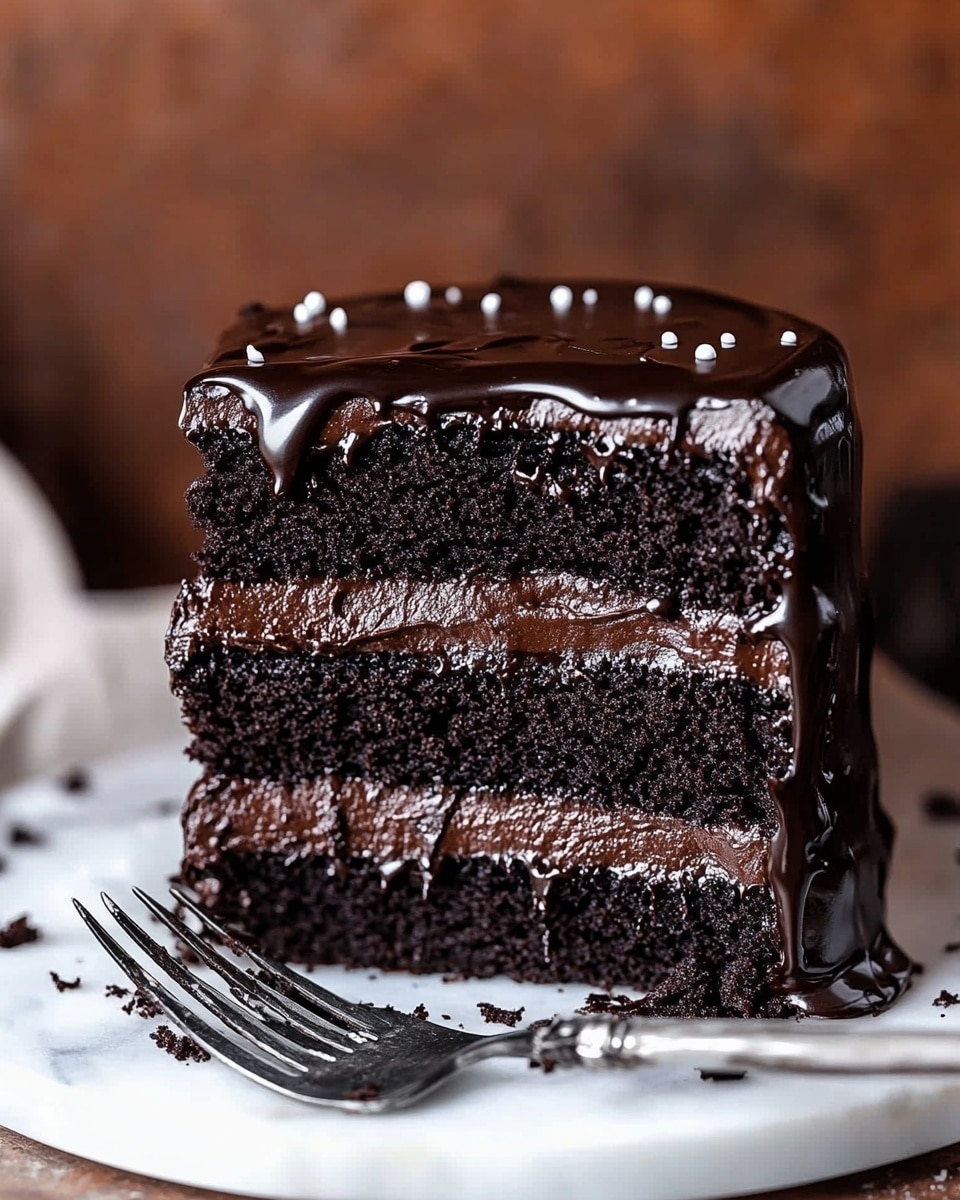
I absolutely love this Black Velvet Cake Recipe because it’s a showstopper every time I bring it out. The deep, dark cocoa layers paired with a luscious, creamy frosting make it feel like a luxurious treat, but it’s actually pretty straightforward to pull off. Whether you’re baking for a birthday, a special occasion, or just because you deserve a slice of something truly decadent, this cake won’t disappoint.
When I first tried this recipe, I was amazed by how the black cocoa powder really takes the flavor to a whole new level—you get that intense chocolate kick without it being overly sweet. Plus, the frosting is so rich and smooth, it’s like the perfect cozy hug for the cake layers. You’ll find that making the black velvet cake from scratch is totally worth the effort; it’s moist, tender, and ridiculously delicious.
Why You’ll Love This Recipe
- Rich, Deep Flavor: Thanks to black cocoa powder, this cake offers an intense chocolate taste that’s not too sweet.
- Moist & Tender Texture: The combination of buttermilk and oil keeps the cake incredibly soft and moist.
- Decadent Frosting: The silky chocolate ganache frosting perfectly complements the cake layers without overpowering them.
- Impressive Yet Manageable: It looks fancy but comes together with easy-to-follow steps that anyone can master.

Ingredients You’ll Need
Each ingredient in this Black Velvet Cake Recipe plays a special role, balancing flavor and texture. I always suggest using quality cocoa powders and fresh buttermilk for the best results, and don’t skip the hot coffee—it really deepens the chocolate notes.
- Unsalted butter: Using unsalted gives you control over the salt level and ensures a clean, creamy base for the frosting.
- Fine sea salt: Enhances the chocolate flavor and balances out the sweetness.
- Heavy whipping cream: Adds richness and smoothness to the frosting for that melt-in-your-mouth feel.
- Granulated sugar: Sweetens both the cake and frosting evenly without weighing down the batter.
- Semi-sweet chocolate chips: Melted into the frosting, they add an extra layer of chocolate richness.
- Dutch-processed cocoa powder: Provides a milder chocolate flavor and great color for the cake and frosting.
- Black cocoa powder: The secret to the cake’s signature dark color and intense, bold cocoa taste.
- Vanilla extract: Rounds out the flavor and adds warmth to both cake and frosting.
- All-purpose flour: Make sure to measure carefully for light, fluffy layers.
- Baking soda: Works alongside the buttermilk for nice rise and tenderness.
- Canola oil: Keeps the cake moist without adding extra flavor.
- Buttermilk: Adds tanginess and tender crumb; room temperature is key to even mixing.
- Large eggs: Provide structure and richness; using room temperature eggs ensures smooth batter.
- Hot coffee: Really brings out the chocolate flavor; you can substitute hot water if preferred.
Variations
I love tinker with this Black Velvet Cake Recipe depending on the occasion or my mood. It’s surprisingly versatile, so don’t hesitate to make it your own—especially if you’re catering to dietary needs or want to add a seasonal twist.
- Gluten-Free Version: Swap the all-purpose flour with a high-quality gluten-free blend; I tested this with great results and the cake still stays moist and tender.
- Mocha Twist: Add a teaspoon of instant espresso powder to the batter along with the coffee for an extra caffeine kick that my family adores.
- Dairy-Free Adaptation: Use coconut cream in the frosting and almond milk in place of buttermilk (with a splash of lemon juice) for a luscious vegan-friendly option.
- Seasonal Spice: Mix in a pinch of cinnamon or chili powder to the cocoa for a subtly warmed, festive flavor perfect for fall.
How to Make Black Velvet Cake Recipe
Step 1: Make the Magic Frosting
Start by melting the butter and salt together in a pot over medium heat. Once melted, whisk in the heavy cream and sugar, stirring occasionally until the mixture is almost boiling—this takes about 7-8 minutes, so patience is key here. I discovered that whisking gently but constantly helps prevent scorching and keeps the texture silky smooth. Stir in the semi-sweet chocolate chips until completely melted, then stream this warm chocolate blend into your sifted cocoa powders in a stand mixer bowl. Mixing it until smooth and lump-free can take a few minutes—scrape down the sides to make sure it’s perfectly combined, then add vanilla extract. Transfer the frosting to a container and pop it in the fridge for at least 4-6 hours or overnight. Trust me, this waiting step is worth it—the frosting firms up beautifully and the flavors meld perfectly.
Step 2: Prep Your Cake Pans & Oven
While the frosting chills, line three 6-inch cake pans with parchment paper rounds on the bottoms—you don’t want your gorgeous cake sticking later. Preheat your oven to 350°F (180°C) so it’s ready when you are. I like using a kitchen scale here to divide the batter evenly; it ensures all three layers bake perfectly uniform and stack up nicely.
Step 3: Whisk Dry & Wet Ingredients Separately
In one bowl, whisk together your flour, baking soda, and salt until combined and aerated. In a large bowl, whisk the oil and sugar together until smooth, then add the buttermilk, eggs, and vanilla extract. Once the wet ingredients are smooth, fold in the dry ingredients carefully. You’ll want to mix until just smooth here—overmixing can make the cake tough, so stop as soon as it’s blended.
Step 4: Add the Chocolate Coffee Mixture
Mix your hot coffee (or hot water substitute) with the black cocoa powder until lump-free, then whisk this into your cake batter gently. This step really enhances the cake’s depth of flavor and keeps it moist. Pour the batter evenly into your prepared pans—aim for about 395 grams per pan if you’re using a scale, which helps them bake consistently.
Step 5: Bake and Cool
Bake for 25 to 35 minutes, but start checking at 25 minutes. When a toothpick inserted in the center comes out with just a few moist crumbs, it’s done. Don’t overbake—this cake shines when it’s moist. Let the pans cool on a wire rack, then gently run an offset spatula around the edges and flip the cakes out onto the rack to cool completely.
Step 6: Assemble & Frost Your Cake
Bring your frosting to room temperature for about an hour before you start. Give it a quick paddle mix for 30-60 seconds to loosen it up—you don’t want to overmix or it’ll lighten and lose that rich dark color. Starting with your first cake layer on the board, pipe or spread an even layer of frosting on top. Stack and repeat with all three layers, flipping the final layer upside down for a smooth top. Chill the cake for 30-60 minutes so the frosting firms up, then use the remaining frosting to cover the top and sides with swoops for some gorgeous texture. This is my favorite part—it makes the cake look bakery-level pretty.
Pro Tips for Making Black Velvet Cake Recipe
- Use a Kitchen Scale: This was a game-changer for me to evenly portion batter and bake consistent layers every time.
- Don’t Overmix Your Batter: Mixing just until combined keeps the crumb tender and light.
- Chill Frosting Overnight: It develops a better texture and richer flavor when it rests in the fridge.
- Use Fresh Ingredients: Fresh eggs and buttermilk really make a difference in taste and texture.
How to Serve Black Velvet Cake Recipe
Garnishes
I keep garnishes simple to let this rich black velvet cake shine—powdered sugar dusting or a few fresh berries on top adds a lovely touch. Sometimes I sprinkle some toasted cocoa nibs or dark chocolate shavings for subtle crunch and extra chocolate love. You’ll enjoy how these small additions bring freshness and visual interest without overshadowing the frosting’s silky texture.
Side Dishes
I like serving slices with a dollop of lightly sweetened whipped cream or a scoop of vanilla bean ice cream for contrast. A cup of freshly brewed coffee or a creamy latte pairs beautifully to balance the cake’s bold flavors. For a special gathering, fresh fruit salad with citrus elements can brighten each bite.
Creative Ways to Present
For birthdays or celebrations, I’ve piped rosettes along the edges using the same frosting and added edible gold leaf for a touch of glam. Another fun way is to slice the cake and layer pieces in elegant dessert glasses for mini trifle-style servings. If you want a dramatic effect, serve it alongside a drizzle of raspberry coulis—a pop of color that’s as tasty as it is beautiful.
Make Ahead and Storage
Storing Leftovers
I store leftover slices in an airtight container in the fridge, where they stay delicious for 4-5 days. I learned that wrapping individual slices tightly in plastic wrap before placing them in an airtight container really helps keep the moisture locked in and prevents them from absorbing other fridge smells.
Freezing
When freezing, I wrap each slice tightly in plastic wrap and place them in a freezer-safe airtight container. You can freeze the cake for up to one month without a noticeable loss in flavor or texture. This saved me from last-minute baking, especially when unexpected guests popped by!
Reheating
To enjoy frozen slices, I thaw them overnight in the fridge. I avoid microwaving because the frosting can get messy, but if you’re in a hurry, a gentle 10-15 second zap at low power works—just be careful not to melt the frosting completely. Letting the cake come to room temperature naturally always yields the best texture and flavor.
FAQs
-
What makes a Black Velvet Cake different from a traditional chocolate cake?
The key difference is the use of black cocoa powder, which is much darker and less sweet than regular cocoa powder. This gives the Black Velvet Cake its signature deep, almost black color and a bolder chocolate flavor. The recipe also typically includes a rich chocolate ganache frosting that enhances the decadence.
-
Can I substitute coffee for hot water in this Black Velvet Cake Recipe?
Yes, absolutely! While hot coffee intensifies the chocolate flavor, hot water can be used as a substitute if you prefer to avoid caffeine. The cake will still be delicious but may have a slightly milder chocolate depth.
-
How do I prevent my cake from drying out?
Measuring the flour correctly is essential—too much flour can dry out the cake. Also, don’t overbake; start checking with a toothpick at the minimum baking time. Including oil and buttermilk in the batter helps keep it moist and tender.
-
Can I make this cake in larger pans?
Yes! For an 8-inch cake, adjust the baking soda and add baking powder as the recipe suggests. Also, reduce the oven temperature slightly and watch closely for shorter baking times. Using larger pans results in thinner layers, so keep an eye on doneness.
-
How long should I chill the frosting before assembling the cake?
Chill the frosting for at least 4-6 hours or preferably overnight. This helps it firm up, making it easier to frost the cake and giving the frosting a wonderful, smooth texture.
Final Thoughts
Honestly, this Black Velvet Cake Recipe has earned a permanent spot in my baking rotation because it feels special without being intimidating. I love sharing it with friends and family who always ask for the recipe afterward. If you want a dessert that says “wow” with every bite and brings everyone to the table, you’ll really enjoy making this one. It’s like a little piece of chocolate heaven you can whip up at home!
Print
Black Velvet Cake Recipe
- Prep Time: 5 hours
- Cook Time: 28 minutes
- Total Time: 5 hours 28 minutes
- Yield: 10 servings
- Category: Dessert
- Method: Baking
- Cuisine: American
Description
This Black Velvet Cake recipe combines rich black cocoa powder with a decadent chocolate ganache frosting to create a moist, deeply chocolatey dessert perfect for any special occasion. The cake layers are tender and balanced by the creamy frosting, making it a show-stopping treat that’s both elegant and irresistible.
Ingredients
Frosting Ingredients
- 6 tablespoons unsalted butter
- 3/4 teaspoon fine sea salt
- 1 2/3 cups + 1/4 cup heavy whipping cream
- 1 1/2 cups granulated sugar
- 2/3 cup + 1 tablespoon semi-sweet chocolate chips
- 1 cup Dutch-processed cocoa powder, sifted
- 3/4 cup black cocoa powder, sifted
- 1 teaspoon vanilla extract
Cake Ingredients
- 1 3/4 cup all-purpose flour
- 1 teaspoon baking soda
- 1 teaspoon fine sea salt
- 2 cups granulated sugar
- 1/2 cup canola oil
- 1 cup buttermilk, room temperature
- 2 large eggs, room temperature
- 1 teaspoon vanilla extract
- 2/3 cup hot coffee (or substitute hot water)
- 3/4 cup black cocoa powder
Instructions
- Prepare the Frosting: In a pot, melt the butter and sea salt together. Once fully melted, whisk in the heavy cream and sugar, stirring occasionally until the mixture is nearly boiling, about 7-8 minutes. Remove from heat and stir in the semi-sweet chocolate chips until completely melted and smooth.
- Combine Cocoa Powders with Chocolate Mixture: Place the sifted Dutch-processed and black cocoa powders into a stand mixing bowl. Slowly stream the hot chocolate mixture into the bowl, mixing until just combined. Scrape down the sides and mix for an additional 2-3 minutes until the frosting is smooth and lump-free. Stir in vanilla extract. Transfer the frosting to a container and refrigerate for at least 4-6 hours or overnight to set.
- Prepare Cake Pans and Oven: Line three 6-inch cake pans with parchment paper rounds on the bottoms. Preheat the oven to 350°F (180°C).
- Mix Dry Ingredients: In a bowl, whisk together the all-purpose flour, baking soda, and salt until well combined. Set aside.
- Mix Wet Ingredients: In a large bowl, whisk the canola oil and granulated sugar together. Add the buttermilk, eggs, and vanilla extract and whisk until smooth.
- Combine Dry and Wet Ingredients: Slowly whisk the dry flour mixture into the wet ingredients until the batter is smooth and lump-free.
- Add Cocoa and Coffee: In a separate small bowl, mix the black cocoa powder with the hot coffee or hot water until lump-free. Gently whisk this mixture into the cake batter until just combined, being careful not to overmix.
- Distribute Batter and Bake: Evenly divide the batter among the prepared cake pans, ideally weighing each to contain 395 grams for uniform layers. Bake for 25-35 minutes or until a toothpick inserted in the center comes out with a few moist crumbs attached.
- Cool Cakes: Let the pans cool on a wire rack. Then run an offset spatula around the edges and invert the cakes out onto the rack to cool completely.
- Prepare Frosting for Assembly: Before assembling the cake, remove the frosting from the fridge and bring to room temperature, about 1 hour. Paddle-mix the ganache in a bowl for 30-60 seconds to loosen without overmixing to avoid lightening the color.
- Assemble the Cake: Place the first cake layer on your serving board. Pipe or spread an even layer of frosting on top. Repeat layering cake and frosting, ending with the last cake layer placed upside down. Chill the assembled cake in the refrigerator for 30-60 minutes until the frosting firms up.
- Finish Decorating: Use the remaining frosting to cover the top and sides of the cake. Use the back of a spoon to create swoops and texture in the frosting. Decorate as desired and serve.
- Storage: Store leftover cake slices in an airtight container in the refrigerator for 4-5 days. For longer storage, wrap individual slices tightly in plastic wrap, place in an airtight container, and freeze for up to 1 month.
Notes
- For an 8-inch cake: reduce baking soda to 1/2 teaspoon and add 1 1/2 teaspoons baking powder. Pour batter into three 8-inch pans and bake at 325°F (165°C) for about 18-20 minutes.
- Measure flour properly using the spoon-level method or preferably a kitchen scale to avoid dense cakes from over-measuring flour.

Your email address will not be published. Required fields are marked *