
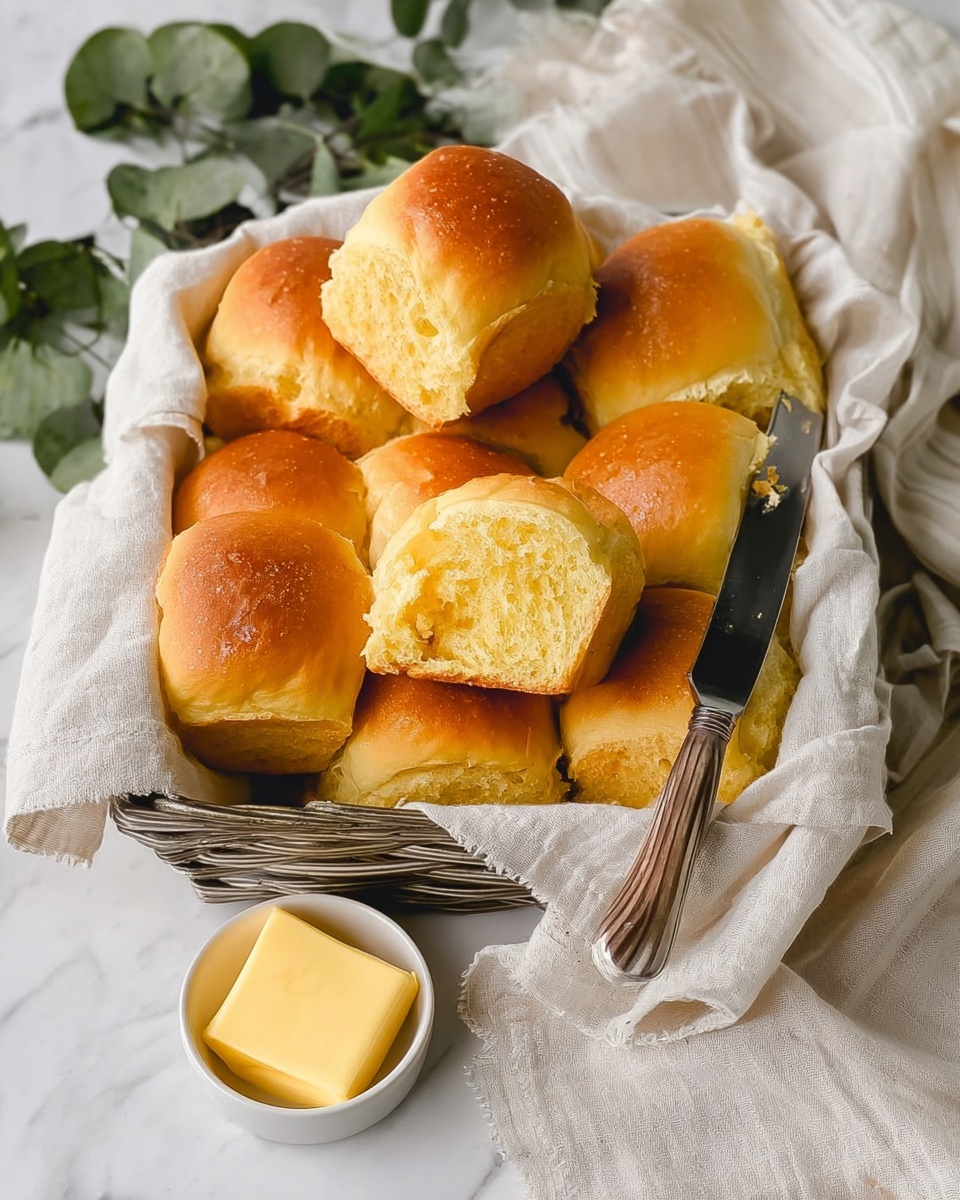
If you’re looking for a soft, slightly sweet, and utterly comforting roll recipe to add to your baking repertoire, you’re going to absolutely love this Butternut Squash Milk Bread Rolls Recipe. I discovered this gem a while back when I wanted a twist on my usual dinner rolls, and the butternut squash adds a subtle sweetness and beautiful tender crumb that’s simply irresistible. Trust me, whether you’re serving it for a family dinner or bringing something new to a holiday table, these rolls won’t last long!
Why You’ll Love This Recipe
- Naturally Sweet and Moist: The butternut squash brings a lovely natural sweetness and moistness that keeps these rolls soft for days.
- Perfectly Soft Texture: Thanks to a smart mix of bread and cake flour, these rolls have a tender crumb that melts in your mouth.
- Great for Any Occasion: These rolls complement everything from weeknight dinners to holiday feasts beautifully.
- Hands-on Yet Simple: The step-by-step process is so satisfying, and once you master the dough, it’s a breeze every time.

Ingredients You’ll Need
The magic of this Butternut Squash Milk Bread Rolls Recipe lies in the balance of soft, naturally sweet squash with special flour blends and just the right amount of butter. I always recommend using fresh butternut squash for that best flavor, and the honey or sweetened condensed milk adds a subtle depth of sweetness.
- Butternut squash: Choose fresh and ripe for the sweetest flavor; I love using the part near the seeds for extra sweetness.
- Milk: Cold milk helps control dough temperature for an even rise.
- Instant yeast: Saf instant yeast is my go-to as it’s super reliable and fast.
- Bread flour: Gives structure and chewiness to the rolls.
- Cake flour: Adds softness and tenderness; if you don’t have it, just use all bread flour.
- Fine sugar: Balances the savory elements and feeds the yeast.
- Honey or sweetened condensed milk: Adds moisture and a hint of flavor complexity.
- Sea salt: Enhances all the flavors beautifully.
- Unsalted butter: For richness and that melt-in-your-mouth texture.
- Melted butter and maple syrup (for brushing): A quick glaze for a shiny, sweet finish.
Variations
I like to play around with this Butternut Squash Milk Bread Rolls Recipe depending on the season and what flavors my family’s craving. You can easily swap or add ingredients to make these rolls your own, and I encourage you to get creative!
- Herb Infused Rolls: I sometimes add fresh rosemary or thyme to the dough for an earthy twist that pairs wonderfully with savory meals.
- Dairy-Free Version: Use plant-based milk and vegan butter substitutes; the texture stays just as soft and lovely.
- Sweet Rolls: Add a touch more honey and sprinkle the tops with cinnamon sugar before baking for a breakfast treat.
- Gluten-Free Adaptation: Gluten-free bread flour blends work but expect a slightly denser crumb; I always recommend adding a bit of xanthan gum for structure.
How to Make Butternut Squash Milk Bread Rolls Recipe
Step 1: Prep Your Butternut Squash
Start by peeling and cubing your butternut squash, then steam it for about 20 minutes until it’s super soft. I love using the part near the seeds because it’s sweeter and really elevates the flavor. Once it’s tender, mash it well with a fork and let it cool completely. If you want, pop it in the fridge for a few hours—it makes the dough easier to work with, and I’ve found it enhances the texture.
Step 2: Mix the Dough
In your stand mixer, combine the cooled mashed squash with the cold milk and mix gently to combine. Add your instant yeast, bread flour, cake flour, sugar, and honey. Set your mixer to medium-low and bring it all into a rough dough. Cover and let it rest for 20-30 minutes. This bit of rest helps the flour fully hydrate, making kneading smoother and the final dough silkier.
Step 3: Incorporate Butter and Knead
Once rested, add in the salt and knead briefly for a minute. Then, add your butter cubes one at a time. It’ll look messy at first — the dough is sticky and soft — but don’t worry! Keep kneading until the dough becomes silky smooth and passes the windowpane test. This step takes some patience; I usually take about 8 minutes at medium speed, scraping down the bowl as needed. If the dough feels too sticky to handle, sprinkle a tiny bit of bread flour and knead a little longer, but don’t add too much or the rolls might turn out dense.
Step 4: First Rise
Form the dough into a ball—yes, it’ll be sticky!—and place it in a lightly greased bowl. Cover it and set it somewhere warm (between 80°F to 90°F if you can) to rise until doubled, about an hour. This is the moment I usually take a quick break—sometimes tempting to peek, but try to resist!
Step 5: Shape the Rolls and Second Rise
After the dough has doubled, transfer it to a lightly floured surface and divide it into 20 equal pieces—or fewer if you want larger rolls. Let the pieces rest covered for 5 minutes—it helps the gluten relax, so rolling into smooth balls is more manageable. Then shape each piece into a tight ball and place them in your lined baking pan, giving them a quarter to half-inch gap for expansion.
Cover the pan with greased plastic wrap and let the rolls proof again in a warm place until they nearly double in size, about an hour. This second rise is crucial for that fluffy texture you’re after.
Step 6: Bake to Golden Perfection
While they’re proofing, preheat your oven to 350°F about 20 minutes before baking. Bake the rolls for 16 minutes, then immediately brush them with a mixture of melted butter and a bit of maple syrup (if you want that extra touch of sweetness and shine). Pop them back in the oven for another 2-3 minutes to finish baking. Once out, transfer them to a cooling rack and let them rest at least 10 minutes before enjoying. Honestly, the flavor and texture get even better once completely cooled.
Pro Tips for Making Butternut Squash Milk Bread Rolls Recipe
- Use Cooler Liquids: I’ve found that using cold milk helps keep the dough temperature ideal, preventing the yeast from activating too quickly.
- Stick with Fresh Squash: Fresh butternut squash tastes way better than canned, and steaming it gently preserves its sweetness.
- Don’t Rush the Butter Incorporation: Adding the butter slowly and kneading well is key for that ultra-soft, silky dough.
- Patience on Proofing: Letting the dough rise in a warm, draft-free spot makes all the difference for light, airy rolls.
How to Serve Butternut Squash Milk Bread Rolls Recipe
Garnishes
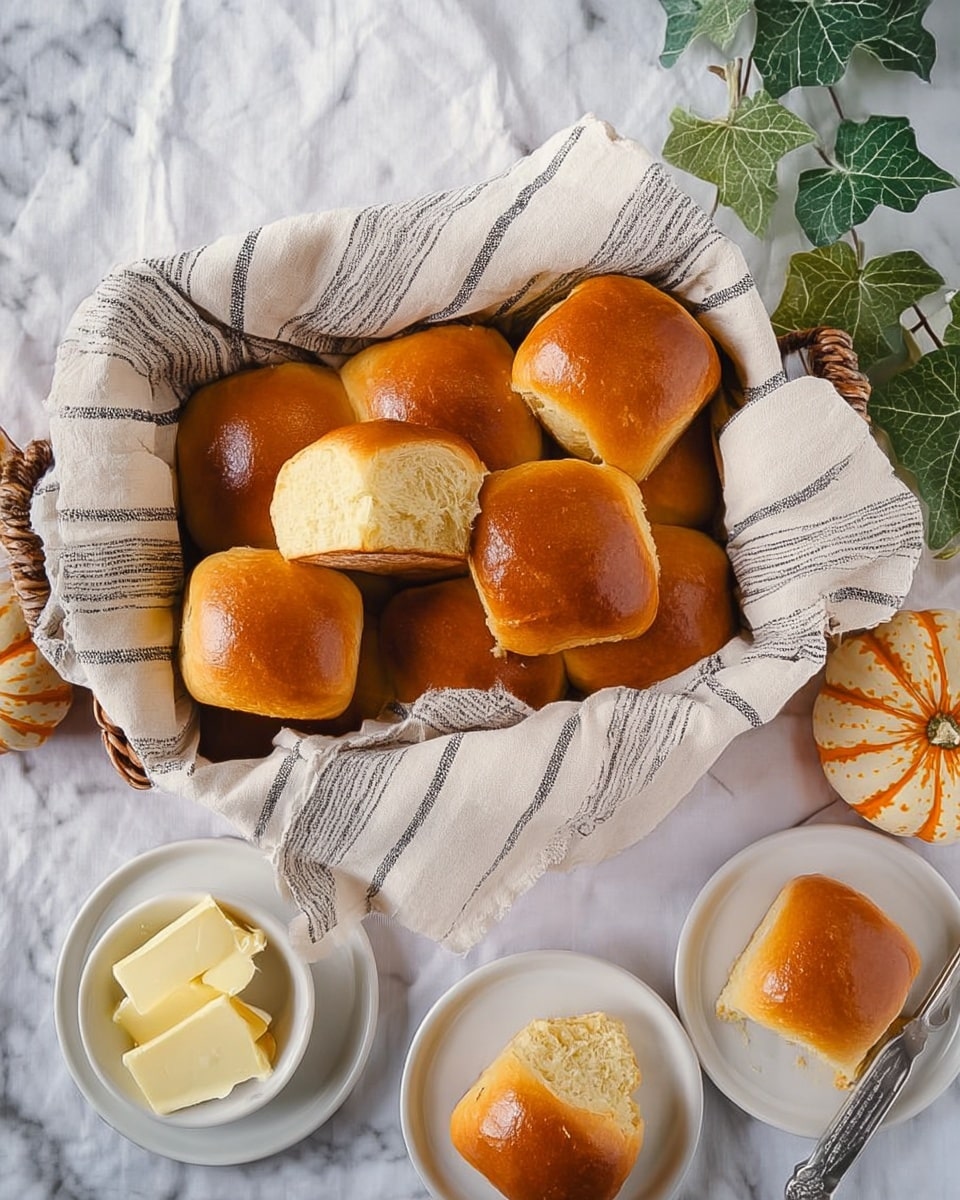
I love brushing these rolls with butter and maple syrup for a glossy finish, but you can sprinkle flaky sea salt or a bit of fresh herbs like rosemary on top before baking for an extra special touch. They look so inviting with a sprinkle of freshly chopped parsley or a touch of garlic butter on the side.
Side Dishes
These Butternut Squash Milk Bread Rolls are a dream alongside roasted veggies, creamy soups like pumpkin or tomato bisque, and hearty stews. They’re also fantastic served with sharp cheeses and a drizzle of honey for a cozy brunch.
Creative Ways to Present
For special occasions, I arrange the rolls in a wreath shape on a baking tray and decorate with rosemary sprigs and cranberries—such a festive centerpiece! Another fun idea is pulling the rolls apart at the table, perfect for sharing and making your guests feel right at home.
Make Ahead and Storage
Storing Leftovers
I store leftover rolls in an airtight container at room temperature, and they stay soft for about 2 days. If you don’t plan to eat them quickly, I recommend freezing to enjoy later.
Freezing
I like to freeze the rolls after the first rise, shaped and ready to proof. Just wrap the pan tightly in plastic wrap and aluminum foil, then freeze. When you’re ready, thaw and let them proof fully before baking. You can also freeze baked rolls; just cool completely, freeze in a sealed bag, and toast or warm before serving.
Reheating
To reheat leftovers, I pop them in a 300°F oven for 5-7 minutes wrapped in foil to restore softness or warm them slightly in the microwave covered with a damp paper towel. Both ways bring back that fresh-from-the-oven feel without turning dry.
FAQs
-
Can I use canned pumpkin instead of butternut squash?
While canned pumpkin might seem like a convenient substitute, butternut squash has a slightly sweeter and fresher flavor that adds a nice subtlety to the rolls. If you do use canned pumpkin, make sure it’s pure pumpkin and not pie filling, and consider adjusting the sweetness slightly as canned pumpkin can be less moist.
-
Why do I need both bread flour and cake flour?
The blend of bread and cake flour is what gives these rolls their structure and softness. Bread flour provides the strength for good chewy texture and rise, while cake flour keeps the crumb tender and light. If you skip the cake flour, your rolls will still turn out great, but might be a bit less delicate.
-
How sticky should the dough be?
This dough is naturally quite sticky because of the squash and butter. It should be tacky and soft but still pull away from the bowl with some effort. Resist adding too much extra flour, which can dry the dough out—use wet hands when shaping instead for easier handling.
-
Can I make the rolls without a stand mixer?
Absolutely! You can mix and knead by hand—it just takes a bit more time and elbow grease. Be sure to knead thoroughly until the dough is silky smooth and passes the windowpane test. Using a large bowl and a bench scraper can help keep things manageable.
Final Thoughts
Honestly, this Butternut Squash Milk Bread Rolls Recipe has become a staple in my home. The combination of natural sweetness, buttery softness, and that tender crumb just makes every bite a little celebration. If you’re thinking about making something special that’s both comforting and a bit unexpected, give this recipe a go—you can trust that you’ll impress family and friends while treating yourself, too. Bake it, share it, and enjoy every single, delicious roll.
Print
Butternut Squash Milk Bread Rolls Recipe
- Prep Time: 30 minutes
- Cook Time: 18 minutes
- Total Time: 3 hours 18 minutes
- Yield: 20 rolls
- Category: Dinner Rolls
- Method: Baking
- Cuisine: Western
- Diet: Vegetarian
Description
Soft and fluffy Butternut Squash Milk Bread Rolls made with steamed mashed butternut squash, a blend of bread and cake flour, milk, butter, and honey for a subtly sweet and moist dinner roll perfect for any meal.
Ingredients
Dough
- 200 g butternut squash (about ¾ cup after steamed and mashed)
- 185 g cold milk (¾ cup)
- 1½ teaspoon instant yeast (preferably SAF instant yeast)
- 450 g bread flour (3½ cups)
- 50 g cake flour (⅓ cup) (optional, see notes)
- 45 g fine sugar (3 tbsp)
- 20 g honey or sweetened condensed milk (1 tbsp)
- ¾ teaspoon sea salt
- 45 g unsalted butter (3 tbsp, cold and cut into 6 pieces)
Brushing
- ½ tablespoon melted butter
- ½ tablespoon maple syrup (optional)
Instructions
- Prepare Butternut Squash: Cut the butternut squash into cubes and steam for 20 minutes until completely softened. Use the part near the seeds for sweeter flavor, then mash with a fork and let cool completely. Should yield about ¾ cup mashed squash. Chill in fridge for a few hours if time permits.
- Mix Dough Ingredients: In a stand mixer, combine the mashed squash and cold milk, mixing gently with a spatula to roughly combine. Add yeast, bread flour, cake flour, sugar, and honey or sweetened condensed milk. Mix on medium-low speed until a rough dough forms. Cover and let rest for 20-30 minutes.
- Add Salt and Knead: Remove butter from fridge and cut into pieces. Add salt to the dough and knead for 1 minute. Add butter cubes one at a time and continue kneading until dough is smooth, silky, and passes the windowpane test. This takes about 8 minutes with a mixer; scrape the bowl sides as needed. If dough is too sticky to handle, add a little bread flour and knead 1-2 more minutes.
- First Proof: Form dough into a ball and place in a lightly greased bowl. Cover and let rise in a warm place (80°F to 90°F) for about 1 hour until doubled in size.
- Divide and Rest: Transfer dough to work surface, cut into 20 even pieces (or fewer for larger rolls). Cover and let rest for 5 minutes.
- Shape Rolls and Second Proof: Shape each piece into a ball and place on a lined baking pan spaced ¼-½ inch apart. Cover with greased plastic wrap and let rise in a warm place (80°F to 90°F) for about 1 hour until doubled.
- Preheat Oven and Bake: Preheat oven to 350°F during the last 20 minutes of proofing. Bake the rolls for 16 minutes.
- Brush and Final Bake: Mix melted butter with maple syrup (if using). Remove rolls from oven and quickly brush with this mixture. Return to oven and bake for an additional 2-3 minutes.
- Cool and Serve: Transfer rolls to a cooling rack and cool for 10 minutes before serving. The flavor improves as they cool completely.
Notes
- Adding cake flour results in softer, more delicate rolls. If unavailable, replace cake flour with bread flour.
- Use the sweeter part of butternut squash near the seeds for better flavor.
- Chilling the mashed squash before mixing helps dough consistency.
- If dough is too sticky to handle, add small amounts of bread flour gradually.
- Proofing in a warm place between 80°F to 90°F is ideal for yeast activity.
Nutrition
- Serving Size: 1 roll (approximately 50g)
- Calories: 140 kcal
- Sugar: 3.5 g
- Sodium: 110 mg
- Fat: 4.5 g
- Saturated Fat: 2.8 g
- Unsaturated Fat: 1.2 g
- Trans Fat: 0 g
- Carbohydrates: 22 g
- Fiber: 1.2 g
- Protein: 3 g
- Cholesterol: 15 mg

Your email address will not be published. Required fields are marked *