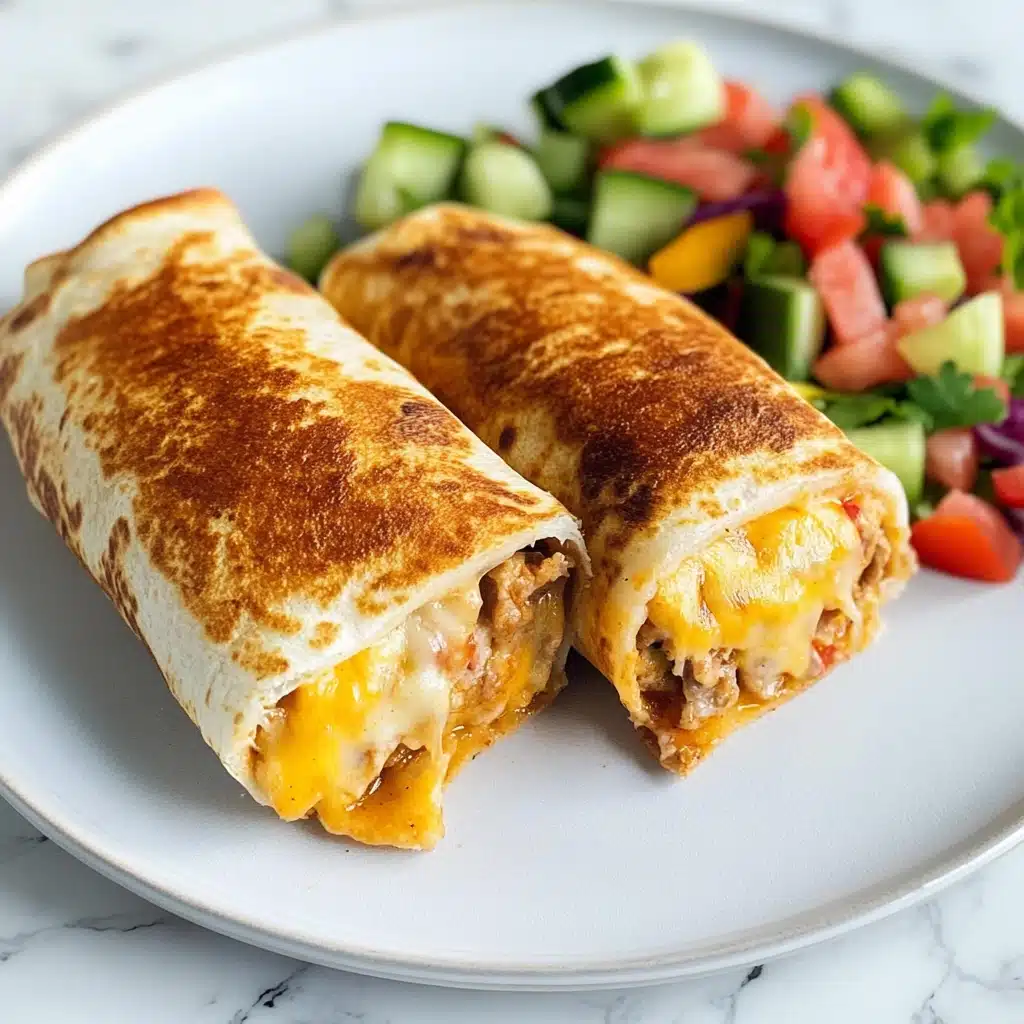
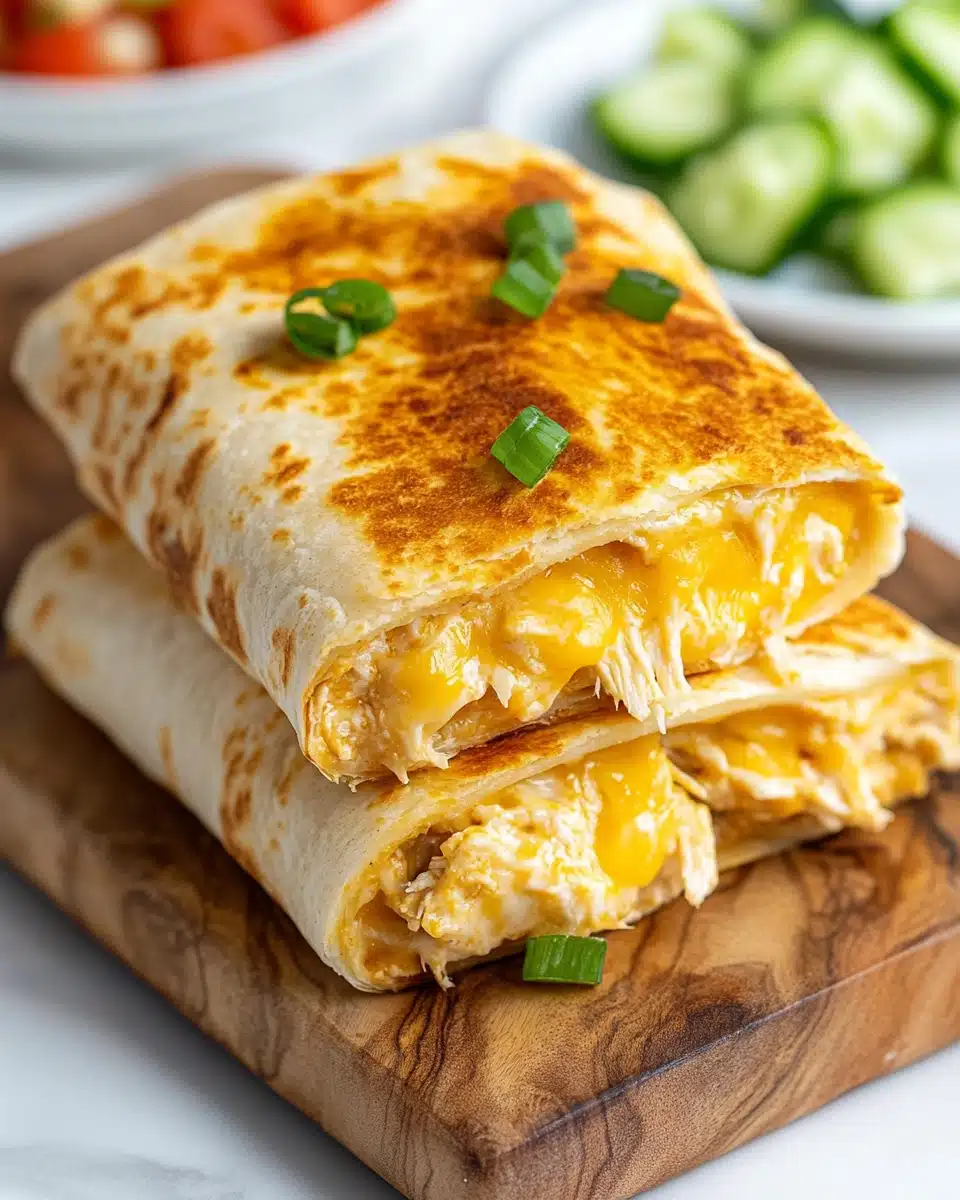
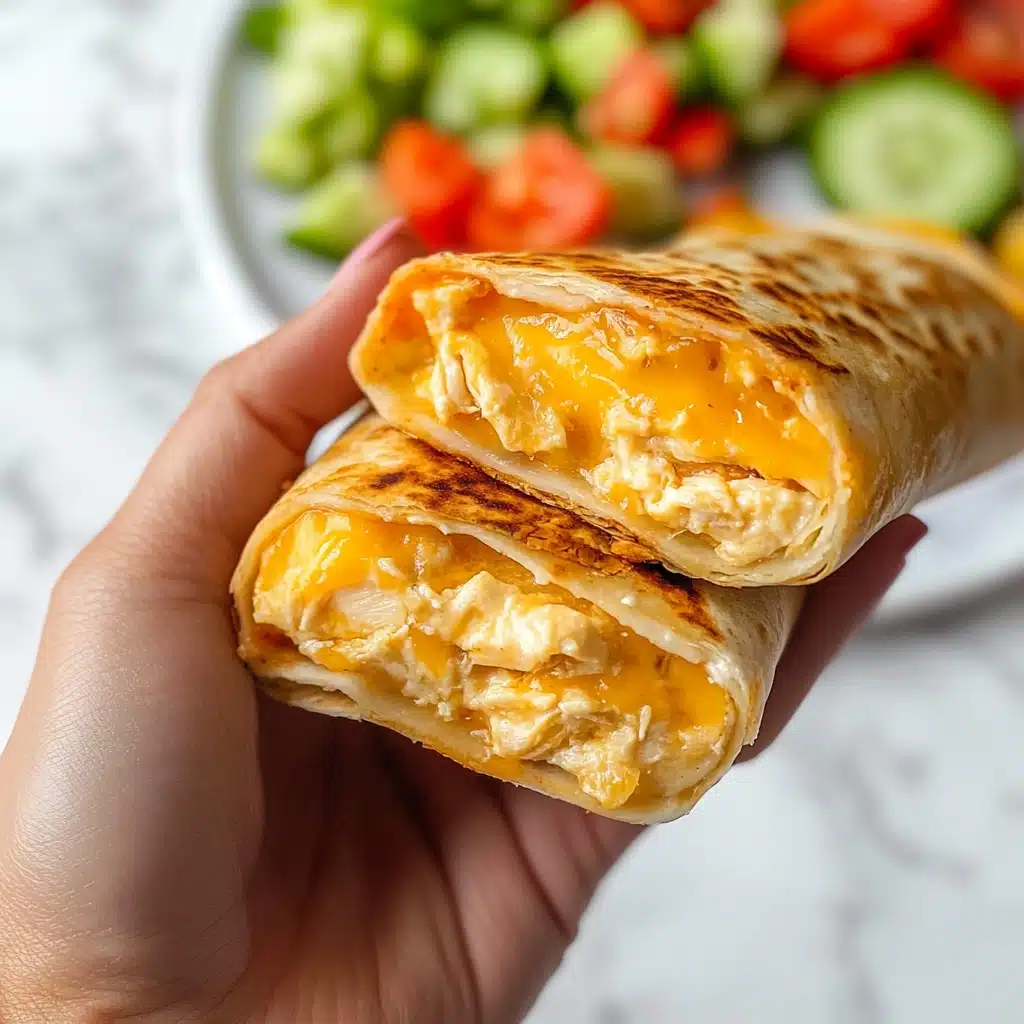
Meet your new obsession: Cheesy Garlic Chicken Wraps! These golden, melty masterpieces fuse tender chicken, plenty of gooey cheese, and a punchy garlic kick, all bundled up in a crisp tortilla. Whether you’re hustling through lunch or craving a cozy dinner in, this is the wrap you’ll want on repeat.
Why You’ll Love This Recipe
- That Melty Cheesy Center: Nothing beats the thrill of breaking into a Cheesy Garlic Chicken Wrap and finding an oozy, savory, super-satisfying cheese pull in every bite.
- Garlic Lovers’ Dream: With fresh minced garlic in the filling, each mouthful bursts with just the right amount of garlicky goodness—bold, aromatic, and downright addictive.
- Quick & Customizable: Ready in just over 20 minutes and endlessly adaptable, these wraps fit perfectly into a whirlwind weeknight or a meal-prep marathon.
- Irresistible Crispy Shell: Pan-seared (or air-fried!) tortillas guarantee that signature crunch you crave when biting into the ultimate cheesy wrap.
Ingredients You’ll Need
The beauty of Cheesy Garlic Chicken Wraps is that you only need a handful of everyday ingredients—each one playing a key role in flavor and texture. Let’s break down why every element matters and how it all comes together in the most epic wrap you’ll ever make.
- Tortillas (2 large): Your trusty vessel for all that cheesy chicken magic—use regular or try a high-protein or low-carb version if you want to switch things up.
- Cooked chicken (7 oz): Rotisserie is my lazy-day hero, but leftover roast or grilled chicken works beautifully. Chop it or shred it for max flavor in every bite.
- Fresh garlic (2 cloves): It’s what gives these wraps their punch—grate it for a bold kick or mince it for a mellower vibe.
- Light mayonnaise (2 tbsp): Adds creamy richness without overpowering—plus it helps bind everything together.
- Greek yogurt or plain yogurt (1 tbsp): Just the right amount of tang to balance the richness; use light or regular depending on your mood.
- Hot sauce (2 tsp): A dash of heat that won’t set your mouth on fire—Frank’s is classic, but use your preferred brand (or go mild for kiddos).
- Salt (¼ tsp): Enhances flavors and brings the whole filling to life.
- Grated cheese (3 oz): Cheddar blends melt into creamy deliciousness, but any good melting cheese will work (Monterey Jack, mozzarella, or pepper jack = yum!).
- Green onion (1): Pops of freshness and color—don’t skip it if you love a bit of edge in every mouthful.
- Olive oil spray: Helps the tortillas crisp up golden-brown in the pan or air fryer with minimal mess or extra calories.
Variations
Cheesy Garlic Chicken Wraps are like a blank canvas—so easy to personalize! Whether you’re cooking for picky eaters or catering to dietary needs, you can swap, tweak, and level up these wraps to make them truly your own.
- Bake or Air Fry Instead: Skip the stovetop and pop your wraps in the oven (400°F for 10–12 minutes) or air fryer (375°F for 6–8 minutes) for hands-off crunch.
- Add Veggie Power: Toss in sautéed spinach, roasted bell peppers, or sliced tomatoes for an extra burst of color, vitamins, and weeknight variety.
- Go Spicy or Mild: Amp up the hot sauce if you’re a heat-seeker, or simply leave it out or swap for barbecue sauce for a milder wrap that still packs flavor.
- Change the Cheese: Fancy a Tex-Mex vibe? Try pepper jack or a Mexican cheese blend; for creamy comfort, mozzarella or provolone is dreamy.
How to Make Cheesy Garlic Chicken Wraps
Step 1: Mix the Cheesy Garlic Chicken Filling
In a medium bowl, stir together your chopped cooked chicken, grated or minced garlic, light mayo, Greek yogurt, hot sauce, and salt. Don’t be shy with the garlic—it’s the real MVP here. Give everything a good mix until the chicken is evenly coated with all that creamy, zesty goodness.
Step 2: Layer the Wrap for Maximum Melt
Lay out a tortilla and sprinkle a generous layer of cheese on the lower third—this builds a melty foundation. Top with about ⅔ cup of your chicken mixture, followed by another sprinkle of cheese and some bright flakes of green onion. The double cheese trick means gooier bites and no sad, empty corners.
Step 3: Roll ‘Em Up
Fold the sides of the tortilla inward, then roll it up tightly from the bottom. The tighter your roll, the less likely you’ll lose cheese or filling during cooking. If you’re prepping ahead, you can wrap these up and keep them refrigerated until you’re ready to crisp!
Step 4: Pan-Fry to Crispy Perfection
Heat a non-stick skillet over medium-high and give it a light spray with olive oil. Place your wraps seam-side down and cook for 3–4 minutes per side, pressing gently for even browning. Cover the pan with a lid as they cook—it helps the cheese melt and the inside stay steamy hot!
Step 5: Slice, Serve, and Savor
Let the wraps rest for a minute before slicing in half (diagonals make them extra inviting). Serve immediately while the cheese is still melty and the tortilla crackles with every bite. Prepare to be bombarded with “Can I have your recipe?!” requests.
Pro Tips for Making Cheesy Garlic Chicken Wraps
- Max Cheese Pull: Place half the cheese under and half over the filling for ribbons of gooeyness stretching from first to last bite.
- Steam for the Win: Cover your skillet while cooking—the extra steam ensures the filling is piping hot and the cheese melts even faster.
- Air Fryer Shortcut: Use the air fryer for super-crispy wraps without standing over the stove—perfect when you’ve got multiple mouths to feed.
- Make-Ahead Mastery: Mix up the chicken filling up to 3 days ahead; wrap and cook on-demand for the freshest Cheesy Garlic Chicken Wraps anytime.
How to Serve Cheesy Garlic Chicken Wraps

Garnishes
Sprinkle your Cheesy Garlic Chicken Wraps with extra chopped green onions, a handful of freshly chopped parsley, or even a dusting of smoked paprika for a pop of color. Want a little zing? A squeeze of fresh lemon over the top makes the flavors sing.
Side Dishes
These wraps shine solo, but if you want to round out your meal, try pairing with a big, crunchy salad (think romaine, cucumbers, and tomatoes), tangy pickles, or roasted veggies. Chips, salsa, or a little bowl of coleslaw also make unbeatable partners for dipping and crunching alongside.
Creative Ways to Present
Cut your wraps into mini pinwheels for a party platter, serve them halved and stacked for a casual family meal, or pack them into a bento box for an enviable packed lunch. Don’t forget a side of your favorite hot sauce or creamy ranch for dramatic dunking!
Make Ahead and Storage
Storing Leftovers
Cooked Cheesy Garlic Chicken Wraps keep well in the fridge for up to 2 days. Just let them cool, then wrap tightly in foil or pop in an airtight container to maintain that irresistible crunch and flavor.
Freezing
For best results, freeze only the chicken filling (not the assembled wraps) in a sealed container for up to one month. Thaw overnight in the fridge, then fill and cook fresh tortillas—this way you still get that legendary crispy shell.
Reheating
To revive that crispy magic, reheat the wraps in a skillet or air fryer rather than the microwave. Just a few minutes on each side will refresh the cheese and crisp the outside like new.
FAQs
-
Can I use leftover grilled or roasted chicken?
Absolutely! Any cooked chicken (grilled, roasted, or rotisserie) works perfectly in Cheesy Garlic Chicken Wraps. Just be sure to chop or shred it into bite-sized pieces for the most even flavor and texture.
-
How can I make these Cheesy Garlic Chicken Wraps gluten-free?
Simply use certified gluten-free tortillas and double-check that your other ingredients like hot sauce and mayonnaise are gluten-free. The filling itself contains no gluten, so it’s an easy swap!
-
What’s the best cheese for extra meltiness?
A cheddar blend provides fantastic flavor and melt, but you can use Monterey Jack, mozzarella (for stretch!), or even pepper jack if you like a spicy twist. Aim for freshly grated cheese when possible for the gooeyest results.
-
Can I prep Cheesy Garlic Chicken Wraps ahead for meal prep?
Yes! Make the chicken filling up to 3 days in advance and store it chilled. When ready to eat, assemble and cook the wraps for a fast, fresh, and delicious meal—no soggy tortillas here.
Final Thoughts
If you crave big flavor with minimal fuss, Cheesy Garlic Chicken Wraps are guaranteed to win you over. They’re melty, crunchy, and supremely satisfying—so go ahead, whip up a batch, share them with family or eat them all yourself (no judgment), and experience pure wrap joy!
Print
Cheesy Garlic Chicken Wraps Recipe
- Prep Time: 15 minutes
- Cook Time: 7 minutes
- Total Time: 22 minutes
- Yield: 2 servings
- Category: Main Dish
- Method: Pan-Frying
- Cuisine: American
- Diet: Low Calorie
Description
These Cheesy Garlic Chicken Wraps are a delicious and easy-to-make meal that is perfect for a quick lunch or dinner. Packed with flavor and melty cheese, they are sure to become a favorite in your meal rotation.
Ingredients
Tortillas:
- 2 large tortillas regular or low-carb/high-protein
Chicken Filling:
- 7 oz cooked chicken, chopped (about 200 grams, rotisserie is great)
- 2 garlic cloves, minced or grated (adjust to taste)
- 2 tablespoons light mayonnaise
- 1 tablespoon light Greek yogurt or plain yogurt
- 2 teaspoons hot sauce like Frank’s
- 1/4 teaspoon salt
- 3 oz grated cheese (about 90 grams, cheddar blend)
- 1 green onion, chopped
- Olive oil spray
Instructions
- Prepare Chicken Filling: In a bowl, mix chopped chicken, garlic, mayonnaise, yogurt, hot sauce, and salt.
- Assemble Wraps: Lay out tortillas. Sprinkle cheese on the lower third, top with chicken mixture, additional cheese, and green onion. Fold sides, then roll up tightly.
- Cook Wraps: Heat a non-stick pan, spray with olive oil. Place wraps seam-side down, cook for 3–4 minutes per side until crispy and golden. Cover with a lid while cooking.
- Serve: Slice wraps in half and serve hot.
Notes
- Covering the pan helps melt the cheese and warm the filling faster.
- Make the chicken filling ahead and keep in the fridge for up to 3 days.
- For a lighter version, reduce the cheese.
- Use leftovers in toasties, quesadillas, or stuffed into baked potatoes.
- Store cooked wraps in the fridge for up to 2 days. Reheat in a skillet or air fryer.
- Make the chicken filling ahead for convenience.
- Serve with a side salad, roasted veggies, pickles, or salsa.
Nutrition
- Serving Size: 1 wrap
- Calories: 320
- Sugar: 2g
- Sodium: 680mg
- Fat: 15g
- Saturated Fat: 6g
- Unsaturated Fat: 7g
- Trans Fat: 0g
- Carbohydrates: 20g
- Fiber: 1g
- Protein: 25g
- Cholesterol: 70mg


Your email address will not be published. Required fields are marked *