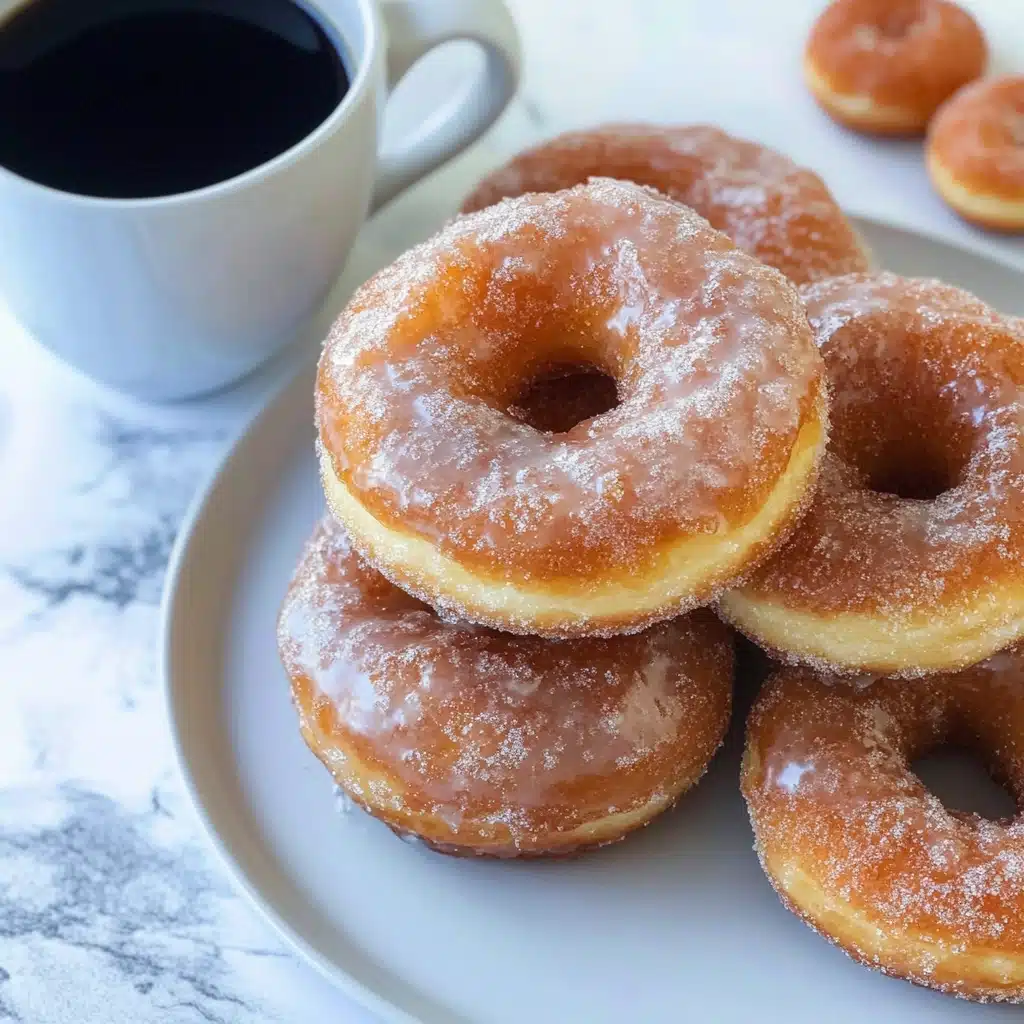
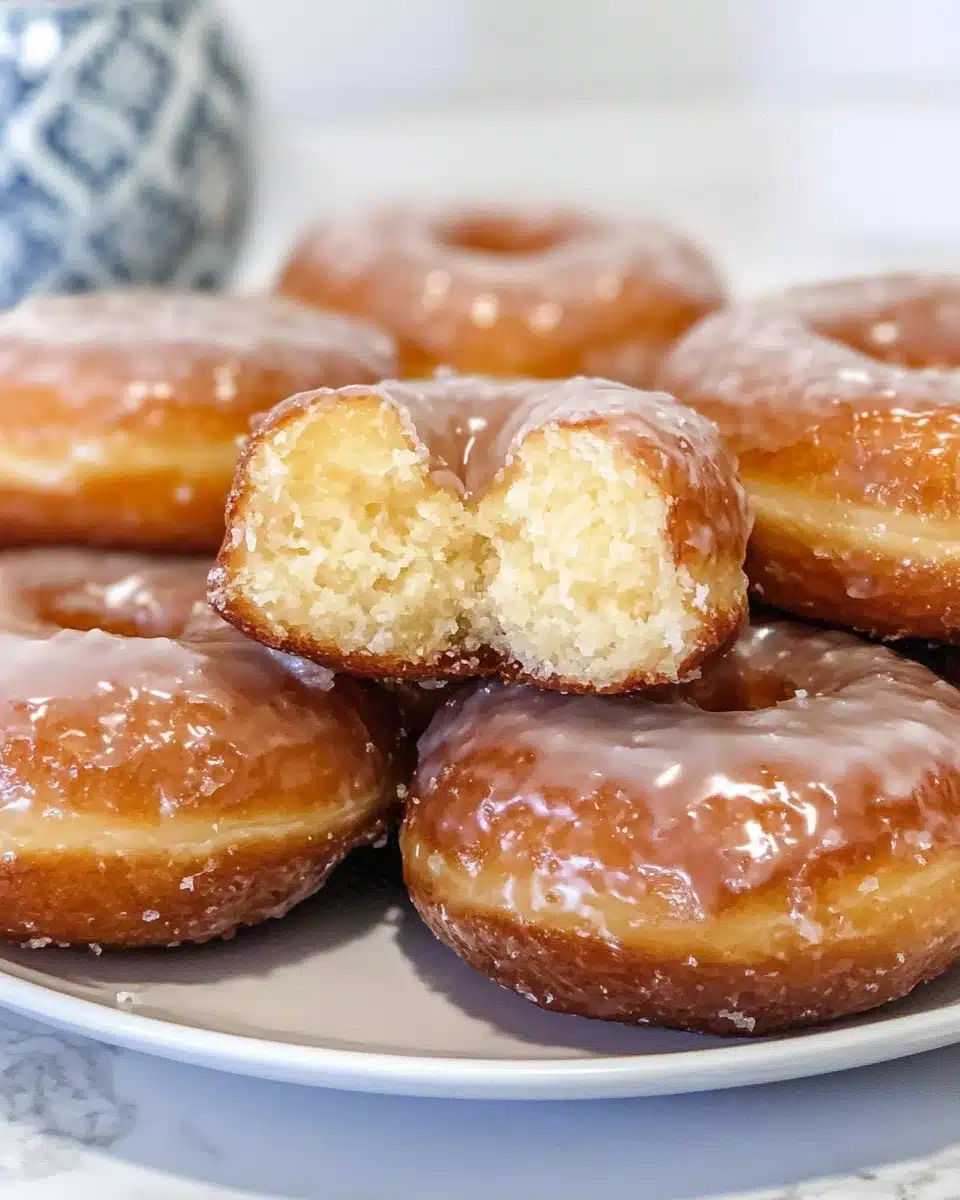
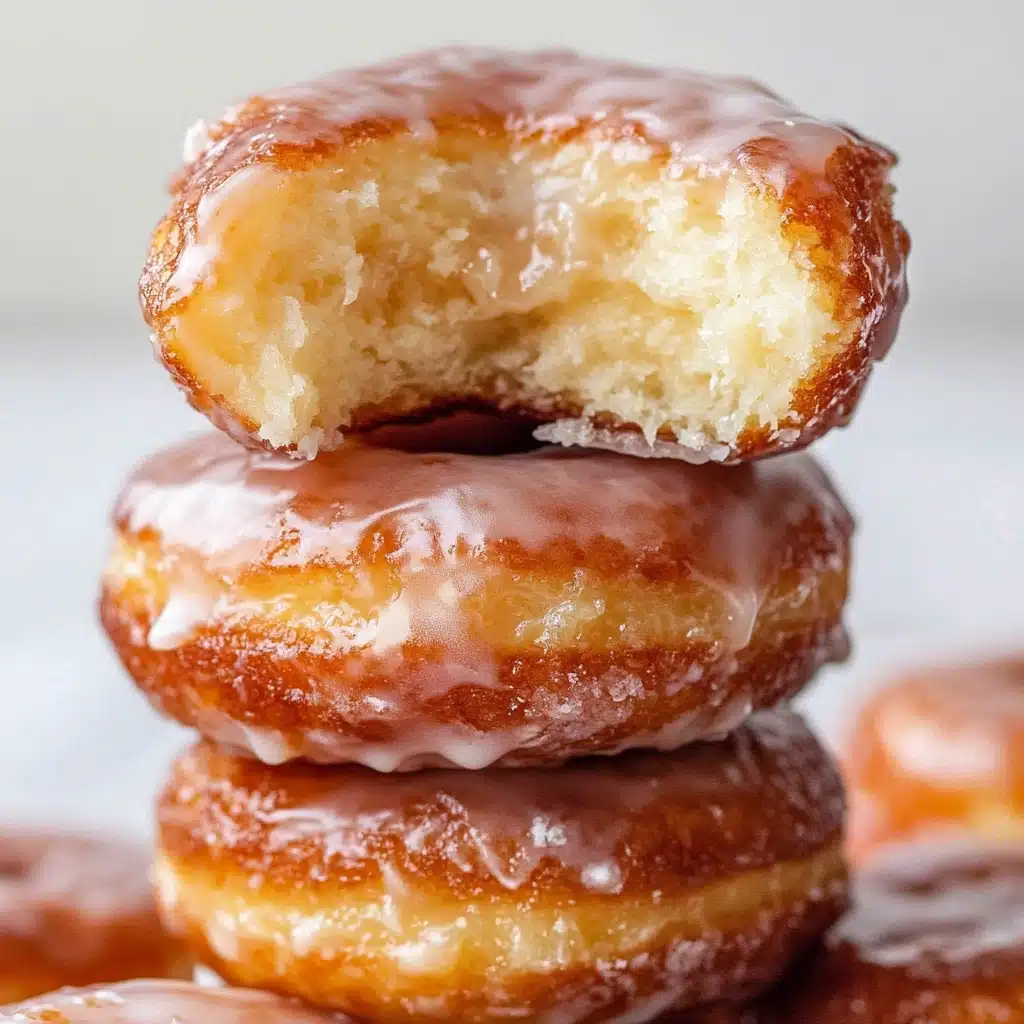
Sink your teeth into pure nostalgia with this Classic Sour Cream Glazed Doughnuts Recipe—a treat that’s impossibly tender inside, crisp at the edges, and crowned with a sweet, shimmery glaze. If you love the old-fashioned cake doughnuts from your favorite bakery, you’re going to be over the moon with how easy (and fun!) it is to make them right at home.
Why You’ll Love This Recipe
- Unbelievably Tender Texture: The secret blend of cake flour and sour cream makes these doughnuts super soft and moist on the inside—no dry doughnuts here!
- That Bakery-Style Crackle: Frying up just right, the dough develops those signature deep cracks that soak up the luscious vanilla glaze.
- Glaze Lover’s Dream: Each doughnut gets double-dipped for maximum glaze coverage, ensuring every bite is sheer bliss.
- Classic Flavors, Customizable: The nutmeg, vanilla, and rich sour cream create an old-fashioned flavor profile you can tweak to your taste.
Ingredients You’ll Need
Part of what makes the Classic Sour Cream Glazed Doughnuts Recipe so magical is its humble, pantry-friendly ingredients. Each item plays a starring role, so don’t be shy about using the best you can get—these little details are what create doughnut perfection!
- Cake Flour: The light, low-protein flour is key for creating that classic, cakey crumb—don’t substitute with all-purpose if you want the true texture.
- Baking Powder: Gives your doughnuts their lovely lift and helps create those signature cracks when frying.
- Salt: Brings out all the nuanced flavors in both the dough and glaze, balancing the sweetness perfectly.
- Ground Nutmeg: The classic hint that instantly says “old-fashioned doughnut”—you can adjust or omit to your taste, but just a touch does wonders.
- Sugar: Sweetens the dough, of course, but also helps with caramelization for that golden crust.
- Butter (at cool room temperature): Adds rich flavor and helps create a soft crumb when creamed with sugar.
- Egg Yolks: Pure indulgence—the extra yolks (instead of whole eggs) make the dough extra tender and deeply flavorful.
- Sour Cream: This is the magic ingredient; it adds moisture, a hint of tang, and unbeatable tenderness.
- Canola Oil (for frying): Chosen for its neutral flavor and high smoke point, so your doughnuts fry up beautifully crisp and light.
- Powdered Sugar (for the glaze): Sifted for a silky, smooth finish that clings to every craggy bite of doughnut.
- Corn Syrup: A tiny bit makes the glaze glossy and helps it set perfectly so it won’t slide right off.
- Vanilla Extract: For warmth and depth in that dreamy glaze.
- Hot Water: Just enough to bring the glaze to dipping consistency—use freshly boiled for best results!
Variations
One of the best things about this Classic Sour Cream Glazed Doughnuts Recipe is how adaptable it is. Whether you’re working with what’s in your pantry, looking for gluten-free swaps, or eager to turn up the flavor, there’s room to make these doughnuts your own!
- Cinnamon Sugar Finish: After frying, skip the glaze and toss the warm doughnuts in cinnamon sugar for a nostalgic, spiced twist.
- Chocolate Glaze: Swap half the powdered sugar in the glaze with cocoa powder for an equally decadent, chocolate-covered doughnut.
- Lemon Zest in the Glaze: Add a teaspoon of fresh lemon zest to the glaze for a citrusy lift that brightens every bite.
- Gluten-Free Version: Use a reputable 1:1 gluten-free baking flour in place of cake flour; your doughnuts will still be tender and delicious.
- Reduce or Skip Nutmeg: Not a nutmeg fan? Try a pinch of cardamom or warm cinnamon instead.
How to Make Classic Sour Cream Glazed Doughnuts Recipe
Step 1: Mix and Cream the Dough
To start, sift together the cake flour, baking powder, salt, and nutmeg into a medium bowl—you want everything well-combined for super-even doughnuts. In your stand mixer, cream the cool butter and sugar together until the texture looks sandy (not soft and fluffy). Then, add your egg yolks and mix until the blend is pale and thick, which takes just a minute. This creamy base is essential for that melt-in-your-mouth crumb!
Step 2: Incorporate Sour Cream and Dry Ingredients
Add the dry ingredients to the butter-egg mixture in three additions, alternating with the sour cream—start and end with the flour mixture. Mix gently on low speed until the dough just comes together and looks smooth but a little sticky. If things are too sticky to handle, don’t fret! Add one tablespoon of cake flour at a time until it’s workable.
Step 3: Chill the Dough
Scrape the dough into a bowl and cover it tightly with plastic wrap. Chill for at least 1 hour—or until firm. This step makes rolling, cutting, and frying a total breeze and prevents sticky, unruly dough when it’s showtime!
Step 4: Roll and Cut the Doughnuts
Generously flour your work surface and roll the chilled dough out to about 1/2 inch thickness. Use a doughnut cutter (or a large and small biscuit cutter) to cut out those picture-perfect doughnuts and holes, dipping the cutters in flour each time. If the dough loosens up, simply pop it back in the fridge to keep things firm and easy to handle.
Step 5: Fry to Golden Perfection
Pour about 2 inches of canola oil into a heavy-bottomed pot and attach a deep-fry thermometer. Bring the oil to 325°F—temperature is everything here. Fry the doughnuts a few at a time, turning after about 2 minutes per side. Don’t overcrowd the pot, and keep a close eye on the thermometer to avoid burnt outsides or raw centers. Once golden and puffed, drain them on a paper bag for the ultimate classic touch.
Step 6: Dip and Set the Glaze
While the doughnuts cool just a bit, whisk together the powdered sugar, corn syrup, salt, vanilla, and hot water to create a smooth, pourable glaze. Dunk each doughnut generously, letting the excess drip off before placing on a wire rack (with a pan underneath to catch drips). Let them sit about 20 minutes so the glaze sets into a gleaming, sugary shell—irresistible!
Pro Tips for Making Classic Sour Cream Glazed Doughnuts Recipe
- Mastering Dough Consistency: If your dough feels unbearably sticky, add just a little extra cake flour—a tablespoon at a time—until it comes together without overworking it. Humidity and room temp can really affect dough, so feel it out!
- Chill is Your Friend: Chilling the dough thoroughly makes it much easier to cut tidy shapes and helps the doughnuts keep their puff when they hit the oil—don’t skip!
- Fry at the Right Temperature: Maintaining 325°F is crucial—the doughnuts need time to cook through gently and develop those old-fashioned cracks without browning too fast.
- Glaze While Warm: Dip doughnuts in glaze when they’re still slightly warm—it helps the glaze adhere with that perfect glassy finish instead of dripping completely off.
How to Serve Classic Sour Cream Glazed Doughnuts Recipe

Garnishes
For a bakery-worthy touch, add a sprinkle of finely chopped toasted nuts or pretty festive sprinkles while the glaze is still wet. A tiny dusting of extra nutmeg or cinnamon right before serving is lovely, too—and of course, classic doughnut holes need their own quick dip in glaze as well!
Side Dishes
There’s nothing like pairing homemade doughnuts with a piping hot cup of coffee or silky café au lait. On a brunch spread, stack them alongside fresh berries, sliced melon, or a scoop of creamy Greek yogurt for something light and bright. Doughnuts also love a splash of milk—classic and so comforting.
Creative Ways to Present
For gatherings, pile glazed doughnuts high on a cake stand or stack them into a “doughnut tower” centerpiece. Arrange holes in a little bowl with colorful napkins for snacking, or pop skewers through mini doughnuts for the cutest party kabobs. If you’re feeling extra, wrap them in wax paper and baker’s twine for charming homemade gifts.
Make Ahead and Storage
Storing Leftovers
Your doughnuts will taste best the day you fry them, but leftovers will keep beautifully! Store any extras in an airtight container at cool room temperature for up to 3 days—the glaze helps lock in freshness, though the “crunch” will soften a bit after the first day.
Freezing
If you want Classic Sour Cream Glazed Doughnuts on standby, freeze unglazed, fully cooled doughnuts layered with parchment in a sealed container. They’ll keep for 2–3 months. Thaw at room temperature, then dip in fresh glaze for that “just made” magic.
Reheating
To bring doughnuts back to life, warm them briefly (7-10 seconds) in the microwave, or pop them in a 300°F oven for a few minutes. If already glazed, don’t reheat too long or the glaze may melt off—just enough to restore a bit of that fresh-from-the-fryer feel.
FAQs
-
Can I use all-purpose flour instead of cake flour?
You can, but the texture will change—the doughnuts will be just a bit denser and less melt-in-your-mouth. If you’re after that authentic Classic Sour Cream Glazed Doughnuts Recipe fluffiness, cake flour is the way to go.
-
What if I don’t have a stand mixer?
No problem! You can use a hand mixer or even a sturdy wooden spoon and some elbow grease to cream together the butter, sugar, and yolks. Just be sure to mix until pale and slightly thick.
-
Is nutmeg absolutely necessary?
Nutmeg is classic for old-fashioned doughnuts and gives that signature bakery flavor, but if you’re not a fan, feel free to reduce it or leave it out—your Classic Sour Cream Glazed Doughnuts Recipe will still be delicious.
-
Can I make the dough ahead of time?
Absolutely! You can make the dough, wrap it well, and refrigerate overnight. Let it soften slightly at room temperature, then roll, cut, and fry as usual. This makes the Classic Sour Cream Glazed Doughnuts Recipe even more doable for a brunch party or special morning.
Final Thoughts
This Classic Sour Cream Glazed Doughnuts Recipe brings so much joy from such simple ingredients—it’s a true baking hug. Whether you’re making a batch for celebration, sharing with loved ones, or simply craving the comfort of an old-fashioned treat, I hope these doughnuts become a favorite in your kitchen, too. Give them a try and share the love—your morning just got a whole lot sweeter!
Print
Classic Sour Cream Glazed Doughnuts Recipe
- Prep Time: 15 minutes
- Cook Time: 25 minutes
- Total Time: 2 hours
- Yield: 12 doughnuts and holes
- Category: Dessert
- Method: Frying
- Cuisine: American
- Diet: Vegetarian
Description
Indulge in the delightful nostalgia of Old-Fashioned Sour Cream Doughnuts with this easy-to-follow recipe. These tender, cake-like doughnuts are fried to perfection and coated in a sweet glaze, making them a perfect treat for any occasion.
Ingredients
For the donuts:
- 2 1/4 cup (255 grams) cake flour
- 1 1/2 teaspoons baking powder
- 1 teaspoon salt
- 1/2 teaspoon ground nutmeg
- 1/2 cup (100 grams) sugar
- 2 tablespoons (29 grams) butter, at COOL room temperature
- 2 large egg yolks
- 1/2 cup (113 grams) sour cream
- Canola oil, for frying
For the glaze:
- 3 1/2 cup (350 grams) powdered sugar, sifted
- 1 1/2 teaspoons corn syrup
- 1/4 teaspoon salt
- 1/2 teaspoon vanilla extract
- 1/3 cup hot water
Instructions
- For the donuts: In a bowl, sift together the cake flour, baking powder, salt, and nutmeg. In the bowl of a stand mixer fitted with a paddle attachment, beat the butter and sugar together until sandy. Add the egg yolks and mix until light and thick. Add the dry ingredients to the mixing bowl in 3 additions, alternating with the sour cream, ending with the flour.
- Mix for 30 seconds on low speed or until the dough is smooth but slightly sticky. Cover with plastic wrap and chill for 1 hour. Roll out the dough, cut out the donuts, and fry in oil at 325°F.
- For the glaze: Mix all ingredients until smooth. Dip each doughnut in the glaze and let set on a wire rack.
Notes
- Some readers have suggested reducing nutmeg to 1/4 teaspoon if desired.
Nutrition
- Serving Size: 1 doughnut
- Calories: 275
- Sugar: 20g
- Sodium: 180mg
- Fat: 8g
- Saturated Fat: 3g
- Unsaturated Fat: 4g
- Trans Fat: 0g
- Carbohydrates: 45g
- Fiber: 1g
- Protein: 3g
- Cholesterol: 40mg


Your email address will not be published. Required fields are marked *