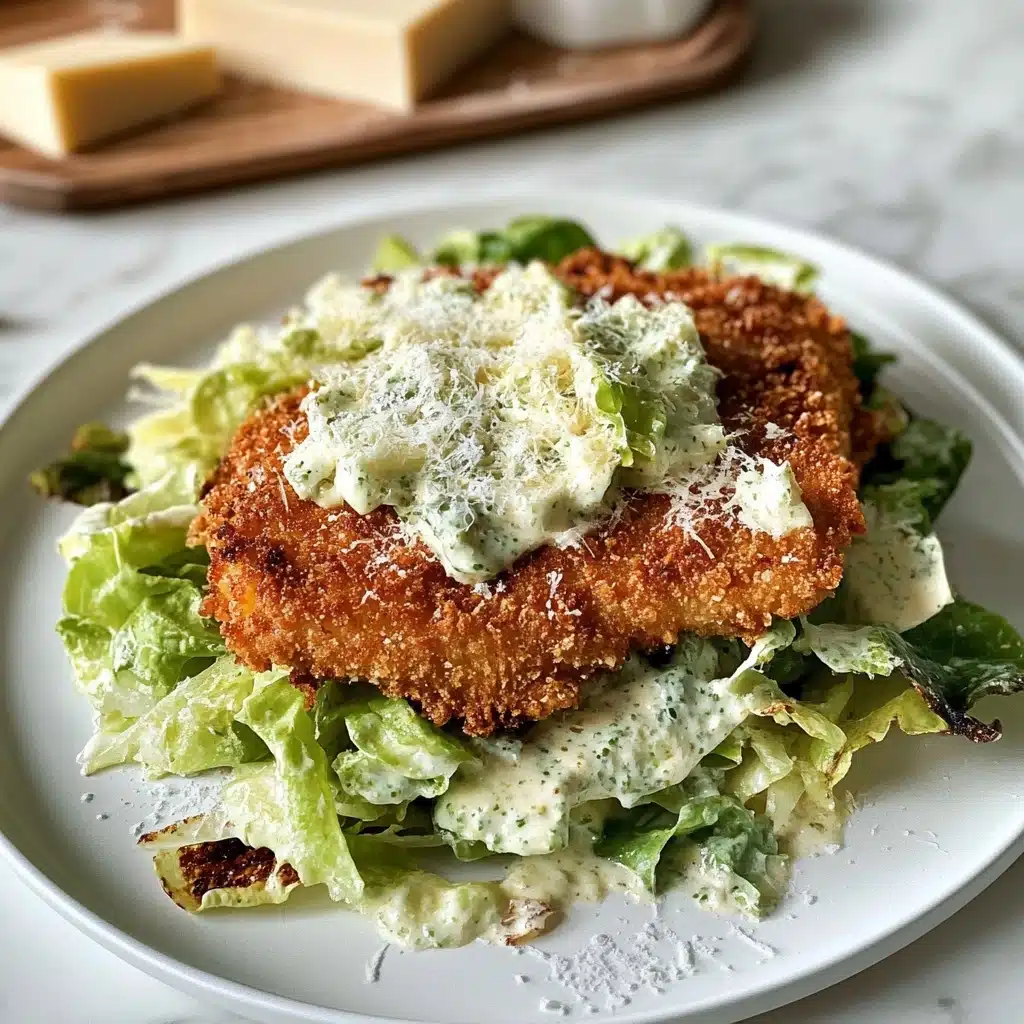
If you think Caesar salad can’t get any better, just wait until you try this Crispy Chicken Caesar Salad. Picture all the savory, creamy, crunchy joy of a classic Caesar, then add juicy, golden chicken cutlets on top. It’s an absolute showstopper for lunch or dinner—quick, easy, and satisfying down to the last bite!
Why You’ll Love This Recipe
- Ultimate Crunch: The golden, crispy chicken cutlets bring a mouthwatering crunch that contrasts beautifully with cool, crisp romaine.
- Lighter, Creamier Caesar Dressing: Greek yogurt makes the dressing lusciously creamy but keeps it lighter and packed with protein—no anchovies required!
- Weeknight-Friendly: With only 25 minutes from start to finish, you get the magic of restaurant-worthy Crispy Chicken Caesar Salad at home, quicker than delivery.
- Totally Customizable: Make it gluten-free, dairy-free, traditional, or modern—see variations below to tailor it just how you like.
Ingredients You’ll Need
This Crispy Chicken Caesar Salad is all about simple, top-notch ingredients transforming into something greater than the sum of their parts. Each ingredient—from panko for extra crunch to a punchy dash of Dijon—plays a special role in building layers of flavor, texture, and irresistible color on your plate.
- Boneless, skinless chicken breast: Provides lean, juicy protein and is the perfect canvas for that crispy coating.
- Panko breadcrumbs: Japanese-style breadcrumbs deliver an airy, super-crispy shell you just can’t get with regular breadcrumbs.
- Freshly grated parmesan cheese: Adds salty, nutty depth to both the breading and the dressing—freshly grated melts right in for the best bite.
- Italian seasoning & garlic powder: Just a sprinkle of these classics gives the breading big flavor without extra effort.
- Kosher salt & black pepper: The essential duo for boosting and balancing every other flavor.
- All-purpose flour: Helps the coating stick and results in a crunchy, even crust—use gluten-free if needed!
- Large egg & a splash of water: This “glue” helps the panko adhere to your chicken, sealing in juiciness.
- Avocado oil: Its high smoke point makes it perfect for pan-frying the chicken cutlets to golden perfection.
- Romaine lettuce: Crisp and refreshing, romaine is hearty enough to stand up to warm chicken and creamy dressing.
- Plain Greek yogurt or skyr: Swapped in for heavy dressing, this brings a boost of creaminess and protein to keep things light.
- Lemon juice, Dijon mustard, Worcestershire sauce, garlic powder: These bring brightness, tangy zip, umami, and boldness to tie the Caesar flavor together.
Variations
One of the best things about a Crispy Chicken Caesar Salad is how effortlessly you can adapt it. Don’t be afraid to riff on the recipe to fit your ingredient stash, suit special diets, or simply change things up based on your mood!
- Gluten-Free: Swap in gluten-free panko and flour—there are loads of great options that crisp up beautifully.
- Dairy-Free: Use your favorite dairy-free parmesan (look for nut-based or coconut options) and a dairy-free yogurt for the dressing.
- Traditional Caesar: For a classic flavor, add a teaspoon of anchovy paste to the dressing for authentic, briny richness.
- Extra Veggies: Toss in halved cherry tomatoes, crisp cucumber, or avocado chunks to make your salad heartier and more colorful.
How to Make Crispy Chicken Caesar Salad
Step 1: Prep and Pound the Chicken
Start by getting your chicken to the perfect thickness for quick, even frying. If you’re using two small chicken breasts, gently pound them to ¼-inch thickness with a meat tenderizer (cover with parchment or plastic wrap to contain the mess). For one large breast, butterfly it, then pound out. Pat the pieces dry, then season both sides generously with kosher salt and black pepper—this simple step is the secret to juicy, flavorful chicken!
Step 2: Set Up Your Breading Station
Get three shallow bowls ready: one for the seasoned flour, one for the beaten egg with water, and one for your panko-parmesan mixture. This breading lineup ensures every bite is coated to shattering crispness and full of flavor. Use a fork to keep your fingers (mostly) clean as you prep the rest.
Step 3: Bread the Chicken
Now the fun part! Dredge each chicken piece first in the flour (tap off excess), then dip into the egg (let excess drip), and finally coat thoroughly in the panko-parmesan mix. Press down firmly in the breadcrumbs to help everything stick and build that signature crunch. Set aside while you heat the pan.
Step 4: Fry Until Golden and Crispy
Pour avocado oil into a large pan and get it hot (medium-high). You’ll know it’s ready when a few panko crumbs sizzle and brown in about 30 seconds. Gently lay your chicken cutlets in the pan—one at a time if necessary—and lower the heat to medium. Cook until gorgeously golden (about 3 minutes one side, 2 more after flipping), and make sure the internal temp hits 165°F. Let them rest briefly on a wire rack for extra crispiness, and sprinkle with flaky sea salt if you’re feeling fancy!
Step 5: Whip Up That Creamy Caesar Dressing
While your chicken cools slightly, whisk together Greek yogurt, parmesan, lemon juice, Dijon, Worcestershire, and garlic powder in a small bowl. Taste and adjust with a pinch of salt or black pepper. This dressing is creamy, zippy, and totally mouthwatering (bonus: it’s great for dipping leftover chicken, too).
Step 6: Toss and Assemble the Salad
In your largest bowl, toss chopped romaine with the creamy Caesar dressing until every leaf is coated. To serve, you can either go modern (crispy chicken cutlet on the bottom, salad piled high on top) or classic (lettuce on the bottom, sliced chicken artfully arranged atop). Don’t forget a final flourish of more freshly grated parmesan and cracked black pepper!
Pro Tips for Making Crispy Chicken Caesar Salad
- Chicken Thickness Matters: Thinner cutlets cook lightning-fast and stay juicy inside while achieving a crunchy, golden crust.
- Pan Temperature Perfection: Wait until your oil is shimmering and a panko crumb sizzles before adding the chicken—this prevents sogginess and gets you that shatteringly crisp exterior.
- Wire Rack Cooling: Letting chicken rest on a rack (not paper towels) keeps the bottom crispy while you finish assembling everything else.
- Toss Salad Just Before Serving: Romaine loves to stay crunchy—wait until the last moment to toss with dressing for ultimate texture and freshness!
How to Serve Crispy Chicken Caesar Salad

Garnishes
For maximum visual appeal (and flavor!), shower your Crispy Chicken Caesar Salad with extra finely grated parmesan right before serving. Add a twist of fresh cracked black pepper and, if you’re feeling especially extra, a sprinkle of flaky sea salt or even some lemon zest to brighten everything up. Torn fresh parsley makes for a pretty, herby touch, too.
Side Dishes
Crispy Chicken Caesar Salad is hearty enough to shine solo, but if you want to round out your meal, try it with a side of roasted potatoes, warm flatbread, or a cup of simple tomato soup. If you’re hosting, pair with a crisp white wine or a sparkling lemonade for something that’s as refreshing as the salad itself.
Creative Ways to Present
For a fun twist, serve the salad deconstructed—with the chicken sliced and fanned beside a heap of caesar-dressed romaine or even piled into wraps for an easy lunch. Or, assemble as mini “salad stacks” on individual plates for a dinner party-worthy presentation. Plating on a big wooden board also transforms it into a stunning centerpiece for sharing!
Make Ahead and Storage
Storing Leftovers
If you end up with leftover chicken cutlets or undressed salad, simply store the chicken in an airtight container in the fridge (up to 3 days). For best results, keep the salad and dressing separate until ready to eat, as the romaine can wilt once dressed.
Freezing
The crispy chicken cutlets freeze surprisingly well! Let them cool, then freeze on a parchment-lined tray before transferring to a freezer bag. Reheat straight from frozen in the oven or air fryer—but skip freezing the salad or dressing, as their textures won’t hold up.
Reheating
To bring leftover chicken back to life, pop it in a hot oven or air fryer for 5–7 minutes until hot and crisp. Avoid microwaving, as it will make the coating soggy—keep that coveted crunch with dry heat instead!
FAQs
-
Can I use store-bought Caesar dressing instead?
Absolutely! If you’re short on time or just love a certain bottled dressing, swap in about 1/3 cup of your favorite Caesar—just remember, homemade takes this salad over the top in terms of freshness and protein boost.
-
How can I make the chicken even crispier?
For maximum crunch, use panko breadcrumbs and make sure your oil is properly preheated before frying. Letting the breaded chicken rest for a minute or two before frying also helps develop a thicker, crunchier coating.
-
Is this Crispy Chicken Caesar Salad recipe gluten-free?
It can be! Use gluten-free panko and flour—everything else in the recipe is naturally gluten-free. Just be sure to check labels if you have any sensitivities.
-
Can I prep anything in advance?
Definitely. You can pound and bread the chicken and keep it in the fridge for a few hours before frying, and mix up the dressing a day ahead. Wait to toss the salad with dressing and fry the chicken until just before eating for the best texture.
Final Thoughts
I can’t wait for you to dig into this Crispy Chicken Caesar Salad—it truly transforms a classic into something crave-worthy you’ll want to make on repeat. It’s crunchy, creamy, fresh, and full of flavor in every bite. Give it a try, and let it become your new favorite way to Caesar!
Print
Crispy Chicken Caesar Salad Recipe
- Prep Time: 15 minutes
- Cook Time: 10 minutes
- Total Time: 25 minutes
- Yield: 2 servings
- Category: Stovetop
- Method: Frying
- Diet: Gluten Free
Description
A delicious and crispy twist on the classic Caesar salad, featuring homemade crispy chicken cutlets served with a creamy Greek yogurt Caesar dressing over a bed of romaine lettuce.
Ingredients
For the Crispy Chicken Cutlets:
- 10 oz boneless, skinless chicken breast
- 1 cup panko breadcrumbs (normal or GF)
- 1/4 cup freshly & finely grated parmesan cheese
- 1/2 tsp italian seasoning
- 1/2 tsp garlic powder
- 1/2 tsp kosher salt
- 1/4 tsp black pepper
- 1/2 cup all purpose flour (normal or GF)
- 1 large egg
- 1 tbsp water
- 5 tbsp avocado oil
For the Caesar Dressing:
- 1/4 cup full-fat plain Greek yogurt or skyr
- 3 tbsp freshly & finely grated parmesan cheese
- 1 tbsp lemon juice
- 1 tsp dijon mustard
- 1/2 tsp Worcestershire sauce
- 1/4 tsp garlic powder
- Kosher salt & black pepper to taste
For the Salad:
- 3 cups chopped romaine lettuce
- Freshly & finely grated parmesan cheese
Instructions
- Prepare the Chicken: Pound the chicken breast to ¼” thickness, season with salt and pepper.
- Coat the Chicken: Dredge chicken in flour, egg, then breadcrumb mixture.
- Cook the Chicken: Fry in avocado oil until golden brown and cooked through.
- Make the Dressing: Combine all dressing ingredients in a bowl.
- Assemble Salad: Toss romaine with dressing, top with chicken, and garnish with parmesan.
Notes
- This Caesar dressing is a healthier alternative using Greek yogurt and omitting anchovies.
- Feel free to use store-bought Caesar dressing if preferred.
Nutrition
- Serving Size: 1 serving
- Calories: Approximately 450
- Sugar: 2g
- Sodium: 700mg
- Fat: 22g
- Saturated Fat: 5g
- Unsaturated Fat: 15g
- Trans Fat: 0g
- Carbohydrates: 24g
- Fiber: 2g
- Protein: 36g
- Cholesterol: 120mg


Your email address will not be published. Required fields are marked *