
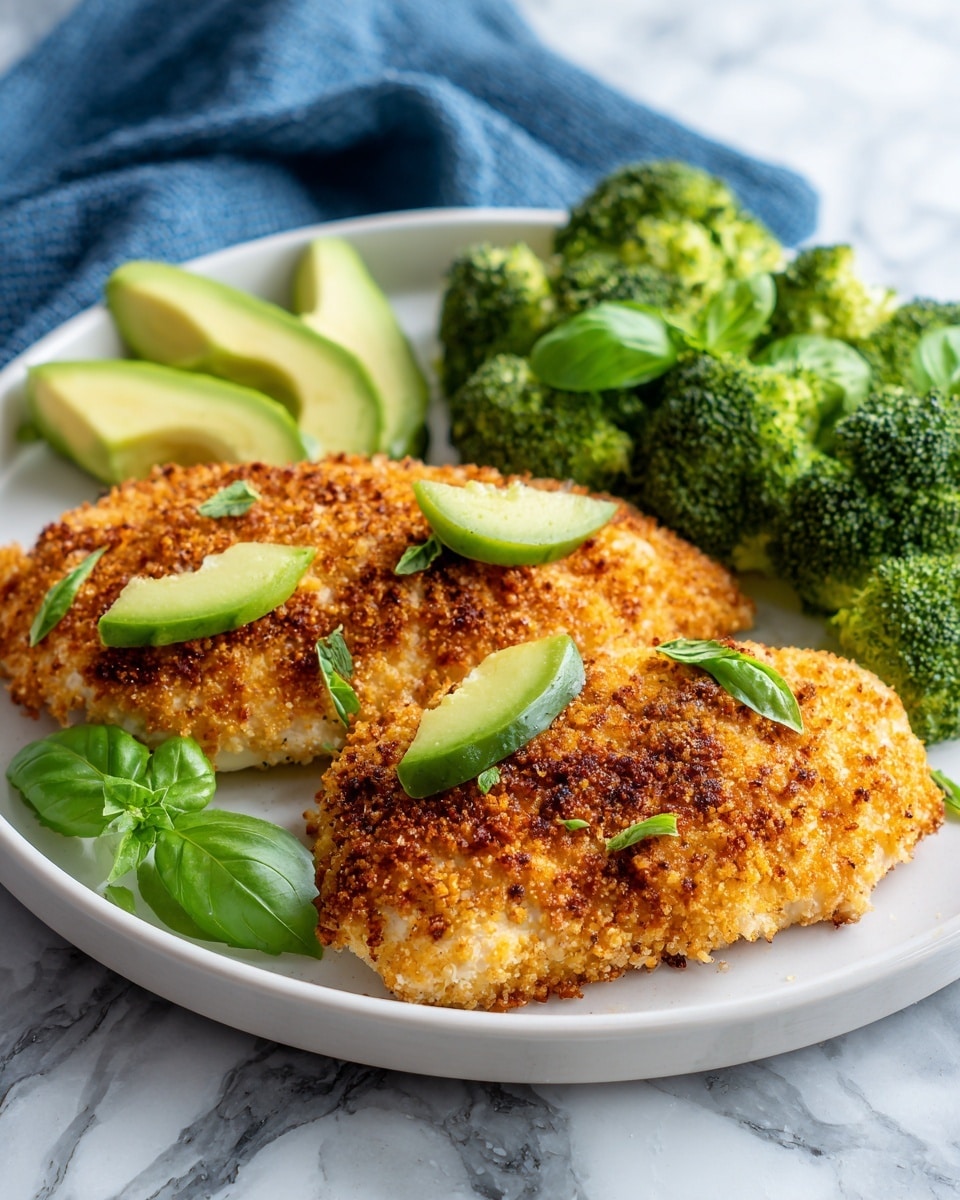
If you love bold, tangy flavors combined with the crispy, comforting goodness of breaded chicken, you’re going to absolutely adore this Dill Pickle Chicken Recipe. I first tried this dish when craving something different that still felt like a warm hug from home—and wow, did it deliver! The pickle juice marinade makes the chicken incredibly juicy and adds a subtle zing that you just won’t forget. Stick around, and I’ll walk you through every step so you can nail it perfectly in your own kitchen.
Why You’ll Love This Recipe
- Juicy, tender chicken: The dill pickle juice marinade not only tenderizes but infuses a lovely tang.
- Easy prep and bake: Minimal ingredients and hands-on time make it weeknight-friendly.
- Crunchy coating: A mix of seasonal breadcrumbs and panko delivers the perfect crisp.
- Family-approved flavor: My family goes crazy for this, making it a forever staple.

Ingredients You’ll Need
The magic behind this Dill Pickle Chicken Recipe is in the balance of tangy pickle juice and the crispy breadcrumb coating. Using thinly sliced chicken breasts keeps things quick to cook and easy to enjoy. Here are some tips about the ingredients so you can shop smart.
- Chicken breasts: Thinly sliced works best for even cooking and soaking up that pickle juice flavor.
- Dill pickle juice: Don’t toss it after pickles are gone—grab that liquid, it’s the star for marinating!
- Eggs: Acts as the perfect glue to get the breadcrumbs to stick tightly.
- Milk: Helps to lighten the egg wash and keeps the coating moist without sogginess.
- Seasoned breadcrumbs: Adds savory flavor and texture; you can use store-bought or make your own.
- Seasoned panko breadcrumbs: Gives that extra crunch everyone loves.
- Kosher salt and black pepper: To enhance all those flavors naturally.
- Olive oil cooking spray (optional): Spraying before baking helps the coating brown beautifully without deep frying.
Variations
One of the things I love about this Dill Pickle Chicken Recipe is how easy it is to tweak and make your own. Whether you want to dial up the spice or keep it classic, there are plenty of ways to customize it.
- Spicy kick: Add a dash of cayenne or smoked paprika to the breadcrumb mixture for a smoky heat that my family found irresistible.
- Gluten-free: Swap regular breadcrumbs and panko for gluten-free alternatives—they work beautifully and keep that crunch intact.
- Garlic lovers: Mix some garlic powder into the breading for an extra savory punch; I discovered this last minute and it became a favorite.
- Air fryer method: If you have an air fryer, this recipe crisps up perfectly in about 10-12 minutes, cutting down bake time and cleanup.
How to Make Dill Pickle Chicken Recipe
Step 1: Marinate for Maximum Flavor
Start by placing your thin chicken breasts into a ziplock bag with 1 ½ cups of dill pickle juice. Remove as much air as possible to ensure even coverage. Let it sit in the fridge for 8 to 12 hours—this slow marinade is key for juicy, tangy bites. I’ve learned the hard way that rushing this step really impacts the flavor, so don’t skip or shorten the time!
Step 2: Prep the Coating Station
Once your chicken is marinated, pat it dry with paper towels to help the coating stick better. Preheat your oven to 425°F and line a baking sheet with parchment paper—or better yet, place a wire rack on your baking pan for extra crispiness all around. Then, whisk eggs and milk in a bowl, and mix your breadcrumbs, panko, salt, and pepper in a separate shallow dish.
Step 3: Bread and Bake to Perfection
Dip each chicken piece first into the egg mixture, letting excess drip off, then into the breadcrumb mix, pressing gently to coat. Place the breaded chicken on your prepared sheet or rack. A quick spritz of olive oil spray on both sides before baking helps create a golden crust without deep frying. Bake for 10 minutes, flip, then bake another 8 minutes or until the internal temperature hits 165°F. You’ll notice the smell halfway through—pure magic!
Pro Tips for Making Dill Pickle Chicken Recipe
- Use thin chicken slices: This ensures everything cooks evenly and the crumb coating crisps without drying out the meat.
- Pat chicken dry after marinating: Removing excess liquid helps the breading stick better and prevents sogginess.
- Baking rack hack: Baking on a wire rack lets heat circulate around the chicken, giving you a crunchier crust all over.
- Don’t overbake: Check internal temp early to avoid dry chicken — remember, it’s done at 165°F!
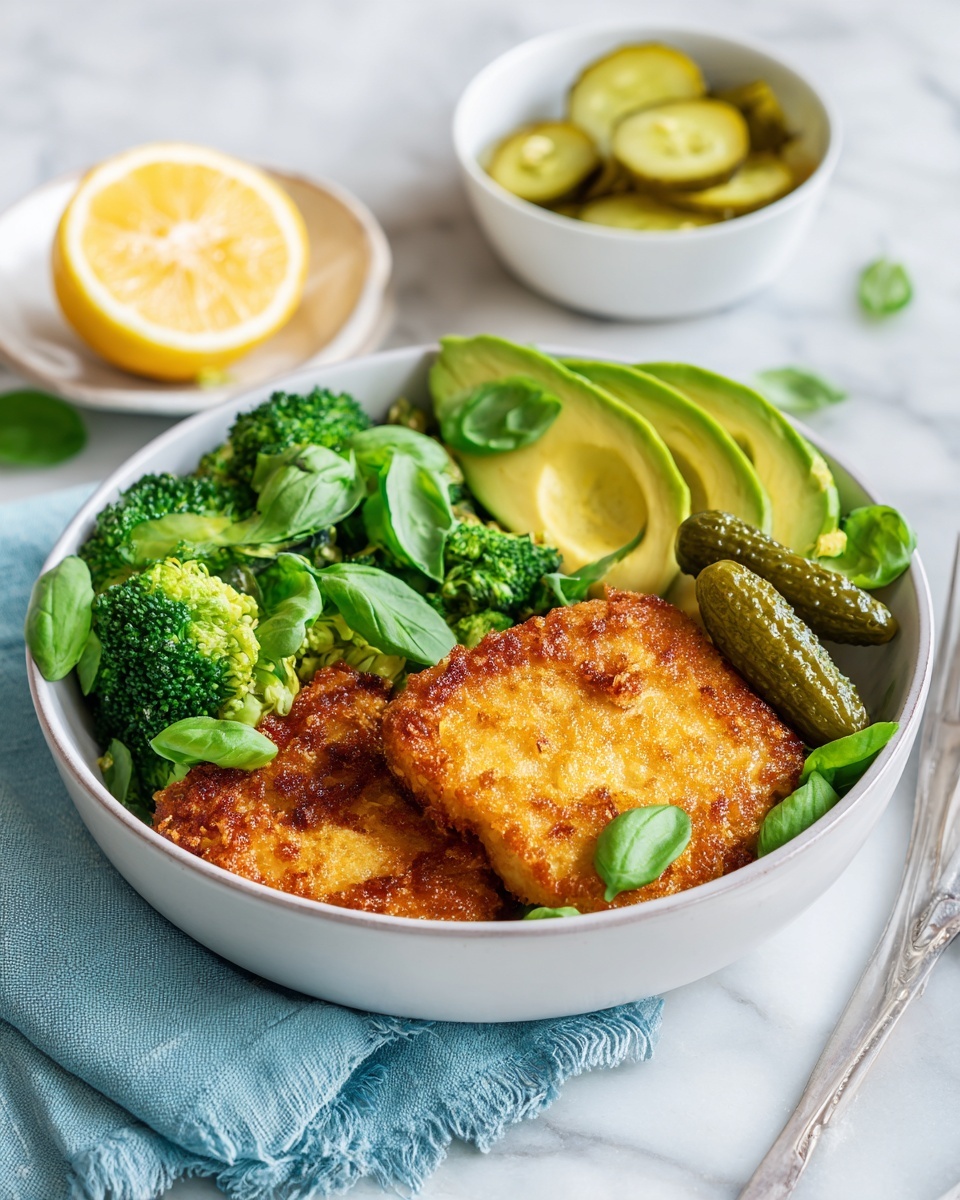
How to Serve Dill Pickle Chicken Recipe
Garnishes
I love topping this chicken with fresh chopped dill or parsley to echo the pickle juice flavor and add a fresh pop of color. A squeeze of lemon juice right before serving brightens things up as well. Sometimes I even add thin pickle slices for fun and extra tang!
Side Dishes
My go-to sides with Dill Pickle Chicken Recipe are crispy roasted potatoes or a simple green salad with a light vinaigrette. Coleslaw also pairs beautifully to keep the meal light and refreshing. For a cozy twist, creamy mashed potatoes balance the tang nicely.
Creative Ways to Present
For a special occasion, try serving the chicken sliced over buttery noodles or even in toasted sandwich buns with a smear of mayo and pickle chips — it turns into an epic sandwich! I’ve also layered it atop a salad with hard-boiled eggs for a delicious, light lunch.
Make Ahead and Storage
Storing Leftovers
I usually pop leftovers in an airtight container and keep them in the fridge for up to 4 days. The breading stays reasonably crisp if you reheat them carefully, so plan a tasty second meal with little hassle.
Freezing
Freezing works best when you bread the chicken but don’t bake it yet. I bag the raw breaded chicken in a freezer-safe bag and freeze up to 3 months. When ready, just bake straight from frozen—add a few minutes to the bake time and you’re good to go!
Reheating
To reheat, gently microwave in 20-second bursts to keep it moist without overcooking. My favorite method is popping leftovers in an air fryer at 375°F for 3-5 minutes, which brings back that fresh-crisp texture like it just came out of the oven.
FAQs
-
Can I use chicken thighs instead of breasts for this Dill Pickle Chicken Recipe?
Absolutely! Chicken thighs will add extra juiciness and flavor. Just make sure to adjust cook times since thighs might take a bit longer to reach 165°F. Thinly slicing them helps with even cooking.
-
Is it necessary to marinate the chicken overnight?
Marinating for 8 to 12 hours really amplifies the flavor and tenderness, but if you’re short on time, even 2-3 hours will still improve taste. Just avoid skipping it altogether for best results.
-
Can I bake this chicken without spraying olive oil?
You can, but spraying helps the coating brown and crisp evenly. Without it, the texture may be a little drier or less golden. Alternatively, tossing chicken in a light drizzle of oil before breading also works.
-
How do I know when the chicken is fully cooked?
The safest bet is using a meat thermometer to check that the internal temperature reaches 165°F. Visually, it should be golden brown on the outside and juices run clear when cut.
Final Thoughts
This Dill Pickle Chicken Recipe holds a special place in my kitchen because it takes simple, familiar ingredients and flips them into something unexpectedly delightful. It’s an easy dish that tastes fancy, and the tangy, crispy combo makes everyone at the table ask for seconds. If you’re looking to shake up your chicken dinner routine with minimal fuss but maximum flavor, you really must give this one a try—you’ll thank me later!
Print
Dill Pickle Chicken Recipe
- Prep Time: 15 minutes
- Cook Time: 18 minutes
- Total Time: 8 hours 33 minutes
- Yield: 4 servings
- Category: Main Dish
- Method: Baking
- Cuisine: American
Description
This Dill Pickle Chicken recipe features thinly sliced chicken breasts marinated in tangy dill pickle juice, then coated in a crispy seasoned breadcrumb and panko mixture before baking to golden perfection. The marinade tenderizes the chicken while infusing it with bright, zesty flavor, creating a uniquely delicious and juicy baked chicken dish perfect for a flavorful weeknight meal or casual gathering.
Ingredients
Chicken and Marinade
- 1.5 lbs thinly sliced chicken breasts
- 1 ½ cup dill pickle juice
Coating
- 2 large eggs, beaten
- 1 tablespoon milk
- ¾ cup seasoned breadcrumbs
- ¾ cup seasoned panko breadcrumbs
- ½ teaspoon kosher salt
- Black pepper, to taste
- Olive oil cooking spray, optional
Instructions
- Marinate the Chicken: Place the thinly sliced chicken breasts and 1 ½ cups of dill pickle juice in a ziplock bag. Remove as much air as possible from the bag, then massage the chicken around to ensure it is completely coated in the pickle juice. Seal the bag and refrigerate for 8 to 12 hours to allow the flavors to permeate and the chicken to tenderize.
- Prepare for Coating: After marinating, remove the chicken from the pickle juice and pat dry thoroughly using paper towels to remove excess moisture. Discard the leftover pickle juice to avoid sogginess during baking.
- Preheat and Prepare Bakeware: Preheat your oven to 425°F (220°C). Line a large baking sheet with parchment paper or, for extra crispy chicken, place a wire cooling rack on a rimmed baking pan to allow air circulation around the chicken pieces during baking.
- Mix Egg Wash and Coating: In a medium bowl, whisk together the beaten eggs and milk to create an egg wash. In a large shallow dish, combine the seasoned breadcrumbs, seasoned panko breadcrumbs, kosher salt, and black pepper thoroughly.
- Coat the Chicken: Dip each piece of chicken first into the egg wash, ensuring it is fully coated, then dredge it into the breadcrumb mixture. Press lightly to help the coating adhere well and shake off any excess crumbs.
- Arrange and Spray: Lay the coated chicken breasts onto the prepared baking sheet or wire rack in a single layer. Optionally, spray the tops and bottoms lightly with olive oil cooking spray to promote browning and crispiness during baking.
- Bake the Chicken: Bake the chicken in the preheated oven for 10 minutes. Then carefully flip each piece and bake for an additional 8 minutes or until the chicken is golden brown and the internal temperature reaches 165°F (74°C) to ensure it is fully cooked.
Notes
- Storage: Store cooked chicken in an airtight container in the refrigerator for up to 4 days.
- Freezing: Bread the chicken breasts as usual, but do not bake. Place in a large freezer-safe bag and freeze for up to 3 months.
- Reheating: Reheat cooked chicken in the microwave in 20-second increments until warmed through, or use an air fryer at 375°F for 3-5 minutes for crispiness.
- Crispier Texture: Using a wire rack placed on a baking sheet allows air to circulate and results in a crispier crust compared to baking directly on parchment.
- Marination Time: Allowing the chicken to marinate for the full 8 to 12 hours enhances flavor and tenderness significantly.
Nutrition
- Serving Size: 1 serving (approximately 6 oz chicken)
- Calories: 350 kcal
- Sugar: 2 g
- Sodium: 850 mg
- Fat: 10 g
- Saturated Fat: 2 g
- Unsaturated Fat: 7 g
- Trans Fat: 0 g
- Carbohydrates: 20 g
- Fiber: 1.5 g
- Protein: 40 g
- Cholesterol: 125 mg

Your email address will not be published. Required fields are marked *