
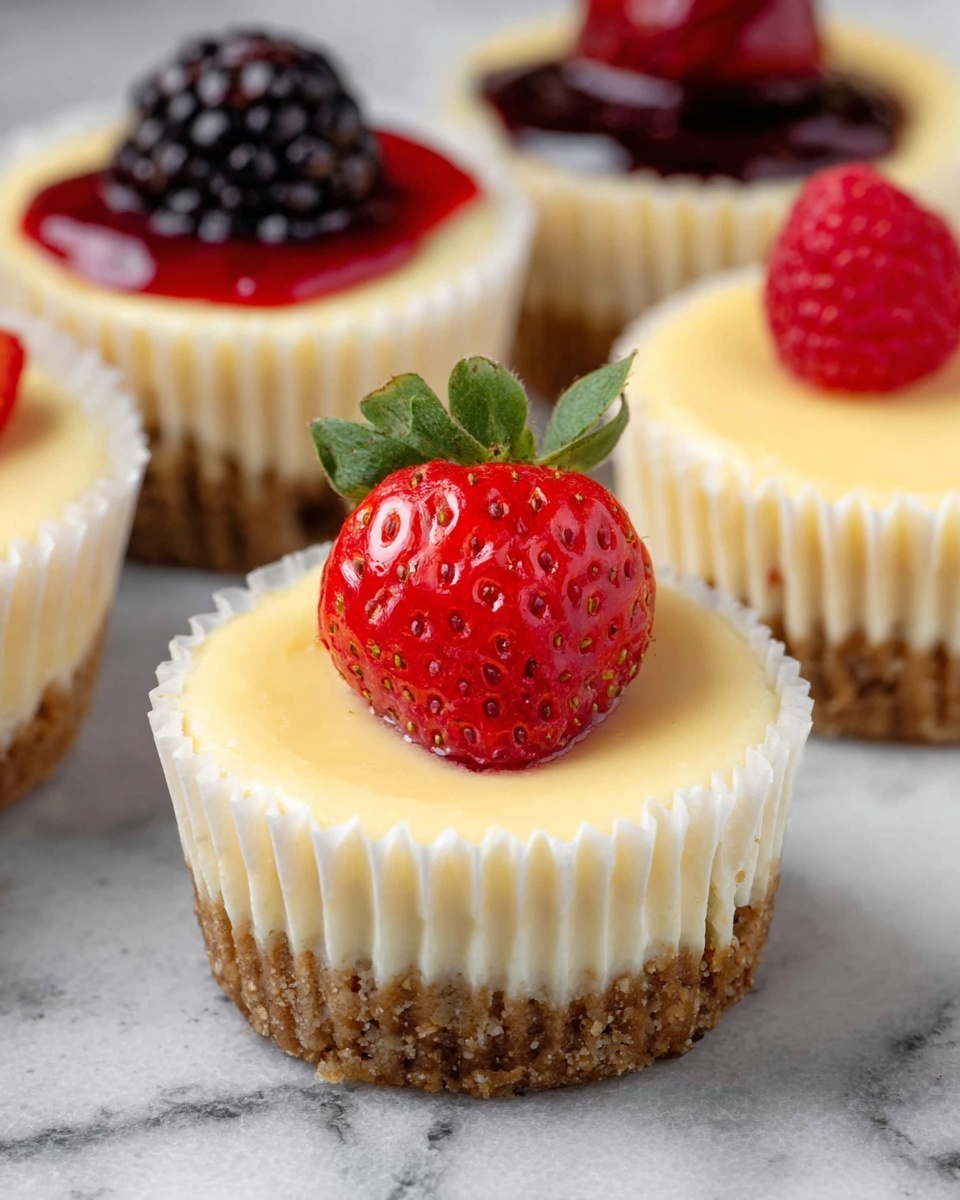
If you’ve ever wanted to make a dessert that feels just as special as it tastes, this Easy Mini Cheesecakes Recipe is going to become your new best friend. What I love most about these little cheesecakes is how perfectly they balance creamy richness with a buttery crust, all in a cute, individual size that’s super fun to serve and even easier to eat. Whether you’re making them for a casual family weekend or a fancy dinner party, these mini cheesecakes always impress without any of the fuss you’d expect from homemade cheesecakes.
I’ve tried so many cheesecake recipes over the years, and this Easy Mini Cheesecakes Recipe genuinely stands out because it’s foolproof and straightforward but never sacrifices flavor or texture. You’ll find that with just a few ingredients and simple steps, you get this silky, luscious filling and a crunchy crust that keeps everything perfectly balanced. Plus, making them in muffin tins with liners means minimal mess and the cutest presentation—something your guests will remember!
Why You’ll Love This Recipe
- No-fail technique: Designed to minimize cracks and deliver that classic creamy cheesecake texture every time.
- Simple ingredients: Pantry staples come together beautifully so you don’t need fancy or hard-to-find items.
- Perfect portion size: Miniature cheesecakes mean fewer leftovers and just the right sweet treat for each guest.
- Versatile dessert: Makes a wonderful base for any topping you love, from fresh berries to chocolate drizzle.

Ingredients You’ll Need
When it comes to this Easy Mini Cheesecakes Recipe, using full-fat ingredients truly makes all the difference—the flavor and texture just come to life. Plus, choosing the right biscuits for the crust adds that perfect crunch that complements the creamy filling.
- Biscuits crumbs: Graham cracker crumbs are classic, but I’ve used digestive biscuits or even slightly flavored cookies for a twist.
- Unsalted butter: Melted and mixed into the crumbs to bind everything into a crisp, golden crust.
- Full-fat cream cheese: Let it come to room temperature for the smoothest, lump-free filling; trust me, cold cream cheese is a nightmare.
- Granulated sugar: Sweetens without overpowering, blending perfectly with the tangy cream cheese.
- Eggs: Added one by one to keep the batter smooth and prevent cracks; room temp eggs help the mix stay silky.
- Vanilla extract: A splash adds warmth and depth to the flavor.
- Lemon juice: I love the subtle brightness it brings, cutting through the richness for balance.
- All-purpose flour: Helps stabilize the batter, so your mini cheesecakes hold their shape beautifully.
- Full-fat sour cream: Makes the filling extra creamy and adds a gentle tang that takes the texture next level.
Variations
One of the best parts about this Easy Mini Cheesecakes Recipe is how flexible it is. I often switch up the crust or topping depending on the season or what I have on hand, and you can easily make it your own with just a few simple swaps.
- Crust swap: I’ve used crushed pretzels for a salty-sweet twist that my family loves, especially around the holidays.
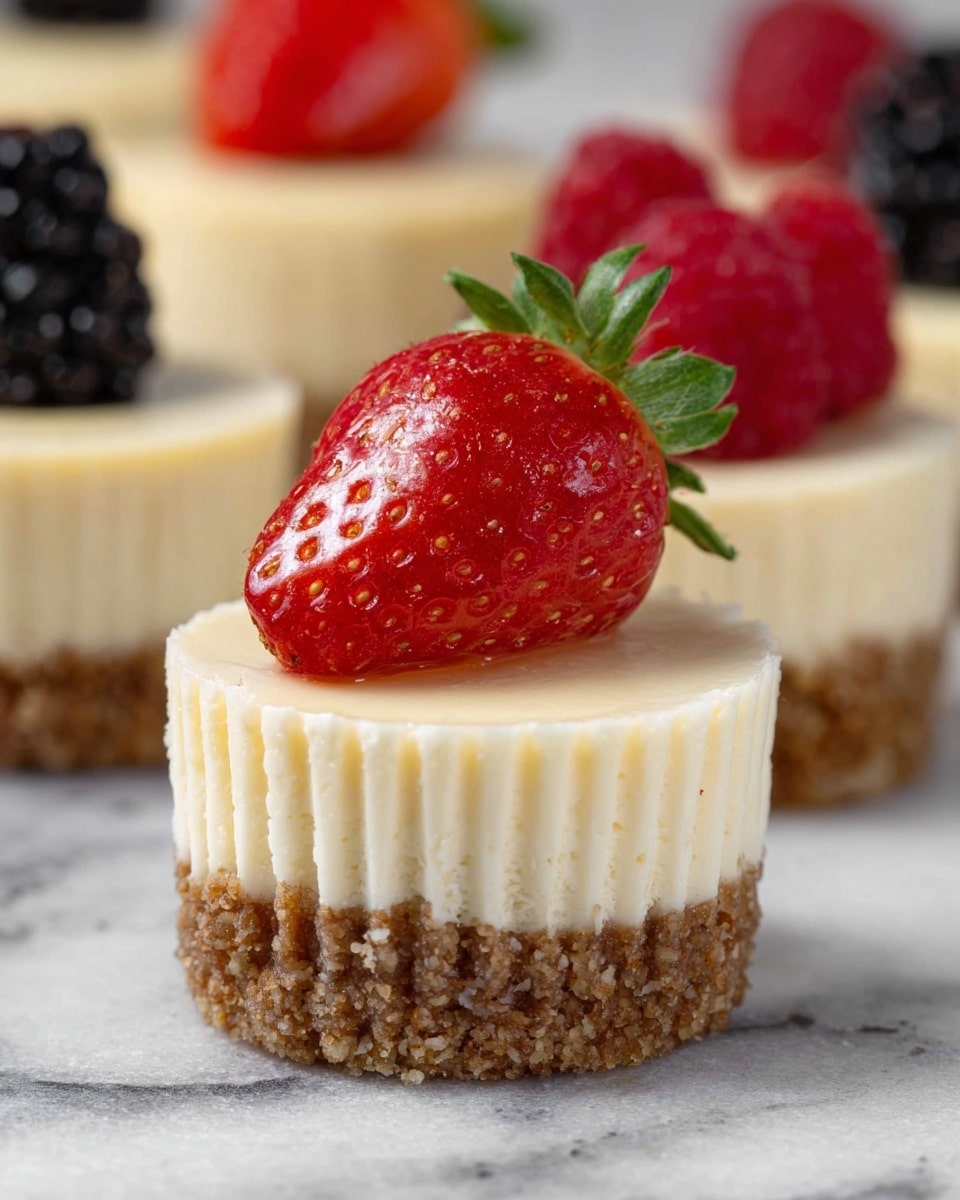
- Fruit toppings: Fresh berries or a quick homemade berry compote make these mini cheesecakes extra special and colorful.
- Chocolate lovers: Mixing in a bit of cocoa powder into the filling or drizzling melted chocolate on top is always a hit at my house.
- Dairy-free option: I’ve experimented with vegan cream cheese and plant-based yogurt—results are surprisingly good when baked a bit longer.
How to Make Easy Mini Cheesecakes Recipe
Step 1: Making the Perfect Crust
Start by crushing your biscuits until they’re fine crumbs—using a food processor speeds this up, but a plastic bag and rolling pin works just fine. Combine the crumbs with melted unsalted butter so everything holds together when pressed into the muffin liners. I usually press the mixture gently but firmly into the bottoms of a lined 12-cup muffin pan; this creates a sturdy base that won’t crumble when you eat your mini cheesecake.
Step 2: Crafting the Creamy Filling
Trust me, room temperature cream cheese is your best friend here. Beat it on low speed just until creamy, then slowly mix in the sugar to avoid lumps. Adding eggs one at a time on low speed helps keep your batter smooth and crack-free once baked. Stir in the vanilla, lemon juice, and flour—only just until combined—to keep the texture silky. Finally, fold in the sour cream gently for that rich, tangy finish that makes these cheesecakes stand out.
Step 3: Baking and Chilling the Mini Cheesecakes
Bake your mini cheesecakes at a steady 320°F (160°C) on the lower rack for about 15 minutes. You’ll want to pull them out when the edges are set but the centers still jiggle just a bit—this is key to avoiding dryness. Let them cool completely in the pan on a wire rack before chilling for at least 4 hours or overnight. This slow cooling process helps prevent cracking and perfects the creamy texture everyone will rave about.
Pro Tips for Making Easy Mini Cheesecakes Recipe
- Room Temperature Ingredients: I learned that starting with all dairy and eggs at room temp makes mixing easier and prevents lumps.
- Avoid Overmixing: Mixing eggs too vigorously traps air that can cause cracks, so keep it gentle and just combined.
- Steady Low Oven Heat: Baking at 320°F gives that perfect creamy center—too hot, and the tops dry and crack.
- Cooling Gradually: Cooling completely in the pan before chilling preserves smooth tops and a creamy texture—don’t rush this step!
How to Serve Easy Mini Cheesecakes Recipe
Garnishes
I’m a big fan of topping these mini cheesecakes with slightly tart fresh berries like raspberries or blueberries—the pop of color and brightness is unbeatable. Sometimes I sprinkle a little lemon zest or drizzle a tiny bit of honey for extra shine and flavor. For that indulgent vibe, a dollop of whipped cream or a drizzle of melted chocolate works beautifully too.
Side Dishes
These mini cheesecakes pair wonderfully with a light cup of coffee or tea, making them an excellent choice for brunches or afternoon gatherings. If you want a bit more, I like serving fresh fruit salad or a scoop of vanilla bean ice cream alongside—they complement the richness perfectly.
Creative Ways to Present
For holidays or special occasions, I often place these mini cheesecakes on a tiered dessert stand with colorful springform liners or even edible flowers as decoration. Another fun idea I tried was serving them in small clear cups layered with fruit compote—a beautiful and eye-catching twist that wowed my guests.
Make Ahead and Storage
Storing Leftovers
I usually keep leftover mini cheesecakes in an airtight container in the refrigerator; they stay fresh and retain their creamy texture for up to 4 days. You can line the container with parchment paper between layers to avoid sticking if you made a big batch.
Freezing
If I’m freezing these cheesecakes, I pop them on a baking sheet to firm up first, then transfer to a freezer-safe container with parchment paper between layers. When wrapped well, they freeze beautifully for up to 2 months without losing much of their rich flavor.
Reheating
I don’t usually reheat mini cheesecakes since they’re best enjoyed chilled, but if you thaw frozen ones in the fridge overnight, they come back perfectly creamy and delicious. Just avoid microwaving—they can weep or lose that lovely texture.
FAQs
-
Can I use low-fat cream cheese for this Easy Mini Cheesecakes Recipe?
While you can, I highly recommend using full-fat cream cheese for the best texture and flavor. Low-fat versions tend to be less creamy and might affect the cheesecake’s ability to set properly.
-
How do I prevent cracks on my mini cheesecakes?
Mix the batter gently to avoid incorporating too much air, bake at a low temperature (320°F), and remove them from the oven while centers still jiggle slightly. Also, cooling the cheesecakes gradually before chilling helps keep the tops smooth and crack-free.
-
Can I make this recipe gluten-free?
Yes! Use gluten-free biscuits for the crust, and ensure your flour substitute (like rice or almond flour) works well in small amounts or just skip the flour and rely on careful mixing and chilling to set the filling.
-
How long do these mini cheesecakes need to chill?
At least 4 hours in the refrigerator is necessary, but chilling overnight yields the best texture and makes slicing or removing from liners easier.
Final Thoughts
I absolutely love making this Easy Mini Cheesecakes Recipe because it feels like giving a little slice of heaven wrapped in simplicity. Whether you’re a seasoned baker or trying cheesecake for the first time, these mini versions make the process approachable and fun. Trust me, once you try these, you’ll find yourself reaching for this recipe again and again—it’s the perfect balance of creamy, sweet, and just the right amount of tang. So go ahead, give it a whirl, and enjoy every luscious bite with the people you love!
Print
Easy Mini Cheesecakes Recipe
- Prep Time: 15 minutes
- Cook Time: 15 minutes
- Total Time: 4 hours 30 minutes
- Yield: 12 mini cheesecakes
- Category: Dessert
- Method: Baking
- Cuisine: American
Description
These Easy Mini Cheesecakes are a creamy, perfectly portioned dessert with a buttery biscuit crust and a smooth, tangy filling. With a simple recipe that requires minimal ingredients and an easy baking process, these cheesecakes are ideal for any occasion. They bake at a low temperature to achieve a rich and silky texture without cracks, and the chilling step ensures a refreshing finish every time.
Ingredients
Crust
- 1 ½ cup (150 g) biscuit crumbs (graham crackers or your choice)
- ¼ cup (60 g) unsalted butter, melted
Filling
- 10.5 oz (300 g) full-fat cream cheese, room temperature
- ½ cup (100 g) granulated sugar
- 2 large eggs, room temperature
- 1 teaspoon vanilla extract
- 1 tablespoon lemon juice
- 1 ½ tablespoon (14 g) all-purpose flour
- ¾ cup (185 g) full-fat sour cream, room temperature
Instructions
- Preheat the Oven: Preheat your oven to 320ºF (160ºC). Line a 12-cup muffin pan with paper liners to prepare for the crust and filling.
- Make the Crust: Crush your choice of biscuits into fine crumbs. Mix the crumbs with the melted unsalted butter until fully combined. Press the mixture evenly into the bottom of each lined muffin cup to form the crust.
- Prepare the Cream Cheese: Soften the full-fat cream cheese to room temperature for smooth mixing. Beat on low speed just until creamy – avoid overmixing to prevent air incorporation.
- Add Sugar: With the mixer still on low, add the granulated sugar gradually until fully incorporated and creamy.
- Incorporate Eggs: Add the eggs one at a time while mixing on low speed. Mix only until just combined to reduce air bubbles, which can cause cracks.
- Add Flavorings and Flour: Pour in the vanilla extract, lemon juice, and all-purpose flour. Mix just until combined to keep the batter smooth and consistent.
- Mix in Sour Cream: Add the room-temperature sour cream and gently mix until the batter is smooth. Avoid overmixing.
- Fill Muffin Cups: Divide the cheesecake batter evenly among the 12 muffin cups over the prepared crust.
- Bake: Bake the mini cheesecakes on the lower two-thirds rack of the oven at 320ºF (160ºC) for approximately 15 minutes. The edges should be set while the centers still jiggle slightly.
- Cool and Chill: Let the cheesecakes cool completely in the pan on a wire rack. Once cooled, transfer them to the refrigerator and chill for at least 4 hours, preferably overnight, for the best texture.
- Serve: Serve chilled, optionally topped with your favorite fresh fruit or sauce just before eating.
Notes
- Use room-temperature cream cheese for a smooth batter; cold cream cheese leads to lumps.
- Don’t overmix after adding eggs to prevent cracks by minimizing air in the batter.
- Bake at a steady low temperature to achieve a creamy texture without cracking; consider using an oven thermometer for accuracy.
- Remove the cheesecakes from the oven when the edges are set but centers still jiggle slightly to ensure optimal texture.
- Cool the cheesecakes gradually in the pan before refrigerating to maintain smooth, crack-free tops.
Nutrition
- Serving Size: 1 mini cheesecake (approx. 80g)
- Calories: 280
- Sugar: 18g
- Sodium: 120mg
- Fat: 20g
- Saturated Fat: 12g
- Unsaturated Fat: 7g
- Trans Fat: 0g
- Carbohydrates: 18g
- Fiber: 0.5g
- Protein: 5g
- Cholesterol: 90mg

Your email address will not be published. Required fields are marked *