

If you’re on the lookout for a fun, quirky dessert that’s as cute as it is delicious, let me introduce you to my Frankenstein Pudding Cups Recipe. This treat is seriously a crowd-pleaser – it’s creamy, just the right amount of sweet, and has that playful Halloween vibe that gets everyone smiling. I still remember the first time I made these for my nephew’s party; they vanished in no time! Stick with me, and I’ll walk you through how to nail them perfectly at home.
Why You’ll Love This Recipe
- Super Simple Ingredients: You probably already have most of these in your pantry or fridge.
- Kid-Friendly Fun: Decorating the cups feels like a mini art project everyone enjoys.
- No-Bake and Quick: It takes about 30 minutes total, perfect for last-minute treats.
- Customizable Flair: You can easily tweak colors or toppings to match your event or mood.

Ingredients You’ll Need
These ingredients create the perfect pudding texture and that iconic Frankenstein green hue. Each part brings something special, whether it’s creaminess, sweetness, or a fun crunch. When you shop, pick quality cream cheese for the best texture and don’t skimp on the Oreos—they’re essential for that “hair” effect!
- Cold Milk: Using cold milk helps the instant pudding set up nicely.
- Vanilla Instant Pudding Mix: The vanilla flavor keeps things classic and balances the sweetness.
- Cream Cheese (softened): Softened cream cheese adds a luscious, rich base that makes this pudding cup extra creamy.
- Butter (softened): Butter adds depth and smoothness to the pudding mixture.
- Powdered Sugar: Powdered sugar blends easily and sweetens without graininess.
- Green Food Coloring: A few drops take it from basic to festive and fun.
- Oreos: Crushed Oreos bring the perfect chocolate “hair” texture and a little crunch.
Variations
I love how versatile the Frankenstein Pudding Cups Recipe is—once you have the base down, you can really make it your own! I often switch up the toppings or go lighter on the coloring depending on the occasion.
- Chocolate Twist: I once swapped vanilla pudding for chocolate and added crushed peanuts for a nutty crunch—my family loved that twist.
- Dairy-Free Version: Using coconut milk pudding and dairy-free cream cheese worked great when I made these for a friend with allergies.
- Berry Upgrade: Adding fresh raspberries between the pudding and Oreo crumbs adds a nice pop of flavor and color.
- Holiday Edition: For Christmas, I swapped green for red food coloring and used crushed peppermint Oreos on top.
How to Make Frankenstein Pudding Cups Recipe
Step 1: Whisk up the pudding base
Start by stirring your cold milk together with the vanilla instant pudding mix. Do this in a large bowl using a whisk, mixing until everything is smooth and no lumps remain. Set it aside for a few minutes to let it thicken up—this step is key so your pudding isn’t runny later.
Step 2: Cream the cream cheese and butter
Beat the softened cream cheese and butter together in a separate bowl until completely smooth and creamy. I like to use a hand mixer for this because it speeds things up and ensures no pesky lumps.
Step 3: Sweeten and combine
Next, mix in the powdered sugar with your cream cheese and butter until combined. Then gently fold in the pudding you prepared earlier. At this point, you should have a luscious, even mix that’s ready for the fun part—color!
Step 4: Add the green magic
This is where your Frankenstein Pudding Cups Recipe really comes to life. Add green food coloring a drop at a time, stirring all the while, until you get the shade that screams “monster hair.” I usually add 6-8 drops, but trust your eyes and have fun!
Step 5: Assemble your pudding cups
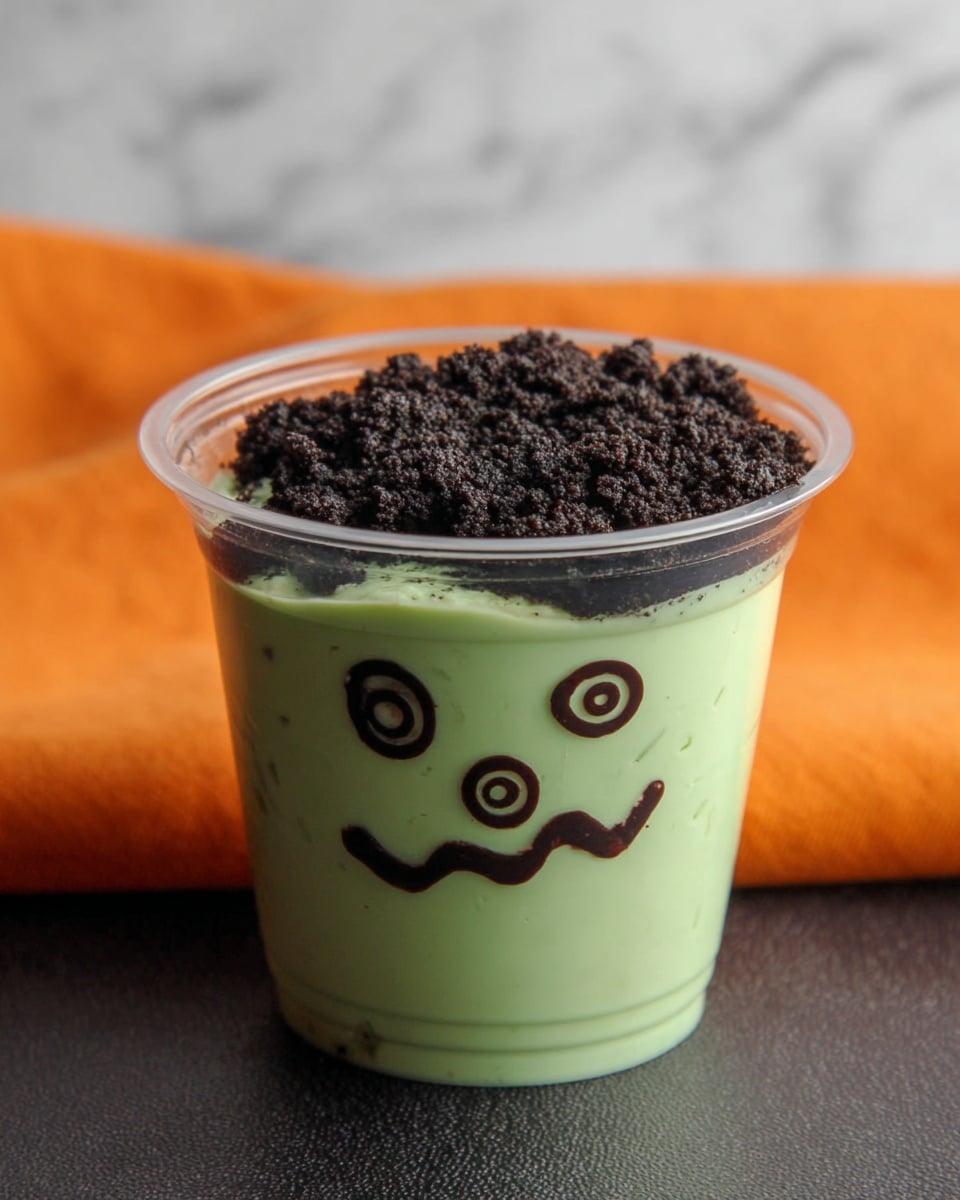
Spoon the green pudding mixture evenly into clear plastic cups—these let your masterpiece shine. Give each cup a gentle tap on the counter to level out the pudding surface; it helps when adding the “hair.”
Step 6: Create the creepy hair
Now, crush those Oreos finely—either with a rolling pin inside a bag or a food processor if you have one. Sprinkle a generous layer of crumbs on top of each pudding cup for that delicious spooky “hair” effect. It adds texture and the perfect chocolatey contrast.
Step 7: Draw your monster’s face
Grab a black permanent marker and carefully draw Frankenstein’s signature face on the cup side. You can do this before or after adding the Oreo crumbs. This step is super fun if you have kids helping out, and personalizes each cup!
Step 8: Chill and serve
Pop your Frankenstein Pudding Cups in the fridge and let them chill until everything is nice and firm—usually about 15 minutes. Then, get ready to watch these treats disappear fast!
Pro Tips for Making Frankenstein Pudding Cups Recipe
- Use Room Temperature Cream Cheese and Butter: This makes blending smooth and prevents lumps in your pudding.
- Don’t Overmix the Pudding: Stir just until combined to keep the texture silky and light.
- Crush Oreos Finely: The finer the crumbs, the more realistic the “hair” looks and feels.
- Draw Faces Before Filling With Oreos: I found this helps the marker not to smudge, keeping those Frankenstein smiles sharp!
How to Serve Frankenstein Pudding Cups Recipe
Garnishes
I like to keep it simple with crushed Oreos, but sometimes I sprinkle a few mini chocolate chips or use edible googly eyes on top for an extra goofy touch. Fresh mint leaves can add a surprising pop of green, but usually, the Oreo crumbs steal the show!
Side Dishes
These pudding cups are a dessert all on their own, but when I do serve sides, it’s usually light fruit like sliced strawberries or a bowl of mixed berries. It balances the creamy sweetness nicely.
Creative Ways to Present
At parties, I’ve arranged the cups on a dark tray sprinkled with dry ice for a smoky effect—kids loved the spooky vibe! You can also line them up on a tiered stand or place little “Frankenstein” name tags on toothpicks stuck into the pudding for a professional look.
Make Ahead and Storage
Storing Leftovers
If you have any leftovers (which is rare in my house!), just cover each cup tightly with plastic wrap and store them in the fridge. They keep well for up to 3 days without losing that creamy texture or Oreo crunch.
Freezing
I haven’t personally frozen these pudding cups because the cream cheese base tends to shift texture when thawed, becoming a bit grainy. However, if you want to try, I recommend freezing only the pudding mixture before assembling.
Reheating
Since these are served chilled, reheating isn’t necessary. Just give them a good cooldown in the fridge if they’ve been out too long. If you add fresh fruit, wait until serving time so it stays juicy and fresh.
FAQs
-
Can I make Frankenstein Pudding Cups Recipe ahead of time?
Yes! You can prepare the pudding mixture and assemble the cups up to a day in advance. Just cover and refrigerate, then add the Oreo crumbs right before serving to keep their crunch.
-
What can I use if I don’t have green food coloring?
If you don’t have green food coloring, you can experiment with natural alternatives like spinach powder or matcha, but keep in mind the flavor might subtly change. Otherwise, just skip the coloring—it will still taste delicious!
-
Is there a way to make the pudding cups less sweet?
Absolutely. You can reduce the powdered sugar slightly or swap the vanilla pudding mix for a sugar-free version. Remember, Oreos add sweetness too, so consider using fewer crumbs if you want it less sugary overall.
-
Can children help make these pudding cups?
Definitely! Kids love mixing the pudding and decorating the cups—just supervise when using the permanent marker. It’s a great hands-on activity before the treats disappear!
Final Thoughts
I absolutely love how the Frankenstein Pudding Cups Recipe combines flavors and fun into one simple dessert. The creamy pudding paired with the crunchy Oreos and those goofy little drawn-on faces always brings smiles and laughter around my table. Honestly, once you try this, you’ll find it’s a dessert that’s both nostalgic and fresh—a guaranteed hit for Halloween or anytime you want a playful treat. Give it a go, and let me know how your monster pudding cups turn out!
Print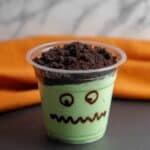
Frankenstein Pudding Cups Recipe
- Prep Time: 15 minutes
- Cook Time: 0 minutes
- Total Time: 30 minutes
- Yield: 8 servings (in 9 oz. cups)
- Category: Dessert
- Method: No-Cook
- Cuisine: American
- Diet: Vegetarian
Description
Frankenstein Pudding Cups are a fun and festive dessert perfect for Halloween or any spooky-themed party. These creamy vanilla pudding cups are flavored with a smooth cream cheese blend, tinted green, and topped with crushed Oreos to resemble Frankenstein’s hair. Presented in clear cups with a cute monster face drawn on the outside, they are both adorable and delicious.
Ingredients
Base Pudding Mixture
- 3½ cups cold milk
- 6.8 oz. vanilla instant pudding mix (2 boxes)
Cream Cheese Mixture
- 8 oz. cream cheese, softened
- ¼ cup butter, softened
- 1 cup powdered sugar
- Green food coloring, as needed
Topping
- 24 Oreos, crushed or processed into crumbs
Instructions
- Prepare the pudding: In a large mixing bowl, stir together the cold milk and vanilla instant pudding mix until completely combined. Set it aside to let the pudding begin to set for a few minutes.
- Make cream cheese mixture: In a separate bowl, beat the softened cream cheese and butter together until smooth and creamy. Gradually add the powdered sugar, continuing to beat until fully incorporated and smooth.
- Combine pudding and cream cheese: Stir the partially set pudding into the cream cheese mixture until everything is combined and smooth.
- Add color: Add green food coloring gradually to the pudding mixture until your desired shade of green is reached, stirring thoroughly for even coloring.
- Assemble cups: Spoon the green pudding mixture into clear plastic cups. Gently tap the bottom of each cup on the counter a few times to level the pudding surface.
- Prepare topping: Crush the Oreos into fine crumbs using a food processor or by hand, being careful not to make them powdery.
- Add Oreo ‘hair’: Spoon a layer of crushed Oreos over the top of each pudding cup to resemble Frankenstein’s hair.
- Decorate faces: Use a permanent marker to carefully draw a Frankenstein face on the side of each plastic cup.
- Chill and serve: Refrigerate the pudding cups until ready to serve, allowing the flavors to meld and the pudding to fully set.
Notes
- Make sure the cream cheese and butter are softened to room temperature for a smooth mixture without lumps.
- Use clear plastic cups to best showcase the green pudding and Oreo topping for visual effect.
- The permanent marker used to draw faces is for decoration only and should not come into contact with the food.
- These pudding cups are best served chilled but can be prepared a few hours in advance for convenience.
- Crush Oreos just before serving to keep the toppings crunchy if preferred, or prepare earlier for softer topping texture.
Nutrition
- Serving Size: 1 cup (approx. 9 oz)
- Calories: 320
- Sugar: 35g
- Sodium: 220mg
- Fat: 15g
- Saturated Fat: 8g
- Unsaturated Fat: 5g
- Trans Fat: 0g
- Carbohydrates: 40g
- Fiber: 1g
- Protein: 5g
- Cholesterol: 45mg

Your email address will not be published. Required fields are marked *