

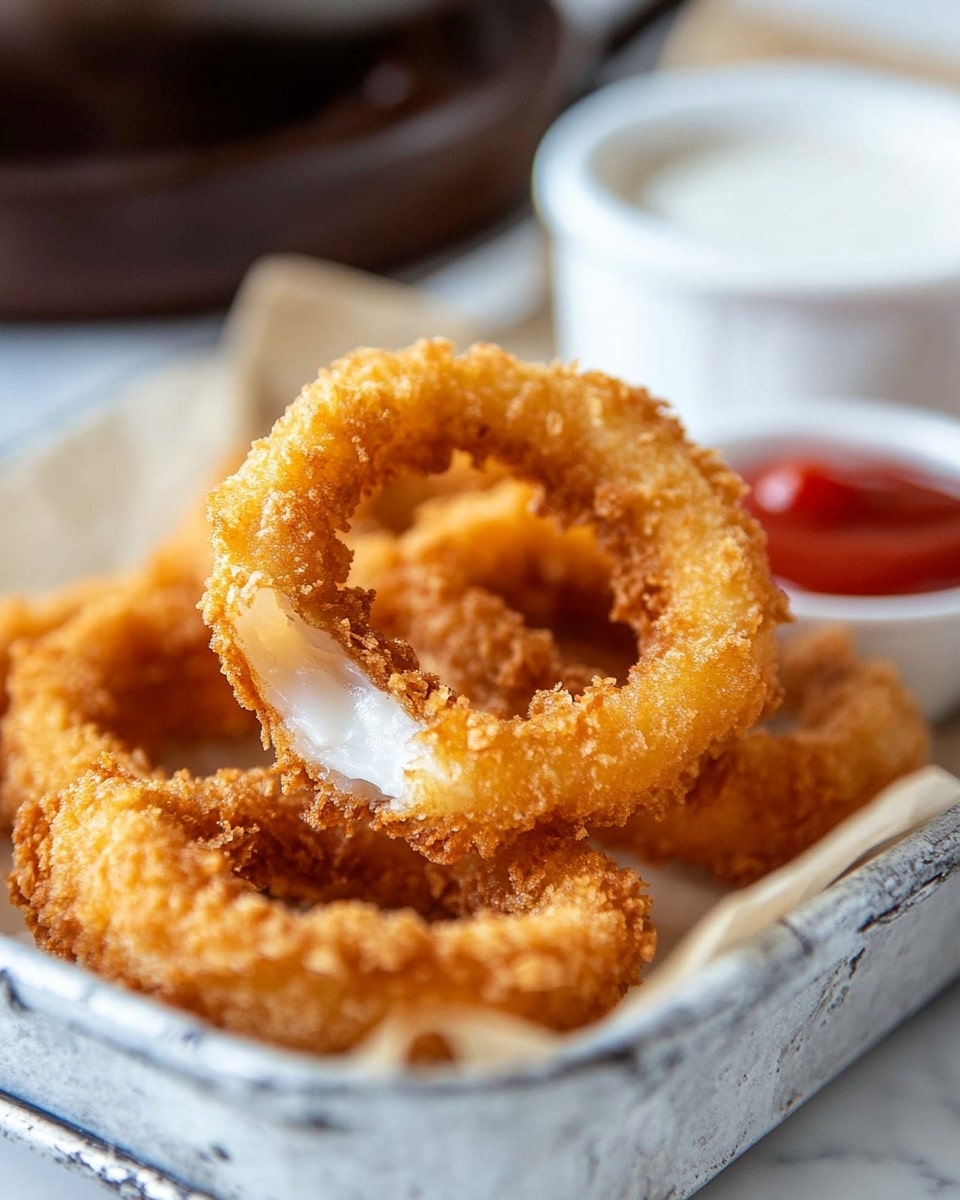
I absolutely love sharing this Fried Homemade Onion Rings Recipe with friends because it’s just that good — golden, crispy, and perfectly seasoned every single time. There’s something so satisfying about making these from scratch rather than grabbing the frozen aisle version. When you try this recipe, you’ll notice the crunchy panko coating combined with the tangy buttermilk batter really makes these onion rings pop with flavor and texture.
Whether you’re serving these up for a casual weekend snack, game day, or alongside a juicy burger, this recipe truly shines. I used to struggle with breading falling off and soggy coatings until I discovered the trick of letting the breaded rings sit briefly before frying — it’s a game changer. Stick with me here, and I promise you’ll nail crispy, restaurant-quality onion rings at home with this easy Fried Homemade Onion Rings Recipe.
Why You’ll Love This Recipe
- Crunchy, Light Texture: The combination of panko and a buttermilk egg wash creates a perfect crispy crust that’s never greasy.
- Easy to Make: No complicated steps here — just three simple bowls and a little patience for perfect coating adhesion.
- Flavor Boosted: A touch of smoked paprika and garlic powder adds a subtle smoky depth that elevates the onions.
- Versatile to Serve: Great with dips, burgers, or even a fun appetizer for friends and family gatherings.

Ingredients You’ll Need
These ingredients come together to build a crunchy, flavorful onion ring that’s better than any takeout. Don’t skip the buttermilk — it tenderizes the onion and helps the coating stick just right.
- Large sweet or yellow onion: Choosing sweet onions helps keep a nice balance of flavor without too much bite.
- Buttermilk: The acidity softens the onion and gives the batter a nice tang.
- Large egg: Binds the wet and dry ingredients so the coating sticks perfectly.
- All-purpose flour: Gives structure to the batter and helps absorption.
- Cornstarch: Key to extra crispiness by reducing gluten formation.
- Smoked paprika: Adds a subtle smoky warmth that plays beautifully with the sweetness of onions.
- Salt: Brings out the natural onion flavor and seasons the coating.
- Black pepper: Just enough spice to layer flavor without overpowering.
- Garlic powder: A mild onion complement for savory depth.
- Panko bread crumbs: For that light, airy crunch you want in your fried onion rings.
- Oil for frying: Canola, vegetable, or peanut oil all work well due to their high smoke points.
Variations
I like to mix things up sometimes — this recipe is so flexible you can easily adjust it based on what you have or what you’re craving. Don’t hesitate to personalize flavors or even go gluten-free if needed.
- Spicy Kick: Add a pinch of cayenne pepper or chili powder to the flour mixture if you want your onion rings with a little heat — I love this twist on game days.
- Gluten-Free Option: Swap all-purpose flour with a gluten-free blend and use gluten-free panko crumbs to make these friendly for sensitive diets.
- Air Fryer Version: For a lighter take, you can air fry these breaded onion rings — spray them generously with cooking spray and bake until crisp. It’s a nice shortcut when you want less mess.
- Herby Coating: Toss some dried Italian herbs or fresh chopped parsley into your bread crumbs for a fresh, fragrant flavor boost.
How to Make Fried Homemade Onion Rings Recipe
Step 1: Prep the Onion Rings and Wet Mixture
Start by slicing your onion into ½-inch thick rings — not too thin or they won’t hold up, and not too thick or they won’t cook through properly. Whisk together buttermilk and egg in a shallow dish; this combo softens the onions and helps the batter stick beautifully later on.
Step 2: Mix Dry Ingredients and Prepare Breading Stations
In a separate shallow bowl, combine the flour, cornstarch, smoked paprika, salt, pepper, and garlic powder. In a third dish, pour in your panko bread crumbs. Setting up these three stations — flour mixture, wet mixture, and crumbs — makes the breading process faster and cleaner.
Step 3: Dredge the Onion Rings
Coat each onion ring first in the flour mixture, then dip it into the buttermilk and egg blend, and finally press it into the panko crumbs until well coated. Setting these aside on a baking sheet and allowing them to sit for 10-15 minutes before frying really helps the batter “set” and cling, so less falls off when they hit the hot oil.
Step 4: Heat the Oil and Fry
Heat about an inch of oil in a cast iron skillet or heavy pot to between 350°F and 375°F — this temperature range ensures a crispy, golden crust without absorbing too much oil. Fry 3-4 onion rings at a time to avoid overcrowding, cooking for 2-3 minutes and flipping halfway through. You’ll know they’re ready once they turn a light golden brown and feel crispy to the touch.
Step 5: Drain and Serve
Use a slotted spoon to remove the rings and place them on a wire rack over a baking sheet — this method helps excess oil drain so your rings stay crispy longer. Repeat the process with the remaining rings and serve warm with your favorite dipping sauces.
Pro Tips for Making Fried Homemade Onion Rings Recipe
- Use Sweet Onions: I found sweet onions create the best balance; too sharp and the onion can overpower the crispy coating.
- Let Rings Rest Before Frying: This simple step helps the coating bind tighter, which stopped my breading from falling off and gave me an even crunch.
- Maintain Oil Temperature: Keep the oil hot but not smoking; using a thermometer makes frying easier and safer.
- Don’t Crowd the Pan: Frying too many at once drops the oil temperature, causing soggy rings — trust me, it’s worth the patience.
How to Serve Fried Homemade Onion Rings Recipe
Garnishes
I love sprinkling a little flaky sea salt right after frying — it makes the onion rings pop with a subtle crunch and a hint of saltiness. A squeeze of fresh lemon juice can also brighten the flavors if you want a zesty finish. Fresh chopped parsley adds a nice pop of color and freshness, too.
Side Dishes
This Fried Homemade Onion Rings Recipe pairs wonderfully with classic diner fare. I often serve it alongside cheeseburgers, crispy fried chicken, or even a hearty salad to mix textures. And of course, a variety of dipping sauces like spicy sriracha mayo, garlic aioli, or classic ketchup are always crowd-pleasers.
Creative Ways to Present
For a fun party, I’ve arranged the onion rings stacked like a tower on a platter with little bowls of different sauces around it — it always gets people reaching and chatting. You can also thread them onto skewers for a crunchy popcorn-style snack or serve them in mini cones wrapped with parchment paper for an easy handheld appetizer.
Make Ahead and Storage
Storing Leftovers
After frying, I let the onion rings cool completely and store leftovers in a single layer on a plate, covered loosely with foil or in an airtight container in the fridge. They keep well for up to 3 days, perfect if you want to prep ahead for a party or save dinner leftovers.
Freezing
I’ve frozen leftover breaded and fried onion rings successfully by placing them on a baking sheet in a single layer and freezing until firm, then transferring to a freezer bag. To reheat, bake them straight from frozen for a few minutes — they retain their crunch and flavor surprisingly well.
Reheating
To bring onion rings back to life, I recommend reheating in the air fryer or oven instead of the microwave. A quick 5-7 minute bake at 350°F crisps up the panko coating without drying out the onion inside — microwaving tends to make them soggy, which we don’t want!
FAQs
-
Can I use regular bread crumbs instead of panko for this Fried Homemade Onion Rings Recipe?
You can absolutely substitute regular bread crumbs, but panko gives a lighter, airier crunch that makes a big difference in texture. If using regular crumbs, the coating might feel a bit denser and less crispy.
-
How do I keep the onion rings from slipping off the batter while frying?
Letting the breaded rings rest for 10-15 minutes before frying allows the coating to set and become tacky, reducing slippage. Also, be gentle when flipping and avoid overcrowding the pan, which can cause bubbles and disrupt the crust.
-
Can I bake these instead of frying?
You can bake them, especially if you’re looking for a lighter option. Preheat the oven to 425°F, place the breaded rings on a parchment-lined baking sheet, and bake for 15-20 minutes, flipping halfway through. They’ll be crispy, but frying still gives the best texture.
-
What oil is best for frying onion rings?
Oils with high smoke points like canola, vegetable, or peanut oil work best to fry onion rings. They stay stable at high heat and won’t impart unwanted flavors, helping you get that perfect golden crust.
-
Why is cornstarch used in this Fried Homemade Onion Rings Recipe?
Cornstarch helps keep the coating light and crispy by reducing gluten formation in the flour. It also aids in better adhesion of the batter to the onion rings.
Final Thoughts
This Fried Homemade Onion Rings Recipe really feels like one of those kitchen victories — easy enough for a weeknight but impressive enough to serve guests. I love how the crunchy coating perfectly hugs sweet onion rings, and how a few simple ingredients come together for such a delicious treat. Give this a try for your next snack or meal side, and I promise you’ll find yourself making it again and again. Enjoy the warm, crispy goodness and happy frying!
Print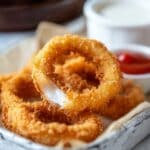
Fried Homemade Onion Rings Recipe
- Prep Time: 15 minutes
- Cook Time: 5 minutes
- Total Time: 20 minutes
- Yield: 4 servings
- Category: Appetizer
- Method: Frying
- Cuisine: American
Description
Crispy and flavorful homemade fried onion rings with a perfectly seasoned breading. These golden onion rings are coated in a buttermilk and egg wash, dredged in a seasoned flour mixture, and fried to crunchy perfection. Ideal as a snack, appetizer, or side dish.
Ingredients
Onions
- 1 large sweet or yellow onion, sliced into 1/2-inch thick rings
Breading and Batter
- 1 cup buttermilk
- 1 large egg
- 1/2 cup all-purpose flour
- 1 Tablespoon cornstarch
- 1 teaspoon smoked paprika
- 1 teaspoon salt
- 1/2 teaspoon black pepper
- 1/2 teaspoon garlic powder
- 1 cup panko bread crumbs
Frying
- Oil for frying (canola oil, vegetable oil, or peanut oil recommended)
Instructions
- Prepare Buttermilk Mixture: Whisk together 1 cup buttermilk and 1 large egg in a shallow dish until smooth and combined. This mixture will help the breading adhere to the onion rings.
- Mix Dry Ingredients: In a separate shallow dish, whisk together 1/2 cup all-purpose flour, 1 tablespoon cornstarch, 1 teaspoon smoked paprika, 1 teaspoon salt, 1/2 teaspoon black pepper, and 1/2 teaspoon garlic powder. In a third shallow dish, place 1 cup panko bread crumbs.
- Coat Onion Rings: Take the onion rings and dredge them first in the seasoned flour mixture, ensuring an even coating. Then dip them into the buttermilk and egg mixture, allowing any excess to drip off. Finally, press the onion rings into the panko bread crumbs to coat thoroughly. Set aside for 10 to 15 minutes to allow the breading to become tacky and adhere better during frying.
- Heat Oil: Pour oil into a large cast iron skillet or heavy-duty pot until it is about 1 inch deep. Heat the oil to a temperature of 350°F to 375°F, using a thermometer for accuracy to ensure crisp and non-greasy onion rings.
- Fry Onion Rings: Fry 3 to 4 onion rings at a time without overcrowding the pan. Fry each batch for 2 to 3 minutes, flipping halfway through, until the onion rings turn a light golden brown and achieve a crispy texture.
- Drain and Cool: Transfer fried onion rings to a wire rack set over a baking sheet. This allows excess oil to drain away, keeping the rings crispy. Repeat the frying process with the remaining onion rings.
Notes
- Storage: Keep leftover onion rings tightly covered in the refrigerator for up to 3 days. Reheat in an air fryer or oven to maintain crispiness.
- Air Fryer Option: Instead of deep frying, spray the breaded onion rings with cooking spray and place them in a single layer in the air fryer basket. Air fry at 350°F for 12 to 15 minutes until crispy, working in batches as needed.
- Oil Choice: Use a neutral oil with a high smoke point such as canola, vegetable, or peanut oil for best frying results.
- Temperature Control: Maintaining the oil between 350°F and 375°F is critical to avoid greasy or burnt onion rings.

Your email address will not be published. Required fields are marked *