

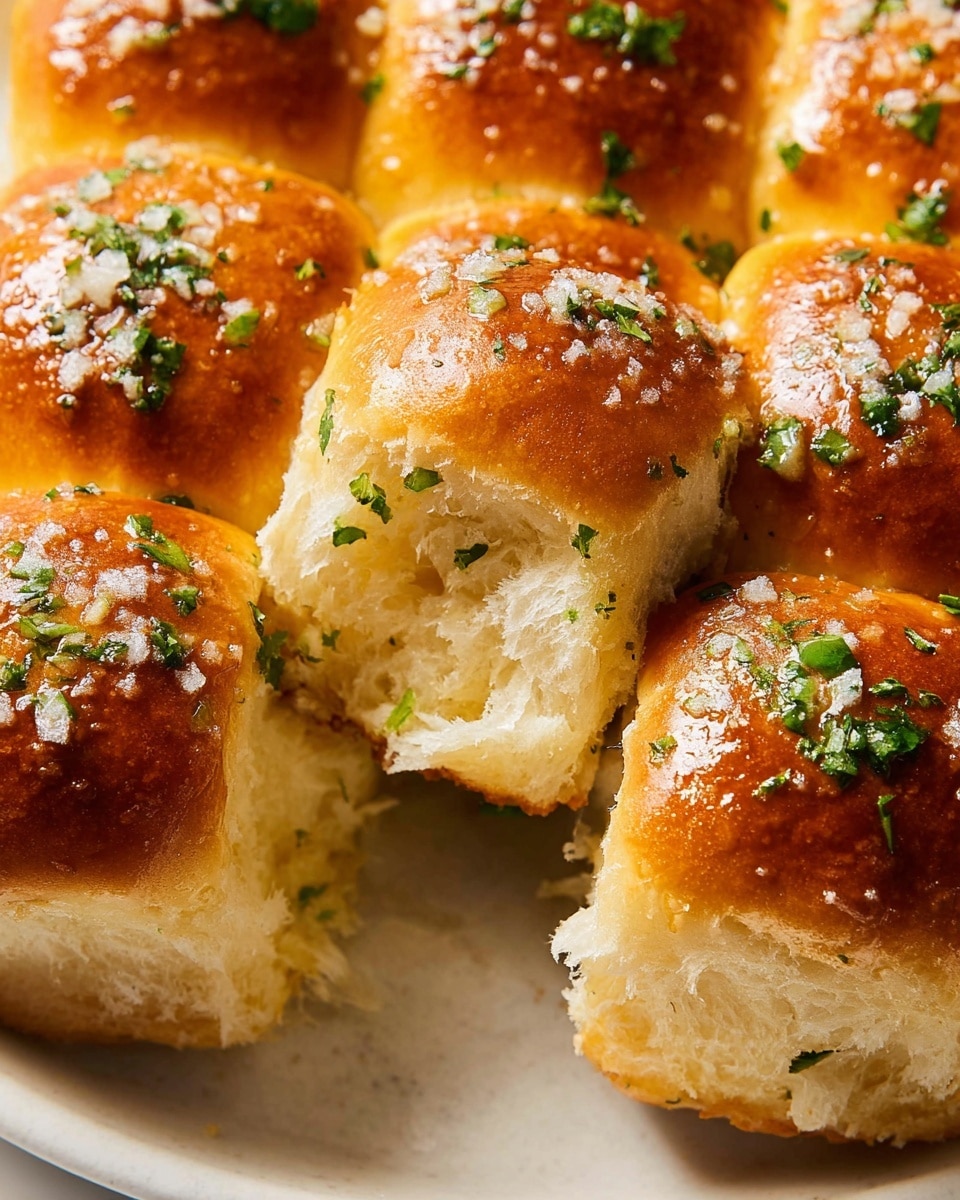
If you love warm, fluffy bread kissed with garlic and herbs, then this Garlic Bread Rolls Recipe is going to be your new go-to. I absolutely love how these rolls turn out—soft on the inside, golden and buttery on the outside, with that perfect garlicky punch. When I first tried making these, I was amazed at how approachable the recipe was, even for a beginner baker. Stick with me, and I’ll walk you through every step so you can enjoy these irresistible garlic bread rolls fresh from your oven.
Why You’ll Love This Recipe
- Effortless Flavor Boost: The garlic butter brushed on after baking adds an incredible fresh flavor that makes every bite unforgettable.
- Perfectly Soft and Tender: Thanks to the combination of milk, butter, and just the right kneading, these rolls come out tender, not dense.
- Great Make-Ahead Option: You can shape the rolls ahead of time and refrigerate overnight, saving you stress on busy days.
- Family Favorite: My family goes crazy for these at dinners, holidays, and even as a snack straight out of the oven.

Ingredients You’ll Need
All the ingredients here come together to create the perfect garlic bread rolls – soft yeast rolls with that signature garlicky butter finish. Using fresh garlic and parsley really lifts this recipe, and measuring your flour properly is key to getting that soft texture.
- Unsalted butter: For that rich, buttery flavor and to control salt levels perfectly.
- Minced garlic: Fresh is best here for the most vibrant, pungent garlic taste.
- All-purpose flour: Spoon and level to avoid packing, or better yet, use a kitchen scale for accuracy.
- Chopped fresh parsley: Adds a fresh, green note that balances the garlic.
- Granulated sugar: Just enough to feed the yeast and add a touch of sweetness.
- Instant yeast: Helps the dough rise quickly without needing to activate separately.
- Fine sea salt: Enhances all the flavors without overpowering.
- Whole or 2% milk: Warmed to 110°F to activate the yeast gently.
- Large egg: Adds richness and helps create a tender crumb.
- Beaten egg (for brushing): Gives the rolls a beautiful shiny, golden crust.
- Flaky sea salt (for finishing): A sprinkle on top after baking gives a delightful texture and burst of flavor.
Variations
I love personalizing this Garlic Bread Rolls Recipe depending on the occasion and what I have on hand. Don’t hesitate to tweak it a bit — that’s part of the fun in baking!
- Herb Mix: I sometimes swap parsley for fresh basil or oregano to give the rolls an Italian twist.
- Cheesy Addition: Adding shredded mozzarella or parmesan inside the rolls before baking makes them ooey-gooey and irresistible.
- Vegan Version: You can use a plant-based milk and vegan butter, plus a flax egg to replace the egg — it still works well!
- Spicy Kick: A pinch of red pepper flakes in the garlic butter adds a subtle warmth that my family can’t get enough of.
How to Make Garlic Bread Rolls Recipe
Step 1: Infuse Your Butter with Garlic
Start by melting butter gently in a small pot, then stir in your freshly minced garlic. Cook for just 1 to 2 minutes — the key here is to soften the garlic just enough to release its aroma but not brown it, or you risk bitterness. Once fragrant, take it off the heat and let it cool while you prepare the dry ingredients. This step is where your garlic bread rolls start getting that amazing signature flavor.
Step 2: Mix and Knead the Dough
In a stand mixer fitted with the dough hook, combine flour, chopped parsley, sugar, instant yeast, and fine sea salt. Pour in your warm milk, the egg, and the cooled garlic butter. Knead on low speed for about 10-12 minutes until the dough transforms into a smooth, soft, and slightly tacky ball. If you find your dough too sticky to handle, sprinkle in an extra tablespoon of flour, but don’t go overboard — a tacky dough often makes for softer rolls.
Step 3: Shape and Let Rise
I find using a kitchen scale here super helpful—divide the dough into 12 equal pieces, about 67 grams each, so your rolls bake evenly. Shape each piece into a smooth ball, pinch the seam on the bottom tight, and place them snugly in your buttered baking pan. Cover with plastic wrap or a kitchen towel and set somewhere warm for 1-2 hours until they’ve doubled. Watching the dough slowly rise feels so rewarding, like magic in your kitchen.
Step 4: Bake to Golden Perfection
Preheat your oven to 350°F (180°C). Right before baking, brush the tops of the rolls with the beaten egg for that gorgeous golden sheen. Pop them in, and bake for 20 to 30 minutes, until they’re beautifully golden and sound hollow when tapped. The aroma filling your kitchen at this point? Seriously next-level comfort food vibes.
Step 5: Final Garlic Butter Touch
While the rolls bake, whip up your finishing garlic butter: melt butter gently, add garlic, cook briefly until fragrant, then stir in fresh parsley. The instant your rolls come out of the oven, brush this butter all over them, and sprinkle flaky sea salt on top. Trust me, this final step is what makes these rolls utterly addictive.
Pro Tips for Making Garlic Bread Rolls Recipe
- Flour Measuring Matters: I discovered this trick when I stopped scooping flour directly; weighing the flour ensures your dough isn’t dry or tough.
- Don’t Skip the Egg Wash: It adds that shiny, golden crust that really makes the rolls look bakery-worthy.
- Brush Butter While Hot: Applying the garlic butter right after baking helps it soak into the rolls, amplifying flavor and moisture.
How to Serve Garlic Bread Rolls Recipe
Garnishes
I usually finish these rolls off with a sprinkle of flaky sea salt—it gives a delightful crunch and pops the garlic flavor even more. Sometimes I toss a little more fresh parsley on top for that fresh green sparkle and aroma. Honestly, it’s those small touches that make these rolls feel extra special.
Side Dishes
My favorite way to serve these garlic bread rolls is alongside a big bowl of homemade tomato soup for dipping or next to a hearty pasta dish like spaghetti Bolognese. They’re also amazing paired with roasted chicken or a fresh green salad for a lighter combo. Trust me, they complement so many meals effortlessly.
Creative Ways to Present
For a fun twist during holiday dinners or gatherings, I arrange the rolls in a wreath shape on a festive platter and brush the garlic butter in stages to keep things warm and buttery all around. Another idea is to serve individual rolls on mini plates with a small ramekin of herb butter alongside for an interactive experience. Guests love it!
Make Ahead and Storage
Storing Leftovers
Leftover garlic bread rolls store beautifully at room temperature for 2-3 days. I keep them in an airtight container or a ziplock bag to keep them soft. If you notice they start to dry out a bit, popping them briefly in the microwave with a slightly damp paper towel brings back some of that fresh-from-the-oven softness.
Freezing
Freezing these rolls works great if you want to batch bake ahead of time. After baking and cooling completely, I transfer them to an airtight container or freezer bag. They keep well for up to one month. When ready to enjoy, thaw them overnight in the fridge or at room temperature for a few hours.
Reheating
To reheat, I like wrapping the rolls loosely in foil and warming them in a 350°F oven for about 10 minutes. This method keeps them soft inside while refreshing that buttery crust. You can also zap them in the microwave for 20-30 seconds if you’re short on time, but the oven definitely delivers the best texture.
FAQs
-
Can I use active dry yeast instead of instant yeast for the Garlic Bread Rolls Recipe?
Yes! If you use active dry yeast, you’ll need to “activate” it by stirring it into the warm milk with a pinch of sugar and letting it sit for 5 minutes until bubbly and foamy. After kneading, make sure the dough rises until doubled before shaping, which typically takes 30-60 minutes.
-
How do I measure flour properly for this recipe?
The best way is using a kitchen scale to weigh your flour. If you don’t have one, use the spoon-and-level method: fluff the flour, spoon it lightly into your measuring cup, then level off with a knife. Avoid scooping directly into the bag as it packs down the flour and can lead to dense rolls.
-
Can I make the dough ahead of time?
Definitely! Once shaped in the baking pan, cover the rolls tightly with plastic wrap and refrigerate overnight. The next day, let them come to room temperature and double in size before baking. This makes your morning much easier and breaks up the work.
-
What if I don’t have fresh parsley?
Fresh parsley brightens the flavor, but you can use dried parsley or substitute with other fresh herbs like basil or oregano. Just use about half the amount if using dried since it’s more concentrated.
-
How can I make these garlic bread rolls vegan?
Replace the milk with a plant-based milk and swap butter for vegan butter. Use a flax egg (1 tbsp ground flaxseed mixed with 3 tbsp water) instead of the chicken egg. The texture will be slightly different but still tender and delicious.
Final Thoughts
This Garlic Bread Rolls Recipe has become one of my favorite homemade breads — it’s approachable, comforting, and truly delicious. I love how it fills the kitchen with mouthwatering aromas and brings people together around the table. Once you try these, I’m confident you’ll find yourself making them again and again, just like I do. Seriously, bake a batch soon and share the garlic goodness with someone you love!
Print
Garlic Bread Rolls Recipe
- Prep Time: 1 hour 30 minutes
- Cook Time: 20 minutes
- Total Time: 1 hour 50 minutes
- Yield: 12 rolls
- Category: Side Dish
- Method: Baking
- Cuisine: American
Description
These Garlic Bread Rolls are soft, fluffy, and bursting with rich garlic butter flavor, perfect as an appetizer or side dish. Made with a tender yeast dough enriched with parsley and garlic, then brushed with a savory garlic butter glaze and flaky sea salt, these rolls are a delicious addition to any meal.
Ingredients
Dough Ingredients
- 4 1/2 tablespoons unsalted butter
- 2 tablespoons minced garlic
- 3 1/2 cups + 1 tablespoon all-purpose flour
- 3 tablespoons chopped fresh parsley
- 1 tablespoon granulated sugar
- 2 1/4 teaspoons instant yeast
- 1 teaspoon fine sea salt
- 1 cup whole or 2% milk, warmed to 110°F
- 1 large egg, room temperature
- 1 beaten egg, for brushing the tops
Garlic Butter for Brushing
- 2 tablespoons unsalted butter
- 1 tablespoon minced garlic
- 1 tablespoon chopped fresh parsley
- Flaky sea salt, for finishing
Instructions
- Prepare the Pan: Lightly butter the bottom and sides of a 9×13 inch baking pan and set it aside to prevent the rolls from sticking during baking.
- Make Garlic Butter for Dough: In a small pot, melt 4 1/2 tablespoons of unsalted butter and stir in 2 tablespoons of minced garlic. Cook this mixture over low heat for 1 to 2 minutes until the garlic becomes fragrant, then remove from the heat and let it cool while you assemble the rest of the dough ingredients.
- Mix and Knead the Dough: In a stand mixer bowl, combine 3 1/2 cups plus 1 tablespoon of all-purpose flour, 3 tablespoons chopped fresh parsley, 1 tablespoon granulated sugar, 2 1/4 teaspoons instant yeast, and 1 teaspoon fine sea salt. Add the warmed milk at 110°F, 1 large room temperature egg, and the cooled garlic butter mixture. Knead the dough with a dough hook on low speed for about 10 to 12 minutes until it looks smooth and feels soft and slightly tacky. If the dough is too sticky, gradually add flour one tablespoon at a time until manageable.
- Shape the Rolls: Divide the dough into 12 equal portions, approximately 67 grams each for uniform size. Shape each portion into a smooth ball by pinching the seam at the bottom tightly to seal it. Place the dough balls into the prepared baking pan, arranging them evenly with some space to rise.
- Let the Dough Rise: Cover the pan with plastic wrap or a clean kitchen towel and place it in a warm spot to allow the dough to double in size. This will take about 1 to 2 hours depending on the room temperature.
- Preheat the Oven: When the dough has risen, preheat your oven to 350°F (180°C) to prepare for baking.
- Apply Egg Wash and Bake: Brush the tops of the risen rolls gently with the beaten egg to give them a golden, glossy finish. Bake the rolls in the preheated oven for 20 to 30 minutes or until the tops are golden brown and the rolls sound hollow when tapped.
- Prepare Garlic Butter for Finishing: While the rolls bake, melt 2 tablespoons unsalted butter in a pot and add 1 tablespoon minced garlic. Cook for 1 to 2 minutes until fragrant. Remove from heat and stir in 1 tablespoon chopped fresh parsley.
- Brush and Serve: Immediately after removing the rolls from the oven, brush them generously with the garlic butter mixture. Sprinkle flaky sea salt on top if desired to enhance the flavor. Serve the rolls warm for the best taste experience.
Notes
- Measure flour properly using the spoon-level method or a kitchen scale to avoid dense dough.
- If using active dry yeast instead of instant yeast, activate it by dissolving in warm milk with a pinch of sugar and waiting for 5 minutes until foamy.
- Store baked rolls at room temperature in an airtight container for up to 2-3 days.
- Freeze cooled rolls in an airtight container for up to one month.
- For make-ahead convenience, shape and place the rolls in the pan, cover tightly, refrigerate overnight, then allow to rise at room temperature before baking.
- Reheat rolls wrapped in foil at 350°F until warmed through, or microwave for 20-30 seconds.
Nutrition
- Serving Size: 1 roll (about 67g)
- Calories: 180
- Sugar: 2g
- Sodium: 210mg
- Fat: 7g
- Saturated Fat: 4.5g
- Unsaturated Fat: 2g
- Trans Fat: 0g
- Carbohydrates: 25g
- Fiber: 1g
- Protein: 4g
- Cholesterol: 40mg

Your email address will not be published. Required fields are marked *