
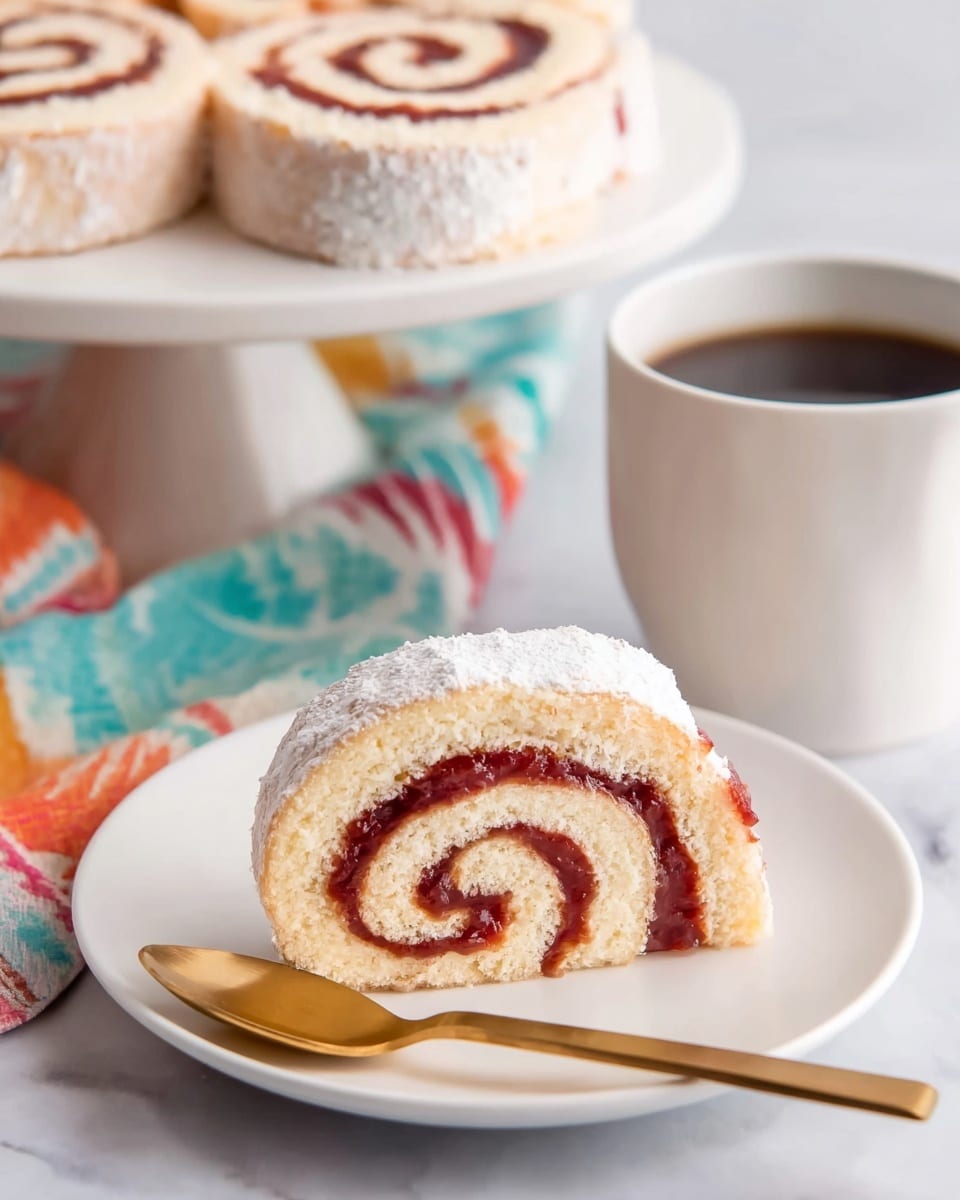
If you love vibrant, tropical flavors wrapped up in soft, delicate cake, then you’re in for a treat with this Guava Jelly Roll Cake (Brazo Gitano) Recipe. I absolutely love how the subtle almond notes mingle with the sweet-tart guava filling, and the light, fluffy sponge makes every bite feel like a little celebration. Trust me, once you try this, you’ll keep coming back for more — and I can’t wait to take you through the whole process step-by-step. Let’s get baking!
Why You’ll Love This Recipe
- Tropical Flavor Explosion: The guava paste brings a bright, luscious sweetness that feels like a mini-vacation in every bite.
- Light and Airy Sponge: This cake’s texture is delicate and moist thanks to the whipped egg whites and sifting technique.
- Simple but Impressive: It’s a stunning dessert for any occasion — yet surprisingly straightforward to make at home.

Ingredients You’ll Need
Each ingredient in this Guava Jelly Roll Cake (Brazo Gitano) Recipe plays an important role to ensure a tender, flavorful sponge and smooth guava filling. Remember, fresh eggs and quality guava paste really take this dessert to the next level.
- Baking spray: Helps prevent the delicate cake from sticking to the pan, making it easier to roll later.
- Cake flour: I prefer cake flour for its lower protein content, which results in a lighter, more tender crumb.
- Cornstarch: This adds additional softness by lightening the flour mixture.
- Baking powder: Gives the cake just enough lift without overpowering its delicate texture.
- Eggs (separated): Using separated eggs allows whipping the whites fluffy for that airy sponge we all love.
- Granulated sugar: Divided into two parts to sweeten both the yolks and whipped whites perfectly.
- Kosher salt: Balances the sweetness and brings out the flavors.
- Almond extract: Adds a subtle, warm depth that pairs beautifully with guava.
- Whole milk: At room temperature, it keeps the batter smooth and moist.
- Powdered sugar: Mixed with cinnamon for a fragrant, pretty finishing dusting.
- Ground cinnamon: Adds a gentle spice that complements the guava’s sweetness.
- Guava paste or guava jelly: The star of the show! Guava paste melts beautifully to create a luscious filling, while guava jelly works if you want a softer spread.
Variations
One of my favorite things about the Guava Jelly Roll Cake (Brazo Gitano) Recipe is how easy it is to make your own. Don’t be shy about swapping or adding your favorite flavors to suit your taste or dietary needs.
- Fruity Swaps: I’ve made this with strawberry or apricot jams instead of guava, and it’s always delicious — just watch the sweetness level.
- Almond Flair: Sometimes I sprinkle chopped toasted almonds on the filling for extra crunch and nutty flavor; my family raves about this twist.
- Gluten-Free Version: Try a 1:1 gluten-free flour blend in place of cake flour and cornstarch; just be gentle folding in the whites to keep the cake airy.
- Dairy-Free Adaptation: Swap whole milk with coconut or almond milk; it complements the tropical vibe beautifully.
How to Make Guava Jelly Roll Cake (Brazo Gitano) Recipe
Step 1: Preparing Your Pan and Preheating
Preheat your oven to 400°F (204°C). This high heat is what gives the cake that golden, slightly caramelized surface without drying out the inside. Spray the bottom of a half-sheet pan lightly—but important—don’t spray the sides, or the cake has trouble releasing later. Line the pan with parchment paper for a smooth unstickable surface. Pro tip: The parchment helps especially when rolling the cake, so don’t skip this step!
Step 2: Sifting Dry Ingredients for a Tender Crumb
In a medium bowl, sift together the cake flour, cornstarch, and baking powder not once, but twice. I discovered this trick early on and my cakes turned noticeably finer and lighter afterward. Sifting properly aerates the mixture, helping give your sponge that melt-in-your-mouth texture.
Step 3: Whipping Egg Whites to Stiff Peaks
Separate your room-temperature egg whites into a large bowl and whip them starting at low speed until foamy, then slowly add 1/2 cup of sugar while increasing speed to medium-high. Keep whipping until the whites hold stiff peaks—this means when you lift your beaters, the peaks stand straight up without drooping. It usually takes about 6–7 minutes if you’re patient. Believe me, this step is the secret to your cake’s airy lift!
Step 4: Beating Egg Yolks with Sugar, Salt, and Almond Extract
Using the same beaters (no need to wash!), combine your egg yolks with the rest of the sugar, salt, and almond extract. Start at low speed just to mix, then crank it up to medium-high for about 3–4 minutes. You want a pale lemony-yellow and almost fluffy texture where the sugar is nearly dissolved—rub a bit between your fingers to check for graininess. This mixture adds richness and sweetness to your cake base.
Step 5: Mixing Milk and Folding in Flour
Add room-temperature milk to that luscious yolk-sugar mix and stir gently with the mixer on low until evenly combined. Then, sift your dry ingredients directly into the bowl and fold them carefully with a rubber spatula. Folding gently is crucial—you want to keep as much air in your batter as possible. Use a gentle push-pull and fold motion until no flour streaks remain.
Step 6: Folding in Whipped Egg Whites
This part requires tenderness and patience. Add half your fluffy egg whites over the batter and fold them gently but thoroughly. Once it’s mostly combined, add the rest and fold until just smooth without white streaks. Overmixing will deflate the eggs, so err on the side of caution. The result? A bouncy batter that will rise beautifully.
Step 7: Baking Your Cake
Pour your batter into the prepared pan and level it with an offset spatula. Then give the pan a few gentle taps on the counter to pop any big bubbles—this helps the cake bake evenly. Pop it in the oven for 10–12 minutes or until it’s golden brown and springs back lightly when touched. Keep an eye on it, because ovens vary, but you want it just set and not browned too dark.
Step 8: Rolling the Cake While Hot
While the cake is baking, mix powdered sugar and cinnamon in a small bowl. Dust a clean tea towel lightly with a couple tablespoons of this mixture. Once the cake is out of the oven, run a knife around the edges, then invert it immediately onto the sugared towel. It’s hot and delicate now, so roll it up starting from the long side with the towel inside. Let it cool rolled this way for about 45 minutes—this “train” helps the cake keep its shape and makes rolling with filling a breeze later.
Step 9: Preparing the Guava Filling
If you’re using guava paste, cut it into small cubes and heat in the microwave until soft and glossy, then whisk until smooth—this is a trick I learned to get a luscious filling without lumps. Guava jelly, on the other hand, just needs a bit of whisking to loosen its texture. Either way, don’t overheat or it’ll get too runny.
Step 10: Filling and Final Rolling
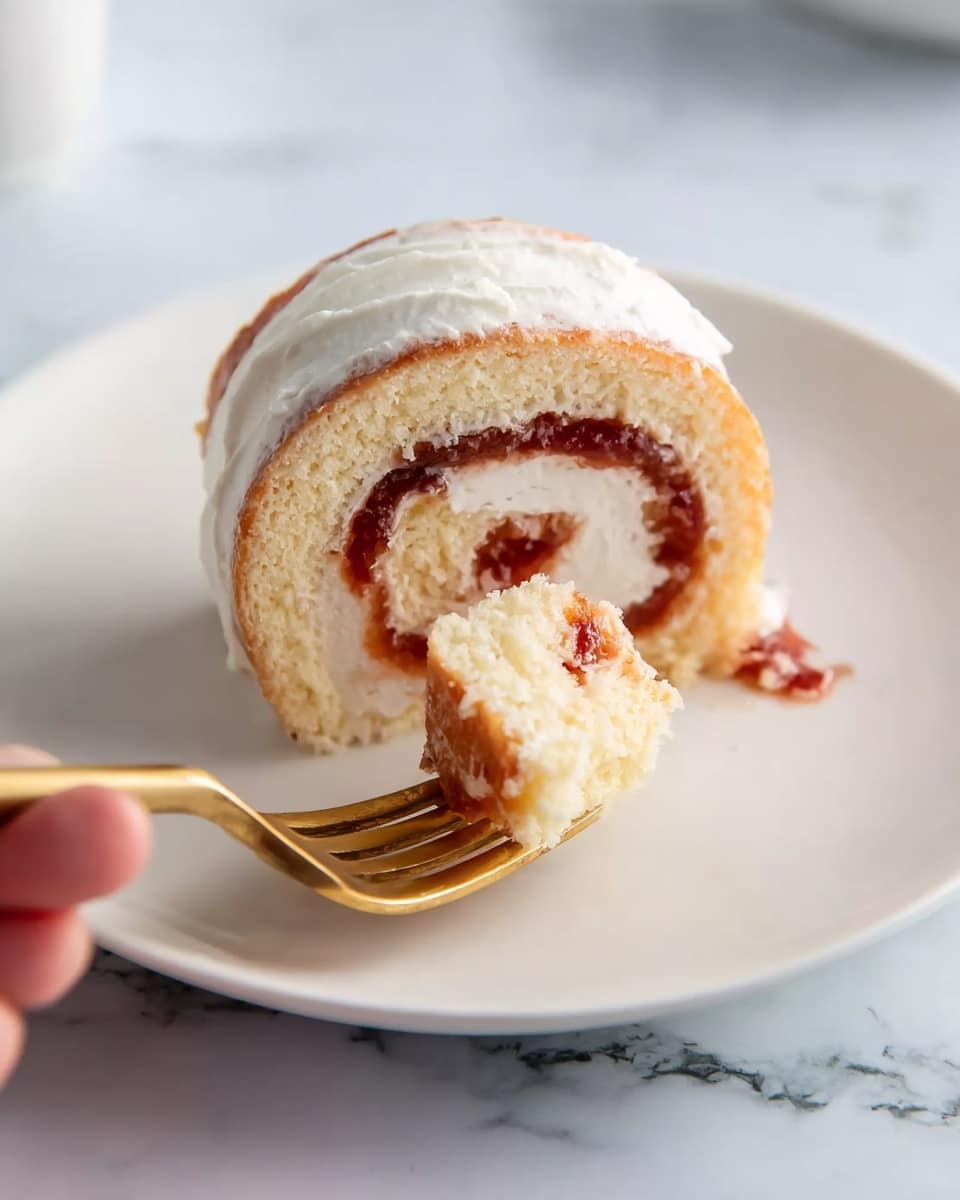
Carefully unroll your cooled cake and peel off the parchment. Spread a thin but generous layer of guava filling on top, leaving about an inch clear at one long edge. Roll it back up tightly from the guava-covered side, using the tea towel to help keep it snug. This creates that beautiful swirl inside that everyone oohs over.
Step 11: Chilling and Serving
Wrap your cake roll tightly in plastic wrap, twist the ends into a cylinder, and refrigerate for at least an hour (two is better!). Chilling sets the shape and flavors fully. Just before serving, unwrap and dust the outside with the remaining cinnamon-sugar mix for that extra touch of sweetness and a touch of spice.
Pro Tips for Making Guava Jelly Roll Cake (Brazo Gitano) Recipe
- Don’t skip parchment paper: It’s your best friend to prevent sticking and ensures a smooth unroll every time.
- Room temperature eggs matter: They whip more easily and help get that light texture in the batter.
- Fold gently but thoroughly: Be patient folding whites in two batches to keep as much air as possible.
- Roll while warm: Rolling the cake right out of the oven prevents cracking and sets the perfect foundation for your guava filling.
How to Serve Guava Jelly Roll Cake (Brazo Gitano) Recipe
Garnishes
I like to keep it simple and true to tradition by dusting with cinnamon sugar, but for special occasions, I sometimes add a drizzle of melted white chocolate or a few fresh berries for a pop of color. A light sprinkle of toasted shredded coconut adds a fun tropical crunch that pairs perfectly with the guava.
Side Dishes
This cake pairs beautifully with a cup of freshly brewed coffee or a light herbal tea, especially jasmine or chamomile. If you’re serving brunch, fresh fruit salad or citrus-y yogurt compliments its sweetness very well.
Creative Ways to Present
For birthdays or festive gatherings, I sometimes slice the brazo gitano into thick rounds and arrange them on a platter with edible flowers. You could also serve slices alongside a scoop of vanilla ice cream and a drizzle of guava coulis for a more decadent dessert experience.
Make Ahead and Storage
Storing Leftovers
I wrap the leftover cake tightly in plastic wrap and store it in the fridge, where it stays fresh and moist for up to 4 days. Just remember to bring it to room temperature before serving so the sponge and guava filling taste their best.
Freezing
If I want to keep it longer, I slice the unwrapped cake into individual portions, wrap each piece tightly in plastic, then foil, and freeze. When you’re ready to enjoy, thaw in the fridge overnight and bring to room temp before serving. The texture holds up surprisingly well this way.
Reheating
Since this is a delicate cake, I avoid microwaving, which can toughen the sponge. Instead, I let it warm at room temperature for about 30 minutes before serving. If you want to soften it up, a quick 5-minute rest in a 300°F oven wrapped loosely in foil does the trick while preserving moisture.
FAQs
-
Can I use guava jelly instead of guava paste in the Guava Jelly Roll Cake (Brazo Gitano) Recipe?
Absolutely! Guava jelly works well, especially if you prefer a smoother, less dense filling. Just whisk it to loosen the texture a bit before spreading. Guava paste gives a thicker, more concentrated flavor, while jelly offers a slightly lighter touch.
-
How do I avoid cracking when rolling the cake?
The key is to roll the cake while it’s still warm, right after it comes out of the oven, using a sugared tea towel as a helper. This softens the sponge, making it flexible. Let it cool rolled up before unrolling to add filling and re-rolling gently.
-
Can I make this cake ahead of time?
Yes, this Guava Jelly Roll Cake actually benefits from some chilling time to let the flavors meld. You can prepare it up to 1 day ahead and keep it wrapped in the fridge. Just dust with cinnamon sugar right before serving for best presentation.
-
What if I don’t have cake flour?
If cake flour isn’t available, you can make a substitute by removing 2 tablespoons of all-purpose flour per cup and replacing those tablespoons with cornstarch — this helps mimic the lower protein content of cake flour for a tender crumb.
Final Thoughts
Making this Guava Jelly Roll Cake (Brazo Gitano) Recipe always brings me back to cherished moments of sharing tropical flavors with loved ones. It feels special without being complicated, and the smiles it draws are priceless. If you’re looking for a dessert that’s both elegant and approachable, this is it. Give it a go — I promise once you taste it, you’ll be hooked just like my family and me!
Print
Guava Jelly Roll Cake (Brazo Gitano) Recipe
- Prep Time: 20 mins
- Cook Time: 10 mins
- Total Time: 2 hrs 15 mins
- Yield: 10 to 12 servings
- Category: Dessert
- Method: Baking
- Cuisine: Latin American
Description
Brazo Gitano is a classic Latin American guava jelly roll cake featuring a tender and airy sponge rolled with a luscious layer of sweet guava paste or jelly. This recipe blends the delicate sponge cake with a cinnamon-sugar dusted tea towel technique that ensures a soft, rollable texture. Perfect for festive occasions or an elegant dessert, this guava roll cake offers a harmonious balance of sweet, fruity filling and cinnamon aroma.
Ingredients
Dry Ingredients
- 1 1/4 cups (150g) cake flour
- 1/4 cup (30g) cornstarch
- 1/2 teaspoon (2g) baking powder
- 1/2 teaspoon (3g) kosher salt
- 1 1/4 cups (250g) granulated sugar, divided
- 1/3 cup (32g) powdered sugar
- 3/4 teaspoon ground cinnamon
Wet Ingredients
- 4 large eggs, yolks and whites separated and at room temperature
- 1 teaspoon almond extract
- 1/2 cup (125ml) whole milk, room temperature
Filling and Others
- Baking spray
- 14 ounces (392g) guava paste or 1 cup (290g) guava jelly
Instructions
- Preheat the oven and prepare the pan: Preheat your oven to 400°F (204°C). Lightly spray the bottom of a half-sheet pan with baking spray or brush it with melted butter. Line the bottom with parchment paper to prevent sticking.
- Sift the dry ingredients: In a medium bowl, sift together the cake flour, cornstarch, and baking powder twice to aerate and ensure a tender cake crumb. Set aside.
- Whip the egg whites: Using a hand mixer or stand mixer with the whip attachment, whip the egg whites on low speed until foamy, about 30-45 seconds. Gradually add 1/2 cup (100g) granulated sugar while whipping on medium-high speed until stiff peaks form, about 6-7 minutes. The whites should hold firm peaks and stand straight when beaters are lifted.
- Beat egg yolks and sugar: In a separate large bowl, beat the egg yolks, remaining granulated sugar, salt, and almond extract on low speed for 30-45 seconds until combined. Increase speed to medium-high and beat for 3-4 minutes until lemony yellow and sugar is mostly dissolved.
- Add milk to yolk mixture: Pour the whole milk into the egg yolk mixture and mix on low speed until fully incorporated.
- Incorporate the dry ingredients: Sift the dry flour mixture into the yolk mixture. Gently fold them together using a rubber spatula, starting from the sides, pushing down and pulling through the center, rotating the bowl until no streaks remain. Be careful not to deflate the batter.
- Fold in the egg whites: Add half of the whipped egg whites to the batter and fold gently until mostly incorporated with minimal streaks. Add the remaining whites and fold just until fully combined and no white streaks remain.
- Pour batter into pan and bake: Pour batter into the prepared sheet pan and use an offset spatula to spread evenly. Gently tap the pan on the counter 3-4 times to remove large bubbles. Bake for 10-12 minutes until the cake rises and turns golden brown.
- Prepare cinnamon sugar and tea towel: While the cake bakes, whisk powdered sugar and ground cinnamon in a small bowl. Sift two tablespoons of this mixture evenly over a clean tea towel and reserve the rest for later.
- Remove cake and roll with towel: As soon as the cake is out of the oven, run a knife around the edges to loosen it. Invert the cake onto the sugared tea towel. Starting with a long side, roll the cake and towel together into a tight tube. Allow it to cool seam side down for 45 minutes.
- Prepare guava filling: If using guava paste, cut into 1/2-inch cubes and microwave for 45 seconds to 1 minute until glossy, then whisk until smooth. If using guava jelly, whisk until smooth without heating.
- Unroll cake, fill, and re-roll: Once cooled and no longer warm, carefully unroll the cake and remove parchment paper. Spread a 1/8 to 1/4-inch layer of guava filling evenly, leaving a 1-inch margin on one long edge. Starting at the filled edge, roll the cake tightly back into a tube.
- Wrap and chill: Wrap the rolled cake tightly in plastic wrap, twisting the ends to form a snug cylinder. Refrigerate for at least 1 hour, preferably 2 hours, to set.
- Finish and serve: Unwrap and dust the cake generously with the remaining cinnamon sugar. Slice into 10-12 servings and enjoy within 4 days.
Notes
- Use room temperature eggs and milk for better mixing and volume when whipping.
- Folding the batter gently preserves the airy texture essential for a soft sponge.
- When rolling the cake, work quickly while still warm to prevent cracking.
- Refrigerate for best slicing results and to allow the flavors to meld.
- Guava paste provides a thicker, richer filling while guava jelly is lighter and easier to spread.
- Use an offset spatula for even spreading and tapping the pan prevents bubbles for a smooth cake surface.
Nutrition
- Serving Size: 1 slice (approx. 80g)
- Calories: 240
- Sugar: 26g
- Sodium: 85mg
- Fat: 7g
- Saturated Fat: 3g
- Unsaturated Fat: 3g
- Trans Fat: 0g
- Carbohydrates: 40g
- Fiber: 1g
- Protein: 4g
- Cholesterol: 110mg

Your email address will not be published. Required fields are marked *