
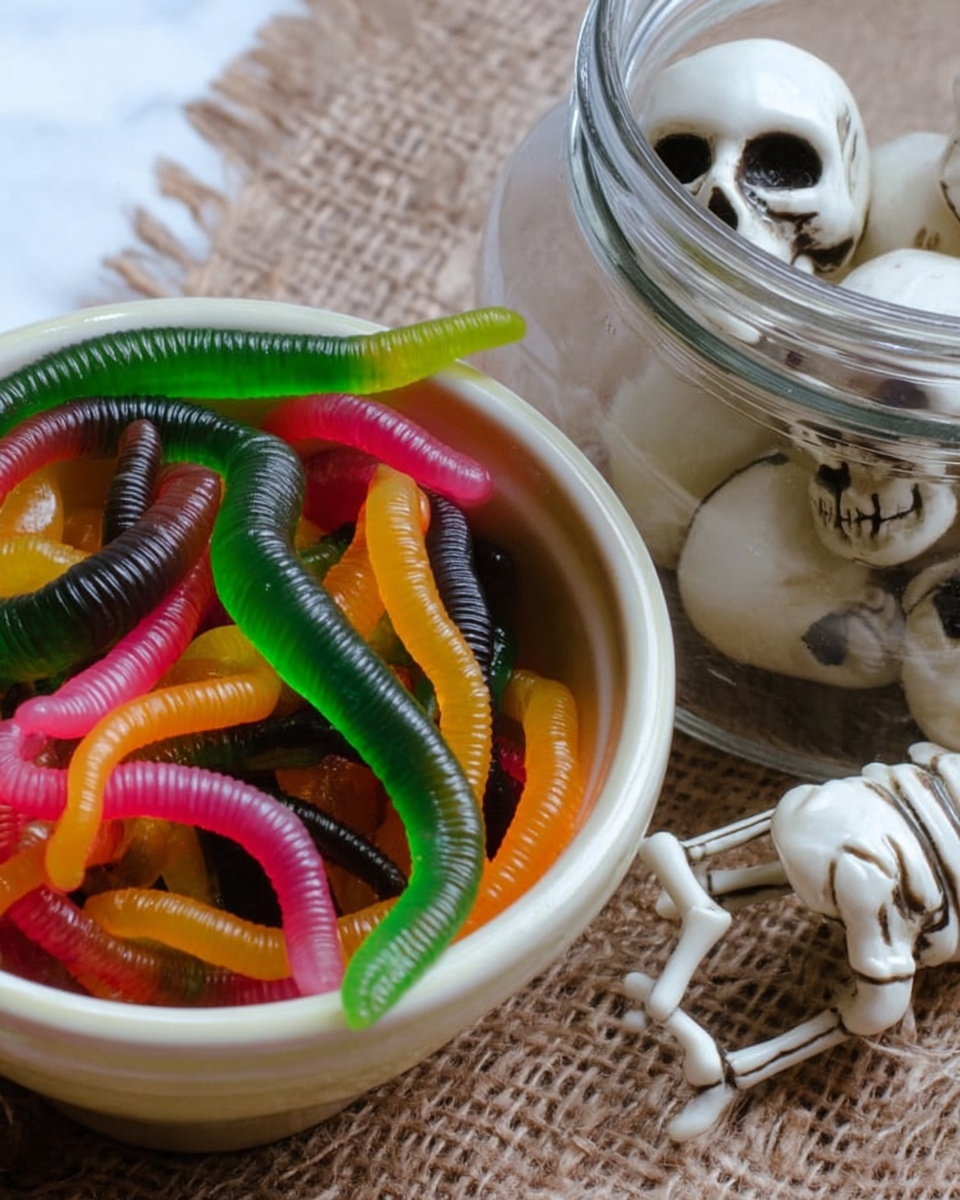
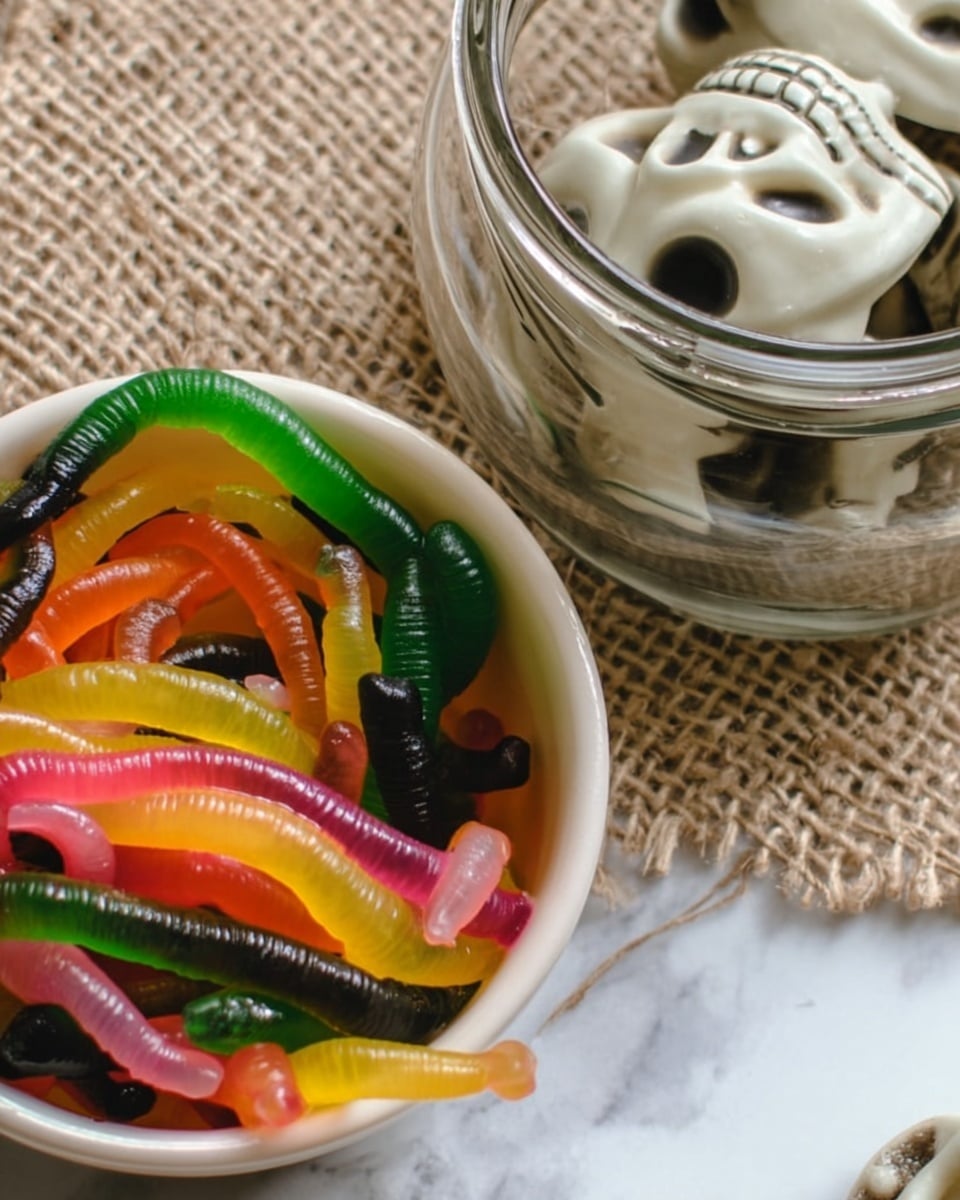
If you’re on the hunt for a spooktacular treat that’s as fun to make as it is to eat, you’ve gotta try my Halloween Jello Worms Recipe. These wiggly, jiggly little creatures are perfect for Halloween parties or just some eerie fun in the kitchen. Trust me, I absolutely love how this turns out – the creamy texture mixed with that subtle sour kick will have you grabbing one after another. Keep reading because I’m breaking down every step so you can nail it on your very first try!
Why You’ll Love This Recipe
- Ridiculously Fun to Make: Kids and adults alike will get a kick out of squeezing the jello into straws and seeing those worms form.
- Customizable Colors and Flavors: You can tailor the worm colors to your Halloween theme by adding food coloring and picking your favorite Jello flavors.
- Perfect Balance of Creamy & Sour: The heavy cream softens the gelatin’s edge, while a sprinkle of citric acid gives that sour pop that makes these worms unforgettable.
- Simple Ingredients & Easy Steps: No fancy equipment needed—just a glass, straws, and some patience during chilling time.

Ingredients You’ll Need
The ingredients here might sound simple, but they come together to create something truly magical—those worms are juicy, creamy, and just the right amount of wobbly. Plus, shopping is a breeze since most of these you’ll find at the grocery or local craft store.
- Jello (any flavor): I recommend starting with classic red or green to get that wormy look, but feel free to mix it up.
- Knox Unflavored Gelatin: This gives extra firmness and elasticity, which is crucial so your worms don’t flop.
- Boiling Water: Essential to dissolve your gelatin mixture fully.
- Heavy Whipping Cream: This adds creaminess and a smoother texture to the worms.
- Plastic Straws (flexible): You’ll need a whole box, as each strand creates your worm mold.
- Rubber Band: Handy for securing your straws together during filling.
- Liquid Food Coloring: Just a few drops to get that perfect eerie hue.
- Citric Acid: Adds a fun sour zing when sprinkled on the finished worms—find this at canning or baking specialty stores.
Variations
I love that the Halloween Jello Worms Recipe is so versatile—you can play around with colors, flavors, and even add a little extra zing if you want. Here are a few of my favorite ways to mix things up.
- Sour Worms: I tried sprinkling extra citric acid on some worms for a really mouth-puckering contrast, and it was a total hit with teens and adults.
- Dairy-Free Option: For friends with allergies, swapping the heavy cream with coconut cream works surprisingly well—just expect a slightly tropical flavor.
- Multi-Color Worms: Pour different colored jello mixtures into the straws in layers to create rainbow worms, which are fun and visually striking for parties.
- Spooky Flavors: Try grape or lime Jello for a twist that still looks creepy but tastes deliciously different.
How to Make Halloween Jello Worms Recipe
Step 1: Prep Your Worm Molds (aka Straws!)
First things first, pull the flexible bendy part out of all the plastic straws. I discovered this trick because the bendy section makes filling tricky, and you want your worms to be straight and easy to push out. Then, bundle all your straws together and secure them tightly with a rubber band. I like to use all 50 for a big batch at once, and then place the whole bundle upright in a glass that’s at least 4-5 inches tall to keep them steady.
Step 2: Mix the Jello and Gelatin
In a small bowl, stir together one small box of Jello with 3 packets of Knox unflavored gelatin. This makes your worms firm enough without getting rubbery. Carefully add 2 cups of boiling water – I like to pour a little at a time and stir gently until everything dissolves completely, about 2 minutes. Then, let the mixture sit for 20 minutes so it cools down just enough to add heavy cream without curdling.
Step 3: Creamy Color & Filling Time
Once cooled, stir in 1/2 cup of heavy whipping cream until fully blended. Then add 10-12 drops of liquid food coloring until you get your desired wormy color—don’t be shy here, vivid colors make it way more fun. Pour the jello mixture into a squeeze bottle for easier filling (a clean condiment bottle works great). Fill each straw about halfway and place the glass with the straws in the freezer for 20 minutes to start firming up the worms.
Step 4: Finish Filling and Chill
After your partial freeze, go back and fill the straws to the top with the jello mixture. Then move the glass to the fridge and let the worms set for at least 3 hours. Patience is key here! If you try to skip this step, you’ll risk the worms falling apart when you remove them from the straws.
Step 5: Worm Extraction & Finishing Touches
When the worms are fully set, run the straws under hot water for a quick 2-3 seconds. This loosens the jello just enough to slide them out smoothly. Use pliers to grip the straw’s top and gently push the worm out onto wax paper. Feeling fancy? Sprinkle with citric acid for an extra zingy surprise that my family goes crazy for. Store leftovers in an airtight container in the fridge.
Pro Tips for Making Halloween Jello Worms Recipe
- Straw Prep Makes a Difference: Removing the flexible part helped me fill the straws evenly and made worms come out smoother.
- Chill Twice: Freezing halfway keeps the worms from mixing together and helps them develop a nice shape.
- Don’t Rush the Set Time: Giving the worms a full 3 hours in the fridge really makes the extraction much easier and cleaner.
- Hot Water Trick: Running straws briefly under hot water is a neat way to avoid tearing your delicate jiggly worms.
How to Serve Halloween Jello Worms Recipe
Garnishes
I love sprinkling the worms with a bit of citric acid for that sour bite — it instantly amps up the flavor and adds an exciting contrast to the creamy sweetness. For a creepy touch, you can even toss them lightly with edible glitter or colored sanding sugar to make them shimmer under party lights.
Side Dishes
These worms are a perfect treat on their own, but I’ve served them alongside other Halloween goodies like “blood” punch (think cranberry or cherry juice), gummy eyeballs, or spooky cupcakes topped with whipped cream and scary sprinkles. The balance of creamy and sour jello worms adds a fun texture contrast to those dishes.
Creative Ways to Present
For a Halloween party, I like to arrange the worms spilling out of a “mad scientist” beaker or nest them in clear bowls filled with crushed chocolate cookies to resemble dirt. Another hit is presenting them in mini plastic test tubes or shot glasses for an eerie lab vibe. Presentation really elevates the fun factor here!
Make Ahead and Storage
Storing Leftovers
I always store leftover Halloween Jello Worms in an airtight container in the fridge. They keep nicely for up to 3 days, but honestly, they rarely last that long around here! Keeping them tightly sealed prevents the jello from drying out or picking up fridge odors.
Freezing
I haven’t tried freezing these worms because the texture changes once frozen and thawed—it tends to become watery or grainy. For best results, I recommend making them fresh just a few hours ahead of your event.
Reheating
Since these are cold jello treats, reheating isn’t really a thing here. Just keep them refrigerated and ready to serve chilled, which keeps their texture and flavor spot on.
FAQs
-
Can I use regular Jello without Knox gelatin for this recipe?
You can, but adding Knox unflavored gelatin makes the worms firmer and easier to pop out of the straws. Without it, your worms might be softer and more fragile, which can make handling them tricky.
-
What if I don’t have plastic straws? Any alternatives?
Plastic straws work best because they’re flexible and easy to bundle, but if you can find flexible silicone tubes or cake pop molds shaped like worms, those could work too. Just make sure whatever you use allows easy removal of the jello.
-
How do I make the worms more sour?
Sprinkle a light coating of citric acid over the worms after you remove them from the straws. Start with a little and add more if needed—it’s easy to overdo it, but that sour kick really makes the worms pop flavor-wise.
-
Can I prepare these a day ahead?
Absolutely! Make the worms the day before your event and store them refrigerated in an airtight container. They tend to taste even better once all the flavors have melded overnight.
Final Thoughts
If you want a Halloween treat that’s easy, fun, and totally Instagram-worthy, this Halloween Jello Worms Recipe checks all the boxes. I love how it brings a little spooky but playful vibe to any gathering, plus it’s a guaranteed crowd-pleaser. Whether you’re making it with kids or whipping it up for a party, you’ll enjoy seeing those wobbly worms come to life—and eating them, of course! So go ahead, grab your straws, and have a slimy good time!
Print
Halloween Jello Worms Recipe
- Prep Time: 30 minutes
- Cook Time: 0 minutes
- Total Time: 3 hours 30 minutes
- Yield: Approximately 50 Jello worms
- Category: Dessert
- Method: No-Cook
- Cuisine: American
- Diet: Vegetarian
Description
Create spooky and fun Halloween Jello Worms using gelatin, Jello mix, and heavy cream. These translucent, wiggly treats are perfect for parties and kids, made by filling plastic straws with flavored gelatin and freezing them to create realistic worm shapes.
Ingredients
Gelatin Mixture
- 1 small box Jello (any flavor)
- 3 packets Knox Unflavored Gelatin
- 2 cups boiling water (per batch)
- 1/2 cup Heavy Whipping Cream
- 10-12 drops liquid food coloring
Additional Supplies
- Plastic flexible straws (1 box of 50)
- Rubber Band
- Citric Acid (optional, for sour coating, available at Ball Canning supplies)
- Glass (at least 4-5 inches tall)
- Plastic Squeeze Bottle
- Pliers
- Wax Paper
Instructions
- Prepare Straws: Pull out the flexible part of each straw and secure the whole box of straws together using a rubber band. Place the bundled straws vertically into a glass that’s at least 4-5 inches tall to keep them steady while filling.
- Make Gelatin Mix: In a small bowl, combine the Jello powder and Knox unflavored gelatin. Stir slightly before adding 2 cups of boiling water. Mix thoroughly until all gelatin dissolves, approximately 2 minutes. Let the mixture cool and begin to set for about 20 minutes.
- Add Cream and Color: Stir in 1/2 cup of heavy whipping cream until well incorporated. Add 10-12 drops of liquid food coloring until the desired worm color is achieved.
- Fill Straws (First Fill): Transfer the gelatin mixture into a plastic squeeze bottle. Partially fill each straw, leaving about an inch of space at the bottom in the glass to allow the mixture to settle properly. Freeze this initial fill for 20 minutes to firm up.
- Fill Straws (Second Fill): Remove the straws from the freezer and continue filling each straw until completely full with gelatin mixture.
- Set Gelatin Worms: Place the fully filled straws in the refrigerator and chill for at least 3 hours to fully set the gelatin worms.
- Remove Worms from Straws: After chilling, carefully separate the straws from the bundle. Run each straw under hot water for 2-3 seconds to loosen the gelatin inside. Using pliers to grip the top of the straw, gently push the gelatin worm out onto a piece of wax paper.
- Add Sour Coating: Optionally, sprinkle citric acid on the worms to add a sour flavor.
- Storage: Store the finished Jello worms in an airtight container in the refrigerator until ready to serve.
Notes
- Prep time includes chilling time for the gelatin to set: approximately 3 hours.
- Make sure to use flexible plastic straws for easy removal of the worms.
- Citric acid is optional but gives a pleasant sour contrast.
- Run straws briefly under hot water to help slide worms out smoothly without breaking.
- Store in an airtight container to keep the worms fresh and prevent drying out.
Nutrition
- Serving Size: 1 worm
- Calories: 40
- Sugar: 5g
- Sodium: 10mg
- Fat: 1.5g
- Saturated Fat: 1g
- Unsaturated Fat: 0.5g
- Trans Fat: 0g
- Carbohydrates: 6g
- Fiber: 0g
- Protein: 1g
- Cholesterol: 10mg

Your email address will not be published. Required fields are marked *