

If you’ve ever wanted to capture that pure, cozy taste of autumn in a bite-sized treat, then you’ll absolutely adore this Homemade Maple Syrup Candy Recipe. It’s incredibly simple, uses only one ingredient, and yields these melt-in-your-mouth candies that feel like a warm hug. When I first tried making maple syrup candy, I was amazed at how just one ingredient could transform into something so special and nostalgic. Stick with me here—I’ll share all the little tricks to help you master this delightful sweet.
Why You’ll Love This Recipe
- Simple Ingredients: Just pure maple syrup—no added sugars or preservatives to worry about.
- Nostalgic Flavor: It channels that classic, rich maple taste that you remember from childhood.
- Quick & Fun to Make: The process is straightforward and a joyful conversation starter in the kitchen.
- Perfect Gift Idea: These candies make fantastic homemade gifts that everyone raves about.

Ingredients You’ll Need
This recipe is delightfully minimalist. Since maple syrup is the star, choosing a high-quality pure maple syrup really ups the final flavor. You’ll see how simplicity here is a total win—no need to complicate this one!
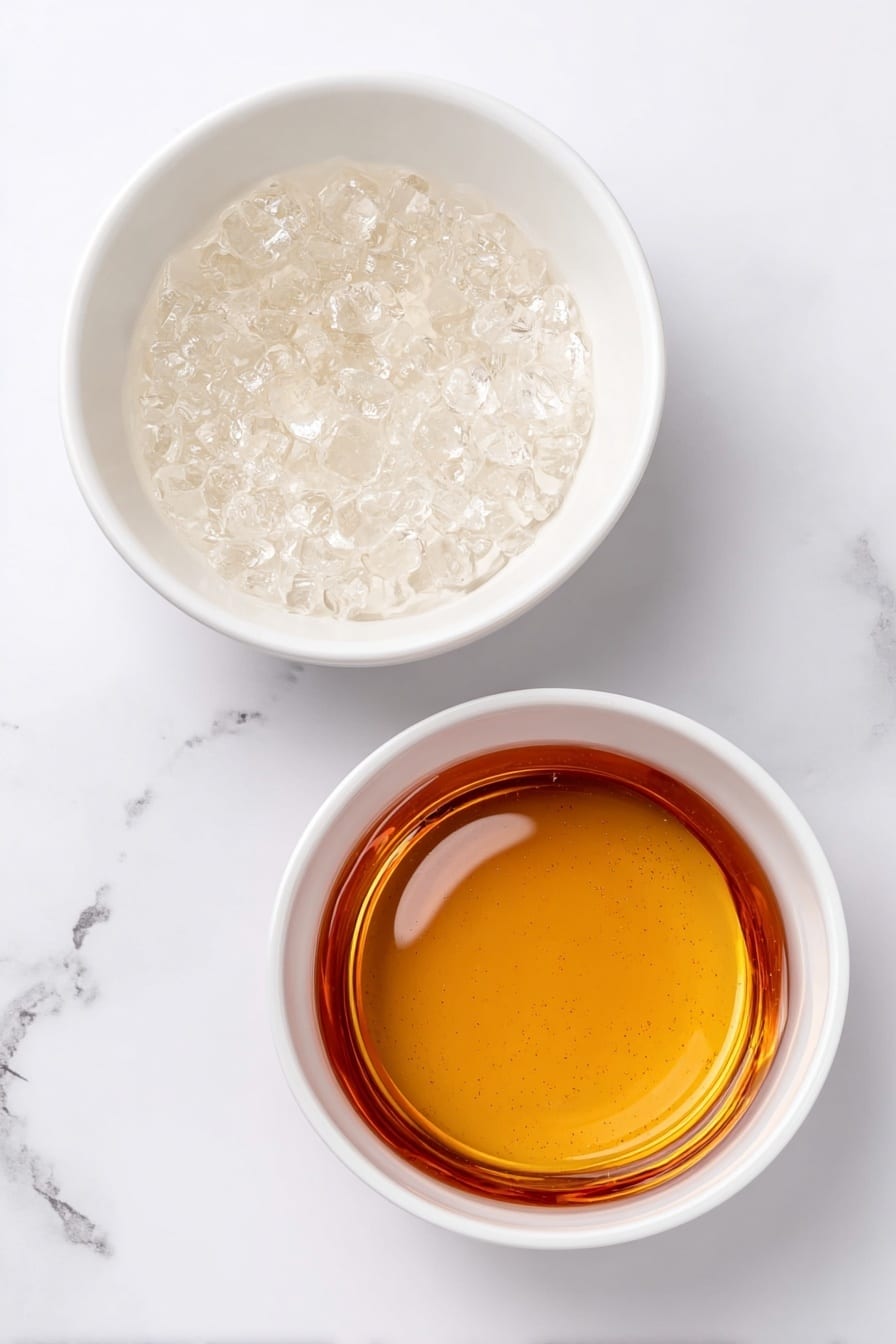
- Pure Maple Syrup: Look for 100% pure maple syrup, preferably Grade A for a balanced sweetness and rich flavor.
Variations
I like to keep this Homemade Maple Syrup Candy Recipe pretty classic, but I also love trying little twists depending on the season. Don’t be afraid to put your own spin on it to make it your own kitchen tradition!
- With Sea Salt: Sprinkling a pinch of flaky sea salt on top right after pouring adds a lovely contrast that my family can’t get enough of.
- Nutty Delight: Toss in some crushed walnuts or pecans for a textural surprise—totally optional but delicious.
- Spiced Up: Add a dash of cinnamon or ground cloves while heating the syrup if you want a cozy spice vibe.
How to Make Homemade Maple Syrup Candy Recipe
Step 1: Calibrate Your Thermometer for Perfect Results
This is the make-or-break step—trust me on this one. Before you even start heating maple syrup, make sure your candy thermometer is accurate. Boil some water and stick your thermometer in it. It should read 212°F. If it doesn’t, note how much it’s off by and adjust all the temperatures in the recipe accordingly. It sounds picky, but this calibration ensures your candy sets perfectly and isn’t too soft or hard.
Step 2: Heat the Maple Syrup to the Ideal Temperature
Pour your 2 cups of pure maple syrup into a large, heavy-bottomed pan. Heat it up over medium heat until it reaches 243-244°F—that’s about 32°F above the boiling point of water. Keep an eye on your thermometer during this phase! Use gentle, steady heat and avoid stirring to prevent crystallization. Once it hits the mark, immediately remove it from the heat.
Step 3: Cool and Beat the Syrup
Let the syrup cool down to around 185°F. This cooling step is crucial because if you start mixing too soon, the candy won’t set right. Then, grab a wooden spoon or spatula and beat the syrup vigorously for about two minutes. You’ll notice the color lighten and it will start to thicken—that’s the magic happening! This texture is key for getting that perfect, melt-in-your-mouth consistency.
Step 4: Pour and Set
Quickly pour the mixture into candy molds or spread it on a parchment-lined baking sheet. If you use a sheet, you can break it into pieces once hardened. This part moves quickly, so have your molds or sheet ready before you start beating. Let the candy sit for about 10 minutes until fully hardened. Then, pop those beauties out and get ready to share or savor them yourself!
Pro Tips for Making Homemade Maple Syrup Candy Recipe
- Thermometer Accuracy: Always calibrate your thermometer first; that’s where I learned to save a ton of guesswork and candy failures.
- Heavy-Bottomed Pan: Use one to prevent hot spots that can burn the syrup and ruin the flavor.
- Beating Technique: Vigorous stirring after cooling is vital to achieve that smooth texture instead of a hard, glassy candy.
- Timing the Pour: Have your molds ready before beating; this candy sets fast, so don’t get caught unprepared!
How to Serve Homemade Maple Syrup Candy Recipe

Garnishes
I love sprinkling a light dusting of flaky sea salt or a touch of finely chopped toasted nuts over the candy right after pouring for contrast and crunch. Sometimes, a gentle sprinkle of cinnamon adds warmth that feels just like fall in every bite.
Side Dishes
These candies are sweet and rich enough to enjoy on their own, but they’re also fantastic paired with a hot cup of spiced tea or a mug of rich coffee. At family gatherings, I like serving them alongside warm apple cider or a simple baked good like a buttery biscuit.
Creative Ways to Present
For holiday gifts, I place the maple candy in small decorative tins lined with parchment paper. Another fun idea is using holiday-themed candy molds to match the occasion, making them look even more special and gift-worthy. Wrapping individual pieces in wax paper adds that old-fashioned charm everyone loves.
Make Ahead and Storage
Storing Leftovers
I store leftover maple candies in an airtight container at room temperature, keeping them away from direct sunlight and heat. This keeps them fresh and prevents them from sweating or sticking together. They usually last a couple of weeks—if they last that long around here!
Freezing
I’ve actually frozen these candies a few times with success, wrapping them tightly in plastic wrap and then placing them in a freezer-safe container. When thawed, they keep their texture well but be sure to bring them to room temp before serving to avoid any condensation issues.
Reheating
Because this candy is best enjoyed as-is, I don’t typically reheat leftovers. But if you want to soften pieces, a few seconds in a warm (not hot) oven or microwave can help. Just be careful not to melt them completely; they can quickly go from soft to sticky.
FAQs
-
Can I use any maple syrup for this recipe?
For the best flavor and texture, use 100% pure maple syrup, preferably Grade A. Avoid pancake syrups or flavored syrups with additives, as they won’t set into candy properly and can affect taste.
-
Why do I need to calibrate my thermometer?
Calibrating ensures your thermometer gives accurate readings, which is crucial because the candy’s texture depends heavily on hitting the exact temperature. Even a few degrees off can mean soft or overly hard candy.
-
What if my candy doesn’t harden properly?
If your candy stays sticky or soft, it might not have reached the correct temperature or wasn’t beaten long enough. Double-check your thermometer calibration and be sure to cool the syrup before beating thoroughly.
-
Can I add flavors or nuts to this candy?
Yes! You can mix in finely chopped nuts, a pinch of salt, or warm spices before pouring. Just add them after beating the syrup but before it sets, and watch for even distribution.
-
How long does this maple syrup candy last?
Stored properly in an airtight container at room temperature, the candy stays fresh for 1-2 weeks. It can also be frozen for longer storage with minimal texture loss.
Final Thoughts
I absolutely love how this Homemade Maple Syrup Candy Recipe brings back those cozy feelings of fall and winter no matter the time of year. It’s a tiny, sweet indulgence that you make with your hands and share with people you care about. I remember my first batch—a little messy but so rewarding—and now it’s become a cherished tradition in my home. Give it a try; I promise you’ll enjoy every sticky, sweet moment of the process and the candy itself.
Print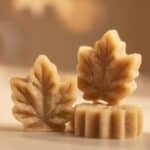
Homemade Maple Syrup Candy Recipe
- Prep Time: 10 minutes
- Cook Time: 25 minutes
- Total Time: 45 minutes
- Yield: 20 candies
- Category: Dessert
- Method: Stovetop
- Cuisine: North American
- Diet: Vegetarian
Description
Maple Syrup Candy is a delightful homemade treat made by boiling pure maple syrup to a precise temperature and then cooling it to create sweet, brittle candy. This simple recipe highlights the rich, natural flavors of maple syrup and requires minimal ingredients, making it an ideal choice for a sweet snack or a thoughtful homemade gift.
Ingredients
Ingredients
- 2 cups of pure maple syrup
Instructions
- Calibration: Boil water in a pot and insert a thermometer into the boiling water. Note the temperature reading should be 212°F. If it isn’t, adjust your baking temperatures accordingly to ensure accurate cooking.
- Heat Maple Syrup: Pour 2 cups of maple syrup into a large, heavy-bottomed pan. Heat the syrup until it reaches 243-244°F, which is approximately 32°F above the boiling point of water, ensuring to verify boiling temperature beforehand for precision.
- Prepare Molds: While the syrup is heating, prepare your candy molds or line a baking sheet with parchment paper to pour the maple mixture onto later.
- Cool the Syrup: Remove the pan from heat and allow the syrup to cool down to 185°F before proceeding.
- Mix the Syrup: Stir the cooled syrup vigorously for about two minutes until the color lightens, indicating it is starting to crystallize properly.
- Pour into Molds: Quickly pour the syrup into prepared candy molds or spread it onto the lined baking sheet. This step must be done swiftly before the syrup hardens.
- Harden the Candy: Allow the maple syrup candy to harden at room temperature for about 10 minutes. Once set, remove the candies from the molds or break the candy into pieces if using a baking sheet.
- Serve and Enjoy: Share your homemade maple syrup candy with friends and family or enjoy as a special sweet treat.
Notes
- Accurate temperature measurement is key for perfect candy texture; calibrate your thermometer before starting.
- Use a heavy-bottomed pan to ensure even heating and prevent burning the syrup.
- Work quickly when pouring the syrup to prevent premature hardening.
- Store the candy in an airtight container to maintain freshness and prevent moisture from softening it.
- Pure maple syrup is essential for authentic maple flavor; do not substitute with pancake syrup or other syrups.
Nutrition
- Serving Size: 1 candy (approx. 15 g)
- Calories: 60 kcal
- Sugar: 14 g
- Sodium: 2 mg
- Fat: 0 g
- Saturated Fat: 0 g
- Unsaturated Fat: 0 g
- Trans Fat: 0 g
- Carbohydrates: 15 g
- Fiber: 0 g
- Protein: 0 g
- Cholesterol: 0 mg

Your email address will not be published. Required fields are marked *