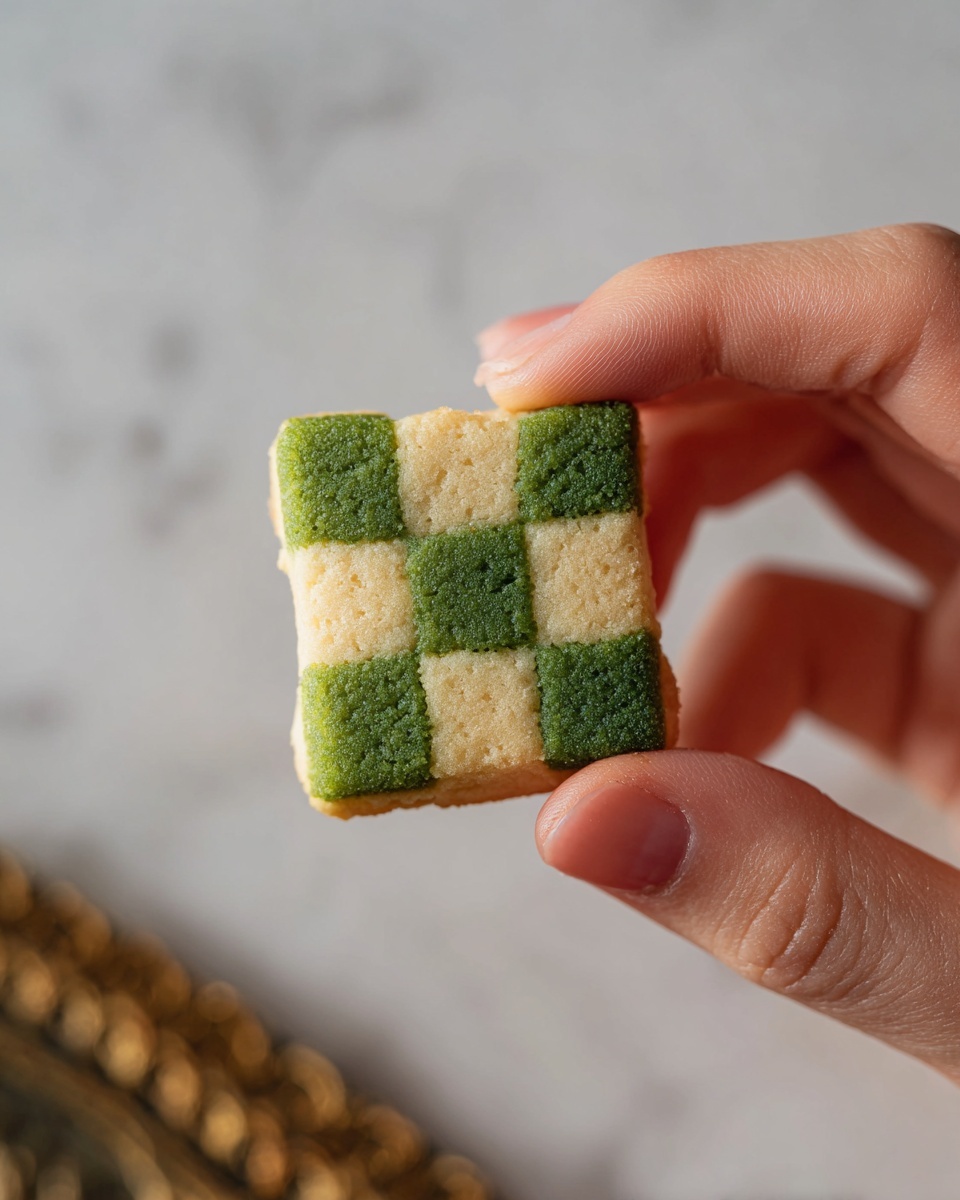
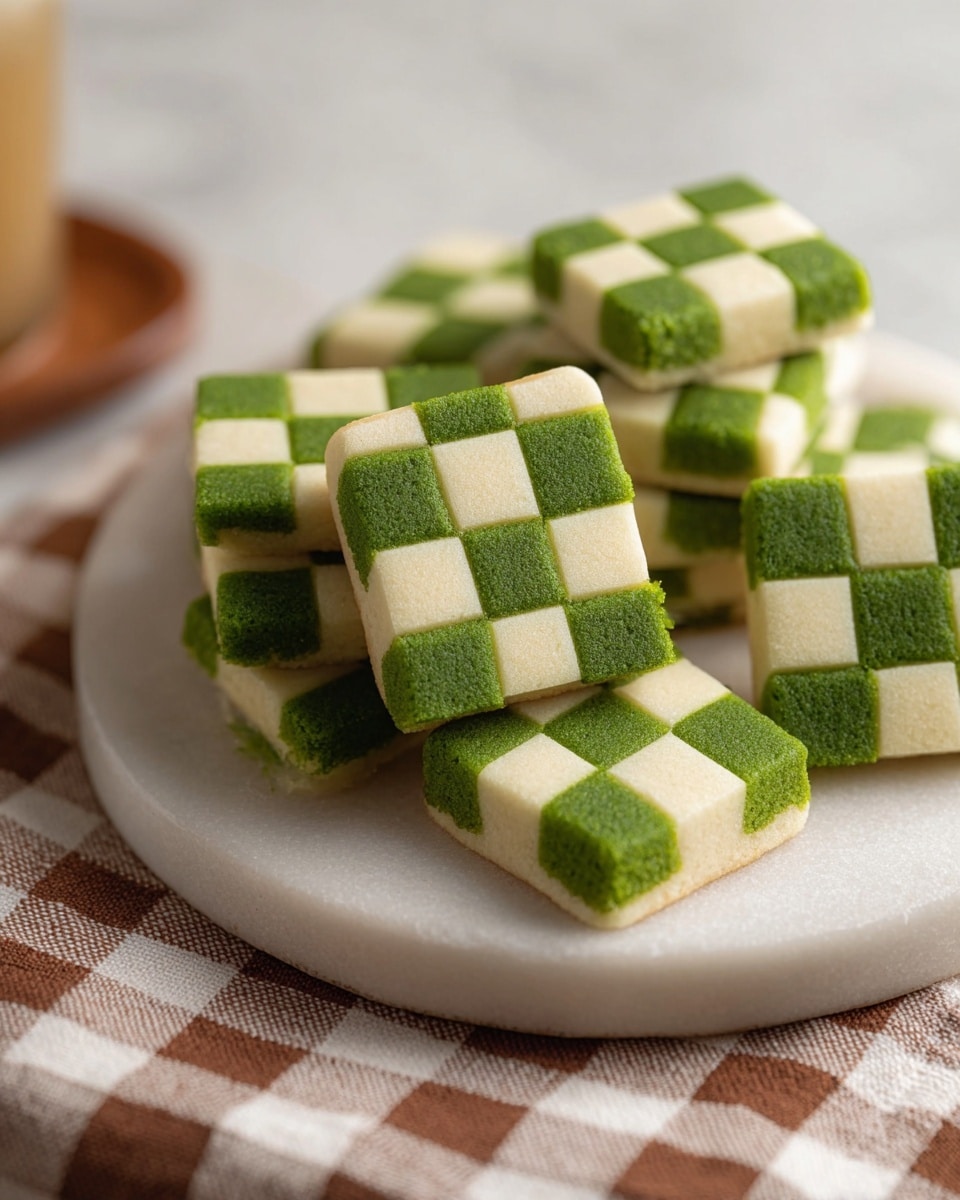
I absolutely love sharing this Matcha Checkerboard Cookies Recipe with you because it’s not just a delight to the eyes but also a treat for your taste buds. The vibrant green of the matcha paired with classic vanilla creates a stunning checkerboard pattern that surprises everyone who tries it. Whether you’re baking for a special occasion or just want to impress friends over tea, this recipe always brings a little magic to the table.
When I first tried making these cookies, I was blown away by how simple ingredients come together to create such a sophisticated look and flavor. You’ll find that with a little patience, the process is straightforward and the results consistently adorable and delicious. I promise, your family and guests will go crazy for this Matcha Checkerboard Cookies Recipe, making it worth every minute spent rolling and layering.
Why You’ll Love This Recipe
- Beautiful Presentation: The checkerboard pattern looks impressive but is easier to achieve than you think.
- Balanced Flavor: Earthy matcha and vanilla create a perfectly balanced, subtle sweetness.
- Family Favorite: My kids love helping to shape these, and they vanish from the cookie jar in no time.
- Flexible Technique: Once you get the dough prep down, you can tweak thickness or flavors to make it your own.
Ingredients You’ll Need
Each ingredient in this Matcha Checkerboard Cookies Recipe plays a crucial role, from creating the tender buttery texture to producing that gorgeous green tint with matcha. I’ll share a few tips to make your shopping easier and your cookies better.
- All-purpose flour: Provides structure; make sure it’s fresh for best results and avoid over-measuring to keep cookies tender.
- Salt: Enhances flavor and balances sweetness.
- Unsalted butter: Use softened butter for easy mixing and a richer flavor; avoid margarine as it changes the texture.
- Granulated sugar: Sweetens and helps with cookie spread and texture.
- Egg yolk: Adds richness and binds the dough together.
- Vanilla extract: Brings out a warm flavor that complements matcha beautifully.
- Matcha powder: Choose a high-quality ceremonial-grade matcha for the best vibrant color and authentic flavor.
- Egg white (for assembling): Acts like a natural glue to help the dough layers stick together without sogginess.
Variations
I love that you can put your own spin on this Matcha Checkerboard Cookies Recipe. From swapping matcha for cocoa to trying different thicknesses, these cookies are great for experimenting. Feel free to make it yours and have fun with the process.
- Cocoa instead of Matcha: I switched to cocoa powder once for a chocolate checkerboard that wowed my chocolate-loving friends.
- Lemon Zest Twist: Adding a teaspoon of finely grated lemon zest to the vanilla dough freshens up the flavor and adds complexity.
- Vegan Option: Use vegan butter and a flax egg to swap out dairy and eggs – results are tasty but texture might be a touch different.
- Thicker Cookies: Rolling the dough to ½ inch thick makes bigger checkerboard squares; great if you want a bolder visual impact.
How to Make Matcha Checkerboard Cookies Recipe
Step 1: Mix the Flour and Salt
Start by whisking together your flour and salt in a medium bowl. I like doing this first so the salt is evenly dispersed, which means every bite of your Matcha Checkerboard Cookies Recipe will have a balanced flavor. Set this aside while you get the butter mixture ready.
Step 2: Cream the Butter and Sugar
Using an electric hand mixer, beat the softened butter until it’s super creamy. This usually takes a couple minutes but it’s worth it for that light, fluffy texture. Then add the sugar and continue beating until the mixture looks pale and fluffy—this step ensures the cookies come out tender and melt-in-your-mouth.
Step 3: Add Egg Yolk and Vanilla
Beat in the egg yolk and vanilla extract on low speed—this enriches the dough and brings warmth. I discovered this trick to keep the dough from separating or becoming greasy—adding eggs gradually on low speed makes all the difference.
Step 4: Combine with Flour Mixture
Slowly add your flour and salt mix to the butter mixture, beating on low speed until just combined. You’ll still see some patches of flour—that’s exactly what you want before dividing the dough into two bowls.
Step 5: Divide the Dough
Split the dough into two halves. Finish mixing one half in its bowl—that’s your vanilla dough. To the other half, sift in the matcha powder and mix on low speed until the color is even. I usually use a fine sieve to avoid clumps and make sure that bright green color pops!
Step 6: Shape and Roll Out the Dough
On parchment paper, press each dough half into rectangles and square off the edges with a bench scraper—that helps with perfect checkerboard corners. Then roll them out to about ¼ inch thickness, trying to keep the shape as rectangular as possible. It’s okay if it’s not perfect; I learned the edges can be tidied up after chilling.
Step 7: Chill the Dough
Place both dough sheets on parchment and refrigerate for at least an hour until firm. This chill time is crucial—it stops the dough from spreading during baking, keeping your checkerboard sharp and defined.
Step 8: Stack, Cut, and Layer for the Checkerboard
Peel one sheet and lay it directly on the other. Cut this stack in half and brush the exposed edge of one half with egg white—this glues the dough layers together. Stack the halved pieces with alternating colors so the stripes form a pattern when sliced. Chill again for 15 minutes, then cut into ¼ inch wide strips. Trust me, this part feels tricky at first, but taking a bit more time and keeping the dough cold makes a huge difference.
Step 9: Assemble the Checkerboard Blocks
Lay one strip flat, brush with egg white, then place another strip on top flipped so the colors alternate. Gently press strips together and stack four layers high. Repeat with remaining strips to get three blocks of checkerboard dough. Pop them back in the fridge for a final chill—you’ll want these nice and firm before slicing.
Step 10: Slice and Bake
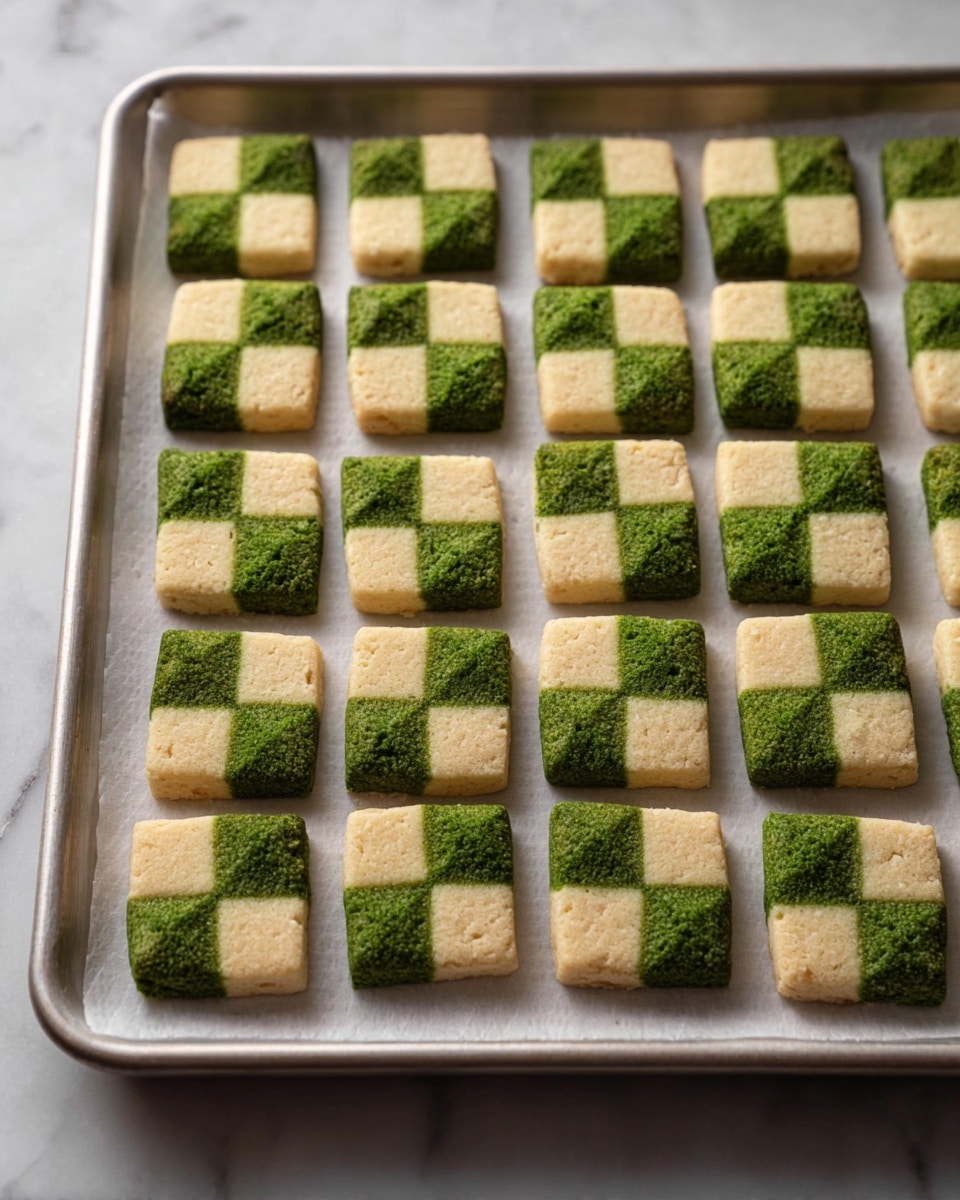
Preheat your oven to 350°F and line a baking sheet with parchment. Slice each dough block into ¼ inch thick cookies and space them about ½ inch apart on the sheet. I used to worry about perfect slices but now I just aim for consistent thickness—it bakes evenly and looks great. Bake for 12-15 minutes until edges just start to brown. Let cool for 5 minutes on the baking sheet before transferring to a rack, so they firm up without breaking.
Pro Tips for Making Matcha Checkerboard Cookies Recipe
- Keep Dough Cold: Chilling the dough multiple times prevents spreading and keeps shapes sharp—don’t skip this!
- Use a Sharp Knife: For clean edges on your checkerboard slices, a sharp chef’s knife makes layering easier and more precise.
- Press, Don’t Stretch: When layering strips, gently press to seal but don’t stretch the dough, or the pattern may warp.
- Patience is Key: Although it looks fancy, take your time at each step. Rushing can lead to uneven dough or layers not sticking properly.
How to Serve Matcha Checkerboard Cookies Recipe

Garnishes
I usually skip elaborate garnishes here because the checkerboard pattern is the real star. But if I want a little extra, a light dusting of powdered sugar or a drizzle of white chocolate adds a lovely touch without covering up that vibrant green matcha color.
Side Dishes
These cookies pair beautifully with a cup of green tea or a mellow jasmine tea for an authentic experience. For a more indulgent pairing, a dollop of whipped cream or a scoop of vanilla bean ice cream alongside is heavenly, especially if you’re serving at a dessert party.
Creative Ways to Present
For Valentine’s Day, I arranged the Matcha Checkerboard Cookies in heart shapes on a pretty platter. During tea parties, stacking them in tiers with edible flowers scattered around really wows guests. Honestly, these cookies are like edible artwork, so just laying them out in neat rows also looks stunning!
Make Ahead and Storage
Storing Leftovers
I keep leftover Matcha Checkerboard Cookies in an airtight container at room temperature for up to a week, although they rarely last that long in my house! To keep them fresh, just avoid stacking them too high so they don’t get squished.
Freezing
I’ve successfully frozen the unbaked cutter blocks wrapped tightly in parchment and plastic wrap. Thaw overnight in the fridge and then slice and bake as usual. This is a great trick when you want to prep ahead for a party or gift-giving.
Reheating
If the cookies lose a bit of their fresh crunch, I like warming them briefly in a 300°F oven for 3-4 minutes to restore that just-baked crispness. Just keep an eye on them so they don’t brown further.
FAQs
-
Can I substitute matcha powder with regular green tea?
Regular green tea leaves won’t work for this recipe because matcha powder is finely ground and blends smoothly into the dough, giving that vibrant green color and earthy flavor. Using steeped green tea or loose leaves would add moisture and could ruin the dough’s texture.
-
Do I need ceremonial-grade matcha for these cookies?
Using ceremonial-grade matcha brings the brightest color and cleanest flavor, but if that’s not accessible, a fine culinary-grade matcha can work too. Just be aware that lower quality matcha might taste more bitter and look less vibrant.
-
Why do we use egg white when assembling the dough layers?
The egg white acts as a natural glue to hold the dough layers together without making them soggy, which is key to maintaining the checkerboard pattern intact during slicing and baking.
-
Can I make the dough ahead of time?
Yes! You can prepare the dough sheets or even the assembled checkerboard blocks a day ahead and keep them wrapped in the fridge. Just make sure they’re well chilled before slicing and baking.
-
What causes cookies to spread too much while baking?
If your dough isn’t chilled enough or the oven temperature is too low, the cookies might spread and lose their shape. Stick to the chilling times and preheat the oven properly to keep your checkerboard pattern sharp.
Final Thoughts
This Matcha Checkerboard Cookies Recipe holds a special place in my heart because it combines simplicity with artistry, turning everyday ingredients into a show-stopping treat. I love seeing how people’s faces light up when they realize they can make something so elegant at home. So, I really hope you give this recipe a try—it’s a fun challenge, a beautiful pastry, and honestly, a little love letter to anyone who enjoys a good cookie with a twist.
Print
Matcha Checkerboard Cookies Recipe
- Prep Time: 1 hour 10 minutes
- Cook Time: 12 minutes
- Total Time: 2 hours 52 minutes
- Yield: 26 cookies
- Category: Cookies
- Method: Baking
- Cuisine: Japanese-inspired
- Diet: Vegetarian
Description
These Matcha Checkerboard Cookies are a visually stunning treat featuring alternating squares of vibrant matcha and classic vanilla dough. The cookies combine a buttery, tender texture with the earthy, slightly bitter flavor of ceremonial-grade matcha powder, balanced by sweet vanilla. Perfect for tea time or special occasions, these cookies offer an impressive checkerboard pattern that is both beautiful and delicious.
Ingredients
Cookies
- 300 g all-purpose flour
- 1/2 teaspoon salt
- 230 g unsalted butter, softened to room temperature
- 100 g granulated sugar
- 1 large egg yolk
- 1 tablespoon vanilla extract
- 1 tablespoon matcha powder, ceremonial-grade
For assembling
- 1 large egg white
Instructions
- Prepare flour mixture: In a medium bowl, stir together the all-purpose flour and salt. Set this mixture aside for later use.
- Cream butter and sugar: In a large mixing bowl, beat the softened unsalted butter using an electric hand mixer until very creamy. Then add the granulated sugar and continue beating until the mixture becomes fluffy and smooth.
- Add egg yolk and vanilla: Add the large egg yolk and vanilla extract to the butter-sugar mixture and beat on low speed just until combined.
- Combine flour and butter mixtures: Gradually add the flour-salt mixture into the butter mixture while beating on low speed. Mix just until barely combined; it’s okay if some flour patches remain.
- Divide dough: Split the dough into two equal halves. Transfer one half into a separate bowl and mix until no flour patches remain—this will be your plain vanilla dough. Set aside.
- Prepare matcha dough: To the remaining dough, sift in the ceremonial-grade matcha powder. Mix with the hand mixer on low speed until the matcha is evenly incorporated throughout the dough.
- Shape the dough: Lay a sheet of parchment paper on the kitchen counter. Turn out the matcha dough and use your hands to press it into a rectangular shape. Use a bench scraper or a straight-edged tool to square off the sides neatly.
- Roll out dough: Place another sheet of parchment paper over the dough and roll it out with a rolling pin to approximately ¼ inch thickness, maintaining the rectangle shape. Use a bench scraper occasionally to correct the edges.
- Repeat rolling for plain dough: On a separate sheet of parchment, shape and roll the plain dough into a rectangle of similar size and thickness. Chill both sheets of dough in the refrigerator for at least 1 hour or until firm.
- Stack dough sheets: After chilling, carefully peel one dough sheet off its parchment and place it directly atop the other sheet.
- Layer and cut dough: Cut the stacked dough in half widthwise. Brush one cut half with a thin layer of egg white, then place the other half on top, creating alternating layers of matcha and vanilla dough. Chill this stack for 15 minutes to firm up again.
- Cut strips: Using a sharp knife, slice the dough stack into about ¼ inch thick strips. Each strip will have 4 alternating colored stripes. You should get about 12 strips in total.
- Create checkerboard blocks: Place one strip flat on your work surface and brush the top with egg white. Flip a second strip over so colors are inverted, then place it on top of the first strip, aligning edges and gently pressing to seal. Repeat until you have stacks of 4 strips. Make 3 such stacks and chill them for 15 minutes again.
- Preheat oven: Heat the oven to 350°F (175°C) and line a baking sheet with parchment paper.
- Slice cookies: Cut each chilled block into ¼ inch thick slices to form individual cookies. Arrange the cookies on the prepared baking sheet, leaving about ½ inch space between each.
- Bake: Bake in the preheated oven for 12-15 minutes or until the edges of the cookies start to lightly brown.
- Cool: Allow cookies to cool on the baking sheet for 5 minutes before transferring them to a wire rack to cool completely, preserving the crisp texture.
Notes
- The thickness of the dough affects the size of the checkerboard squares. For larger squares, roll out the dough to ½ inch thick and slice the strips at ½ inch.
- Using ceremonial-grade matcha enhances the flavor and color quality of the cookies.
- Ensure dough is well chilled before slicing to help maintain shape and pattern during baking.
- Cookies do not spread much, so spacing can be fairly close on the baking sheet.
Nutrition
- Serving Size: 1 cookie (approx. 25 g)
- Calories: 130 kcal
- Sugar: 6 g
- Sodium: 45 mg
- Fat: 8 g
- Saturated Fat: 5 g
- Unsaturated Fat: 3 g
- Trans Fat: 0 g
- Carbohydrates: 14 g
- Fiber: 0.5 g
- Protein: 1.5 g
- Cholesterol: 30 mg


Your email address will not be published. Required fields are marked *