
If you’re craving a wonderfully rich dessert but don’t want to fire up the oven, this No Bake Chocolate Cheesecake Recipe is your new secret weapon. I absolutely love how creamy and decadent it turns out, plus it’s way easier than traditional cheesecake—no baking means no stress! Whether it’s a last-minute treat or a planned indulgence, you’ll find this cheesecake impresses with every bite.
Why You’ll Love This Recipe
- No Oven Required: Perfect for hot days or when you just don’t want to wait around for baking.
- Decadently Chocolatey: Combines smooth melted chocolate with creamy cheese for a luscious texture.
- Simple Ingredients: Uses familiar pantry staples and Oreos for a crowd-pleasing crust.
- Make-Ahead Friendly: Chills overnight, making it great for parties and busy days.

Ingredients You’ll Need
Every ingredient in this No Bake Chocolate Cheesecake Recipe works together to create the perfect balance of flavor and texture. I always opt for good quality chocolate because it makes the whole dessert taste extra special—trust me, your taste buds will thank you!
- Oreo cookies with filling: I like using the classic sandwich cookies here because their spiced chocolate flavor makes a perfect crust base.
- Unsalted butter: Melted butter helps the crumbs stick together for a firm crust that holds up beautifully.
- Quality chocolate: Go for at least 60-70% cacao for a rich, smooth finish that’s not too sweet.
- Heavy whipping cream: Divided amount lets you melt the chocolate seamlessly and whip the rest for a fluffy filling.
- Cream cheese: Room temperature is key here to beat it smooth without lumps for the silkiest filling.
- Powdered sugar: Adds subtle sweetness and creams out perfectly.
- Sweetened whipped cream (optional): For topping and extra indulgence—totally optional but highly recommended!
Variations
This No Bake Chocolate Cheesecake Recipe is a blank canvas for all kinds of fun twists. I love to mix things up depending on the season or who I’m serving it to—feel free to customize it to suit your cravings!
- Mint Chocolate: Adding a dash of peppermint extract to the filling gives it a refreshing holiday vibe that my family can’t get enough of.
- Peanut Butter Swirl: Swirling in some creamy peanut butter before chilling creates a dreamy combo of flavors.
- Fruit Toppings: Fresh raspberries or strawberries add a vibrant pop and balance the rich chocolate perfectly.
- Gluten-Free Crust: Swap Oreos for gluten-free chocolate cookies so everyone can join in the indulgence.
How to Make No Bake Chocolate Cheesecake Recipe
Step 1: Prep the Oreo Crust
Start by lining your springform pan with parchment paper—it’s a little trick I learned that makes pulling the cheesecake out way easier. Then, blitz the Oreos with the melted butter in your food processor until you get fine crumbs that hold together when pressed. Press that mixture evenly along the bottom and half an inch up the sides. You want it well-packed so it won’t crumble when slicing.
Step 2: Melt the Chocolate Smoothly
Combine your chocolate and half a cup of heavy cream in a medium bowl. Microwave in short bursts of 20-30 seconds, stirring each time, until it’s silky and fully melted. Don’t rush this step, patience pays off with glossy, lump-free chocolate. Let it cool slightly before mixing into the cheesecake base—hot chocolate will mess with the cream cheese texture.
Step 3: Make the Cheesecake Filling
Using an electric mixer, beat your softened cream cheese until it’s smooth and creamy. Slowly add the powdered sugar and melted chocolate while mixing on low speed, scraping down the bowl as needed, so everything blends perfectly. This is when the magic happens—the sweet, velvety base that’s about to become your favorite dessert.
Step 4: Whip and Fold the Cream
In a separate bowl, whip the remaining heavy cream until it forms stiff peaks. This adds lightness and air to the rich cheesecake filling, making it wonderfully fluffy. Gently fold the whipped cream into the chocolate cream cheese mixture—take your time here to keep that airy texture intact.
Step 5: Chill and Set
Spread the filling evenly over your prepared crust. Cover tightly and refrigerate for at least 7 hours—overnight is best if you can manage. This sets the cheesecake to the perfect sliceable firmness while keeping it creamy and dreamy.
Pro Tips for Making No Bake Chocolate Cheesecake Recipe
- Room Temperature Cream Cheese: I used to struggle with lumps until I learned to always soften the cream cheese completely before mixing.
- Don’t Overheat Chocolate: Melting chocolate slowly prevents it from seizing and keeps it glossy and smooth.
- Folding Technique: Gently folding in whipped cream maintains fluffiness—stirring too hard can deflate your filling.
- Chilling Time: Be patient and chill at least 7 hours; rushing means it won’t set properly, and you’ll have messy slices.
How to Serve No Bake Chocolate Cheesecake Recipe

Garnishes
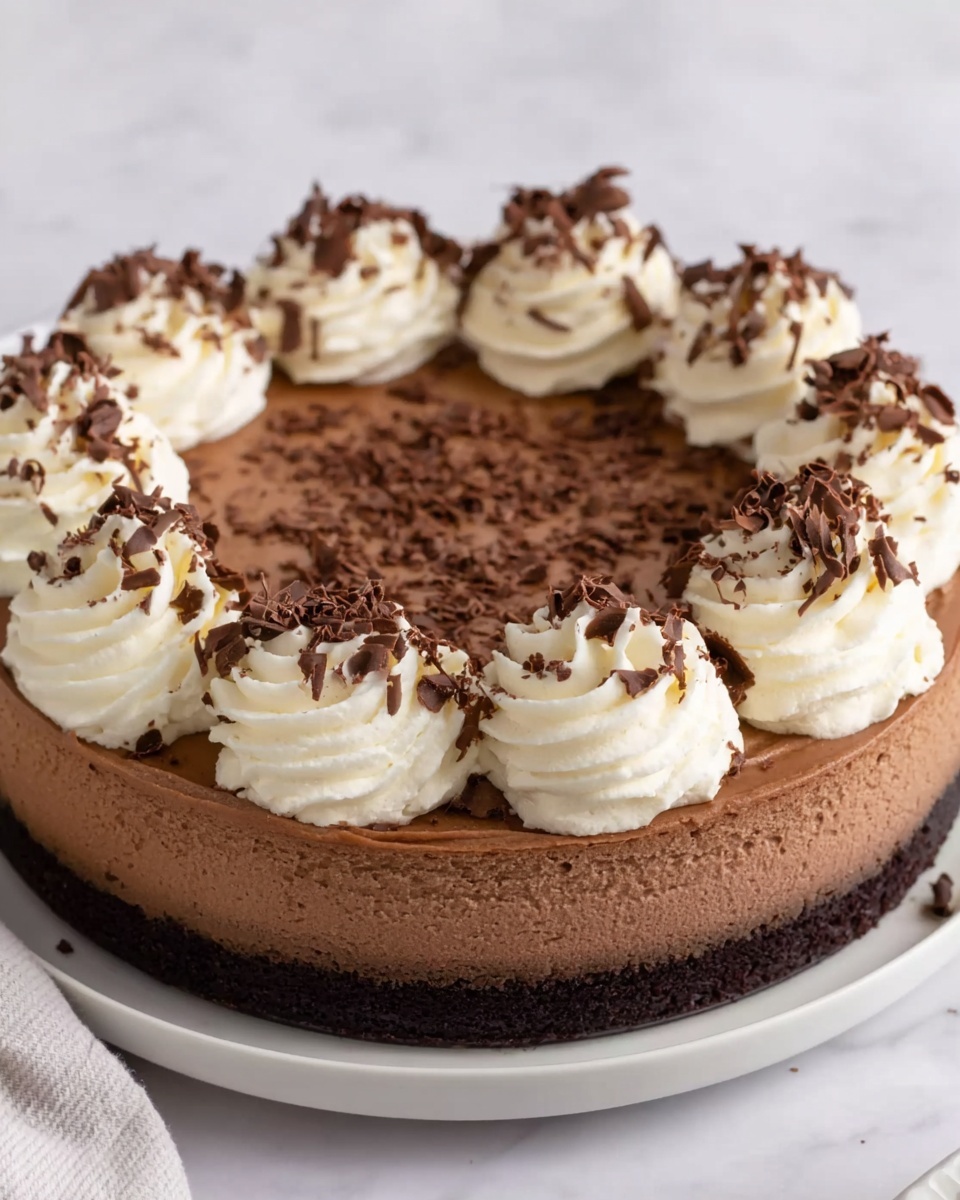
I love topping this cheesecake with a dollop of sweetened whipped cream and a sprinkle of chocolate shavings or crushed Oreos for a little crunch. Fresh berries are also fantastic—they add brightness that cuts through the richness and make it look gorgeous on the table.
Side Dishes
Pairing the cheesecake with something light works best, like a simple mixed green salad with a citrusy vinaigrette or a fresh fruit salad. It balances all that decadence and keeps your meal feeling fresh.
Creative Ways to Present
For special occasions, I sometimes serve this cheesecake in individual clear glasses or mason jars layered with crushed Oreos and whipped cream. It makes for a stunning presentation and perfect portion control—your guests will surely ask for the recipe!
Make Ahead and Storage
Storing Leftovers
After serving, I tightly wrap leftovers and store them in the fridge. This cheesecake keeps beautifully for up to 4 days—you’re welcome to indulge without rushing!
Freezing
If I ever have extras, I freeze slices wrapped tightly in plastic wrap and foil. When thawed slowly in the fridge overnight, they hold their texture well and taste just as delicious.
Reheating
This cheesecake is best served chilled, so I don’t usually reheat it. Just bring it to room temperature for 10-15 minutes before serving if it’s straight from the fridge, to soften the texture slightly and enhance the flavors.
FAQs
-
Can I use regular chocolate chips instead of chocolate bars?
Absolutely! You can swap in good-quality chocolate chips, but I recommend melting them cautiously to avoid scorching. Chop larger chips if needed to help them melt evenly.
-
How do I make the crust without a food processor?
No food processor? No problem! Place the Oreos in a sealed plastic bag and crush them with a rolling pin until fine crumbs form. Mix quickly with melted butter and press into the pan as usual.
-
Can I make this gluten-free?
Yes! Simply use gluten-free chocolate sandwich cookies for your crust. Just check the labels to make sure they’re certified gluten-free.
-
What if I don’t have a springform pan?
You can use a regular cake pan lined with parchment or foil for easier removal, but be extra careful when slicing as the crust won’t have the pan’s removable advantage.
-
How long does the cheesecake last in the fridge?
Stored properly in an airtight container, it stays fresh for about 4 days. Beyond that, it may start to lose its creamy texture.
Final Thoughts
I’ve made this No Bake Chocolate Cheesecake Recipe countless times for both casual family nights and special celebrations. It never fails to get sunny smiles and requests for seconds. The best part? It’s fuss-free yet feels like a luxurious treat. Next time you want something absolutely delicious without the oven hassle, give this recipe a try—you’ll be so happy you did!
Print
No Bake Chocolate Cheesecake Recipe
- Prep Time: 20 minutes
- Cook Time: 0 minutes
- Total Time: 7 hours 20 minutes
- Yield: 12 slices
- Category: Dessert
- Method: No-Cook
- Cuisine: American
Description
This No Bake Chocolate Cheesecake is a rich and creamy dessert featuring a crunchy Oreo cookie crust, smooth chocolate cream cheese filling, and a light whipped cream topping. Ready in just over 7 hours with minimal effort, it’s perfect for satisfying chocolate lovers without turning on the oven.
Ingredients
Crust
- 25 Oreo cookies with filling (about 300g)
- ½ cup unsalted butter, melted
Filling
- 1¼ cups good quality chocolate (7 oz or 200g)
- 1½ cups heavy whipping cream, cold, divided
- 3 packages cream cheese, room temperature (8 oz or 250g each)
- 2 cups powdered sugar (220g)
Topping
- Sweetened whipped cream as desired
Instructions
- Prepare the pan: Place a piece of parchment paper between the bottom and the rim of a 9-inch springform pan. This optional step helps ensure an easier removal of the cheesecake later.
- Make the crust: In a food processor, pulse the Oreo cookies and melted butter until the cookies become fine crumbs and the mixture starts to stick together. Press the crumb mixture firmly into the bottom and about ½ inch up the sides of the pan. Set aside.
- Melt the chocolate: In a medium bowl, combine the chocolate with ½ cup of cold heavy cream. Microwave in 20- to 30-second intervals on high, stirring thoroughly after each interval until the chocolate is completely melted and smooth. Allow it to cool slightly.
- Beat cream cheese: In a large mixing bowl, use an electric mixer to beat the cream cheese until smooth and creamy.
- Add sugar and chocolate: Slowly add the powdered sugar and melted chocolate to the cream cheese. Mix on low speed just until combined, scraping down the sides of the bowl as needed to ensure even mixing.
- Whip remaining cream: In a separate bowl, whip the remaining 1 cup of heavy cream with an electric mixer until stiff peaks form.
- Fold in whipped cream: Gently fold the whipped cream into the cream cheese and chocolate mixture using a spatula or mix on low speed, being careful to maintain the light texture.
- Assemble and chill: Spread the filling evenly into the prepared crust. Cover the pan with plastic wrap or a lid and refrigerate for at least 7 hours, or preferably overnight, to set properly.
- Serve: Slice the cheesecake into 12 pieces and serve topped with sweetened whipped cream as desired.
Notes
- An 8-inch springform pan can be used as an alternative, but the cheesecake will be taller.
- Using cold whipping cream helps achieve better volume when whipping.
- Make sure the cream cheese is at room temperature for a smoother filling.
- Allow the melted chocolate to cool slightly so it doesn’t affect the texture of the cream cheese mixture.
Nutrition
- Serving Size: 1 slice (approx. 1/12 of cheesecake)
- Calories: 470 kcal
- Sugar: 30 g
- Sodium: 180 mg
- Fat: 33 g
- Saturated Fat: 20 g
- Unsaturated Fat: 10 g
- Trans Fat: 0.5 g
- Carbohydrates: 39 g
- Fiber: 1 g
- Protein: 6 g
- Cholesterol: 110 mg

Your email address will not be published. Required fields are marked *