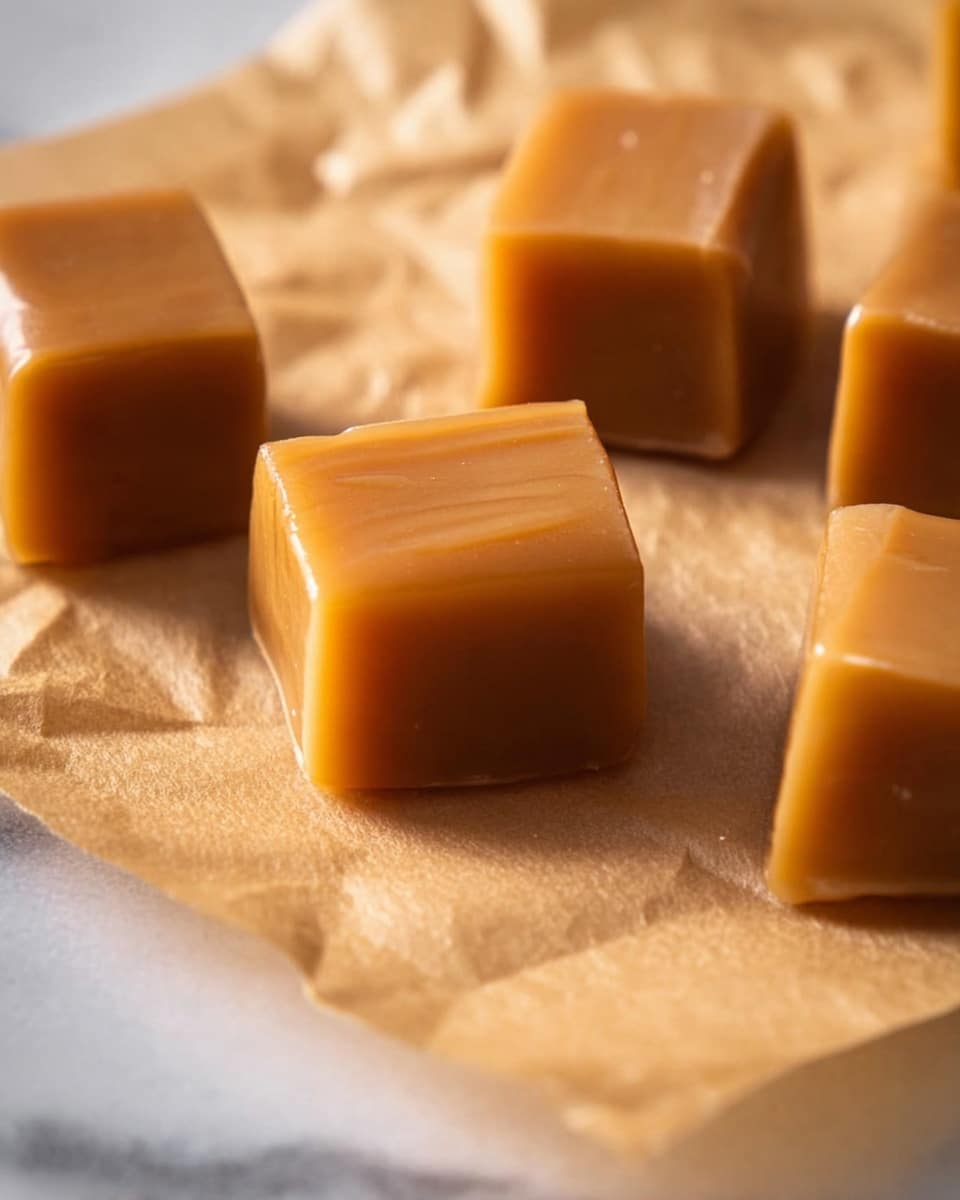
If you’re craving a sweet treat that’s rich, buttery, and melts perfectly in your mouth, then you’re in for a real treat with this Soft and Chewy Homemade Caramels Recipe. I absolutely love how this turns out every single time — it’s like capturing the best candy shop caramel, but made right in your own kitchen with simple ingredients and without any fancy equipment.
Why You’ll Love This Recipe
- Simple Ingredients: You only need a handful of pantry staples to make these irresistible caramels.
- Perfect Texture Every Time: This recipe hits that dreamy soft and chewy stage without any guesswork.
- Great for Gifting: Wrapped in wax paper, these caramels make thoughtful homemade gifts for friends and family.
- Fun and Rewarding to Make: I discovered this trick when I wanted to impress without stress, and it’s my go-to caramel base now.
Ingredients You’ll Need
Each ingredient in this Soft and Chewy Homemade Caramels Recipe plays a meaningful role in how the final candy turns out — the richness, creaminess, and that soft bite you’ll love. I’ve shared some tips below to help you pick the best versions when shopping.
- Brown Sugar: Adds a deep, molasses undertone that regular sugar just can’t match; the darker the sugar, the richer the caramel flavor.
- Sweetened Condensed Milk: This is where the creamy magic happens—don’t swap it for evaporated milk or the texture won’t be right.
- Corn Syrup: I know it sounds scientific, but corn syrup prevents crystallization and keeps caramels silky smooth.
- Butter: Provides richness and a luscious mouthfeel; unsalted butter lets you control the salt level.
- Salt: Just a pinch enhances all the sweet flavors and balances richness perfectly.
- Vanilla Extract: The finishing touch that deepens the flavor and gives the caramel that irresistible aroma.
Variations
I love experimenting with this Soft and Chewy Homemade Caramels Recipe to suit different moods and occasions—you’ll enjoy making it your own. Whether you want something nutty, a little salty, or infused with seasonal flavors, the base recipe is super adaptable.
- Salted Caramel Twist: Sprinkling flaky sea salt on top just before the caramel sets adds that delightful sweet-salty contrast my family goes crazy for.
- Nutty Add-ins: Sometimes, I fold in toasted pecans or almonds right after adding vanilla to give it crunchy contrast.
- Spiced Caramels: Adding a pinch of cinnamon or a splash of bourbon gives a warm, festive vibe that’s perfect for holidays.
- Dairy-Free Version: I’ve tried coconut milk in place of sweetened condensed milk, but be warned—it changes the texture and flavor quite a bit, so it’s more experimental than foolproof.
How to Make Soft and Chewy Homemade Caramels Recipe
Step 1: Prepare Your Pan
Start by lining a 9×9-inch baking dish with parchment paper. Make sure it covers the bottom and sides—this makes lifting the caramel out a breeze later. I learned the hard way that wax paper isn’t a good substitute because it can melt or stick to your caramel.
Step 2: Combine Ingredients in the Saucepan
In a 3-quart saucepan, throw in the butter, brown sugar, corn syrup, sweetened condensed milk, and salt. Using a medium heat setting, stir constantly with a wooden spoon. Scrape the sides and bottom well to prevent any sugary bits from burning. This mix moves from gritty to smooth and luscious—you’ll see the transformation happen right before your eyes.
Step 3: Boil to the Softball Stage
This is the most important part, so let me share a trick: attach a candy thermometer to your pan with the bulb fully submerged in the caramel but not touching the bottom. Bring the mixture to a full boil, then keep stirring and cooking until it hits 236°F, the perfect “soft ball” stage that gives you that chewy yet tender bite you want. Hold the thermometer at eye level to avoid reading errors!
Step 4: Add Vanilla and Pour
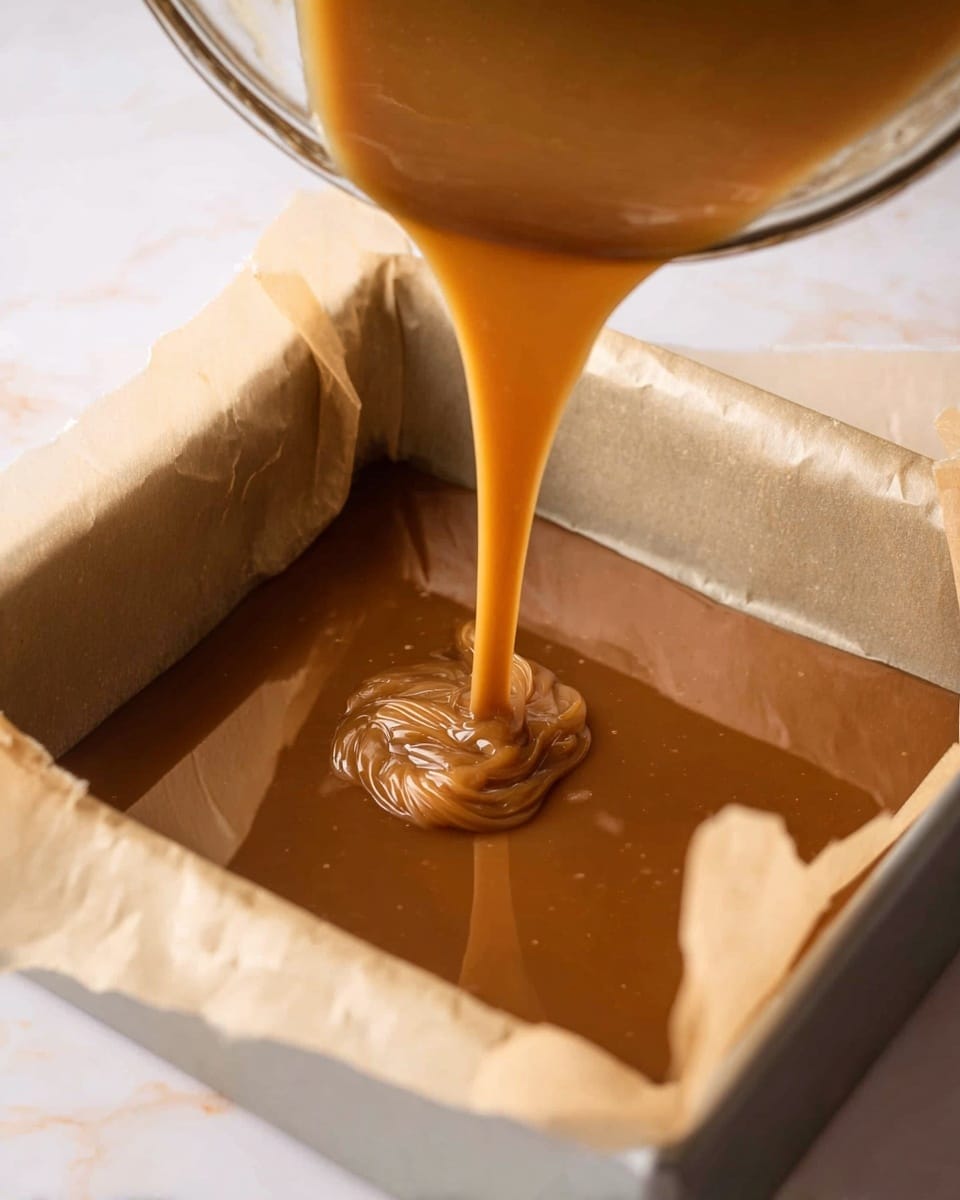
Once it reaches temperature, remove your pan from the heat immediately. Stir in the vanilla extract carefully and wait for the bubbling to settle, which happens quickly. Then pour the hot caramel evenly into your prepared dish. Be extremely careful at this point—hot caramel burns worst, so keep little hands and curious pets away.
Step 5: Cool, Cut, and Wrap
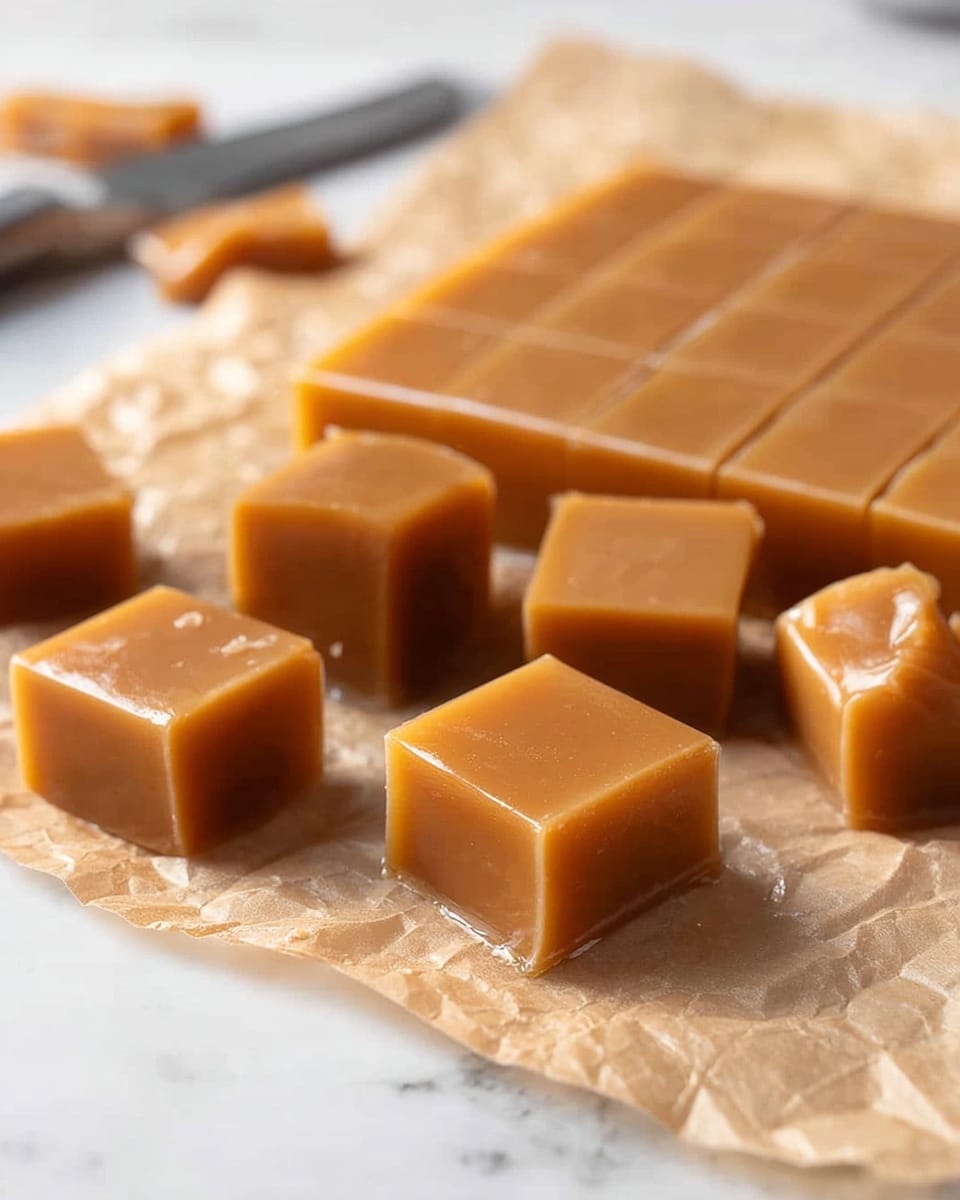
Let the caramel cool at room temperature for at least 4 hours until it’s firm enough to cut. When ready, lift the set caramel out by the parchment paper edges and cut into about 1-inch squares using a buttered knife—for smooth slicing, warm the knife under hot water and dry between cuts. Wrapping each piece in wax paper keeps them fresh and prevents them from sticking together. I’ve wrapped these as little gifts lots of times, and they always impress!
Pro Tips for Making Soft and Chewy Homemade Caramels Recipe
- Constant Stirring: Don’t stop stirring once the mixture heats up—this prevents burning and helps even cooking.
- Thermometer Use: I used to guess temperature until I had a candy thermometer—now I never skip it; it makes all the difference in texture.
- Butter Your Knife: When cutting caramels, dip your knife in warm water and wipe dry for clean cuts without sticking.
- Avoid Wax Paper in Pan: Using parchment instead of wax paper saved me from a sticky, melted mess more than once.
How to Serve Soft and Chewy Homemade Caramels Recipe

Garnishes
While these caramels are fantastic on their own, I often sprinkle a little flaky sea salt on each piece right after pouring for a salted caramel version. You might also coat some pieces lightly with cocoa powder or dip half into melted chocolate to bring a touch of decadence.
Side Dishes
If you’re serving these caramels as part of a dessert spread, they pair beautifully with fresh fruit like apples or pears and even alongside a scoop of vanilla bean ice cream. They’re a perfect bite between richer desserts, balancing sweetness with their buttery texture.
Creative Ways to Present
For gift-giving or parties, I love wrapping each caramel square in waxed paper and arranging them in a pretty tin or a glass jar with a festive ribbon. You can also stack them in small cellophane bags tied with twine—always a hit at holidays and birthdays!
Make Ahead and Storage
Storing Leftovers
Once wrapped, I store leftover caramels in an airtight container at room temperature. They stay soft and chewy for up to two weeks—trust me, you won’t want to keep them that long because they’ll disappear fast!
Freezing
I’ve frozen wrapped caramels in a zip-top freezer bag without issues. When you’re ready to enjoy them, just thaw at room temperature for about an hour. The texture stays great, and it’s a lifesaver if you want to make these in advance for gifts or parties.
Reheating
If your caramels get a bit too firm, a quick 10-second zap in the microwave softens them right up. Just be cautious not to overheat or they’ll become sticky and messy beyond delicious.
FAQs
-
Can I use evaporated milk instead of sweetened condensed milk?
It’s best to stick with sweetened condensed milk in this recipe because its high sugar content helps achieve the soft and chewy texture. Evaporated milk lacks that sweetness and creaminess, so using it could make your caramels less tender and more likely to harden.
-
How important is the candy thermometer?
The candy thermometer is a game changer for this Soft and Chewy Homemade Caramels Recipe. It ensures you hit the correct “soft ball” temperature (236°F) which directly affects texture—too low and the caramels won’t set, too high and they become hard and brittle.
-
Why do I need to use corn syrup?
Corn syrup contains invert sugars that prevent sugar crystals from forming, which means your caramel stays smooth and creamy instead of grainy. It’s the secret behind that flawless soft chewiness!
-
How do I avoid my caramels sticking together?
Wrapping each caramel square individually in waxed paper and storing them in an airtight container is the best way to keep them separate and fresh. Also, make sure the caramel is fully cooled and set before cutting and wrapping.
Final Thoughts
When I first tried making this Soft and Chewy Homemade Caramels Recipe, I was nervous about that tricky candy stage, but now it’s one of my favorite kitchen projects because of how reliably it turns out. I hope you enjoy the process as much as the delicious results—I promise, once you taste these caramels, you’ll want to keep this recipe forever. So grab your saucepan, get stirring, and get ready to indulge in some utterly irresistible homemade caramels that you can share (or keep all to yourself!).
Print
Soft and Chewy Homemade Caramels Recipe
- Prep Time: 15 minutes
- Cook Time: 20 minutes
- Total Time: 4 hours 35 minutes
- Yield: About 64 caramel squares (1-inch each from a 9×9-inch dish)
- Category: Dessert
- Method: Stovetop
- Cuisine: American
Description
These Soft and Chewy Homemade Caramels are rich, creamy, and perfectly chewy candies made from brown sugar, butter, sweetened condensed milk, and corn syrup. Easy to prepare on the stovetop, they stand out for their smooth texture and deep caramel flavor, perfect for gifting or indulging yourself.
Ingredients
Caramel Ingredients
- 16 ounces brown sugar
- 14 ounces sweetened condensed milk (1 can)
- 1 cup corn syrup
- 1 cup butter
- ½ teaspoon salt
- 1 teaspoon vanilla extract
Wrapping (Optional)
- Waxed paper cut into 3 x 4-inch rectangles for wrapping
Instructions
- Prepare the pan: Line a 9×9-inch baking dish with parchment paper, ensuring the paper covers the bottom and sides to prevent sticking. Set aside. Avoid using wax paper here, as it may melt or stick during cooking.
- Combine ingredients: In a 3-quart saucepan, combine the butter, brown sugar, corn syrup, sweetened condensed milk, and salt, stirring to mix well before heating.
- Heat and stir: Place the saucepan over medium heat. Stir constantly with a wooden spoon, scraping the bottom and sides to prevent burning, until the mixture comes to a full boil.
- Cook to softball stage: Attach a candy thermometer to the pan with the bulb fully submerged but not touching the bottom. Continue cooking and stirring frequently until the mixture reaches 236°F (soft ball stage). Hold the thermometer at eye level for an accurate reading.
- Add vanilla and pour: Remove the pan from heat once it reaches 236°F. Carefully stir in the vanilla extract until the caramel is smooth and bubbling stops, which should take less than a minute.
- Pour into dish: Immediately pour the hot caramel into the prepared baking dish, spreading evenly. Be cautious as the caramel will be very hot. Allow to cool completely at room temperature for at least 4 hours until firm.
- Cut and wrap: Once cooled and firm, lift the caramel block from the pan using the parchment paper edges. Use a buttered knife to cut into 1-inch squares. Optionally, wrap each square in waxed paper rectangles for freshness and easy serving or gifting. Fold the paper like a little boxed gift.
Notes
- Use parchment paper in the baking dish to prevent sticking; do not substitute wax paper for lining.
- Constant stirring during cooking is crucial to prevent burning and ensure smooth caramel.
- Accurate temperature measurement using a candy thermometer is key to achieving the perfect soft ball stage for chewy caramels.
- Be careful when handling hot caramel to avoid burns.
- Wrapping caramels in waxed paper helps keep them fresh and prevents sticking when stored or gifted.
Nutrition
- Serving Size: 1 caramel square (approx. 14 grams)
- Calories: 90
- Sugar: 11g
- Sodium: 45mg
- Fat: 4.5g
- Saturated Fat: 3g
- Unsaturated Fat: 1.5g
- Trans Fat: 0g
- Carbohydrates: 13g
- Fiber: 0g
- Protein: 0.5g
- Cholesterol: 15mg


