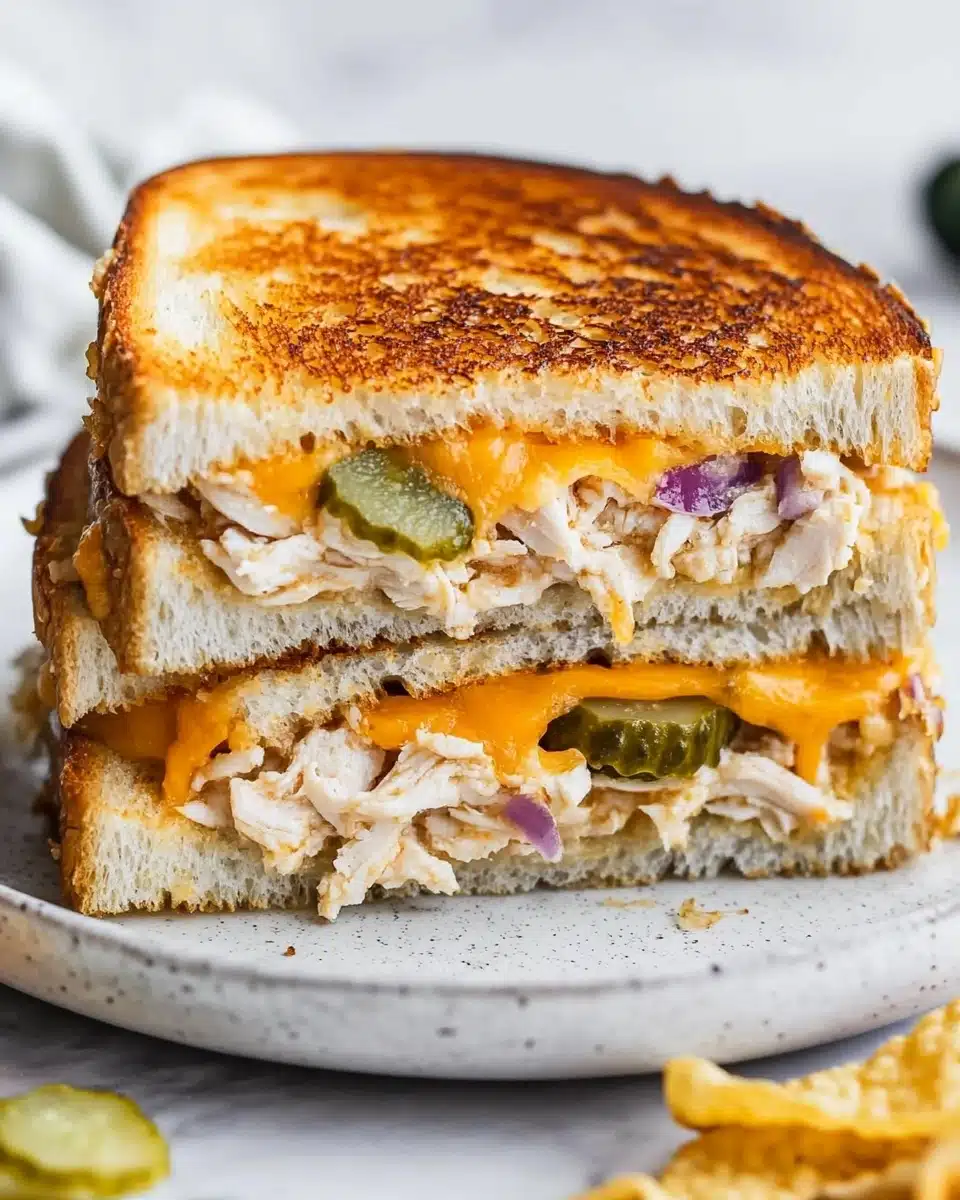
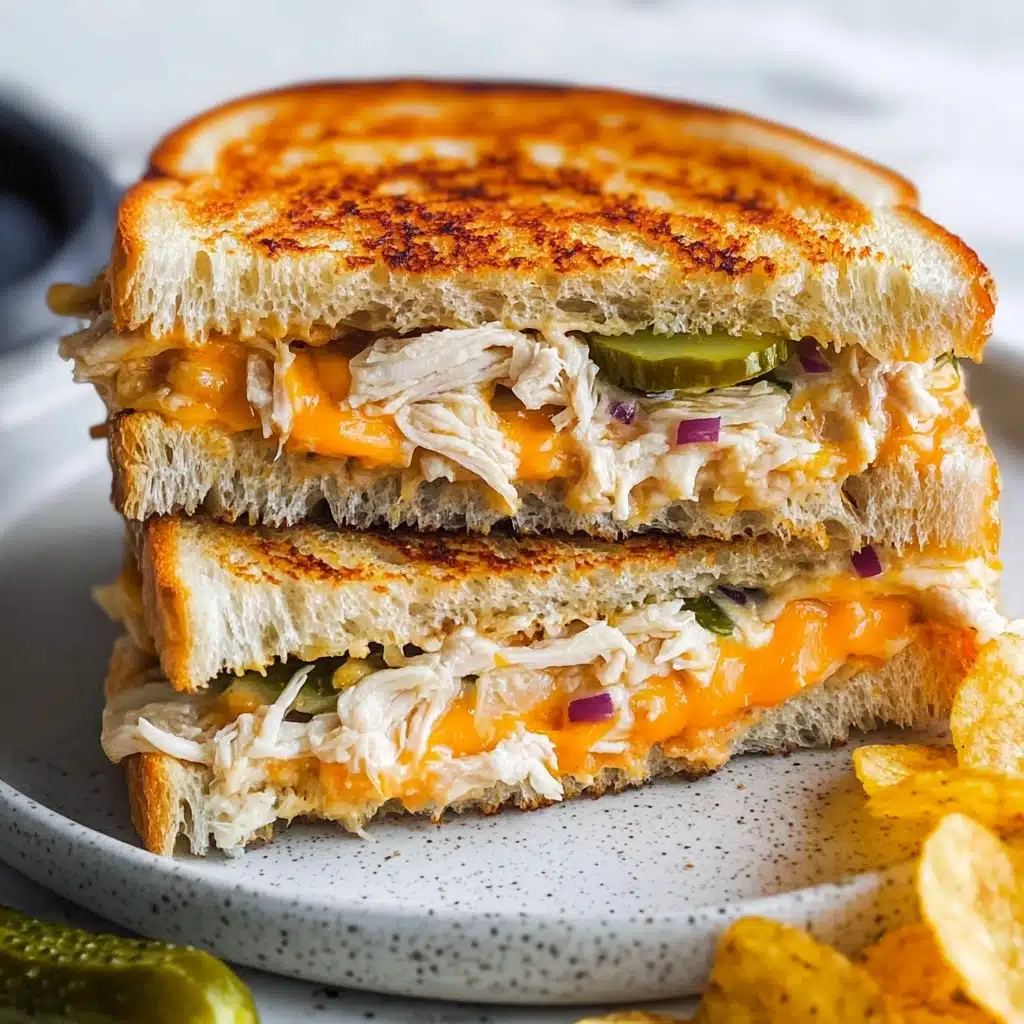
If you’re craving the ultimate comfort food with a punch of protein, look no further than this irresistible Tuna Melt Recipe. Crisp, buttery bread snuggles up with a creamy, tangy tuna salad and melty golden cheddar—every bite is a throwback to cozy lunches and diner classics, only fresher and brighter. Let’s make a hearty masterpiece that’s both nostalgic and a little better for you!
Why You’ll Love This Recipe
- Healthy Comfort Food: Greek yogurt replaces mayo here, making this Tuna Melt Recipe creamy without the extra heaviness, but with all the flavor you love.
- Fast & Satisfying: Ready in just 20 minutes, these melty sandwiches are perfect for speedy lunches, quick dinners, or anytime cravings.
- Crunch, Cream, and Cheese: Tangy pickles and red onion brighten the tuna mix, while sharp cheddar gets perfectly gooey in every bite.
- Customizable Cooking: Whether you use a skillet, air fryer, or panini press, this recipe adapts to your kitchen—and your mood!
Ingredients You’ll Need
Everything you need for this Tuna Melt Recipe is probably already waiting in your kitchen! Each ingredient plays a special part: the tuna brings hearty protein, the Greek yogurt lightens things up, and the pickles and onion make every bite pop with flavor and color. Let’s build your crave-worthy sandwich, one delicious element at a time.
- Solid, Water-Packed Tuna: Stick to sustainably caught varieties if you can—drain them well for the best texture in your mix.
- Nonfat Plain Greek Yogurt: This swap keeps things creamy and tangy, with less fat but all the richness.
- Cornichons or Small Dill Pickles: Finely chopped, they give each bite a bright, tart crunch. Cornichons add a special sharpness!
- Red Onion: Just a few tablespoons adds color and a gentle bite—if you’re not into raw onion, rinse it underwater first to mellow it.
- Freshly Squeezed Lemon Juice: A splash of citrus wakes up all the other flavors—don’t skip it!
- Grainy Mustard: The little mustard seeds jazz up the tuna salad and bring barely-there heat.
- Fresh Parsley or Dill: Just a tablespoon turns the filling fresh and green; use whichever herb you love most.
- Kosher Salt & Black Pepper: A touch of each balances everything. Taste and adjust at the end.
- Whole Grain Sourdough Bread: The hearty slices hold up to the creamy filling and crisp up beautifully in the pan.
- Sharp Cheddar Cheese: Slices melt over the filling for that dreamy, gooey finish—get a block and slice it thick for extra-luxe melts.
- Unsalted Butter: Softened, it toasts the bread to a golden, crunchy exterior.
Variations
This Tuna Melt Recipe is endlessly adaptable, so don’t hesitate to make it your own! Whether you need to go dairy-free, add more veggies, or tailor it to exactly your taste, here are creative ways to switch it up.
- Dairy-Free Delight: Swap Greek yogurt for vegan mayo (or another dairy-free spread) and use your favorite plant-based cheese slices for a melt everyone can enjoy.
- Add Some Crunch: Slip a handful of baby spinach, thin-sliced tomatoes, or even a few slices of avocado into the sandwich before grilling.
- Tangy Heat: Stir a spoonful of chopped pickled jalapeños or drizzle in some Sriracha for spice lovers.
- Lighten the Bread: Try this filling open-faced on whole grain English muffins or pita rounds for a lighter twist.
- Classic Mayo: If you love tradition, simply replace the Greek yogurt with high-quality mayo for old-school richness.
How to Make Tuna Melt Recipe
Step 1: Make the Tuna Salad
Start by thoroughly draining your canned tuna—this makes sure your filling is creamy and not watery. Place the flaked tuna in a mixing bowl, then add Greek yogurt, chopped pickles, red onion, lemon juice, grainy mustard, fresh herbs, salt, and pepper. Use a fork to mash and mix everything together, tasting as you go. Adjust the seasoning until it’s bold and balanced—the herbs and lemon should really shine!
Step 2: Build Your Melts
Lay out your bread slices. For each sandwich, scoop a generous portion of tuna salad (about one third of the mix) and spread it right to the edges for the perfect bite every time. Top each with sharp cheddar and close the sandwich with a second bread slice. Now, butter the top slice—this is your golden ticket to that irresistible crispy crust.
Step 3: Toast to Perfection
If you’re using the stovetop, place your sandwich buttered-side down in a heated nonstick skillet over medium-low. While it sizzles, butter the other side. Grill each side for 2 to 4 minutes, lowering the heat as needed for a slow, even toast and melty cheese middle. For the air fryer or panini press, just follow the instructions—a panini press will give you those dreamy grill marks, and the air fryer makes a hands-off, ultra-crisp melt (just secure with toothpicks so nothing slides off!).
Step 4: Rest, Slice, & Enjoy
Patience pays off! Let your Tuna Melt Recipe rest for a couple of minutes before slicing—it keeps the filling in place and the cheese molten but not scorching. Cut in half (diagonals are always fun), watch the cheddar ooze, and dig in.
Pro Tips for Making Tuna Melt Recipe
- Super-Drain Your Tuna: Squeeze out as much liquid as possible for a filling that stays put and isn’t soggy—pat it dry with paper towels if needed!
- Shred Your Own Cheese: For maximum melt and flavor, slice or shred cheddar straight from the block—pre-sliced cheese can be a little rubbery when heated.
- Low and Slow Toasting: Use medium-low heat for the skillet so your bread gets extra crispy while the cheese inside melts luxuriously instead of rushing and burning.
- Toothpick Trick for the Air Fryer: Pierce toothpicks through the corners to hold everything in place and flip your melts easily without losing any filling.
How to Serve Tuna Melt Recipe

Garnishes
Add a sprinkle of chopped fresh herbs—think parsley or dill—right over the top just before serving to brighten up the Tuna Melt Recipe. A few extra pickle slices, or even a dash of hot sauce, bring a lively, tangy finish that cuts through the richness beautifully.
Side Dishes
This tuna melt absolutely sings next to a crisp green salad, a tangy slaw, or even a bowl of tomato soup for classic diner vibes. Don’t forget kettle chips (crunch lovers unite!) or some roasted veggies for a colorful, well-rounded plate.
Creative Ways to Present
Try cutting your sandwiches into thirds or quarters for party-friendly sliders—perfect for game days or snack platters. You can also serve the tuna salad atop mini toasts or English muffin halves and broil for open-faced melts with bubbling, golden cheese. It’s always fun to let kids “decorate” their own open-faced version too!
Make Ahead and Storage
Storing Leftovers
If you find yourself with extra sandwiches, store cooled Tuna Melt Recipe halves in an airtight container in the fridge for up to 2 days. The bread will soften a little, but the flavor is still fantastic for a quick lunch or snack!
Freezing
It’s best not to freeze assembled tuna melts, as the yogurt-based filling and toasted bread will lose their texture. If you want to get ahead, you can, however, freeze the tuna salad (without dairy) and assemble fresh melts to order.
Reheating
For that just-cooked crunch, reheat leftovers in a skillet over medium-low or pop them in the air fryer at 350°F until warmed through and the bread is crisp. The microwave will heat them up just fine but won’t give that signature crispy bite.
FAQs
-
Can I use a different type of bread for the Tuna Melt Recipe?
Absolutely! While whole grain sourdough is sturdy and flavorful, you can use any bread you love—white sandwich bread, rye, whole wheat, or even English muffins. Just be sure it’s sturdy enough to hold the filling without falling apart.
-
What can I use instead of Greek yogurt in the filling?
If you prefer, swap in mayonnaise or a creamy vegan spread. For extra tang, a mix of half mayo and half Greek yogurt works nicely, or try cottage cheese blended smooth for a protein-packed option.
-
How can I prepare the Tuna Melt Recipe ahead of time for a crowd?
The tuna salad can be made up to 2 days ahead and stored in the fridge. Assemble and grill the sandwiches right before serving for the freshest, meltiest results. For parties, make open-faced melts under the broiler—it’s quick and they can be prepped on a sheet pan.
-
Can I make this recipe gluten-free?
Yes! Just use your favorite gluten-free sandwich bread or rolls. The filling is naturally gluten-free, so with the right bread, your whole Tuna Melt Recipe is ready for everyone to enjoy.
Final Thoughts
This Tuna Melt Recipe has everything you want in a cozy meal: crisp, buttery bread, gooey cheddar, tangy-creamy tuna salad, and all those little touches that turn a simple sandwich into something special. Treat yourself—once you try it, you’ll find endless reasons to make it again and again!
Print
Tuna Melt Recipe
- Prep Time: 10 minutes
- Cook Time: 10 minutes
- Total Time: 20 minutes
- Yield: 3 servings
- Category: Main Dish
- Method: Stovetop, Panini Press, Air Fryer
- Cuisine: American
- Diet: Vegetarian
Description
This Tuna Melt recipe is a delicious and satisfying meal that combines flaky tuna, Greek yogurt, pickles, and cheese on whole grain bread. Perfect for a quick lunch or dinner.
Ingredients
Main Ingredients:
- 2 (5-ounce) cans solid, water-packed tuna, drained (look for sustainably caught)
- 1/3 cup plus 1 tablespoon nonfat plain Greek yogurt
- 1/4 cup finely chopped cornichons or small dill pickles
- 3 tablespoons finely chopped red onion
- 2 teaspoons freshly squeezed lemon juice
- 1 teaspoon grainy mustard
- 1 tablespoon minced fresh parsley or dill
- 1/4 teaspoon kosher salt
- 1/8 teaspoon ground black pepper
Additional Ingredients:
- 6 slices whole grain sourdough bread
- 3 slices sharp cheddar cheese
- 3 tablespoons softened unsalted butter
Instructions
- Prepare Tuna Mixture: Drain tuna and combine with Greek yogurt, pickles, red onion, lemon juice, mustard, parsley, salt, and pepper. Adjust seasoning to taste.
- Assemble Melt: Spread tuna mixture on bread slices, top with cheese, butter, and cook until golden.
- Cooking Methods: Stovetop, Panini Press, or Air Fryer – choose your preferred method.
- Serve: Let the melt cool, cut in half, and enjoy!
Notes
- Store leftover sandwiches in the refrigerator for up to 2 days.
- Reheat in a skillet or air fryer for a delicious leftover meal.
Nutrition
- Serving Size: 1 sandwich
- Calories: 380 kcal
- Sugar: 2g
- Sodium: 810mg
- Fat: 14g
- Saturated Fat: 8g
- Unsaturated Fat: 4g
- Trans Fat: 0g
- Carbohydrates: 33g
- Fiber: 4g
- Protein: 30g
- Cholesterol: 60mg


Your email address will not be published. Required fields are marked *