

This vibrant Shrimp Ceviche is a refreshing, flavor-packed dish that brings restaurant-quality seafood right to your kitchen with minimal effort. The combination of tender shrimp, zesty citrus, and crisp vegetables creates a perfect balance of flavors and textures that’s ideal for warm evenings, gatherings with friends, or whenever you’re craving something light yet satisfying. Ready in just 30 minutes, this no-fuss recipe will quickly become your go-to for impressive, effortless entertaining.
Why You’ll Love This Recipe
- Quick and Simple: From start to finish in just 30 minutes – perfect for those nights when you want something impressive without spending hours in the kitchen.
- Bright and Fresh: The combination of citrus juices and crisp vegetables creates an explosion of freshness that’s absolutely irresistible.
- Versatile: Works beautifully as an appetizer with chips, a light lunch, or even as a stunning dinner paired with complementary sides.
- Crowd-Pleaser: Everyone loves the perfectly cooked shrimp and the balance of flavors – it disappears quickly at gatherings!
- Healthy Option: Packed with lean protein and fresh vegetables, it’s a nutritious choice that doesn’t sacrifice flavor.

Ingredients You’ll Need
- Shrimp: The star of the show – provides a tender, sweet seafood base that soaks up all the citrus flavors. Choose medium-sized shrimp for the perfect bite.
- Lime Juice: The primary acid that “cooks” the shrimp and adds that quintessential tangy backbone to the dish.
- Lemon Juice: Works with the lime to add complexity and brightness.
- Orange Juice: Brings a touch of sweetness to balance the sharper citrus notes.
- Olive Oil: Adds richness and helps marry all the flavors together.
- Red Onion: Provides a sharp, vibrant flavor and beautiful color contrast.
- Jalapeño: Brings just enough heat to wake up your taste buds without overwhelming the dish.
- Tomatoes: Add juicy sweetness and beautiful color. Make sure they’re ripe but firm.
- Cucumber: Contributes refreshing crunch and coolness to counter the acidity and heat.
- Avocado: Creates creamy, rich pockets of flavor that beautifully contrast with the acidic elements.
- Cilantro: That distinctive herbal note that’s essential to authentic ceviche.
- Salt: Enhances all the other flavors – don’t skip this!
Variations
Want to make this recipe your own? Here are some delicious ways to customize:
- Tropical Twist: Add diced mango or pineapple for a sweet counterpoint to the acidity.
- Extra Spicy: Double the jalapeño or add a serrano pepper for serious heat lovers.
- Seafood Medley: Mix in some bay scallops or chunks of firm white fish for a mixed seafood ceviche.
- Southwest Style: Add black beans and corn for a heartier variation with southwestern flair.
- Coconut Infusion: Replace some of the citrus juice with coconut milk for a creamier, tropical version.
How to Make Shrimp Ceviche
Step 1: Cook the Shrimp
Bring a large pot of water to a boil. Add your shrimp and cook briefly for 1-2 minutes until they turn pink and are just cooked through. Immediately remove them from the water to prevent overcooking. Once cool enough to handle, cut the shrimp into bite-sized pieces.
Step 2: Begin the Marinade
In a large bowl, combine the lime juice, lemon juice, orange juice, olive oil, and salt. Add your chopped shrimp and gently toss to coat. Place in the refrigerator to marinate for 10 minutes, allowing the shrimp to absorb all those amazing citrus flavors.
Step 3: Prepare the Vegetables
While the shrimp is marinating, prepare your vegetables. Finely dice the tomatoes, cucumber, red onion, and jalapeño. The small, uniform pieces ensure you get a perfect balance of flavors in each bite.
Step 4: Combine and Marinate
Add all your diced vegetables to the shrimp mixture and gently toss to combine. Return to the refrigerator for at least another 10 minutes to allow the flavors to meld together.
Step 5: Finish and Serve
Just before serving, fold in the diced avocado and chopped cilantro. This last-minute addition keeps these delicate ingredients at their freshest. Give everything a gentle toss and serve immediately for the best flavor and texture.
Pro Tips for Making the Recipe
- Shrimp Size Matters: Medium shrimp (20/24 count) work perfectly, but you can use larger or smaller – just adjust your cooking time accordingly.
- Citrus Secrets: Always use fresh-squeezed citrus juice – the bottled stuff just doesn’t compare and can make your ceviche taste flat.
- Uniform Dicing: Try to cut all your vegetables to a similar size for the best eating experience and most balanced flavor in each bite.
- Temperature Control: Keep everything well-chilled throughout preparation for food safety and the best flavor.
- Avocado Timing: Adding the avocado at the last minute prevents it from breaking down in the acidic marinade and maintains its beautiful color and texture.
How to Serve
Shrimp ceviche is incredibly versatile when it comes to serving options:
As an Appetizer
Serve in a large bowl surrounded by crispy tortilla chips or plantain chips for scooping. For an elegant presentation, serve individual portions in martini glasses or small bowls.
As a Main Course
Spoon ceviche over a bed of leafy greens for a refreshing salad, or serve alongside rice for a more substantial meal. For a fun twist, use it as a topping for tostadas with a thin layer of refried beans as the base.
Perfect Pairings
Complement your ceviche with an ice-cold Mexican beer, a chilled glass of Sauvignon Blanc, or a classic margarita. For non-alcoholic options, a sparkling water with lime makes a refreshing companion.
Make Ahead and Storage
Storing Leftovers
Store leftover ceviche in an airtight container in the refrigerator, with a layer of plastic wrap pressed directly onto the surface to prevent the avocado from browning. Leftovers will keep for 2-3 days, though the vegetables will soften over time.
Make Ahead Tips
You can prepare most components up to a day ahead – cook and marinate the shrimp with the citrus juices, and dice all vegetables except the avocado. Store everything separately in the refrigerator. When ready to serve, combine all components and add freshly diced avocado and chopped cilantro.
Freezing
Freezing is not recommended for ceviche as the fresh vegetables and delicate shrimp texture would be compromised upon thawing.
FAQs
Can I use frozen shrimp for this recipe?
Absolutely! Frozen shrimp works perfectly for ceviche. Just make sure to thaw them completely before cooking, and pat them dry to remove excess moisture. In fact, unless you live coastal, frozen shrimp is often fresher than what’s at the seafood counter since it’s typically frozen right on the boat.
Is this recipe safe to eat?
Yes, this recipe is completely safe because we’re fully cooking the shrimp before marinating it in citrus juice. Traditional ceviche “cooks” raw seafood in acid alone, but our method eliminates any food safety concerns while still delivering authentic flavor.
Can I make this ceviche without cilantro?
While cilantro adds traditional flavor, you can substitute with fresh parsley if you’re among those who find cilantro soapy-tasting. You could also use a combination of fresh mint and parsley for a different but complementary flavor profile.
How spicy is this ceviche?
With one jalapeño (seeds removed), this recipe has just a mild kick. For a spicier version, keep some seeds or add more peppers. For a milder version, you can substitute with bell pepper or reduce the amount of jalapeño.
Final Thoughts
This Shrimp Ceviche recipe brings the bright, zesty flavors of coastal cuisine right to your table with minimal effort. What I love most is how it transforms simple ingredients into something that feels special and celebratory. Whether you’re serving it as an appetizer at your next gathering or enjoying it as a light meal on a warm evening, this ceviche delivers restaurant-quality flavor in every bite. Give it a try, and I’m confident it will become a staple in your recipe collection!
Print
Easy Shrimp Ceviche Recipe
- Prep Time: 10 minutes
- Cook Time: 25 minutes
- Total Time: 55 minutes
- Yield: 4 servings
- Category: Main-course
- Method: Baking
- Cuisine: American
- Diet: Gluten Free
Description
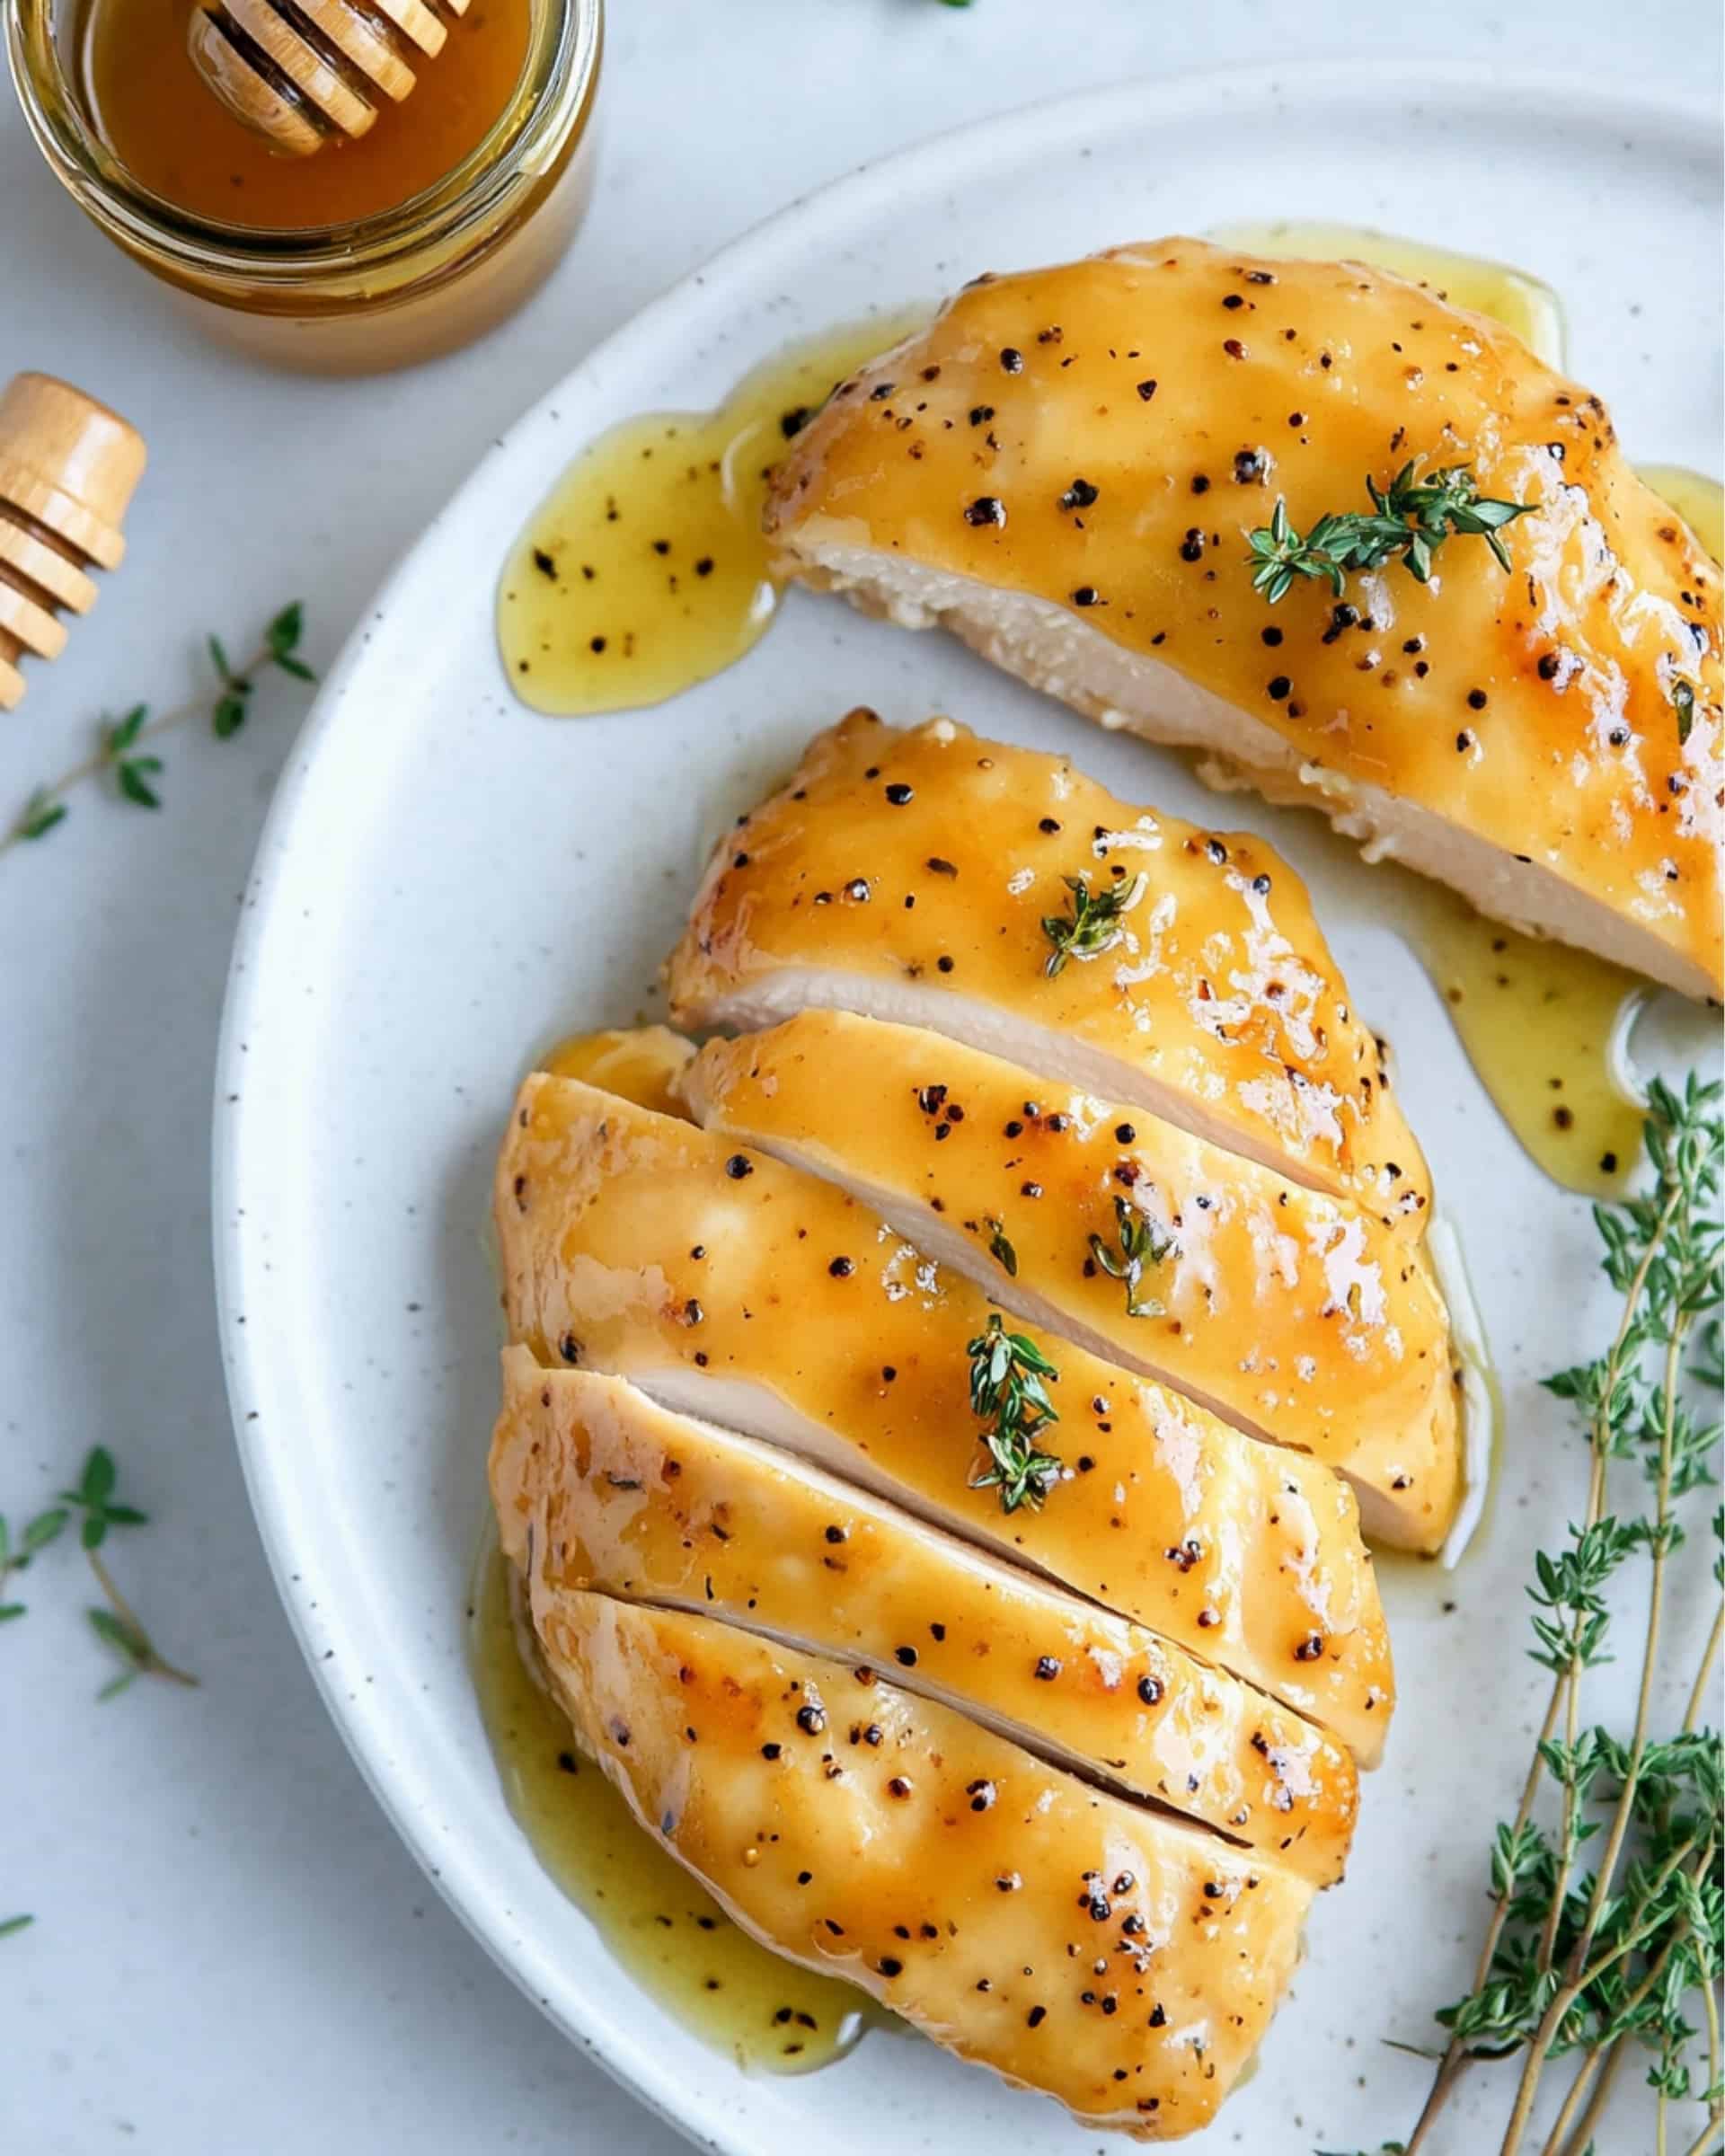
A quick and flavorful recipe for baked honey mustard chicken. Juicy chicken breasts are coated in a tangy-sweet honey mustard marinade and baked to perfection for a delicious and healthy main course that’s easy to make any night of the week.
Ingredients
Main Ingredients
-
- 1 – 1 1/4 lbs. chicken breasts, pounded and cut into 4-5 oz. portions
- 1/2 tsp. salt, to taste
- 1/8 tsp. black pepper, to taste
- 1/8 tsp. paprika
Honey Mustard Sauce
- 2 Tbsp. Dijon mustard*
- 2 Tbsp. honey
- 2 Tbsp. olive oil
- 1/2 tsp. Worcestershire sauce
- 3/4 tsp. fresh thyme, finely chopped*
- 1 clove garlic, crushed
Instructions
- Preheat Oven: Preheat your oven to 375°F to ensure consistent baking temperatures.
- Prepare Chicken: Pound the chicken breasts to an even thickness of about 1 inch and cut into 4-5 oz. portions. This helps the chicken cook evenly.
- Make Honey Mustard Sauce: In a large bowl, whisk together Dijon mustard, honey, olive oil, Worcestershire sauce, thyme, garlic, salt, pepper, and paprika until you have a smooth marinade.
- Reserve Sauce: Set aside 2 tablespoons of the honey mustard sauce for brushing the chicken later.
- Coat Chicken: Place the chicken breasts into the bowl with the remaining marinade. Toss them well until they are evenly coated. For easier storage, you can transfer the chicken and sauce mixture to a gallon-sized Ziploc bag.
- Marinate: Cover and refrigerate the chicken for at least 20 minutes or up to overnight for deeper flavor.
- Prepare Baking Dish: Lightly coat a 9-inch square baking dish with non-stick cooking spray, and place the marinated chicken breasts into the dish in a single layer.
- Bake: Bake the chicken in the preheated oven for 20-25 minutes or until the internal temperature reaches 160°F. Remember that the temperature will rise by 5-10 degrees after removing from the oven, reaching a safe 165°F.
- Brush with Reserved Sauce: Once the chicken is done baking, brush it with the reserved honey mustard sauce for an extra layer of flavor.
- Garnish and Serve: Garnish the chicken with a sprig of fresh thyme and serve warm. Enjoy!
Notes
-
- You can also use ¼ teaspoon of dried thyme if fresh thyme is unavailable.
- Yellow mustard or spicy brown mustard can be used as a substitute for Dijon mustard if you prefer a different flavor profile.
Meal Prep and Storage
- How to prep ahead of time: If preparing more than 24 hours in advance, store the chicken and marinade separately. Toss the chicken in the sauce if preparing less than 24 hours before cooking. The marinade and chicken can be prepared up to 3 days in advance.
- How to store: Store leftover honey mustard chicken in an airtight container for up to 3-4 days in the refrigerator.
- How to freeze: This dish freezes exceptionally well. Simply store the chicken and any excess sauce in a freezer-safe container or Ziploc bag for up to 4-6 months.
- How to reheat: Before eating, let the chicken thaw in the refrigerator and then reheat in a 300°F oven until warmed through.
Nutrition
- Serving Size: 1 serving
- Calories: 245
- Sugar: 7g
- Sodium: 360mg
- Fat: 10g
- Saturated Fat: 2g
- Unsaturated Fat: 8g
- Trans Fat: 0g
- Carbohydrates: 10g
- Fiber: 0g
- Protein: 28g
- Cholesterol: 85mg

Your email address will not be published. Required fields are marked *