

If you’re looking for the ultimate spooky treat this Halloween, you absolutely have to try my Vampire Bite Halloween Cupcakes Recipe. These cupcakes are not just cute—they’re seriously delicious and come packed with an ooey-gooey red velvet filling that spills out like fresh vampire bites. I’m telling you, once you try this recipe, you’ll be hooked. So grab your apron, and let’s make some Halloween magic happen!
Why You’ll Love This Recipe
- Incredibly Unique Filling: The creamy, spilling red velvet filling is the star—it oozes with every bite and will wow your guests.
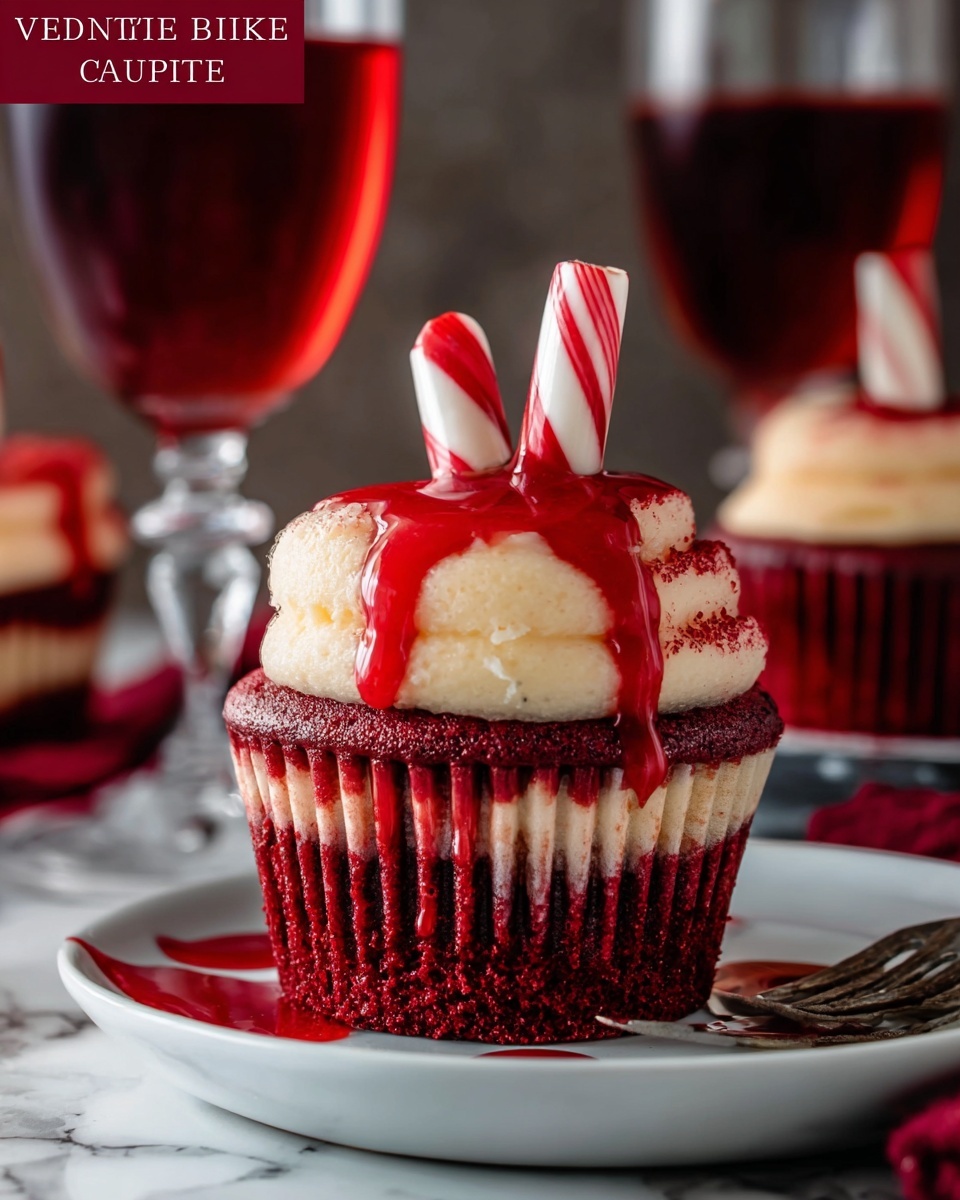
- Visually Stunning: The pale skin-tone buttercream contrasts beautifully with the deep red inside, making these cupcakes a real showstopper.
- Perfect for Halloween: These cupcakes capture the spooky spirit without sacrificing flavor—my family begs me to make them every year.
- Fun to Make and Customize: You’ll enjoy creating the vampire bite effects using candy fangs and edible blood; it’s surprisingly simple and super satisfying!

Ingredients You’ll Need
With Vampire Bite Halloween Cupcakes Recipe, the ingredient choices really come together to create not just a delicious cupcake but a whole experience—from the soft red velvet base to the vibrant filling and the pale frosting that looks like eerie skin.
- All-purpose flour: The sturdy base that gives these cupcakes their perfect crumb.
- Granulated sugar: Sweetens the cupcakes just right, helping with that tender texture.
- Unsalted butter: Softened for both batter and frosting; it’s essential for richness.
- Large eggs: Act as the glue, binding everything together beautifully.
- Buttermilk: Adds moisture and a slight tang, enhancing the red velvet flavor.
- Cocoa powder: A subtle hint of chocolate that deepens the taste and color.
- Red food coloring (gel-based): For that signature vibrant blood-red color—it makes all the difference.
- Vanilla extract: Adds warmth and depth to the cupcake and frosting.
- Baking soda and white vinegar: They create the lift needed for light, fluffy cupcakes.
- Salt: Balances the sweetness and rounds out the flavors.
- Sweetened condensed milk: The secret to that creamy, slightly sticky filling that spills out.
- Red velvet cake crumbs: Leftover cupcake crumbs repurposed for the filling—nothing wasted here!
- Powdered sugar: For the buttercream’s silky texture and sweetness.
- Milk or heavy cream: Smooths out the frosting to just the right consistency.
- Ivory or peach food coloring: Used sparingly to mimic pale vampire skin in your frosting.
- Candy fangs or red gelatin dots: Essential bite marks that give it the spooky edge.
- Red syrup or edible red gel: Looks like dripping blood—very dramatic!
Variations
I love playing around with this Vampire Bite Halloween Cupcakes Recipe depending on who I’m baking for—some like it extra rich, others prefer to skip the food coloring. Feel free to make it your own!
- Almond extract swap: I’ve swapped vanilla for almond extract once to give the frosting a nutty twist; it was surprisingly delicious and unexpected.
- Dairy-free version: Use coconut oil instead of butter and almond milk in the frosting—works like a charm for friends with allergies.
- Mini cupcakes: Perfect for parties; just reduce baking time and you get more bites for everyone to enjoy.
- Berry filling: Sometimes I mix in fresh raspberry puree with the filling for a tart contrast to the creamy sweetness.
How to Make Vampire Bite Halloween Cupcakes Recipe
Step 1: Preheat and Prepare Your Base
Start by heating your oven to 350°F (175°C) and lining a 12-cup muffin tin with paper liners. I always use good-quality liners because they help you get those sharp cupcake edges that show off the red velvet color—plus, they make cleanup a breeze. Then, cream together your softened butter and sugar for about 2-3 minutes until fluffy—that step is key because it traps air that makes your cupcakes light. Add eggs one at a time, beating well each time, then mix in vanilla and the red food coloring. A tip I learned the hard way is to blend the coloring into the butter and sugar before adding dry stuff; this way, you get that perfectly even, gorgeously vibrant red.
Step 2: Mix Dry Ingredients and Bake
Whisk your flour, cocoa powder, and salt separately, then add these little by little to the wet mixture, alternating with buttermilk. Don’t overmix—stir just until combined, or you’ll get dense cupcakes, and nobody wants that! After that, stir in the baking soda and vinegar combo, which helps the cupcakes rise to a beautiful fluffiness. Fill each muffin cup about two-thirds full and pop them in the oven for 18-20 minutes. Always test with a toothpick—it should come out clean or with just a few moist crumbs. When they’re done, let the cupcakes cool in the pan for 5 minutes, then transfer to a wire rack to cool completely. Try removing the paper liners now—you’ll see those stunning red sides that make these cupcakes so spooky and special.
Step 3: Make the Creamy Spilling Red Velvet Filling
Use your saved cupcake crumbs (from the centers you’ll remove soon) and mix them with sweetened condensed milk and melted butter until smooth and glossy. This filling is what makes the bites ooze blood-red deliciousness, so don’t skimp on the red food coloring—it makes it pop! If your filling feels too thick, I recommend adding a little more sweetened condensed milk until it’s just right for spooning and oozing out when bitten.
Step 4: Hollow Out and Fill the Cupcakes
Once completely cooled, carefully cut or core out a small section from the center of each cupcake to make space for the filling. I like to use a small knife to avoid splitting the sides—I’ve found that gentle wiggling rather than force works best! Fill each cavity generously with the creamy red filling, making sure it reaches to the top. Trust me, seeing that filling spill out when you take a bite is what makes this recipe stand out.
Step 5: Whip Up the Skin-Tone Buttercream Frosting
Beat softened butter until creamy, then gradually add powdered sugar, mixing well after each addition. Add vanilla and milk or cream and beat until fluffy. Now, here’s where it gets fun: add a few drops of ivory or peach food coloring to create that pale, perfect vampire skin tone. You’ll want the frosting smooth and evenly colored—think flawless porcelain skin. If your frosting is stiff, add milk sparingly because you want it spreadable, not runny.
Step 6: Frost Your Cupcakes
Use an offset spatula or a piping bag to apply an even layer of your pale buttercream. I love the look of smooth frosting that mimics delicate skin—it’s weirdly satisfying! For the best results, chill your frosted cupcakes for a few minutes before moving on to the vampire bite details; this helps everything set nicely.
Step 7: Add Vampire Bite Details
This is the fun, decorative step: use candy fangs or small drops of red gelatin to create the iconic two puncture wounds on each cupcake. Drip red syrup or edible gel from these marks so it runs down the sides—like fresh vampire bites oozing blood. I like to play around with the “blood” drip patterns to keep it looking realistic; a little asymmetry goes a long way here. If you want, you can place red straws sticking out for a dramatic effect, but be careful—they’re just for show, not to eat!
Step 8: Final Touches and Presentation
Arrange your cupcakes on a dark platter—black or blood red works perfectly. I drizzle extra red syrup around the base of the cupcakes and add some spooky props like plastic bats or flickering candles for ultimate Halloween vibes. Trust me, these cupcakes get rave reviews every time I bring them to a party.
Pro Tips for Making Vampire Bite Halloween Cupcakes Recipe
- Deep Red Color Boost: Use gel-based food coloring for a vibrant, lasting red that doesn’t affect batter consistency.
- Cooling is Key: Always cool cupcakes completely before coring or frosting to avoid crumbling or melting.
- Even Blood Drips: Practice your syrup drizzling on parchment before decorating cupcakes to master that perfect “blood” effect.
- Gentle Center Removal: Use a small sharp knife with a twisting motion to hollow out centers for neat cavities, avoiding cracks.
How to Serve Vampire Bite Halloween Cupcakes Recipe
Garnishes
I’m a big fan of using candy vampire fangs—they immediately add character and a fun 3D effect. Sometimes I scatter edible glitter around the frosting for a “moonlit” shimmer or add tiny red sugar crystals for a blood-like sparkle. Fresh mint leaves work surprisingly well for a little color contrast, too.
Side Dishes
Pair these cupcakes with a spooky punch or dark hot chocolate to complement the rich red velvet flavor. If you’re doing a Halloween party, finger foods like “witch finger” cookies or caramel apples make for a fun, festive spread.
Creative Ways to Present
I once set these Vampire Bite Halloween Cupcakes on a serving tray lined with black lace and red silk petals—it was such a hit! You can also place them inside faux coffin boxes for little party favors or use cupcake stands shaped like haunted houses to elevate your display.
Make Ahead and Storage
Storing Leftovers
Store the cupcakes in an airtight container in the fridge for up to 3 days. I recommend waiting to add the vampire bite “blood” details until right before serving to keep them fresh and prevent syrup from soaking in too much.
Freezing
If you want to freeze, frost cupcakes without the blood details, then freeze in a single layer on a baking sheet before transferring them to a freezer-safe container. Thaw overnight in the fridge and decorate on the day you plan to serve.
Reheating
I usually reheat cupcakes at room temperature—no microwave. Given the delicate frosting and filling, microwaving can melt the buttercream and ruin the chilling effect. If you prefer a warmer cupcake, allow it to sit out for about 30 minutes before serving.
FAQs
-
Can I make Vampire Bite Halloween Cupcakes Recipe dairy-free?
Absolutely! Swap out butter for coconut oil or a dairy-free butter substitute, and use almond or oat milk instead of dairy milk in both the batter and frosting. Make sure your sweetened condensed milk alternative is suitable for your dietary needs.
-
How do I prevent the red filling from leaking too much?
Make sure your filling isn’t too runny by adjusting the condensed milk amount. Also, don’t overfill the cupcake centers, and chill the filled cupcakes before frosting to help everything set in place.
-
Can I prepare these cupcakes a day in advance?
Yes! Bake and frost the cupcakes a day ahead, but add the vampire bite decorations and “blood” drips just before serving to keep them fresh and visually striking.
-
What can I use if I don’t have red food coloring?
You can try natural alternatives like beet juice or powder, but keep in mind the color may be less vibrant and could affect the flavor slightly. Gel-based food coloring still gives the best results for the Vampire Bite Halloween Cupcakes Recipe.
Final Thoughts
I absolutely love how this Vampire Bite Halloween Cupcakes Recipe brings a fun, spooky twist to classic red velvet cupcakes. When I first tried making them, the sight of that glossy red filling oozing out made me smile like a kid on Halloween night. My family goes crazy for these every year, and it’s become a festive tradition I look forward to. Trust me, you’re going to impress your friends and satisfy your sweet tooth with this recipe—give it a try and get ready for some fang-tastic feedback!
Print
Vampire Bite Halloween Cupcakes Recipe
- Prep Time: 10 minutes
- Cook Time: 20 minutes
- Total Time: 30 minutes
- Yield: 12 cupcakes
- Category: Dessert
- Method: Baking
- Cuisine: American
Description
These Vampire Bite Halloween Cupcakes are a spooky yet delicious treat featuring deep red velvet cupcakes filled with a creamy, spilling red velvet filling. Topped with pale skin-tone buttercream and adorned with realistic vampire bite decorations, these cupcakes are perfect for a Halloween party or themed event.
Ingredients
Red Velvet Cupcakes
- 1 1/2 cups all-purpose flour
- 1 cup granulated sugar
- 1/2 cup unsalted butter, softened
- 2 large eggs
- 1/2 cup buttermilk
- 2 tbsp cocoa powder
- 1 tbsp red food coloring (gel-based for vibrant color)
- 1 tsp vanilla extract
- 1/2 tsp baking soda
- 1 tsp white vinegar
- 1/4 tsp salt
Creamy Spilling Red Velvet Filling
- 1/2 cup red velvet cake crumbs (from the cupcake centers)
- 1/3 cup sweetened condensed milk
- 1 tbsp unsalted butter, melted
- 1-2 tbsp red food coloring (for a vibrant, glossy red hue)
Pale Skin-Tone Buttercream Frosting
- 1 cup unsalted butter, softened
- 3-4 cups powdered sugar, sifted
- 2-3 tbsp milk or heavy cream
- A few drops of ivory or peach food coloring (adjust for a pale, skin-tone effect)
- 1 tsp vanilla extract
Vampire Bite Decoration
- Candy fangs or small dots of red gelatin (for puncture marks)
- Red syrup or edible red gel (for “blood” drips)
- Straws (not edible, for decoration)
Instructions
- Preheat and Prepare: Preheat your oven to 350°F (175°C) and line a 12-cup muffin tin with paper liners. In a large mixing bowl, cream together the softened butter and sugar until light and fluffy, about 2-3 minutes. Add the eggs one at a time, beating well after each addition. Mix in the vanilla extract and red food coloring to achieve a deep, vibrant red hue. Tip: To ensure even color, mix the food coloring into the butter and sugar before adding the dry ingredients.
- Mix and Bake: In a separate bowl, whisk together the flour, cocoa powder, and salt. Gradually add the dry ingredients to the wet mixture, alternating with the buttermilk, until just combined. Stir in the baking soda and vinegar mixture, which will help the cupcakes rise beautifully. Spoon the batter into the prepared muffin tin, filling each cup about 2/3 full. Bake for 18-20 minutes, or until a toothpick inserted into the center comes out clean. Let the cupcakes cool in the pan for 5 minutes before transferring them to a wire rack to cool completely. Once cooled, carefully remove the paper liners to expose the deep red sides of the cupcakes. Tip: Allowing the cupcakes to cool completely before decorating ensures a smooth frosting application.
- Prepare the Creamy Spilling Red Velvet Filling: In a small bowl, combine the red velvet cake crumbs with the sweetened condensed milk and melted butter. Stir until the mixture is smooth and slightly glossy. Add red food coloring to achieve an intense, vibrant red. The filling should be creamy but slightly runny, with a glossy finish that will spill out when the cupcake is cut or bitten into. Tip: Adjust the consistency of the filling by adding more sweetened condensed milk if it’s too thick.
- Hollow Out the Cupcakes: Once the cupcakes are completely cool, use a small knife or cupcake corer to remove a small section from the center of each cupcake. Fill each hole with the creamy red velvet filling, ensuring it reaches the top of the cavity. Tip: Be gentle when removing the centers to avoid cracking the cupcakes.
- Make the Skin-Tone Buttercream Frosting: In a large bowl, beat the softened butter until creamy. Gradually add the powdered sugar, one cup at a time, mixing well after each addition. Add the vanilla extract and 2 tablespoons of milk or cream. Beat until the frosting is smooth and fluffy. Add a few drops of ivory or peach food coloring to achieve a pale, skin-tone color. The frosting should be smooth and even, like flawless skin. Tip: If the frosting is too stiff, add more milk or cream until it reaches a spreadable consistency.
- Frost the Cupcakes: Using an offset spatula or a piping bag, frost each cupcake with the pale buttercream. The surface should be smooth and even, resembling delicate skin. Tip: For an ultra-smooth finish, chill the frosted cupcakes for a few minutes before adding the vampire bite details.
- Create the Vampire Bite Decoration: Use candy fangs or small drops of red gelatin to create two close-set puncture marks on the surface of each cupcake. Drizzle red syrup or edible gel from the puncture marks, allowing it to drip down the sides of the cupcakes. Use red straws if you want. Add a few extra drips of red gel around the base of the cupcakes on the serving platter to enhance the vampire theme. Tip: Experiment with the placement of the “blood” drips for a more realistic effect.
- Final Touches: Arrange the decorated cupcakes on a dark serving platter, surrounded by additional red syrup drips for an extra spooky effect. The combination of the pale frosting, deep red velvet filling, and blood-like drips creates an irresistible and terrifyingly delicious treat. Tip: For added drama, serve the cupcakes on a black or red platter with spooky decorations like plastic bats or candles.
Notes
- For vibrant red cupcakes, use gel-based red food coloring.
- Allow cupcakes to cool completely before frosting for best texture.
- Adjust filling consistency with sweetened condensed milk for spill effect.
- Be gentle when coring cupcakes to prevent cracking.
- Use ivory or peach food coloring sparingly to achieve realistic skin tone frosting.
- Chill frosted cupcakes for a smoother finish before adding decorations.
- Use edible gel or red syrup for realistic “blood” drips.
- Serve on dark platters with spooky decorations for added effect.
Nutrition
- Serving Size: 1 cupcake
- Calories: 390 kcal
- Sugar: 38 g
- Sodium: 220 mg
- Fat: 20 g
- Saturated Fat: 12 g
- Unsaturated Fat: 7 g
- Trans Fat: 0.5 g
- Carbohydrates: 48 g
- Fiber: 1 g
- Protein: 4 g
- Cholesterol: 65 mg

Your email address will not be published. Required fields are marked *