

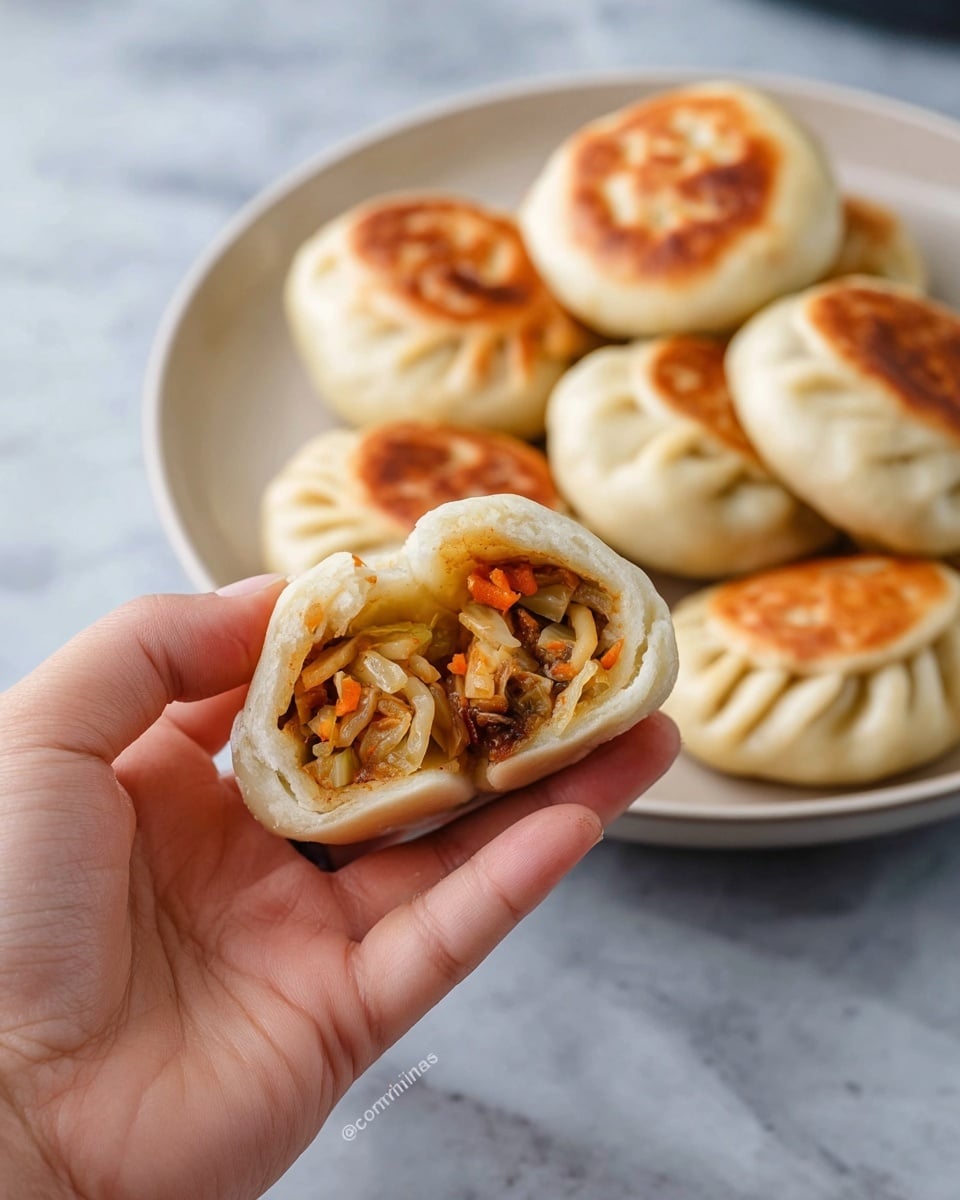
I absolutely love sharing this Vegan Pan-Fried Buns Recipe with you because it brings together that irresistible combination of a crispy pan-fried bottom with a soft, fluffy dough that practically melts in your mouth. When I first tried making these buns, I was amazed by how the savory, cabbage and vermicelli filling balanced perfectly with the toasted sesame notes in the dough, creating a treat that’s both comforting and fresh. Whether you’re inviting friends over or just craving some tasty handheld snacks, these buns are always a hit.
You’ll find that Vegan Pan-Fried Buns Recipe works wonderfully as a snack, appetizer, or even a light meal. Plus, knowing exactly what’s going into them—fresh veggies and simple pantry staples—gives such peace of mind about what you’re eating. I’ve learned a few tricks over time that make these buns easier to handle and crispier than ever, and I’m excited to walk you through all of it so you can get the best results in your kitchen, too.
Why You’ll Love This Recipe
- Perfect Texture: Crispy on the bottom, tender and chewy inside—just like your favorite street food.
- 100% Vegan & Wholesome: Fresh veggies and simple ingredients make it a healthy and satisfying treat.
- Fun to Make: Rolling, wrapping, and pan-frying is a hands-on process that’s actually relaxing and rewarding.
- Make-Ahead Friendly: You can prep, freeze, and reheat these buns without losing their flavor or texture.

Ingredients You’ll Need
Every ingredient in this Vegan Pan-Fried Buns Recipe works together to create a delicious balance of flavors and textures. I always recommend sourcing fresh veggies for the filling and quality flour for the dough to get the best results.
- All-purpose flour: Choose unbleached if possible for a better texture and flavor in your dough.
- Instant dry yeast: This helps the dough rise quickly and effectively; keep opened packs frozen for longevity.
- Sugar: Just a touch to feed the yeast and add a subtle sweetness to the dough.
- Salt: Balances the flavor, both in the dough and the filling.
- Roasted sesame seeds: These give the dough a toasty aroma that really shines through when pan-fried.
- Soy milk (or other non-dairy milk): Warm, not hot, to activate the yeast gently and keep everything vegan.
- Toasted sesame oil: Adds a rich, nutty flavor to the dough and finishing touches in the filling.
- Neutral oil: For stir-frying the veggies without overpowering other flavors.
- Cabbage: Fresh and shredded finely for the perfect filling texture.
- Vermicelli noodles: Soaked and chopped to blend seamlessly into the veggies.
- Carrot: Adds a touch of natural sweetness and color contrast.
- Scallions or chives: Brightens the filling with a fresh aroma.
- Soy sauce: For umami depth in the filling seasoning.
Variations
One of the things I love about this Vegan Pan-Fried Buns Recipe is how easy it is to adjust to your own tastes or what you have on hand. Feel free to swap ingredients, add spices, or tweak fillings to make it truly your own.
- Use different veggies: I’ve tried adding finely chopped shiitake mushrooms or shredded kale, which both add delicious earthiness to the filling.
- Add spice: A pinch of chili flakes or sliced fresh chili in the filling gives the buns a delightful kick my family adores.
- Gluten-free option: Making the dough gluten-free is tricky, but experimenting with a mix of gluten-free flours and xanthan gum can work if you’re diligent.
- Double the filling: If you love a hearty bun, doubling the filling and making slightly larger buns is my go-to for more lunch satisfaction.
How to Make Vegan Pan-Fried Buns Recipe
Step 1: Mix and Rise Your Dough
Start by combining all the dry ingredients in a large bowl—flour, yeast, sugar, salt, and those wonderful roasted sesame seeds. Then make a little well in the center and pour in your warm soy milk and toasted sesame oil. Mix everything together, initially with a spoon or spatula, and then use your hands to bring the dough into a ball. The dough might feel a bit sticky, but that’s okay—it will become smooth after resting. Cover the bowl with a damp towel and let it rest for at least 2 hours, or until it doubles in size. This is the moment when patience really pays off, as the dough develops that soft, elastic texture that makes these buns so good.
Step 2: Prepare the Filling
While your dough is rising, start on the filling. Soak the vermicelli noodles in boiling water until tender, then drain well and chop roughly. Heat a pan with some neutral oil, then toss in your shredded cabbage, carrots, and chives (or scallions). Cook over medium-high heat until the carrots soften, about 4-5 minutes. Add the noodles back into the pan and season everything with soy sauce, salt, and toasted sesame oil. Stir well and continue cooking for another few minutes so all the flavors meld together. Don’t forget to drain this mixture in a strainer to get rid of excess liquid—that way your buns won’t get soggy!
Step 3: Shape Your Wrappers
Once your dough is fluffy and risen, punch it down gently and stretch it out into a flat ring shape. Cut this ring into 12–16 equal pieces, depending on how big you want your buns. Roll each piece into a ball, then flatten it into circles roughly 3 to 5 inches in diameter using a rolling pin dusted with flour (flour the surface and rolling pin lightly so the dough doesn’t stick). Don’t stress about getting perfect circles—mine were often more oval or patchy, but they worked just fine! Keep the rolled wrappers covered with a dry towel or lightly floured between stacks to keep them from drying out.
Step 4: Wrap and Seal the Buns
Place about 2 to 3 tablespoons of filling in the center of each wrapper. Then fold up the edges by pinching little pleats as you go around, twisting the top to seal the bun tightly. I discovered this method after struggling with soggy buns—pinching and twisting really helps keep everything sealed and juicy inside. Lightly press down the tops once sealed and set them aside on a tray covered with a towel. It’s perfectly fine if your buns have a rustic look; they’re all delicious!
Step 5: Pan-Fry to Golden Perfection
Heat a non-stick pan with a bit of oil (about 1 tbsp for every 4 buns). Place the buns in the pan crease-side down, pressing lightly to form a golden crust. Let them cook undisturbed over medium heat for around 4-5 minutes until you see a beautiful golden brown bottom. Flip the buns gently and cook the other side until golden, too.
Now here’s the trick: carefully pour a few tablespoons of water into the pan—using the lid as a shield—and immediately cover the pan to trap the steam. This steams the buns, cooking the dough all the way through while keeping the bottom crispy. Steam for about 5-6 minutes until the water evaporates. Remove the lid and let the buns finish crisping if needed. Repeat with remaining buns and serve hot!
Pro Tips for Making Vegan Pan-Fried Buns Recipe
- Use warm soy milk—not hot: Too hot liquid can kill yeast, so keep it around body temperature for perfect dough rise.
- Don’t overfill the buns: Using about 2-3 tablespoons filling makes wrapping easier and prevents tearing or leaks during cooking.
- Steam with care: Add water slowly and cover immediately to avoid splashing and keep the steam trapped for fluffy buns.
- Prep wrappers in advance: Cover them well and keep stacks small to prevent drying out, which can make rolling tricky.
How to Serve Vegan Pan-Fried Buns Recipe
Garnishes
I love sprinkling toasted sesame seeds over the buns just before serving for an extra nutty crunch. A drizzle of chili oil or a scattering of finely sliced scallions also adds a fresh pop and makes the buns look irresistible. Sometimes, I like a little tangy contrast and serve with thin slices of pickled cucumber or radishes on the side.
Side Dishes
These buns pair beautifully with simple Asian-inspired sides like steamed edamame, a crisp cucumber salad, or miso soup. When I make a bigger batch, I sometimes add a spicy dipping sauce made of soy sauce, rice vinegar, a bit of sugar, chili flakes, and toasted sesame seeds—my family goes nuts for the balance it brings.
Creative Ways to Present
For parties, I’ve arranged these buns on a bamboo steamer lined with cabbage leaves to bring a festive, authentic vibe. Another fun presentation is stacking them in a rustic wooden board with dipping sauces in tiny bowls nearby, making it perfect for sharing. Plus, wrapping the buns in parchment paper squares makes them portable and perfect for picnics or packed lunches.
Make Ahead and Storage
Storing Leftovers
I store leftover buns in an airtight container in the fridge, and they keep well for up to 5 days. When I’m ready to eat them, I prefer pan-frying them briefly with a splash of water to revive that delightful crispy bottom and warm the filling thoroughly. This method brings them back to life better than microwaving alone.
Freezing
Freezing is a real lifesaver with this Vegan Pan-Fried Buns Recipe! I usually freeze the buns before cooking by placing them spaced apart on a tray until firm, then transferring to a bag. You can cook them directly from frozen—just add a couple of extra minutes to the steaming step. This makes them super convenient for busy days or last-minute snacks.
Reheating
To reheat leftover or frozen buns, pan-frying is my favorite because it restores the crispy crust while warming the filling just right. Alternatively, steaming works well if you want soft buns without extra browning. Microwaving with a damp paper towel and a little water also works in a pinch but can make the dough a bit chewy.
FAQs
-
Can I use other types of flour for the dough?
While all-purpose flour is ideal for this recipe because of its gluten content that gives the dough elasticity, you can experiment with bread flour for an even chewier texture. Gluten-free flours require additional binders like xanthan gum and may change the texture significantly, so it’s best to try a tested gluten-free dough recipe if you need that option.
-
What can I use instead of vermicelli noodles?
If you can’t find vermicelli noodles, thin rice noodles or glass noodles are good substitutes. Just adjust soaking time accordingly and be sure to chop them finely so they blend well with the veggies in the filling.
-
How do I prevent buns from sticking to the pan?
Make sure to use a non-stick skillet or a well-seasoned pan and add enough oil before placing the buns. Also, don’t move them once you’ve placed them down to allow a crust to form, which naturally releases from the pan.
-
Can I make these buns gluten-free?
Making this exact recipe gluten-free is challenging due to the dough’s need for elasticity. However, you can try gluten-free dough recipes designed for steamed buns and adapt the filling and frying method accordingly, but results will vary.
-
How long can I keep the cooked buns in the fridge?
Cooked buns stored in an airtight container can last up to 5 days refrigerated. Be sure to reheat them properly to restore texture and taste before serving.
Final Thoughts
This Vegan Pan-Fried Buns Recipe has genuinely become one of my go-to comfort foods and a crowd-pleaser whenever I make it. It’s rewarding to watch the dough rise, fill the buns with fresh veggies, and then hear that satisfying sizzle as they pan-fry to golden perfection. I hope you’ll give it a try and enjoy the process as much as the delicious results. Trust me—you’ll be hooked once you taste that crispy bottom and the tender, savory filling inside. Happy cooking and bun-making!
Print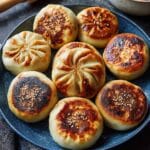
Vegan Pan-Fried Buns Recipe
- Prep Time: 1 hour
- Cook Time: 30 minutes
- Total Time: 2 hours 30 minutes
- Yield: 16 buns
- Category: Appetizer
- Method: Pan Frying with Steaming
- Cuisine: Asian, Vegan
- Diet: Vegan
Description
These Vegan Pan-Fried Buns are soft, savory, and packed with a flavorful vegetable and vermicelli filling. The dough is made with simple pantry staples and non-dairy milk, then filled with a tasty stir-fried mixture of cabbage, carrots, scallions, and vermicelli noodles. After shaping, the buns are pan-fried until golden and then steamed to perfection, creating a crispy yet tender texture. Perfect as a snack or appetizer, they can be enjoyed with a simple soy dipping sauce or your favorite condiments.
Ingredients
Dough – Dry Ingredients
- 3 cups all-purpose flour (375 g)
- 2 tsp instant dry yeast
- 2 tbsp sugar
- 1/2 tsp salt
- 1 tbsp roasted sesame seeds
Dough – Wet Ingredients
- 1 cup warm soy milk or other non-dairy milk
- 1 tbsp toasted sesame oil or neutral oil
Filling
- 1 tbsp neutral oil for cooking
- 6 cups raw shredded cabbage (from 1/2 large head)
- 3.5 oz uncooked vermicelli noodles (100g)
- 1 cup finely shredded or grated carrot (150g)
- 1/2 cup chopped scallions or chives (25g)
- 1 tbsp soy sauce
- 2 tsp salt or to taste
- 1 tbsp roasted sesame seeds
- 2 tbsp toasted sesame oil
Instructions
- Prepare the Dough: In a large bowl, combine all the dry ingredients: flour, instant yeast, sugar, salt, and roasted sesame seeds. Create a well in the center and pour in the warm soy milk and oil. Mix continuously until the dough forms a cohesive ball. Shape the dough into a ball, place in a bowl, and cover with a damp towel. Allow it to rest for at least 2 hours for the dough to rise.
- Cook the Filling: Soak vermicelli noodles in boiling water for 7-8 minutes until soft, then drain and chop into small ½ inch pieces. Heat 1 tbsp neutral oil in a pan over medium-high heat. Add chopped scallions, grated carrots, and shredded cabbage, cooking for 4-5 minutes until carrots are tender. Add noodles, soy sauce, salt, and toasted sesame oil. Stir well and cook an additional 2-3 minutes. Drain any excess liquid through a strainer and set filling aside to cool.
- Prepare the Wrappers: Remove dough from bowl and stretch it into a large ring by punching a hole in the center. Slice into 12 or 16 equal pieces (~50g or ~38g each). Roll each piece into a ball. Using a floured surface and rolling pin, flatten each ball into a wrapper around 3-4 inches (for 38g) or 4-5 inches (for 50g) in diameter. Place wrappers on a tray spaced apart or stacked with flour between layers covered with a dry towel to prevent drying.
- Assemble the Buns: Place 2-3 tbsp of filling in the center of a wrapper. Using your fingers, pleat and pinch the edges together, twisting at the top to seal tightly. Lightly press the top of the bun flat and place on a tray covered with a towel to prevent drying. Repeat with remaining wrappers and filling.
- Cook the Buns: Heat a pan with a lid over medium heat and add 1 tbsp oil for every 4 buns. Place buns creased-side down and press lightly to create contact with the pan. Cook for 4-5 minutes until the bottom is golden brown. Flip and cook the other side until golden brown. Carefully add 4 tbsp water (1 tbsp per bun) to the pan and quickly cover with lid to steam. Cook for about 5-6 minutes until water evaporates. Remove buns and repeat for remaining batches.
- Serve and Store: Enjoy buns hot with your favorite dipping sauce (soy sauce mixed with sugar, chili sauce, and sesame seeds recommended). Store cooked buns in an airtight container in the refrigerator for up to 5 days. Reheat by pan-frying or oven toasting with a splash of water or microwaving covered with water. To freeze, freeze buns spaced on a tray for 5-6 hours then store in plastic bags. Reheat directly from frozen.
Notes
- Use warm soy milk (not hot) to activate yeast without killing it.
- If you stack the wrappers, brush flour between layers and limit stacks to 4-5 to prevent sticking.
- Adjust salt in filling to taste as soy sauce adds saltiness.
- Carefully pour water into the pan while using the lid as a shield to avoid splashing.
- These buns freeze well and can be reheated from frozen without thawing.
- Serve with a dipping sauce made from soy sauce, sugar, chili sauce, and sesame seeds for extra flavor.
Nutrition
- Serving Size: 1 bun
- Calories: 150
- Sugar: 3g
- Sodium: 350mg
- Fat: 4g
- Saturated Fat: 0.5g
- Unsaturated Fat: 3g
- Trans Fat: 0g
- Carbohydrates: 26g
- Fiber: 3g
- Protein: 4g
- Cholesterol: 0mg

Your email address will not be published. Required fields are marked *