
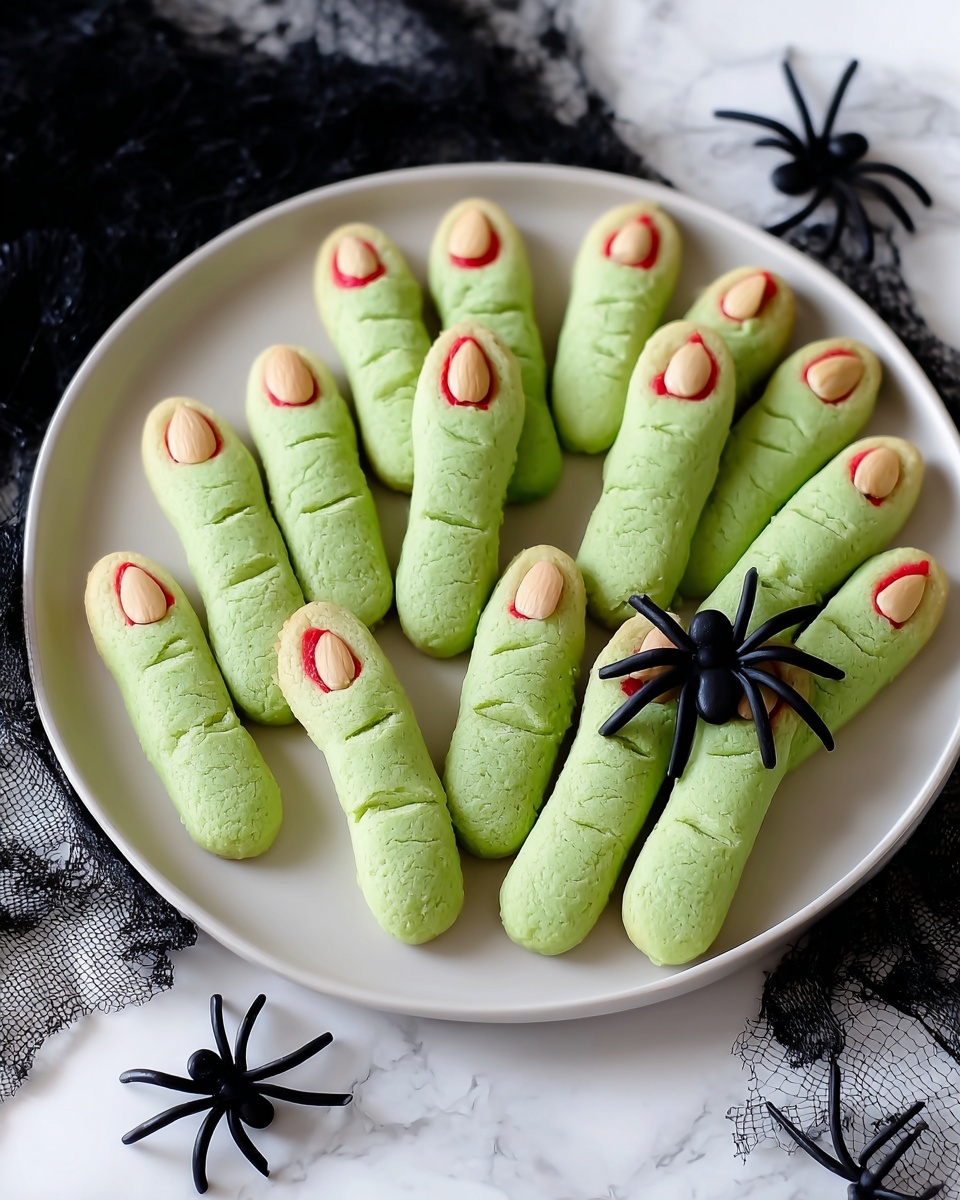
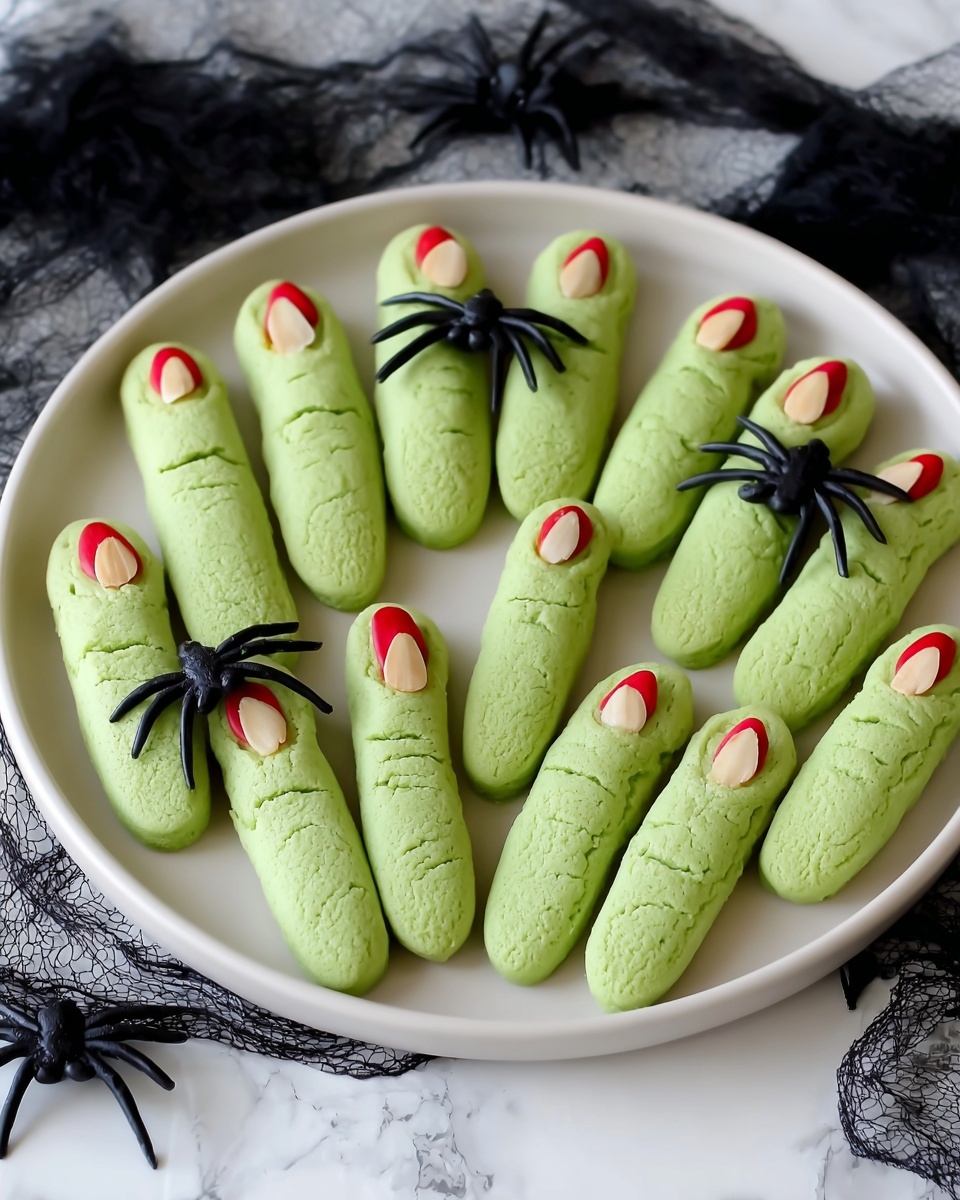
If you’re looking for a Halloween treat that’s as spooky as it is delicious, you’re going to love this Witch Finger Cookies Recipe. They’re delightfully creepy with their eerie green “fingers” and almond “nails” topped with a splash of red jam that looks like blood. I absolutely love how these turn out—crispy on the outside, just the right amount of soft inside, and with a fun, playful look that’ll make your guests’ jaws drop (in a good way!). Whether you’re baking for a party or just want to get in the spooky spirit, stick with me because this recipe is fan-freaking-tastic and super doable.
Why You’ll Love This Recipe
- Distinctive Rustic Look: The almond slices and little knuckle lines give each cookie an authentic witchy finger vibe that’s so fun to create and admire.
- Easy to Make: With simple ingredients and straightforward steps, it’s a perfect recipe even if you’re not a seasoned baker.
- Perfect Texture: These cookies have a lovely soft crunch on the outside with a tender crumb inside, which I discovered by tweaking baking times after my first try.
- Kid-Friendly Prep: Rolling and shaping the dough is a fun activity for kids, making it a fantastic Halloween project for the whole family.

Ingredients You’ll Need
All the ingredients here combine to give these cookies their classic buttery base with that perfect almond essence and the iconic green look. Picking quality unsalted butter and fresh almonds makes a big difference in flavor and texture, trust me. Also, don’t skimp on the green food coloring—it’s what brings the whole witch finger illusion to life!
- Unsalted butter: Softened butter lends richness and a smooth texture—using unsalted lets you control the salt level precisely.
- Powdered sugar: This dissolves quickly into the dough for a tender crumb, unlike granulated sugar which might give a grittier bite.
- Egg: Adds structure and moisture to keep your cookies from falling apart.
- Almond extract: Gives that signature nutty flavor—if you love almond, don’t skip this!
- Vanilla extract: Balances the almond flavor and amplifies the cookie’s aroma beautifully.
- All-purpose flour: The backbone of the cookie dough, providing stability and chewiness.
- Baking powder: Helps the cookies rise just enough without puffing up too much, preserving the finger shape.
- Salt: Enhances flavor—if you use salted butter, use less salt in the recipe.
- Green food coloring or gel: Essential for the witch finger color—gel gives a more vibrant hue without watering down dough.
- Red decorator gel or raspberry jam: Creates that creepy “bloody” effect under the almond nails.
- Almond slices: Used for nails—the pointy shape works perfectly to simulate a witch’s claw tips.
Variations
I’m always tweaking this Witch Finger Cookies Recipe to fit different tastes or dietary needs, and I encourage you to play around with it too! Whether you want to amp up the spooky factor or adapt for allergies, there are simple switches you can make without losing that magical vibe.
- Gluten-Free Version: I swapped the all-purpose flour for a 1:1 gluten-free baking flour blend once, and the texture stayed great—just keep an eye on baking time since gluten-free dough can bake faster.
- Vegan Adaptation: Using dairy-free butter and a flax egg worked surprisingly well, although the taste was slightly less rich but still super satisfying.
- Spice It Up: Adding a pinch of cinnamon or pumpkin pie spice to the dough brought a warm depth, perfect for a fall twist I’ve tried during a chilly October baking day.
- Jam Swap: Raspberry jam gives a sweet tart “blood” effect, but cranberry sauce or cherry preserves also work beautifully and add unique flavors.
How to Make Witch Finger Cookies Recipe
Step 1: Cream the Butter, Sugar, and Eggs
Start by beating together the softened unsalted butter and powdered sugar until smooth and fluffy—this takes about 2-3 minutes with an electric mixer. Then, add in the egg, almond extract, and vanilla extract, mixing well until everything is fully combined. This base makes your dough silky, and the almond + vanilla combo smells heavenly at this point.
Step 2: Incorporate the Dry Ingredients
Next, sift together the all-purpose flour, baking powder, and salt. Gradually add this to your wet mixture, blending just until combined. Overmixing here can toughen the dough, so I usually slow it down and stop as soon as there’s no visible flour left.
Step 3: Add Green Food Coloring and Chill the Dough
This is the fun part: stir in your green food coloring or gel a few drops at a time until you reach your desired witchy shade. I prefer gel coloring because it’s more vibrant and doesn’t change the dough’s consistency. Then, press the dough flat with your hands, cover it tightly with plastic wrap making sure the wrap touches the dough (to avoid any dry skin), and refrigerate for at least 30 minutes to firm up—this step really helps maintain the finger shapes later.
Step 4: Shape the Fingers and Add Details
Preheat your oven to 325°F (163°C) and line baking sheets with parchment paper. When dough is chilled, scoop a heaping tablespoon at a time and roll it into a finger shape. This part is so enjoyable—I like to make the fingers a little uneven and slightly longer to mimic real fingers. Use a toothpick to carve knuckle lines deeply in a few spots and gently press your finger on the dough’s “nailbed” to make space for the almond “nail” after baking.
Step 5: Bake Until Just Golden
Bake the cookies for 18-20 minutes. Keep a close eye because you want the bottoms to start turning golden but don’t want to overbake. When they come out, let them cool completely on the baking sheet, or they might be too fragile to handle for the “nail” step.
Step 6: Add the Bloody Nails
Once cooled, dab a small amount of red decorator gel or raspberry jam near the back of the nailbed indentation and press an almond slice firmly into place. The red gel oozing out a bit gives off that perfect “freshly torn” look. This is where the cookies really come to life, and this finishing touch makes everyone do a double-take!
Pro Tips for Making Witch Finger Cookies Recipe
- Use Gel Food Coloring: It gives vibrant color without watering down your dough as liquid coloring might.
- Chill the Dough Thoroughly: This step helps you shape precise fingers that hold their form during baking.
- Carve Knuckles Deeply: Don’t be shy—deeper toothpick lines really sell the finger illusion.
- Apply “Nails” When Cookies are Cool: Adding the almond nails while cookies are hot risks breaking them—cool completely for best results.
How to Serve Witch Finger Cookies Recipe
Garnishes
I like to scatter a few edible “spooky” accents around my witch finger cookies when serving, like candy eyeballs or tiny Halloween sprinkles for an extra fun table display. Sometimes I dust a little powdered sugar “spiderweb” effect over the platter, which gives a mysterious foggy vibe that takes the presentation up a notch.
Side Dishes
These cookies pair surprisingly well with a warm cup of spiced apple cider or pumpkin spice latte—both complement the almond flavors perfectly. At Halloween parties, I serve them alongside bowls of candy corn and caramel popcorn for a festive spread that guests adore.
Creative Ways to Present
For Halloween gatherings, I’ve arranged mine standing up in small glass jars lined with black tissue paper to look like witch fingers reaching out of a cauldron. Another time, I placed them on a platter with dry ice underneath (safe and supervised, of course!) to create eerie fog creeping over the fingers—guests loved the drama and the cookies disappeared fast!
Make Ahead and Storage
Storing Leftovers
I keep leftover witch finger cookies in an airtight container at room temperature, and they stay fresh and crisp for 3-4 days. If your kitchen is humid, I recommend storing them with a piece of parchment paper between layers to prevent sticking or moisture build-up.
Freezing
You can absolutely freeze the unbaked shaped dough or the fully baked cookies. I usually bake them first, then freeze in a single layer on a baking sheet before transferring to a freezer bag. They keep well for up to 2 months, so you can prepare ahead of Halloween frenzy.
Reheating
To reheat frozen baked cookies, I pop them in a 300°F oven for about 5 minutes—this refreshes their crispness without drying them out. Avoid microwaving as it makes them soft and chewy, which loses that authentic witch finger snap.
FAQs
-
Can I make these Witch Finger Cookies Recipe without almond extract?
Yes, you can omit the almond extract, but it’s a key flavor that gives these cookies their unique twist. If you don’t have almond extract, you can try adding a little extra vanilla or a drop of maple extract for a different, yet still tasty, flavor.
-
How do I prevent the cookies from spreading too much?
Chilling the dough for at least 30 minutes is crucial to prevent spreading. Also, rolling the dough into thicker “finger” shapes helps keep the definition during baking. Make sure your oven temperature is accurate, as baking at too low a temperature can cause more spread.
-
Can I use sliced almonds for the nails instead of full almond slices?
Full almond slices are best because they mimic the shape of long nails perfectly. Thin sliced almonds won’t have the same dramatic look, but if that’s what you have, you can layer a couple together for better effect or experiment with whole pecan halves.
Final Thoughts
I have to say, the charm of the Witch Finger Cookies Recipe isn’t just in how they look, but in the joy they bring while making them. Rolling dough into creepy fingers, carving knuckle lines, and dressing them up with almond nails and “blood” makes baking feel like a fun Halloween craft project. Every year, my family goes crazy for these, and seeing their reactions makes it totally worth the little extra effort. So, grab your ingredients, get your hands messy, and have a blast baking these spooky treats—you won’t regret it!
Print
Witch Finger Cookies Recipe
- Prep Time: 35 minutes
- Cook Time: 20 minutes
- Total Time: 55 minutes
- Yield: 28 cookies
- Category: Dessert
- Method: Baking
- Cuisine: American
Description
This Witch Finger Cookie Recipe offers a fun and spooky twist on traditional sugar cookies, perfect for Halloween or themed parties. Featuring soft green almond-flavored dough shaped into eerie finger shapes with almond ‘nails’ and red gel ‘blood,’ these cookies are sure to delight and spook your guests with their festive appearance and delicious flavor.
Ingredients
Cookie Dough
- 1 cup unsalted butter, softened
- 1 cup powdered sugar
- 1 large egg
- 1 teaspoon almond extract
- 1 teaspoon vanilla extract
- 2 3/4 cups all-purpose flour
- 1 teaspoon baking powder
- 1 teaspoon salt
- 15-20 drops green food coloring or a few generous squirts of gel coloring
Decoration
- 1-2 teaspoons red decorator gel or raspberry jam
- 28 almond slices
Instructions
- Prepare Wet Ingredients: Beat together the softened butter, powdered sugar, egg, almond extract, and vanilla extract in a large bowl until smooth and creamy.
- Add Dry Ingredients: Gradually mix in the all-purpose flour, baking powder, and salt until fully combined forming a dough.
- Add Green Coloring: Stir in green food coloring drops or gel until the dough reaches your desired shade of green.
- Chill Dough: Press dough down evenly in the bowl and cover tightly with plastic wrap touching the dough. Refrigerate for 30 minutes to firm up.
- Preheat Oven and Prepare Pans: Preheat oven to 325°F (163°C) and line two baking sheets with parchment paper.
- Shape Fingers: Roll a heaping tablespoon of dough into a finger shape and place it on the baking sheet. Use a toothpick to create deep lines around the knuckles to simulate wrinkles. Press down gently around the nail bed area to make room for the ‘nail’ decoration after baking.
- Repeat Shaping: Continue shaping all remaining dough into finger shapes and arrange on the baking sheets with adequate spacing.
- Bake Cookies: Bake in the preheated oven for 18-20 minutes or until the bottoms begin to turn golden brown. Remove and allow cookies to cool completely on the baking sheets.
- Add ‘Blood’ and Nails: Dab a small amount of red decorator gel or raspberry jam at the back of each nail bed and press an almond slice firmly on top, ensuring the red gel slightly oozes out to simulate blood.
- Serve and Enjoy: Arrange the completed witch finger cookies on a platter and serve to your guests for a spooky treat.
Notes
- If using salted butter instead of unsalted, reduce the salt in the recipe to 1/2 teaspoon to avoid over-salting.
- Refrigerating the dough helps to firm it up, making it easier to shape detailed finger shapes.
- You can substitute raspberry jam with red food decorator gel for a vivid blood-like effect.
- Ensure cookies cool completely before adding the red gel and almond slices to keep decorations intact.
- These cookies keep well stored in an airtight container for up to 5 days.
Nutrition
- Serving Size: 1 cookie
- Calories: 120
- Sugar: 7g
- Sodium: 90mg
- Fat: 6g
- Saturated Fat: 3.5g
- Unsaturated Fat: 2g
- Trans Fat: 0g
- Carbohydrates: 15g
- Fiber: 0.5g
- Protein: 2g
- Cholesterol: 25mg

Your email address will not be published. Required fields are marked *